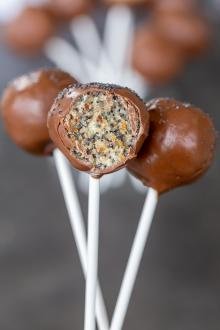
These no-bake Christmas cake pops are festive, fun, and full of Oreo cookies. Loved by both kids and adults alike and always a crowd pleaser!

Looking for another peppermint treat to add to your rotation of Christmas desserts? If you love no bake treats like peppermint bark, look no further than these cream cheese and Oreo Cool Mint cookie cake pops. Not only are they crazy easy to put together, they will do wonders in brightening up your dessert table. You’ll be surprised at how just a couple ingredients can create such a perfect bite.
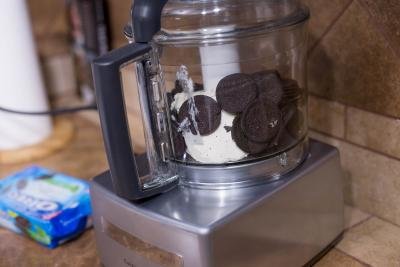
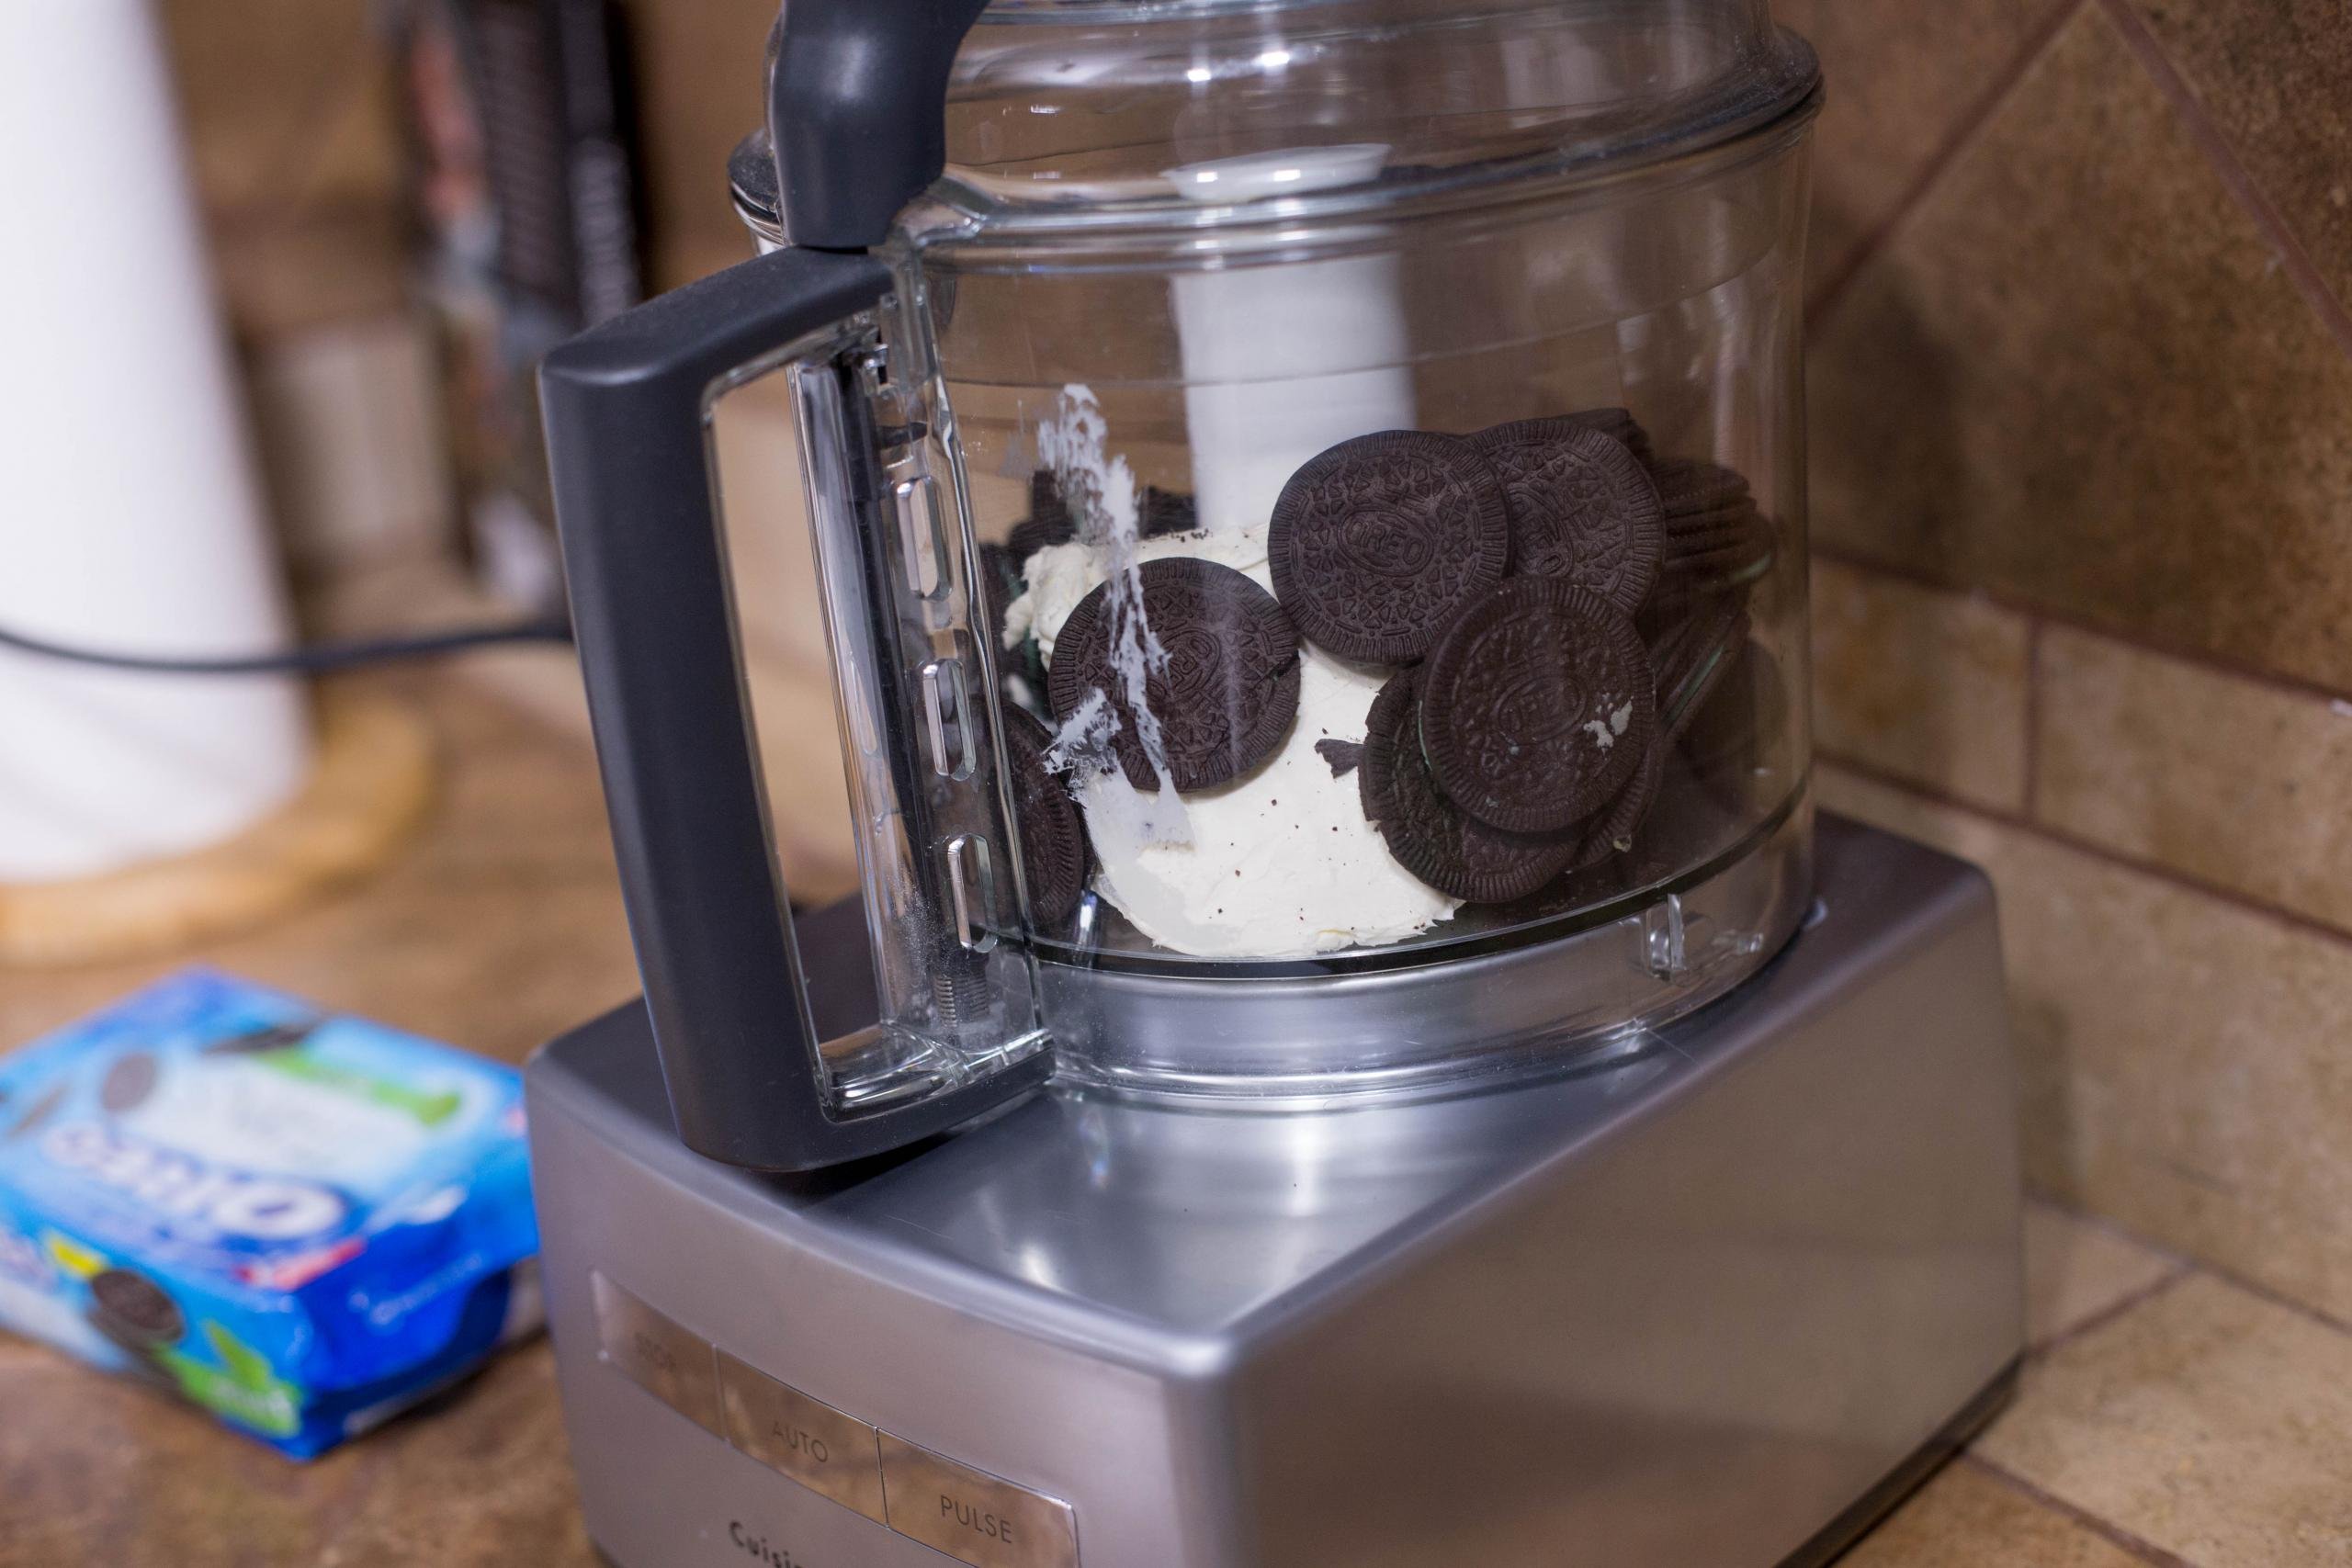
No-Bake Alert: You don’t have to fuss around with the oven and bake a chocolate cake to make these cake pops! The filling is made with just two ingredients – Oreos and cream cheese.
All the Tools & Supplies You Need to Make Cake Pops
Start off with the right tools and supplies to make the process a no-brainer.
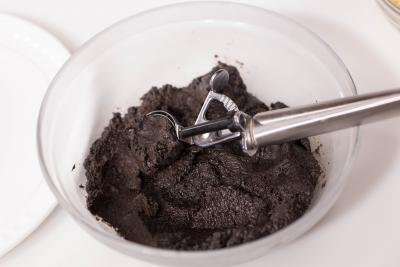
- Ice Cream Scoop: An ice cream scoop will help you portion out the batter for evenly-sized pops.
- Cake Pop Sticks: A bulk bag of cake pop sticks is super cheap and nice to have on hand when you need a quick dessert. If you’ve never tried them, they’re similar to lollipop sticks, but a bit longer.
- Cake Pop Stand: From simple blocks to ornate stands, there are so many different ways you can dry and present your cake pops in style.
How to Assemble Christmas Cake Pops
To make the mixing that much easier, pull the cream cheese out of the fridge about 30 minutes before you plan to get to work to let it soften.
- Make the Batter: In a food processor, combine the Oreo cookies with the softened cream cheese. Transfer the batter to a large bowl and place and place the mixture in the freezer for around 10 minutes.
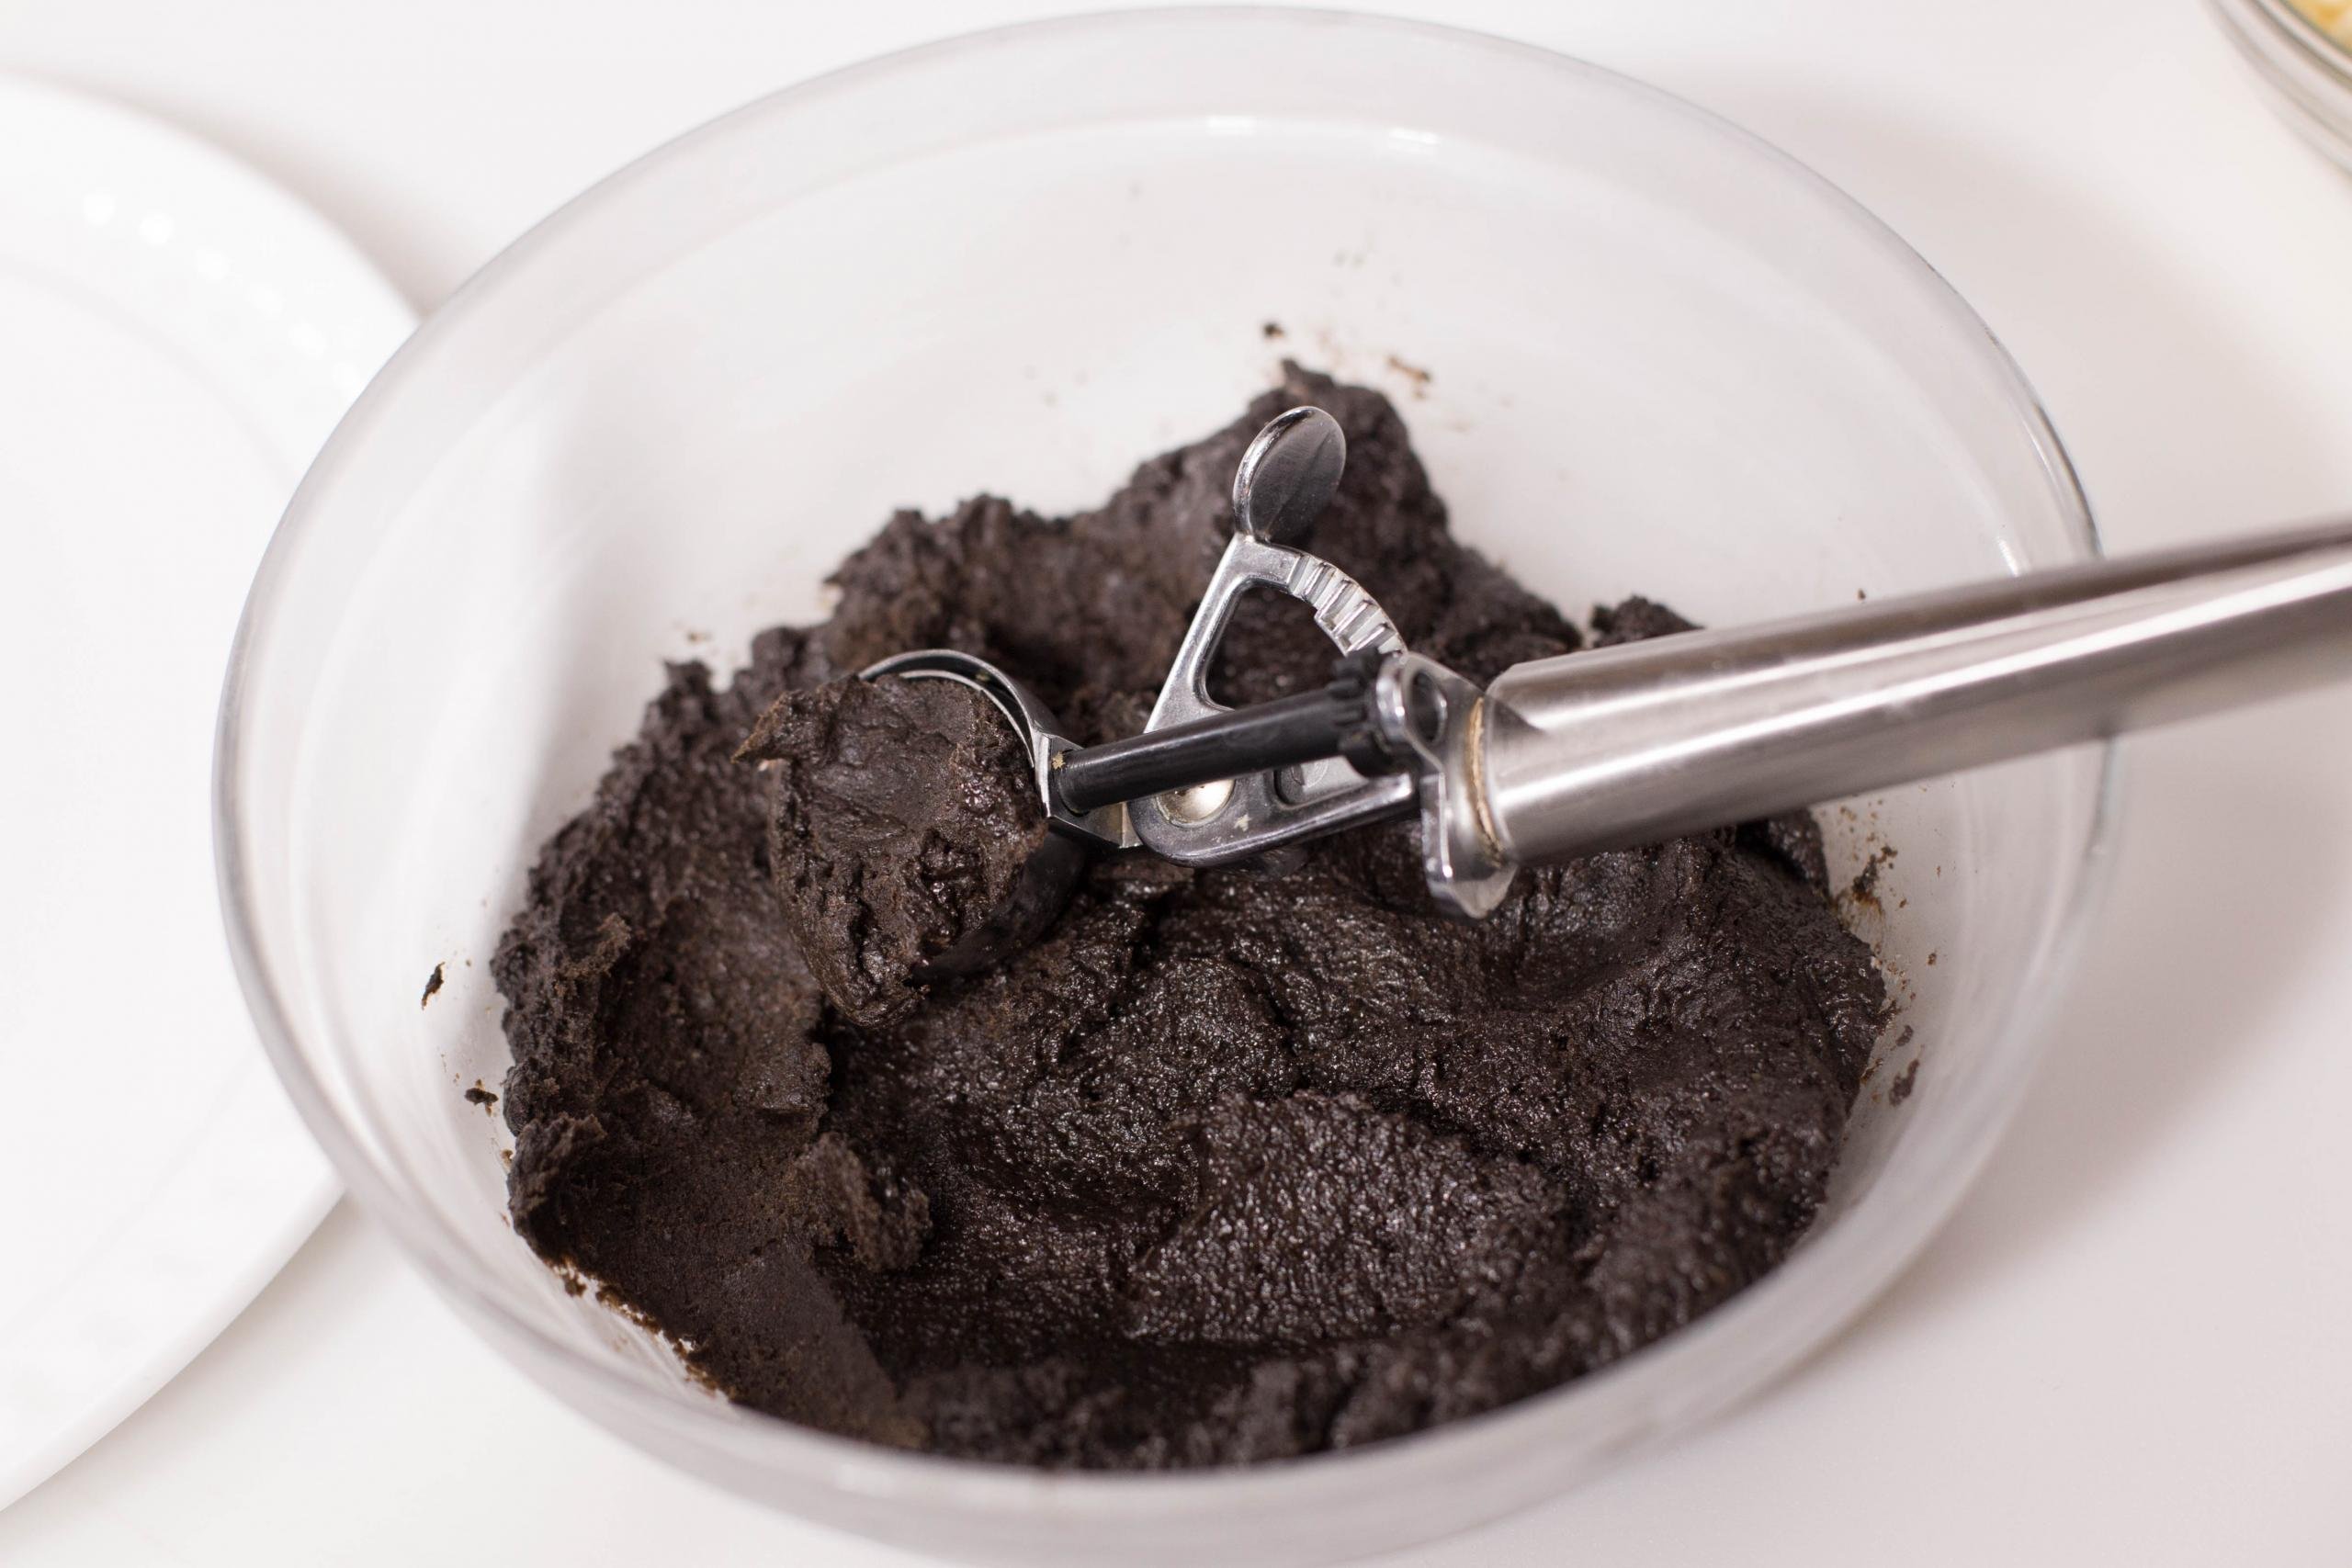
- Shape the Cake Balls: Next, use an ice cream scoop to form similar-sized balls. As you go, lay them out on a baking sheet covered with waxed paper or parchment paper. Pop the baking sheet in the freezer for 10 minutes.
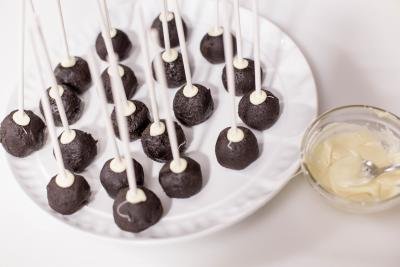
- Insert the Cake Pop Stick: Melt a bit of the chocolate in a small bowl in the microwave (give it a stir every 20 seconds or so until it’s silky smooth). Dip a cake pop stick into the chocolate and insert it into the cake ball. Repeat.
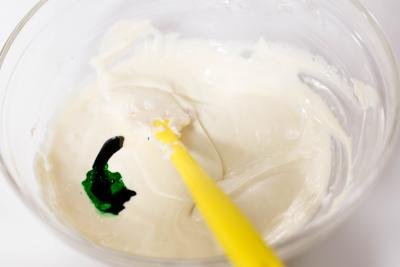
- Coat the Cake Pops: Next, melt the rest of the chocolate and add in the food coloring. Dip the cake pops in the chocolate and garnish them with sprinkles, frostings, or other fun decorations and ornaments.
- Set the Cake Pops: Finally, place the cake pops on a stand and allow them to dry. Pop them in the refrigerator until you’re ready to serve them. Enjoy!


3 Secrets to Making Perfect Cake Pops
Cake pops have become such a trendy dessert in recent years. While they’re super low-maintenance, there are a couple secrets to making them both delicious and sturdy.
- Blend the batter until it’s nice and creamy. If the batter is too chunky, the cake pops will fall apart. You’ll want the cream cheese to be speckled with fine crumbs of Oreos for best results.
- Don’t skip the freeze. Freezing the batter and formed cake balls in 10 minutes heats will help your cake pops keep their structure and stability.
- Attach the cake pop with chocolate “glue”. Reserving some of the chocolate melts to use as a glue will help the stick stay put and prevent the ball from falling off in storage.
Different Ways to Decorate Cake Pops
If you want to get a bit more creative with the decorations, here are a couple holiday-ready ideas to inspire you.
- Frosty the Snowman Cake Pops: Skip the food coloring and keep the chocolate dip white and add a teaspoon of vanilla extract into the batter. Then, create a snowman face by using black and orange sprinkles.
- Rudolph the Rednosed Reindeer Cake Pops: Use brown food coloring to dye the chocolate melts and snap a pretzel in half to create “pretzel antlers”. Then, pop on a red candy nose and pipe on a set of eyes using black and white frosting.
- Christmas Tree Cake Pops: Shape the cake pops into triangles, dye the chocolate melts green, and decorate the pops with candy “ornaments”.
- Santa Hat Cake Pops: Shape the cake pops into cones, dye the chocolate melts red, pop a white ball-shaped candy on top, and rim the bottom of the cone with white frosting.
Storing & Freezing Best Practices
Making your cake pops ahead of time or freezing a batch for later? Find all the best tips and tricks for storage here.
- Refrigerator: The hands down best way to store cake pops is in a cake pop stand in the fridge. Never store them at room temperature, as they are prone to melting. They should keep for up to a week.
- Freezer: If you’d like to have cake pops on hand for up to 3 months, freeze them upright in a cake pop stand. Next, transfer them to a freezer-safe bag. When you’re ready, thaw them upright in the fridge back in the cake pop stand.
FAQ
What can you use instead of candy melts for cake pops?
If you don’t have candy melts on hand, use equal part white chocolate chips with the addition of 1 tablespoon of vegetable oil. The added oil will help the chocolate turn into somewhat of a candy coating and help it stick better.
Can you make cake pops the day of an event?
While you can make cake pops day-of, they are best prepped the day before so they can set in the fridge overnight. You could also make them in the morning if you plan on serving them in the evening.
What’s the difference between chocolate chips and candy melts?
Chocolate melts are made with cocoa butter, making them easier to set and melt than typical chocolate chips.
How many cake pops does this recipe make?
This cake pop recipe makes about 40 servings, but this will vary depending on how small or large you shape the cake balls.
Other Sweet Treats
- Russian Chocolate Cake Balls – Sweetened condensed milk and liqueur cake balls
- Chocolate Raspberry Truffles – 3-Ingredient chocolate and raspberry truffles
- Poppy Seed and Raisin Cake Pops – Slavic-style cake pops
- Easy Creamy Cheese Chocolate Cake Truffles – Dark chocolate and cream cheese truffles
Recipe

Ingredients
- 6 oz cream cheese softened at room temperature
- 15 oz Oreo Cool Mint Cookies
- 12 oz white baking chocolate
- 6 drop green food coloring
- 2 tbsp decorative sprinkles
Instructions
- In a food processor, combine the Oreo cookies with the softened cream cheese until creamy. Place the mixture in the freezer for about 10 minutes.
- Using an ice cream scoop, form balls out of the cookie mixture. Lay them out on a flat tray and freeze the balls for about 10 minutes.
- Melt 3 tablespoons of chocolate, dip each cake pop stick into the chocolate, and insert the stick inside the center of the cake ball.
- Melt the chocolate in the microwave, stirring it every 20-30 seconds. Add in the food coloring and stir until well-combined.
- Dip each cake pop in the chocolate and decorate it as you wish. Place them on a stand to dry and set.

- Keep refrigerated until ready to serve. Enjoy!


My 10 year old tried this absolute flop. Sorry to say I definitely won't be using this again
Hi Ella, can you tell me what went wrong? I am trying to understand how we can help.
I have broke homemade chocolate cookies. Can i use them instead of Oreos?
Hey Diane, you can but you may need to add a bit of cream to the because Oreos have a filling.
Does the cream cheese need to be softened or can it be straight from the fridge?
Softened would work best
This makes 40 cake pops, correct?
Depending on the size you make them but yeah, about 40.