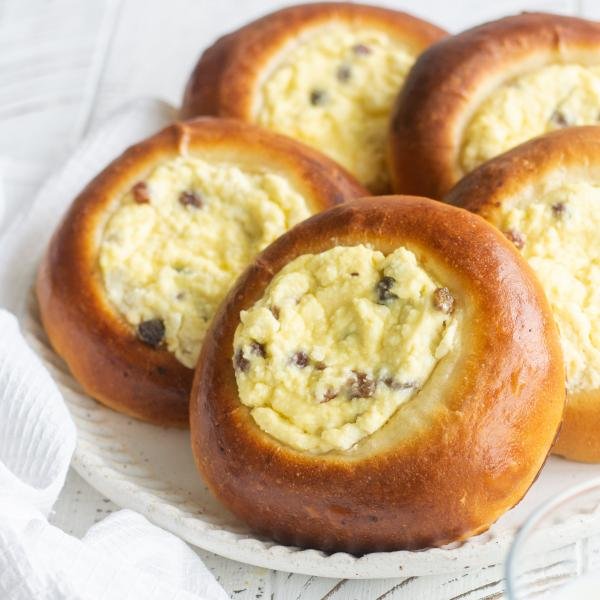
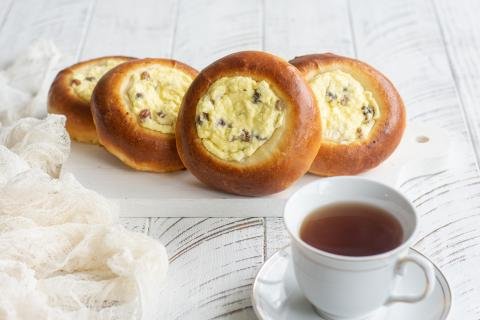
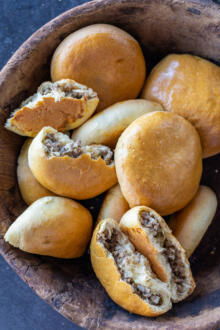
Ready yourself for this soft, pillowy vatrushka bun recipe. These delightful Eastern European cheese pastries are similar to Danishes and perfect for breakfast or dessert!
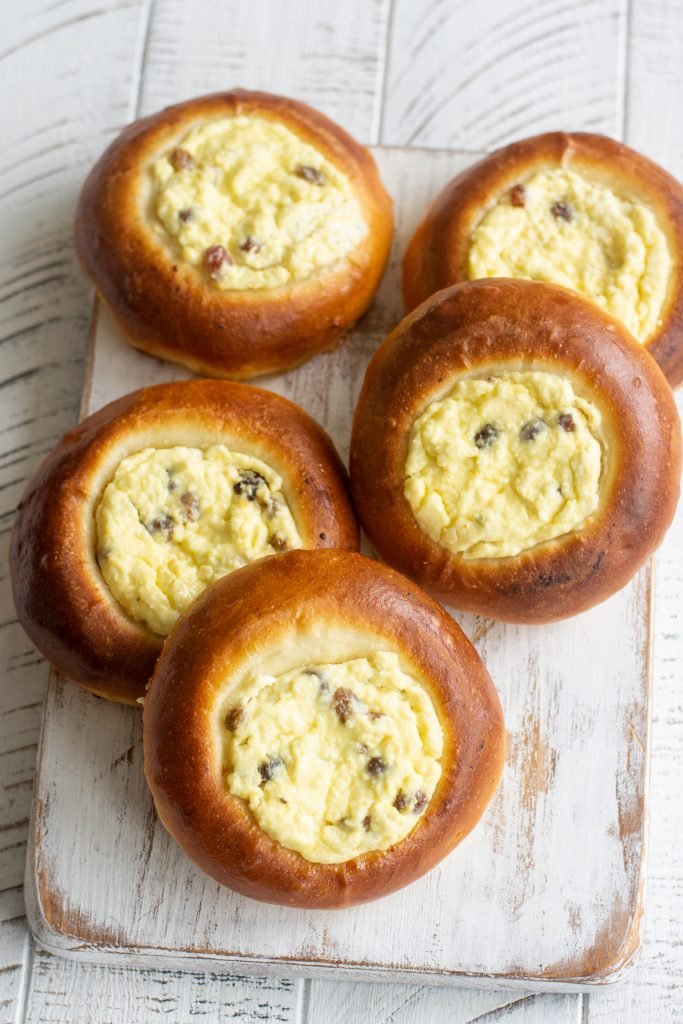
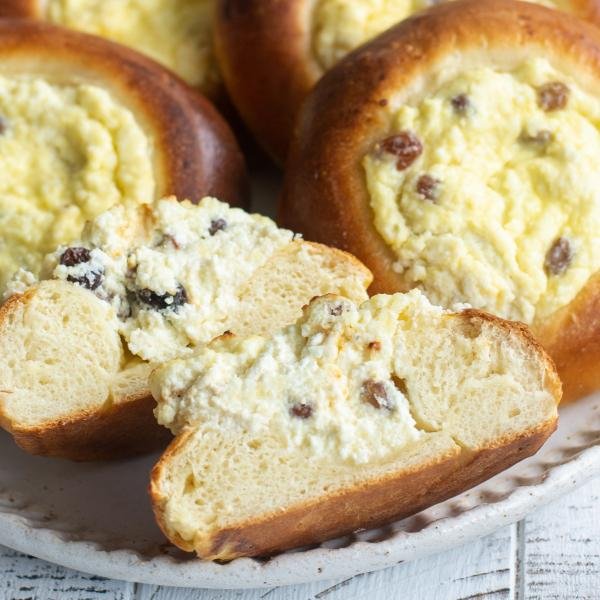
A lot of my readers are from the former Soviet Union, and if you went to school during that time, you’ve gotta remember vatrushki! I remember my school days vividly, and these pastries were a popular dessert there. They’re similar to Danishes, but with a slightly more fluffy dough and a cream cheese/farmer’s cheese filling. It’s a simple and easy pastry — exactly what I love (and need) when it comes to baking!
Hot tip: If you love fluffy sweet buns, you will love our brioche buns recipe.
Vatrushki Video
How To Make Vatrushki
Each time I make vatrushki, I remember another fun memory from my school days. It’s my “flashback” dessert if you want to call it that. Good thing you only need 30 minutes of prep and a couple hours to let them rise before you start baking away (which for me is the perfect amount of time to reminisce about my childhood).
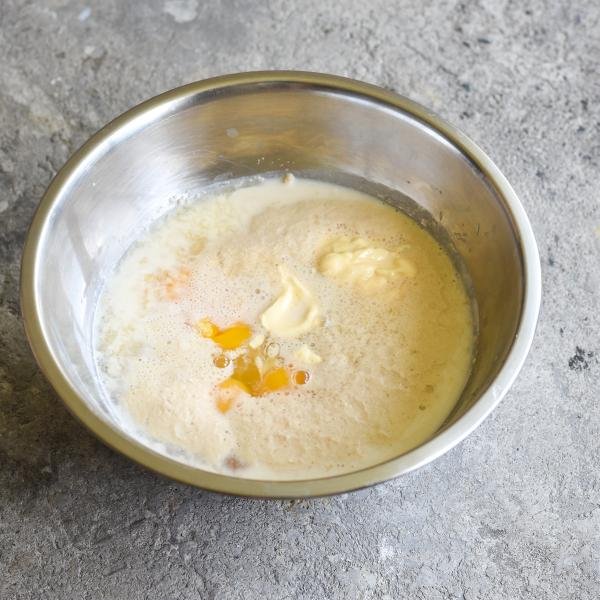
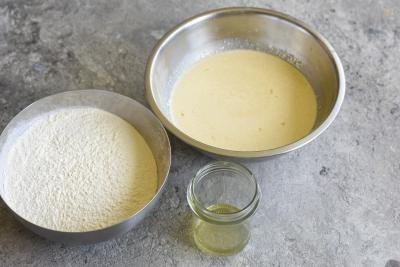
- Prepare the yeast mixture: Combine the yeast with milk and a bit of sugar. Rest the mixture for about 10 minutes.
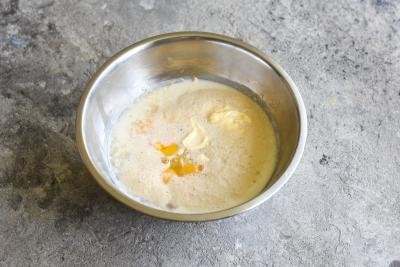
- Add in more ingredients: Whisk in the eggs, mayo, salt, and sugar.
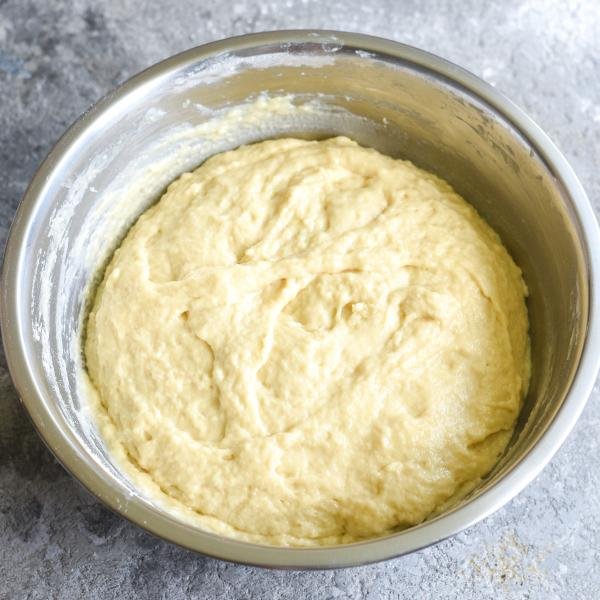
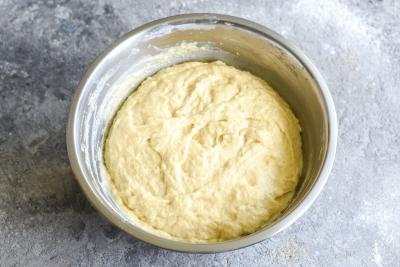
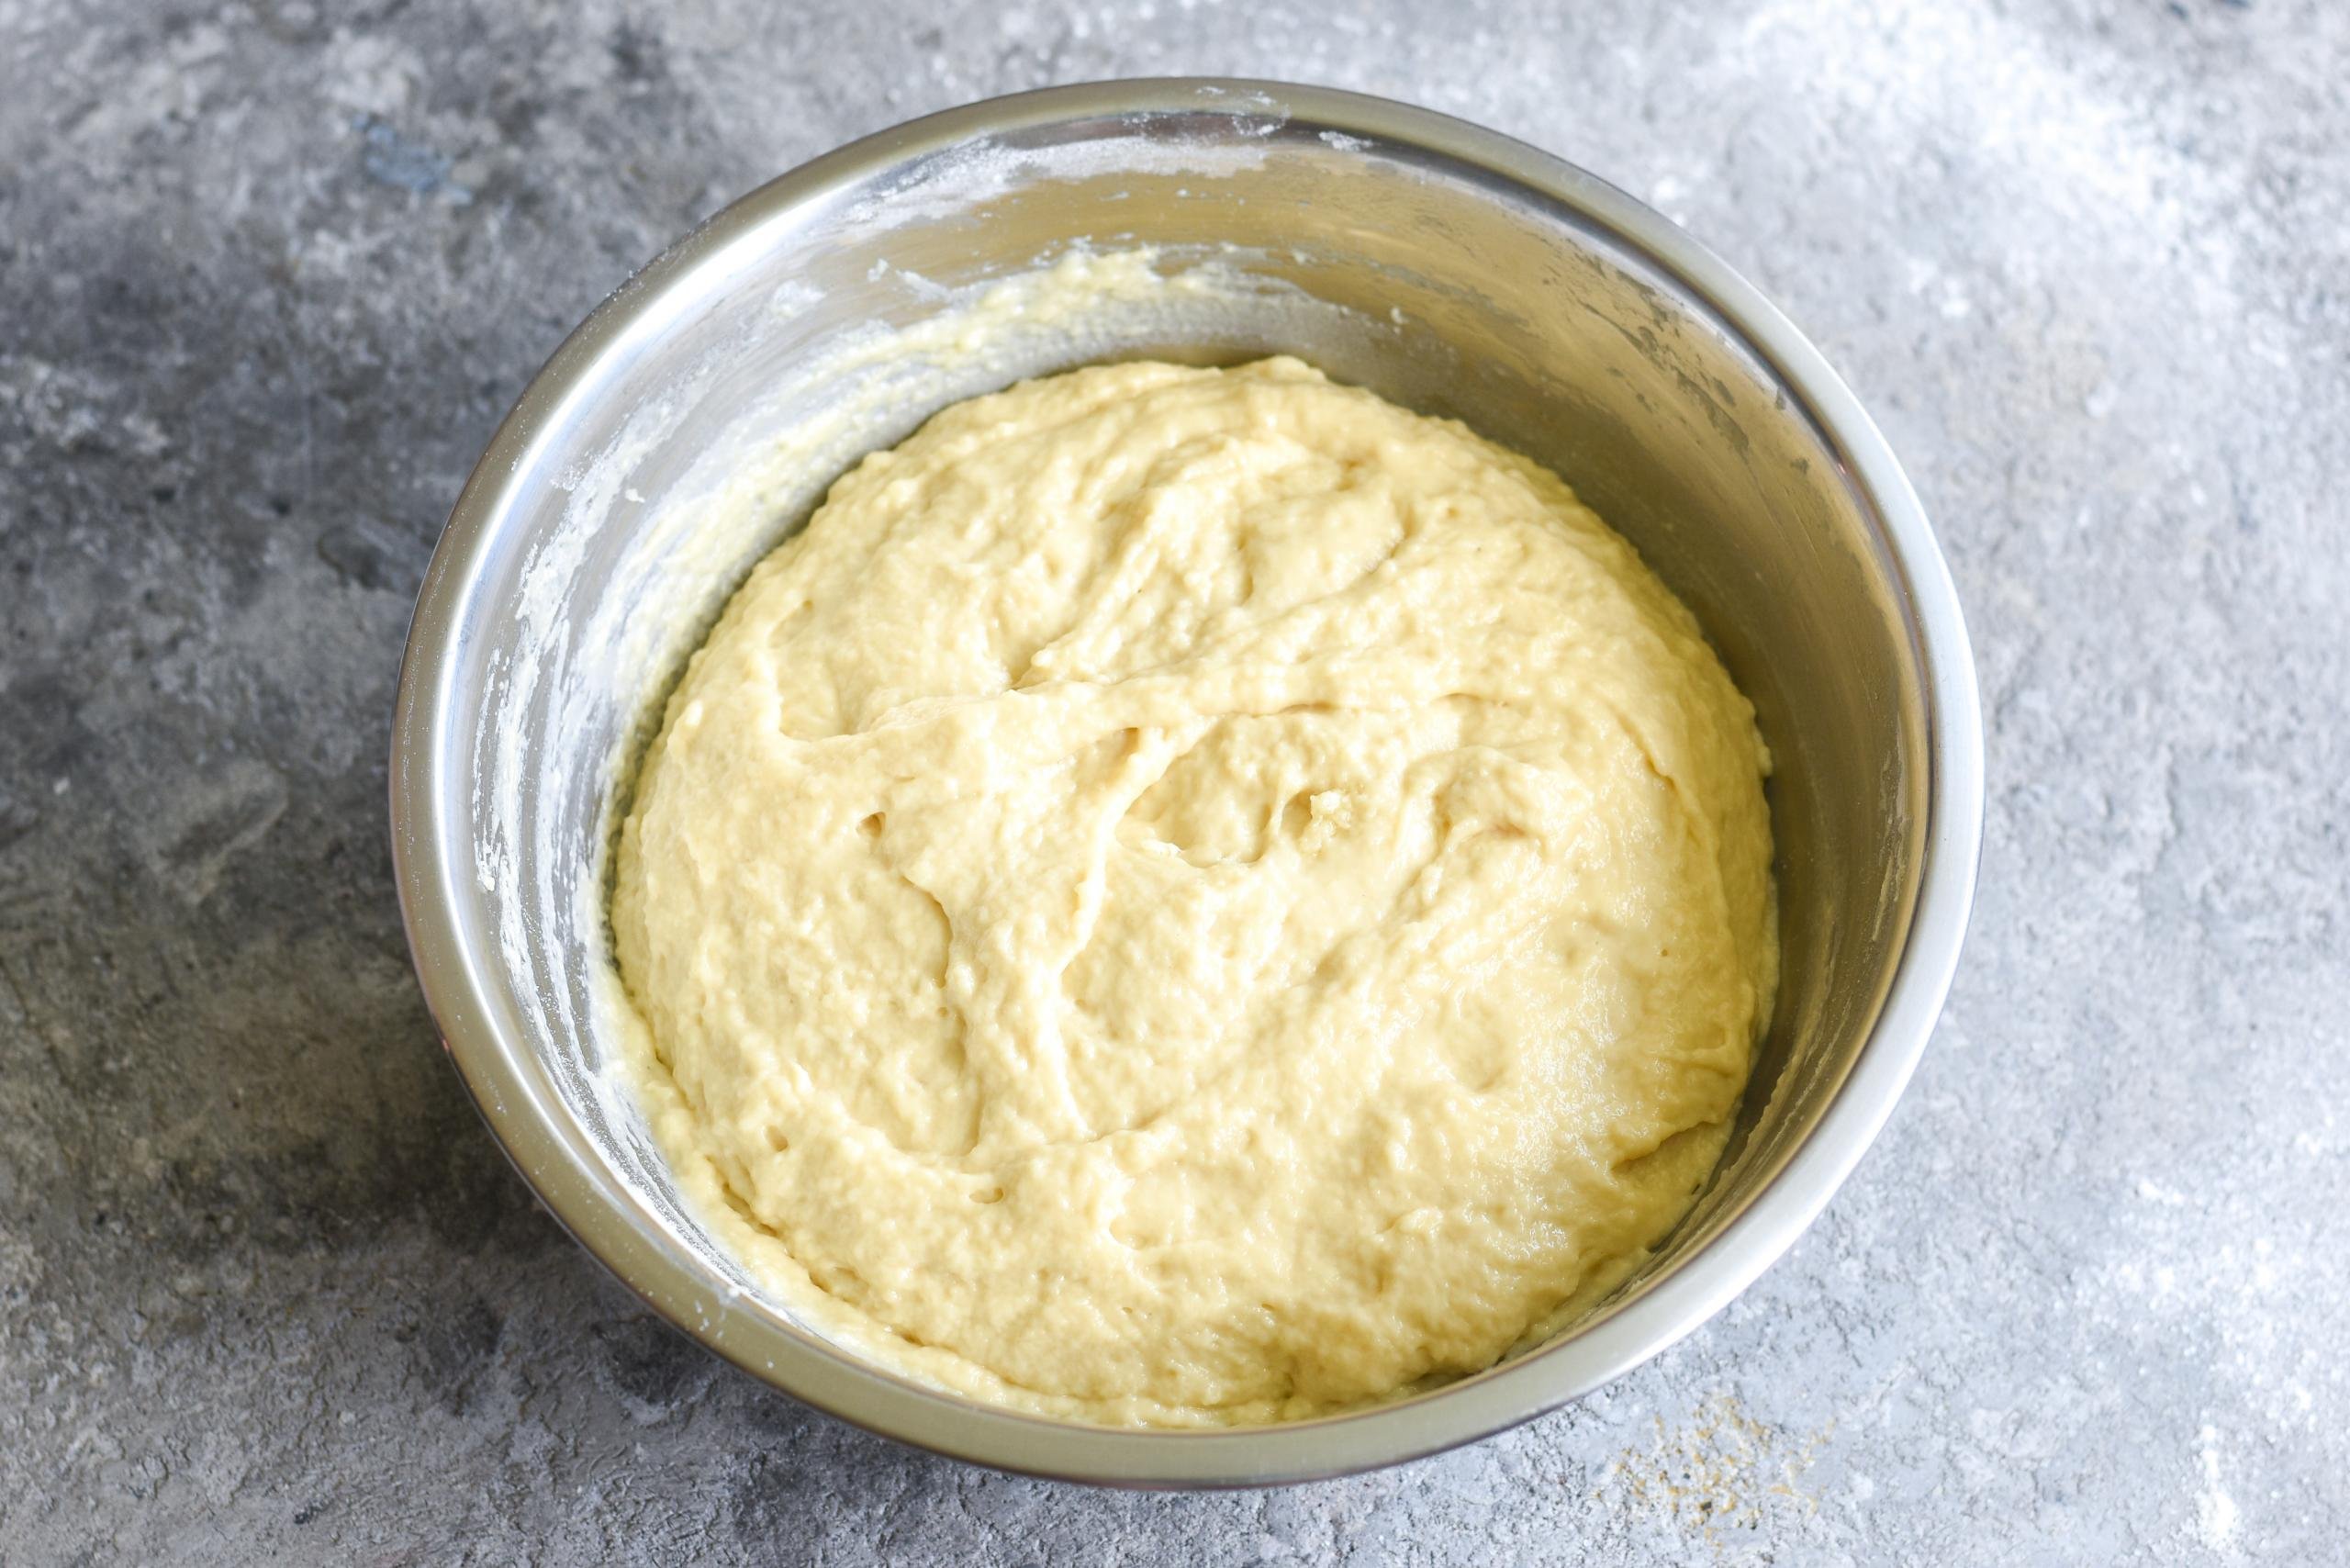
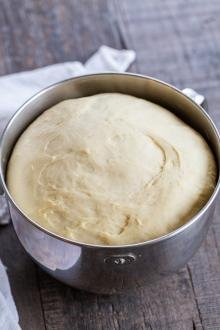
- Mix in the flour: Using a mixer, slowly add in the flour. Once the flour is mixed in well, add the oil. Knead for about 10 minutes or until the dough is elastic. Allow the dough to rise for an hour.
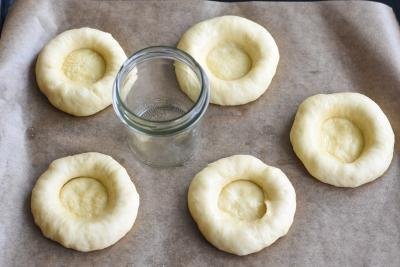
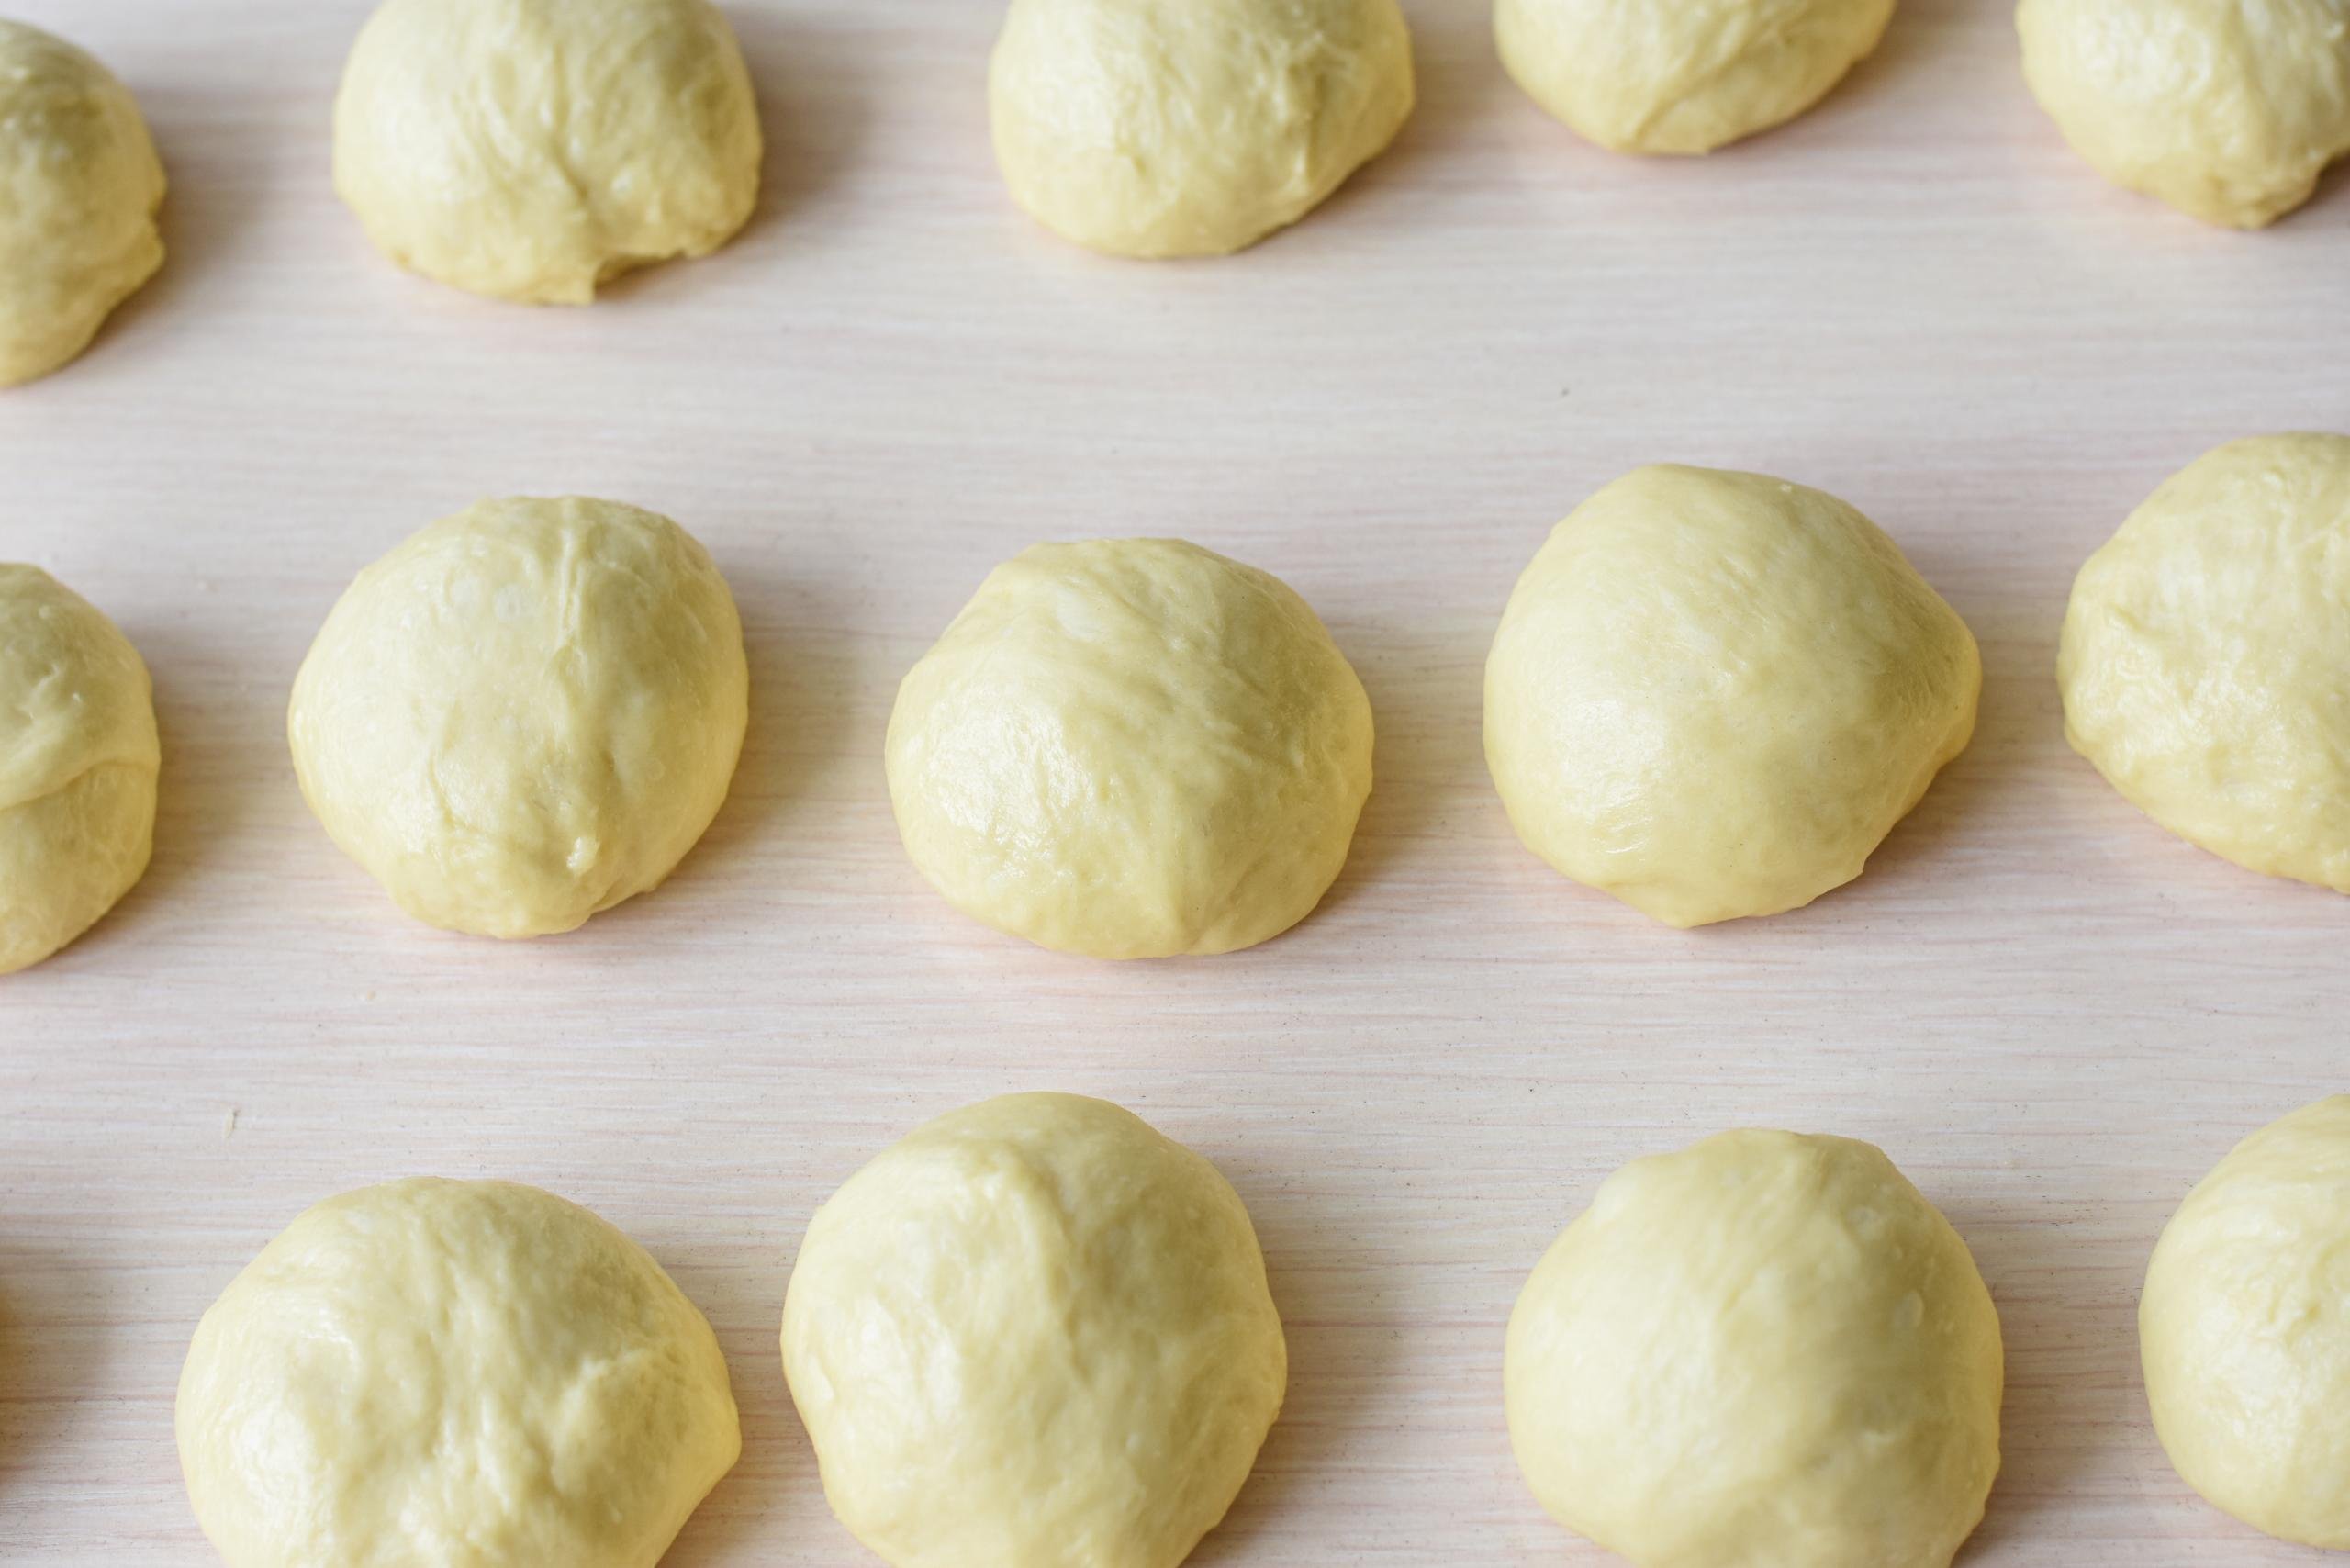
- Cut the dough: Cut and shape the dough into about 30 flattened balls. Space them out on a sheet pan or two and allow them to rise, covered, for 30 minutes.
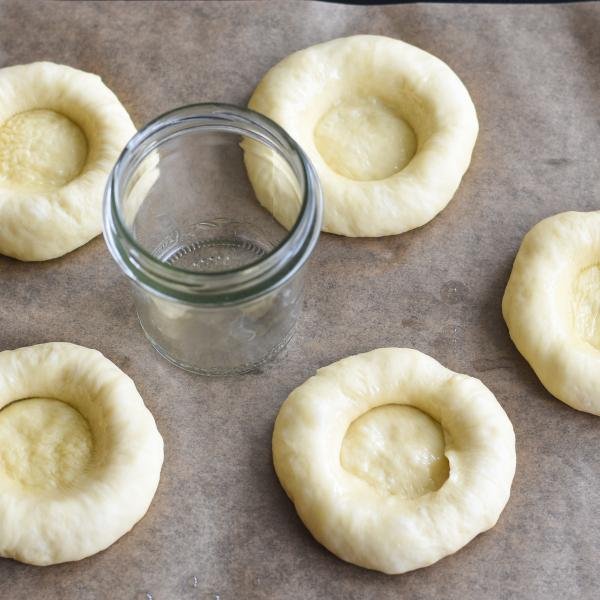
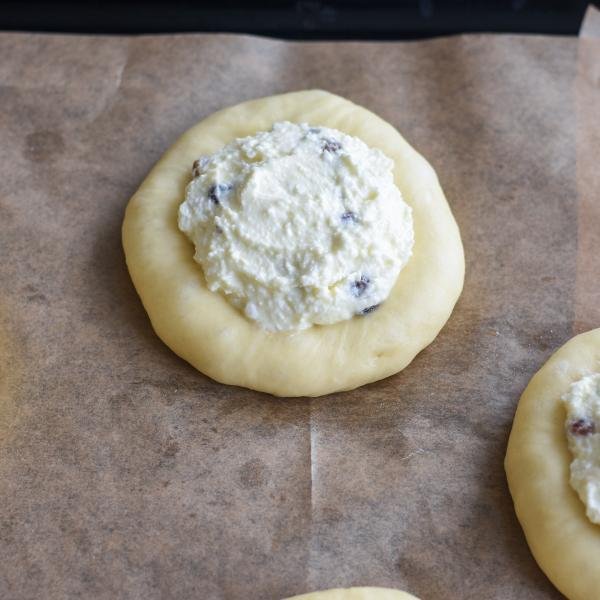
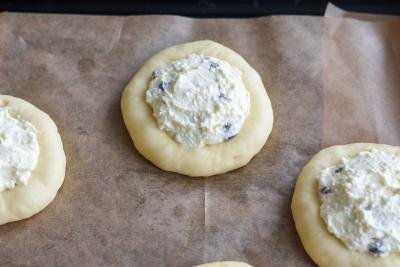
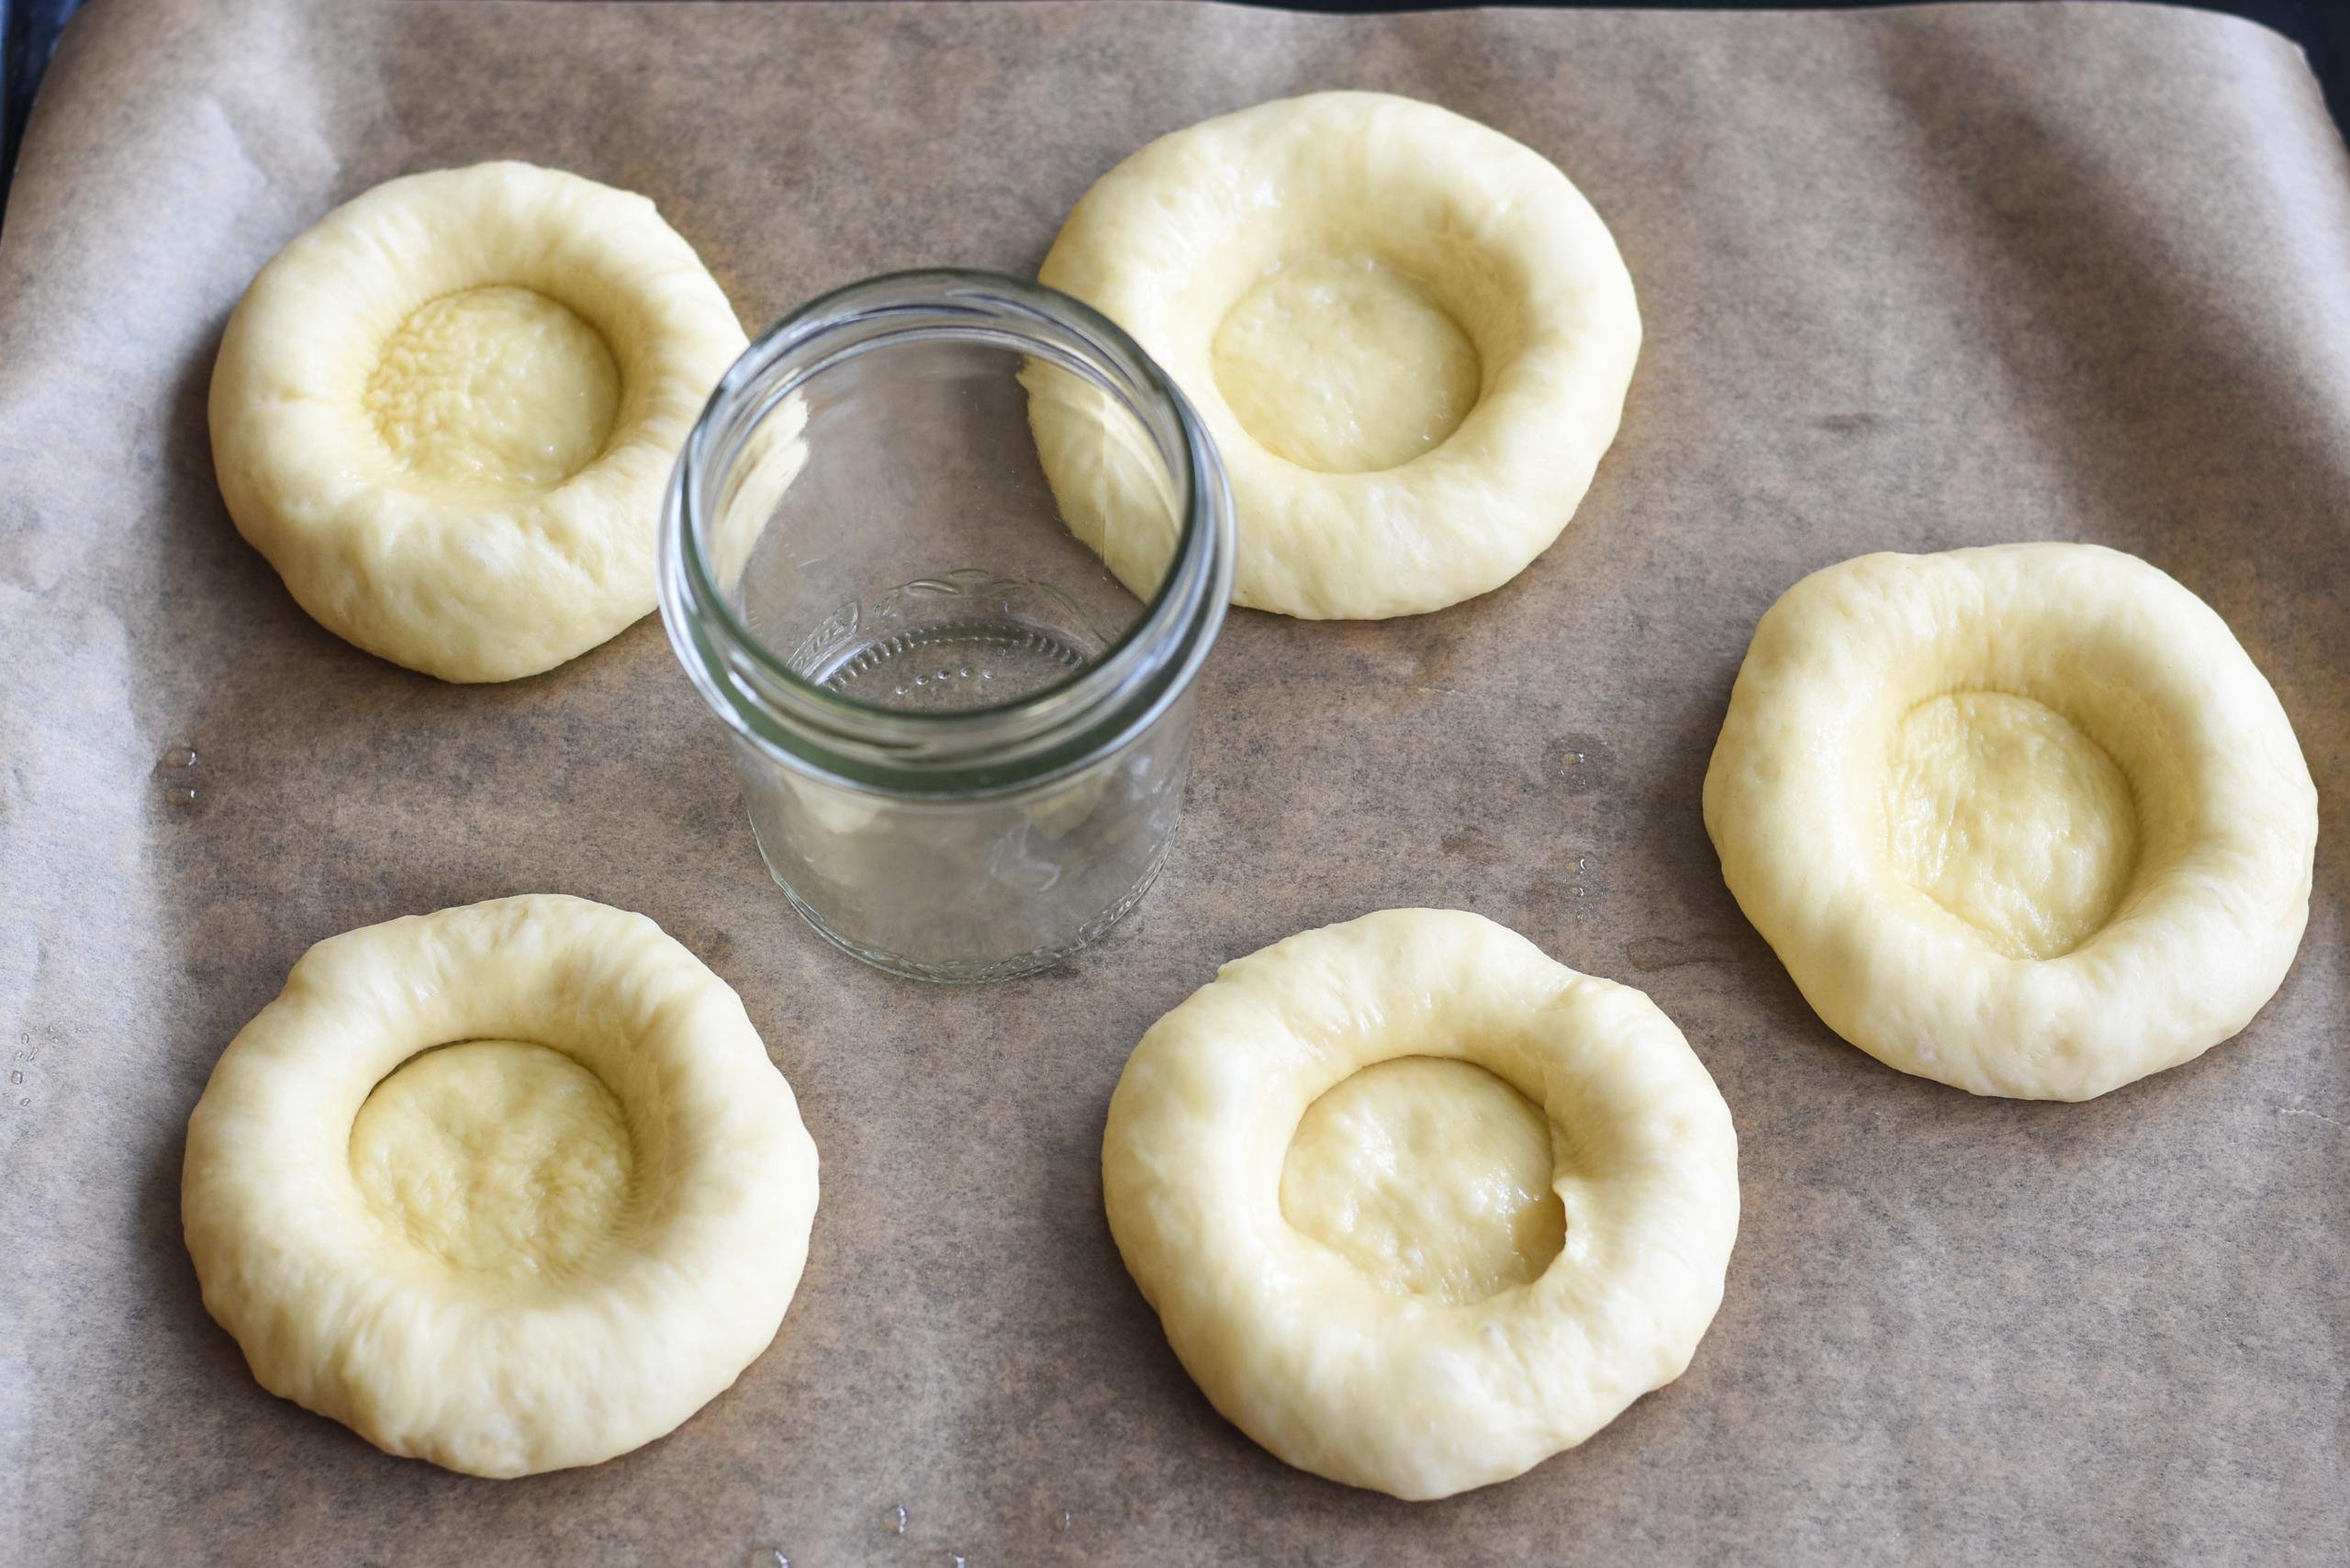
- Hollow out the centers: Use a glass to hollow out the center of each bun for the filling.
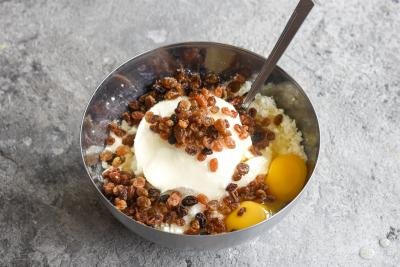
- Prepare the filling: Combine the cream cheese, cottage cheese (or farmers cheese), eggs, and sugar.
- Add the filling & bake: Fill each bun center with the filling and bake at 350°F for 30 minutes or until golden brown.
Filling variations: Vatrushka can be filled with tons of different fillings, too (just like danishes!). Add berries or a dollop of raspberry jam on top of the cream cheese filling for a fruity taste! Or for a citrusy spin, add a splash of lemon juice, lemon zest, or lemon curd!

Tips for Great Vatrushka Buns
What is the secret to a delicious vatrushka bun? There’s actually no secret — I’ve got all the tips you’ll need right here!
- Use a good quality flour: I have consistently had the best results with Bob’s Red Mill All Purpose Flour. The dough turns out perfect every time!
- Mix with a stand mixer: It’s super easy to get the correct dough consistency when you knead the dough with a stand mixer. This is my favorite one.
- Oil the glass: When hollowing out the centers with a glass (for the filling), oil the glass. Now it won’t stick to the dough!
- Use two baking sheets: Your dough balls will need space for rising and you don’t want the pastries to overlap when baking, so divide them between two large sheet pans. This set is my favorite!
- Give the buns an egg wash (optional): For an extra golden color, I often brush the pastries with an egg wash before filling and baking them.
- Slightly overfill the centers: Add enough filling to the center of the pastry that it begins to slightly “dome” over. The cheese shrinks as it bakes, so you want to have a little bit extra in there.
Storing Vatrushka
Vatrushka (like many pastries) taste the absolute best right after baking. The warm center and soft dough is to-die-for! But, in case of extras, here are my suggestions on how to best store them.
- Room temperature: If you have only a few left over, place them in an airtight container and store them on the counter for 2-3 days.
- Refrigerator: To store for a week, keep the vatrushki in an airtight container in the fridge.
- Freezer: Fully bake and cool the pastries. Then, wrap them individually in plastic wrap and store in freezer bags for up to three months. Thaw in the refrigerator overnight.
Reheating tip: Vatrushka can be enjoyed either cold or warmed up — it’s up to you! If you want yours warm, put them in the microwave for just a few seconds, or heat a whole tray in the oven until warmed through.
More Sweet Bun Recipes
- Fruit Piroshki Recipe – Eastern European jam-filled hand pie
- Poppy Seed Buns – Twisty buns filled with crunchy poppy seeds
- Quick Cottage Cheese Buns – Yeast-free protein-rich buns
- Brioche Cinnamon Buns – Sweet brioche and cinnamon buns? Yes, please!
Recipe
Ingredients
- 1 1/2 tbsp active dry yeast
- 2 cups warm milk
- 1/2 cup sugar divided
- 3 eggs
- 2 tbsp mayonnaise
- 1 tsp salt
- 5 cups flour (depending on the flour brand, you may need to add more)
- 3 tbsp oil avocado or canola
Filling
- 16 oz cream cheese room temperature
- 16 oz farmers cheese or cottage cheese
- 2 eggs
- 1/2 cup sugar
- 1 cup golden raisins optional
Instructions
- In the bowl of a stand mixer, combine yeast with two cups of warm milk (110°F) and one tablespoon of sugar. Let this mixture rest on the counter for 10 minutes.
- Add the eggs, mayonnaise, salt, and remaining sugar to the mixture, whisking to combine.
- Gradually mix in the flour with a spatula. Once the flour is all mixed in, add oil to the mixture. It's important to add the oil last, as this helps with the dough texture. Use a stand mixer fitted with a dough hook to knead the dough until it's elastic, this will take at least 10 minutes. The dough should not be sticky, but still soft. Then, allow the dough to rise for about an hour.
- Cut the dough into 30 equal pieces (a dough or bench scraper works great here). Shape each piece into a flattened ball. Place the balls 2 inches apart on a parchment lined baking sheet, and cover with a towel. Let them rise for 30 minutes.

- After rising, press each bun in the center with the bottom of a glass to hollow out the center for the filling. You'll want to space out the balls of dough before pressing into them, so that the pastries don't touch. Use two baking sheets to fit all of the buns.
- Whisk the cream cheese, cottage cheese, eggs, and sugar together to create the filling. Optionally, you can add raisins to the filling. (Note: If adding raisins, they will need to be soaked in boiled water for 10-15 minutes and then drained, before combining with the cheese.)
- Fill each center with the sweet cheese filling.
- Preheat oven to 350°F. Bake one tray of vatrushka buns at a time, the other tray can rest on the counter in the meantime. Bake for 30 minutes or until golden brown. Enjoy!


I love these pastries. It helps me feel closer to my heritage since it is not a good time to travel and I love giving them to friends and coworkers who always enjoy them and ask for more!
I'm glad you love them, Scarlet! I find they're nostalgic, too. Hopefully someday soon we can all travel wherever we want to go!
Made this and it was delicious! Added an extra cup of flour or else the dough would’ve been too sticky to work with. I used King Arthur brand all purpose flour. Also opted for farmer’s cheese instead of cottage cheese. The topping was so good! The bottoms were a little hard, not in a bad way but they formed a slight crust. Is this normal or was there something that I could’ve done during the process that caused that? I’ve never had vatrushka before so wasn’t sure.
Glad you enjoyed them! The dough is meant to be a bit sticky, which helps keep the vatrushka soft and fluffy. Adding extra flour can make the dough easier to handle but may also create a firmer crust. Maybe next time use less flour and see if that makes a difference. If not, I'm here to help troubleshoot.
Love the filling!!
Thanks for all the feedback Lana!
Hi Natalya, I made these today using your recipe, and they’re delicious! Thankyou so much
Hi Jen, I'm happy you enjoyed the buns! 🙂
Should I store these in the fridge after?
Hi Emily- you can store any leftovers in an air-tight container in the fridge! They will probably taste best eaten fresh though. 😊
I have been baking since I was little so I have some basic knowledge but I always tend to be so frustrated following your recipes. And I’ve tried many of your recipes. The lack of instructions and the random pictures just makes baking experience frustrating. I figured it out but unfortunately would not recommend your recipes.
Hey Enna- I'm sorry to hear this recipe was challenging to follow. Is there a particular part that you'd like me to clarify? Please let me know, I'm happy to help troubleshoot. Thanks for your feedback!
Hi, I want to try these. I’ve never seen anything like them before. My husband doesn’t do well with processed sugar though. Is there an alternative you would suggest? My go to is honey, but worried that’d be weird in cream cheese
Hi Dinah, I haven't tried using any alternatives in this recipe so I can't confidently suggest one.
Do you use cream cheese and farmers cheese in the filling? Or just one or the other? Thanks for your help. I haven't had these since I lived in Russia as a missionary. I'm excited to try them again.
Hi Randy - We use both! That yields the best texture. Definitely let me know how they turn out and if they're close to what you had while you were in Russia. Happy New Year!
How would you incorporate berries or cherries into the filling (as you listed as alternatives)? Would you do straight jam or mix jam with the cheese? Would like to try some different fillings with the traditional one. Thanks!
Hey Anita, it depends on your preference. I think it would be cool to add a spoonful on top of the cheese but I would skip on raisins.
Wish this recipe said what kind of texture your looking for in the dough. Hard to tell how much flour is enough if there are no directions for that since the recipe says “depending on flour brand” and that’s it. It was frustrating to figure that out. Ended up throwing the dough out and using another recipe that had more clear directions.
We try to describe the texture as much as possible, by adding more videos to the recipes, I hope it will help long term. Also, we do have photos for reference. Sorry about your experience. Glad you found a recipe that you like.
If you use (I use) little packages of yeast, how much should I use?
Thank you.
Hey Anshel, use 1.5 Tbsp of yeast for this recipe. All packages are slightly different and I don't want to mislead you, it would be best to measure.
I used two of the yeast packets. Your directions were very easy to follow, and they were delicious. I made it for my book club tomorrow. We read The gentleman from Moscow. A book centered in Russia. Thank you for the well written recipe. I’m an experienced baker(trained in Germany).
Hi Cathy, SO glad this recipe was a success! Enjoy it! Thank you so much for your feedback.
Never had it before. Partner's dad liked it. Impressed the Russians. 😄
Thank you.
So funny! Russians can be impressive.
Hey . I just did your recipe today . My kids just loved it . Dough had really great texture. Thank you for sharing!
Hey Marina, this is such a great comment. It always makes me so happy when kids love the food! 🙂 thanks for sharing
There was a reference to this scrumptious dessert in a book I am reading. Just had to try your recipe. Wow, love them! I made 1/2 of them with plumped dried cranberries mixed into the cheese filling; I added lemon zest and a bit of lemon juice to the other 1/2 of the cheese filling. Both are wonderful!
A few other things I did when preparing this dessert. I used a KitchenAid stand mixer, but left the dough quite soft. I turned it out onto a generously floured surface and kneaded by hand, still trying to keep the dough soft. Let it rise and again turned it onto a floured surface. Dough is quite sticky. Each ball of dough weighs about 2 oz. (about 56 grams). Let the dough balls rise, then used a 1\2 pint canning jar to make the indentation. Might need to lightly grease the jar bottom. I used some quark cheese (I had to use it up), some cottage cheese (to make up for not having enough quark) and Neufchâtel cheese (because it is what I had in the fridge). I recommend beating the cottage cheese to make it smooth. I divided the cheese filling in half and added plumped dried cranberries to one half and zest from one lemon and 1/2 t. fresh lemon juice. Use about 3 T. filling for each bun. I have frozen some buns, but have not yet defrosted any. I think some lemon curd lightly swirled in the cheese would be outstanding!
This is just so amazing! I am thrilled to find such a helpful response to a recipe that I am trying to figure out. I just love it when someone will take the time to teach others how to make these incredible recipes. I would just like to pass on a big hug and THANKYOU to this person!
Peg, so many amazing tips. I love that you took the time to share your feedback. It will help so many. I hope you love them so much!
Peg, I love the idea is lemon zest. I bet it adds such a nice flavor. Thank you for that tip. So excited to try it!
Hi. You used to have a recipe for Moscow Buns on your site? Can you please share where that it? I wanted to make them, but cannot find the recipe. Thank you so much!
Hey Tamara, currently we don't have a recipe for them on the site. I plan to publish one soon.
Loved this recipe. Great dough! Can be used for any kind of pastries. Actually I made vatrushki for the first time, came out lovely.
Alesia, thank you for sharing. I am so happy to hear this. Thank you for sharing your feedback.
Hey Natalya; have you ever tried choc chips in place of raisins in this recipe? I love cream cheese filling with choc chips. I wonder if the chips would stay fairly whole like they do in the filling for farm cakes ( cream cheese choc chip filled chocolate cupcakes),or if the chips would melt? I can’t wait to try your yeast dough with the mayo and this sweet roll. Btw I love your ethic recipes! You are the best.
Hey Dear, If you use chocolate chips, they should hold their shape. Are you trying to add them to the cheese filling or just chocolate chips alone?
Oops, ethnic recipes!
Hi, i made your recipe today! And it turns superb 🤩🤩🤩🤩🤩, thankss
Hey Anna, thank you so much for sharing your feedback! I am so happy you loved the recipe.
Hi , I made your recipe today! And it turns superb. Thanks for sharing recipe
darn! i forgot to soak the raisins! will they still be good?
They wouldn't be as soft but that's fine. 🙂 Tell me what you think.
The filling is delicious but the proportions are way off—too much filling for the dough. And the dough recipe needs clarification: it’s too wet without an additional cup of flour. The yeast needs to be regular Fleischmanns yeast and not modern bread yeast. The flour needs to be all-purpose and not bread flour. I’m looking for a new more accurate recipe.
Totally agree. I ended up adding more flour because it was too wet and it ended up being too much in the end because I kept adding and not being sure of how much to add and when to stop adding flour. Had to throw the dough out and found a new recipe with clearer instructions.
It’s all about having a feel for the dough. It’s easy to add more flour but impossible to make it more moist. This is why there is leeway in the recipe.
Thank you for the recipe. I love Russian Vatrushka !
Ina, awesome, I am so glad you found this recipe. You will love it!
Thank you for nice and easy recipe loved it 🙂
Yumm!!! l love this. You made me crave them.
I got so carried away that forgot to say thank you from all my soul to lovely Natalya for this awsome recipe!
Omg 🙂 people like you inspire me to keep this going 😉
I made this one too today. I have been dying to have these vatrushka buns and the trickiest part is the dough. I have tried so many different dough recipes but most of them turned out too hard or too dry after baking. This is perfect, just like in my childhood days. Perfect, perfect vatrushka. Everyone loves them.
I love your comment!!! So glad you loved this recipe. Thank you!
this is awesome! i have been looking for such a recipe for ages! thank you
Oh my!!! Happy to be at your service 😉 hope you love them.
Hi, just wondering what is the reason to add mayonnaise?
It makes dough more moist. The dough turns out really good this way.
Would farmers cheese work instead?
Yes, it will work great!
I would like to sliced peaches to this, as a topping. Can it be done
Yes, I think it will work but they may have a lot of juices as the bake. So make deeper well.
This is what I make with this recipe., only that I put 1/2 cup of sugar more.. Thank u soo much for ur work! Love all Iv made by u.
Oh wow! We love poppy seeds, this looks incredible. I am adding it to our menu!