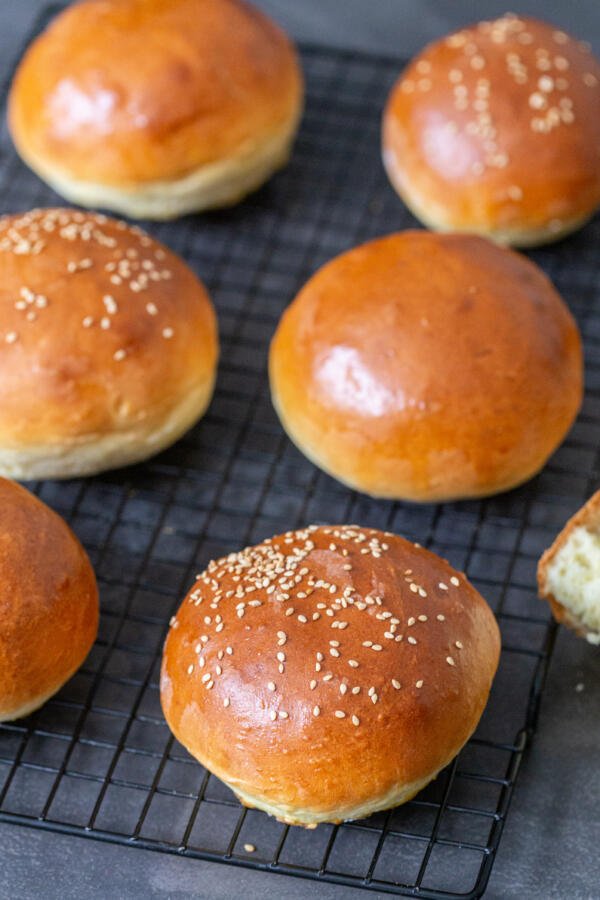
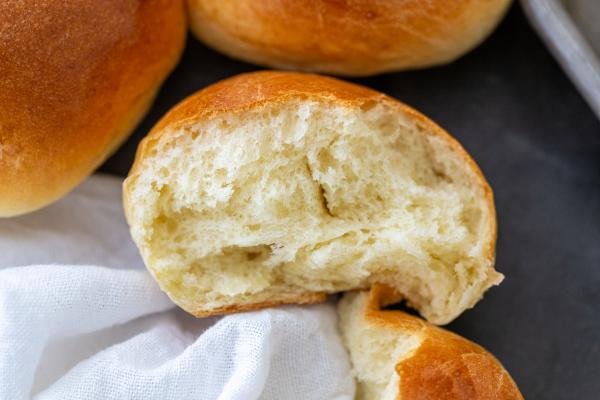
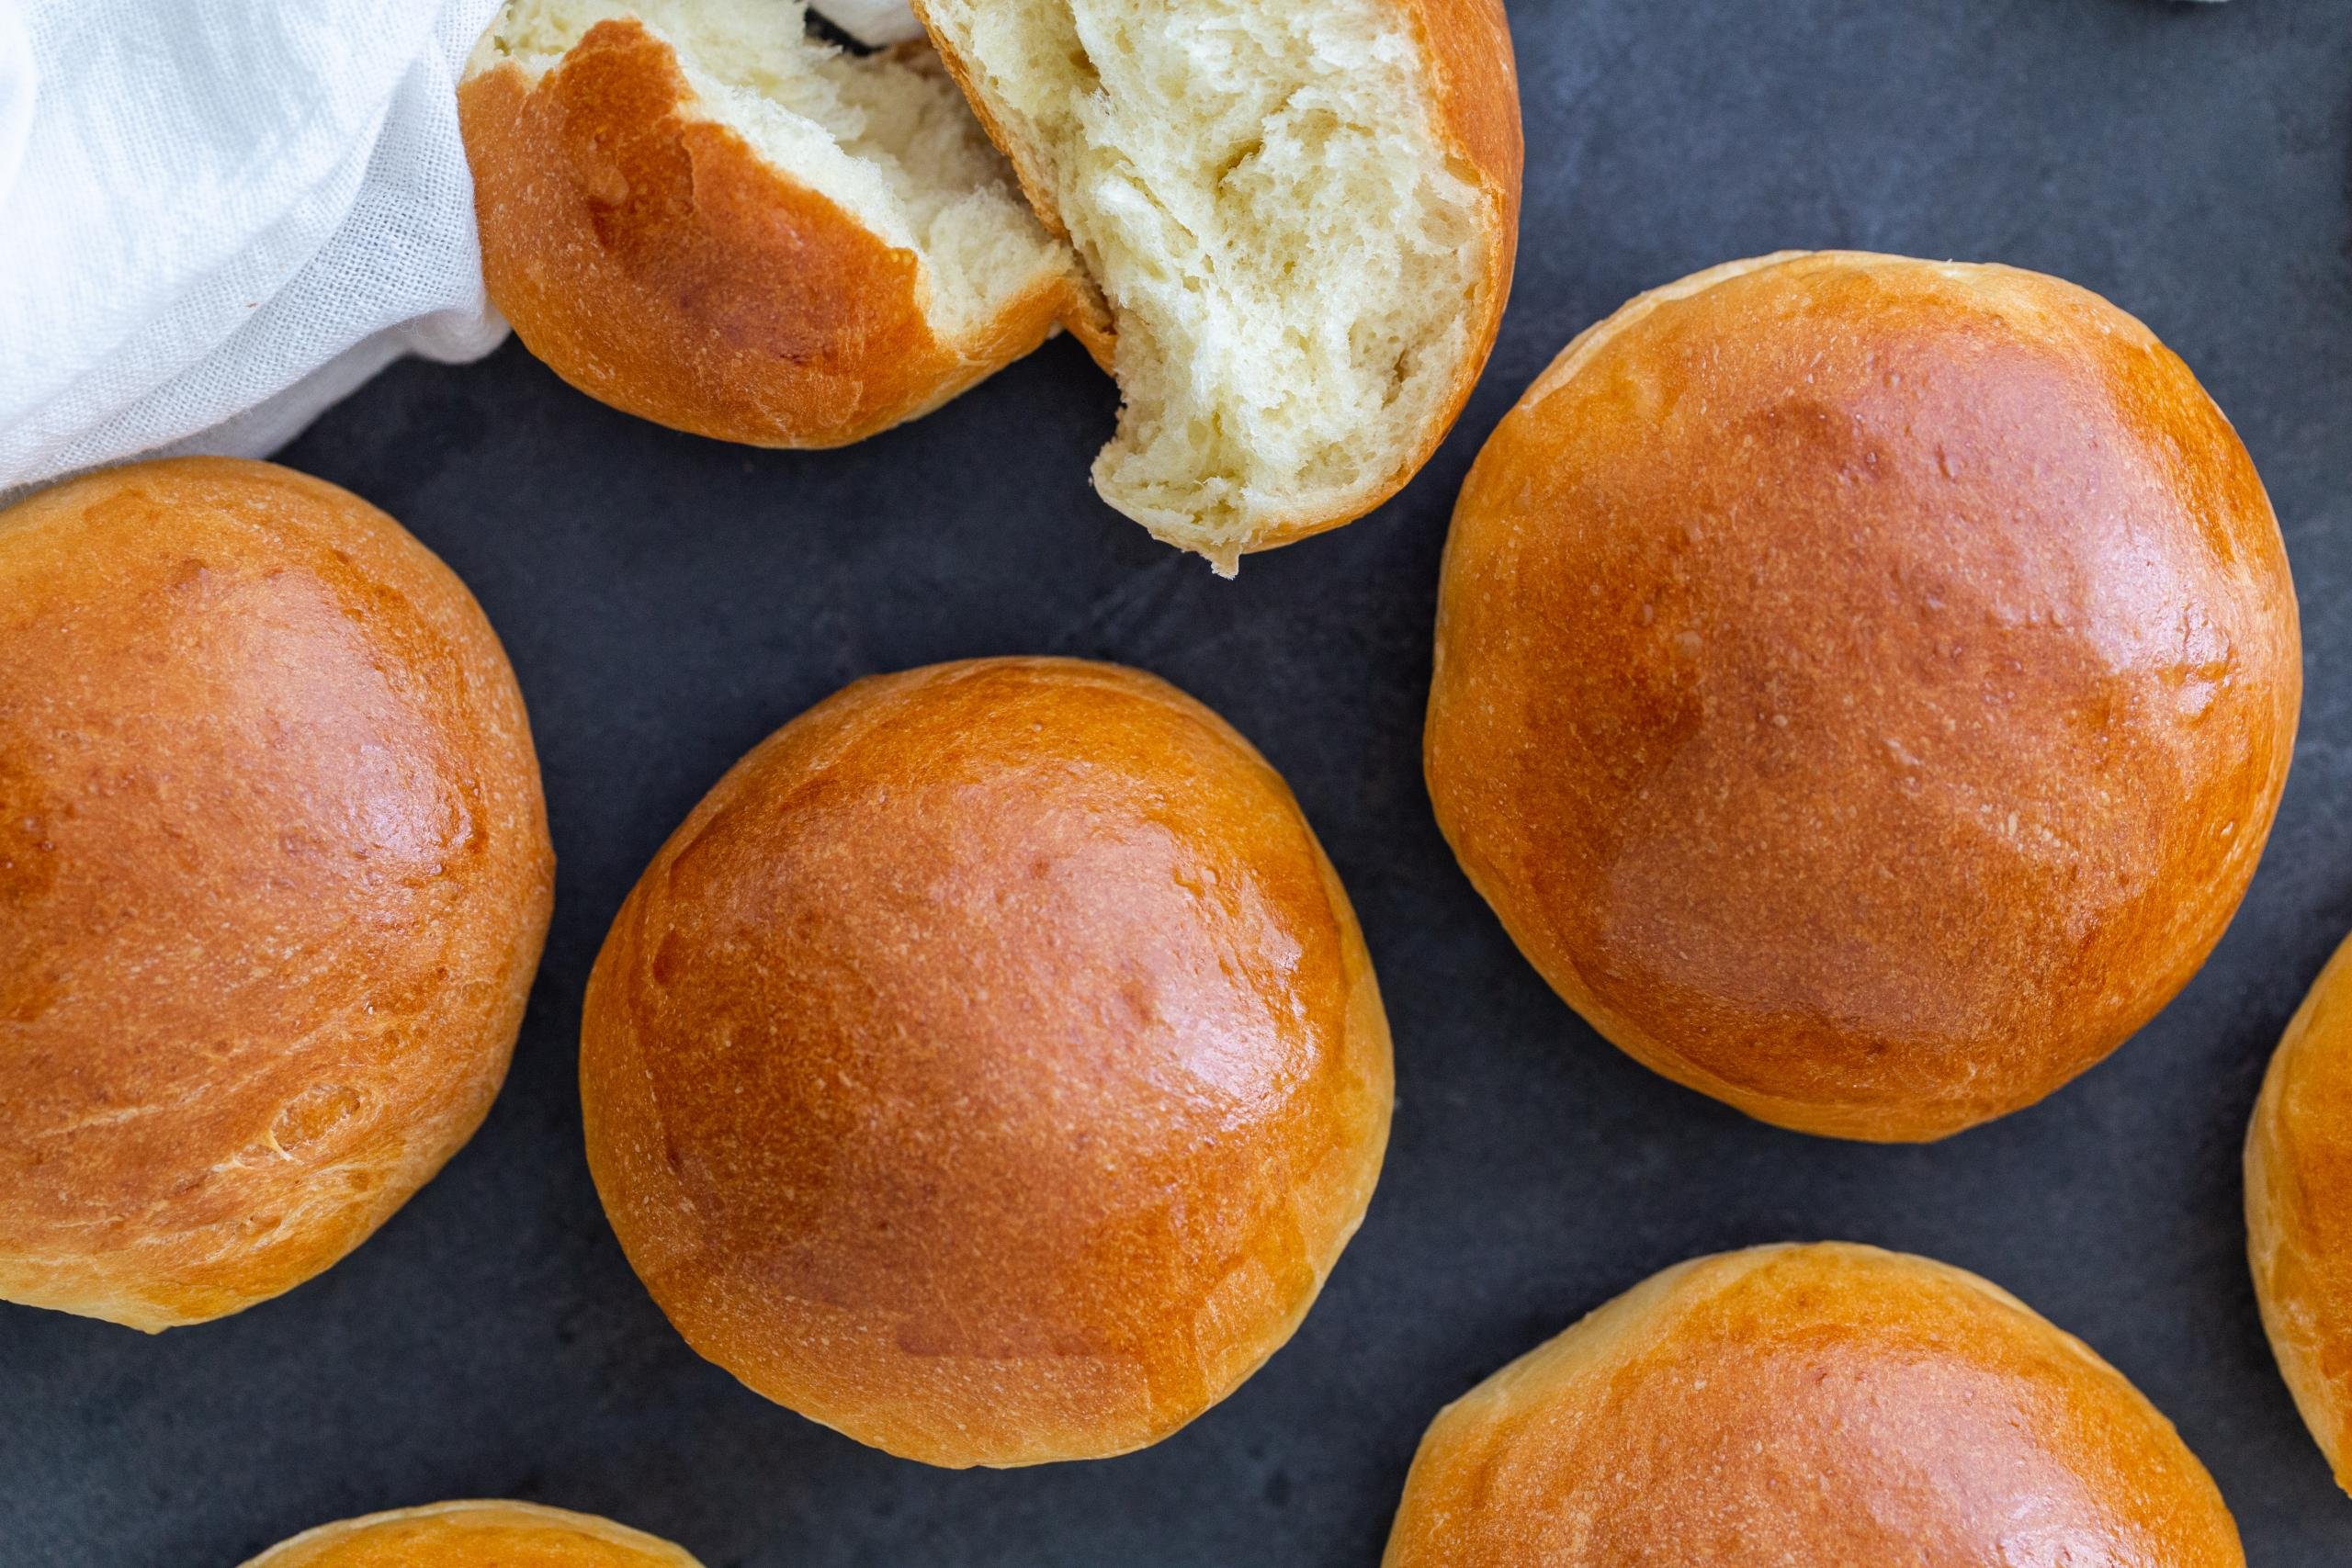
This homemade brioche bun recipe is super light & fluffy. Stuff them with pulled pork, slather them with peanut butter & jelly, or snack on ‘em straight!
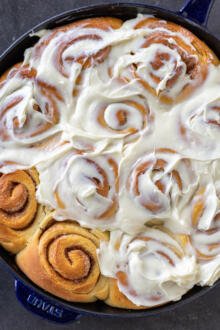
This brioche bun recipe is easier to make than you think! Instead of buying buns at the store, try your hand at making them homemade. I like to make a couple of batches and have them on hand for a last minute BBQ (hello, meaty sandwiches!). If you love the rich and fluffy flavor of brioche, don’t skip our brioche cinnamon rolls!
Note: You can make these buns by hand or use a stand mixer with a dough hook attachment.
What is Brioche Bread?
Made with eggs and butter, this brioche bread recipe has a rich and beautiful yellow color to it. Hailing from France, this bread is similar in flavor to the croissant with much less work. Slightly sweet and buttery, brioche works well with both sweet and savory recipes.
How to Make this Brioche Bun Recipe
Making this brioche bread recipe only requires 6 ingredients and the help of stand mixer (although you can make these buns by hand).
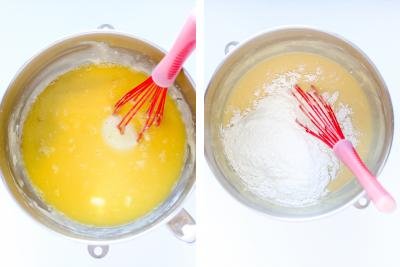
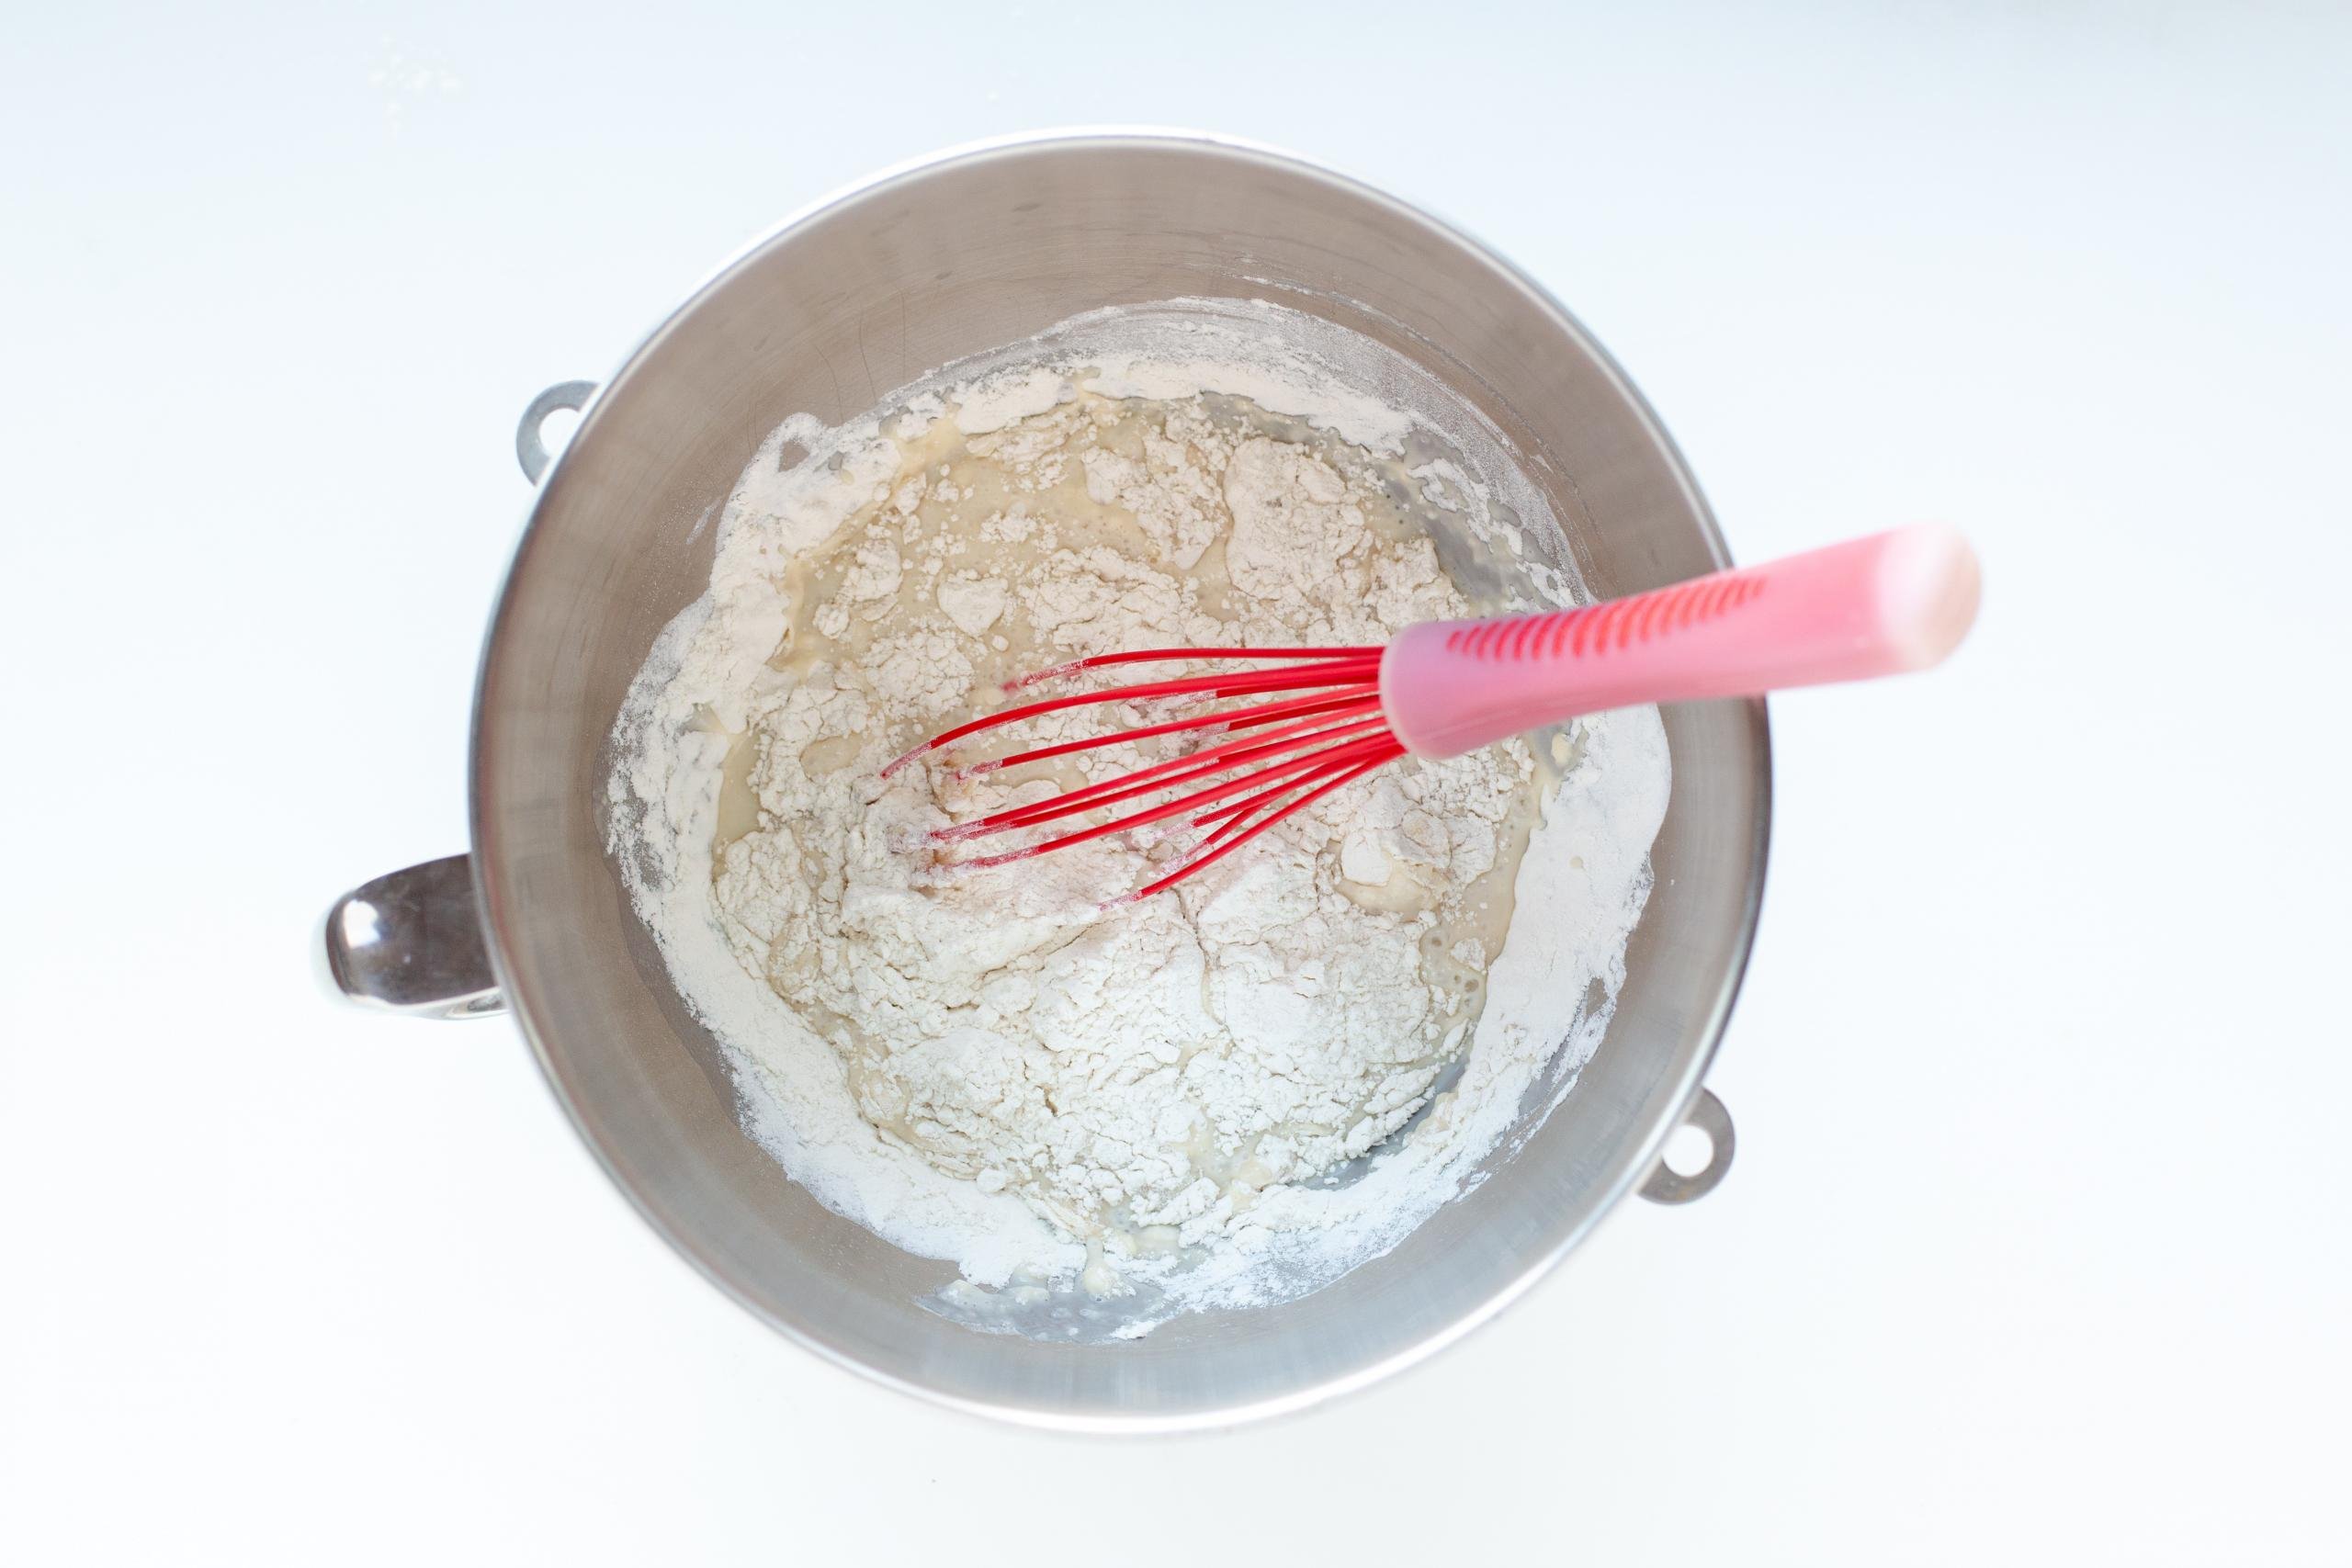
- Build the Dough Foundation: Using the bowl of a stand mixer or a large bowl and a spoon, combine the warm whole milk, active dry yeast, sugar, and two cups of all-purpose flour. Stir by hand or whisk the ingredients over medium speed, cover the bowl, and allow the mixture to rest for 30 minutes at room temperature.
- Add in the Eggs: In a separate bowl, whisk the eggs together. Add the eggs and melted unsalted butter to the dough mixture, followed by the remaining flour in small portions.
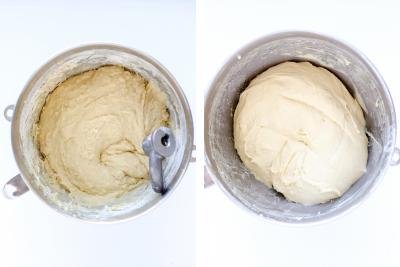
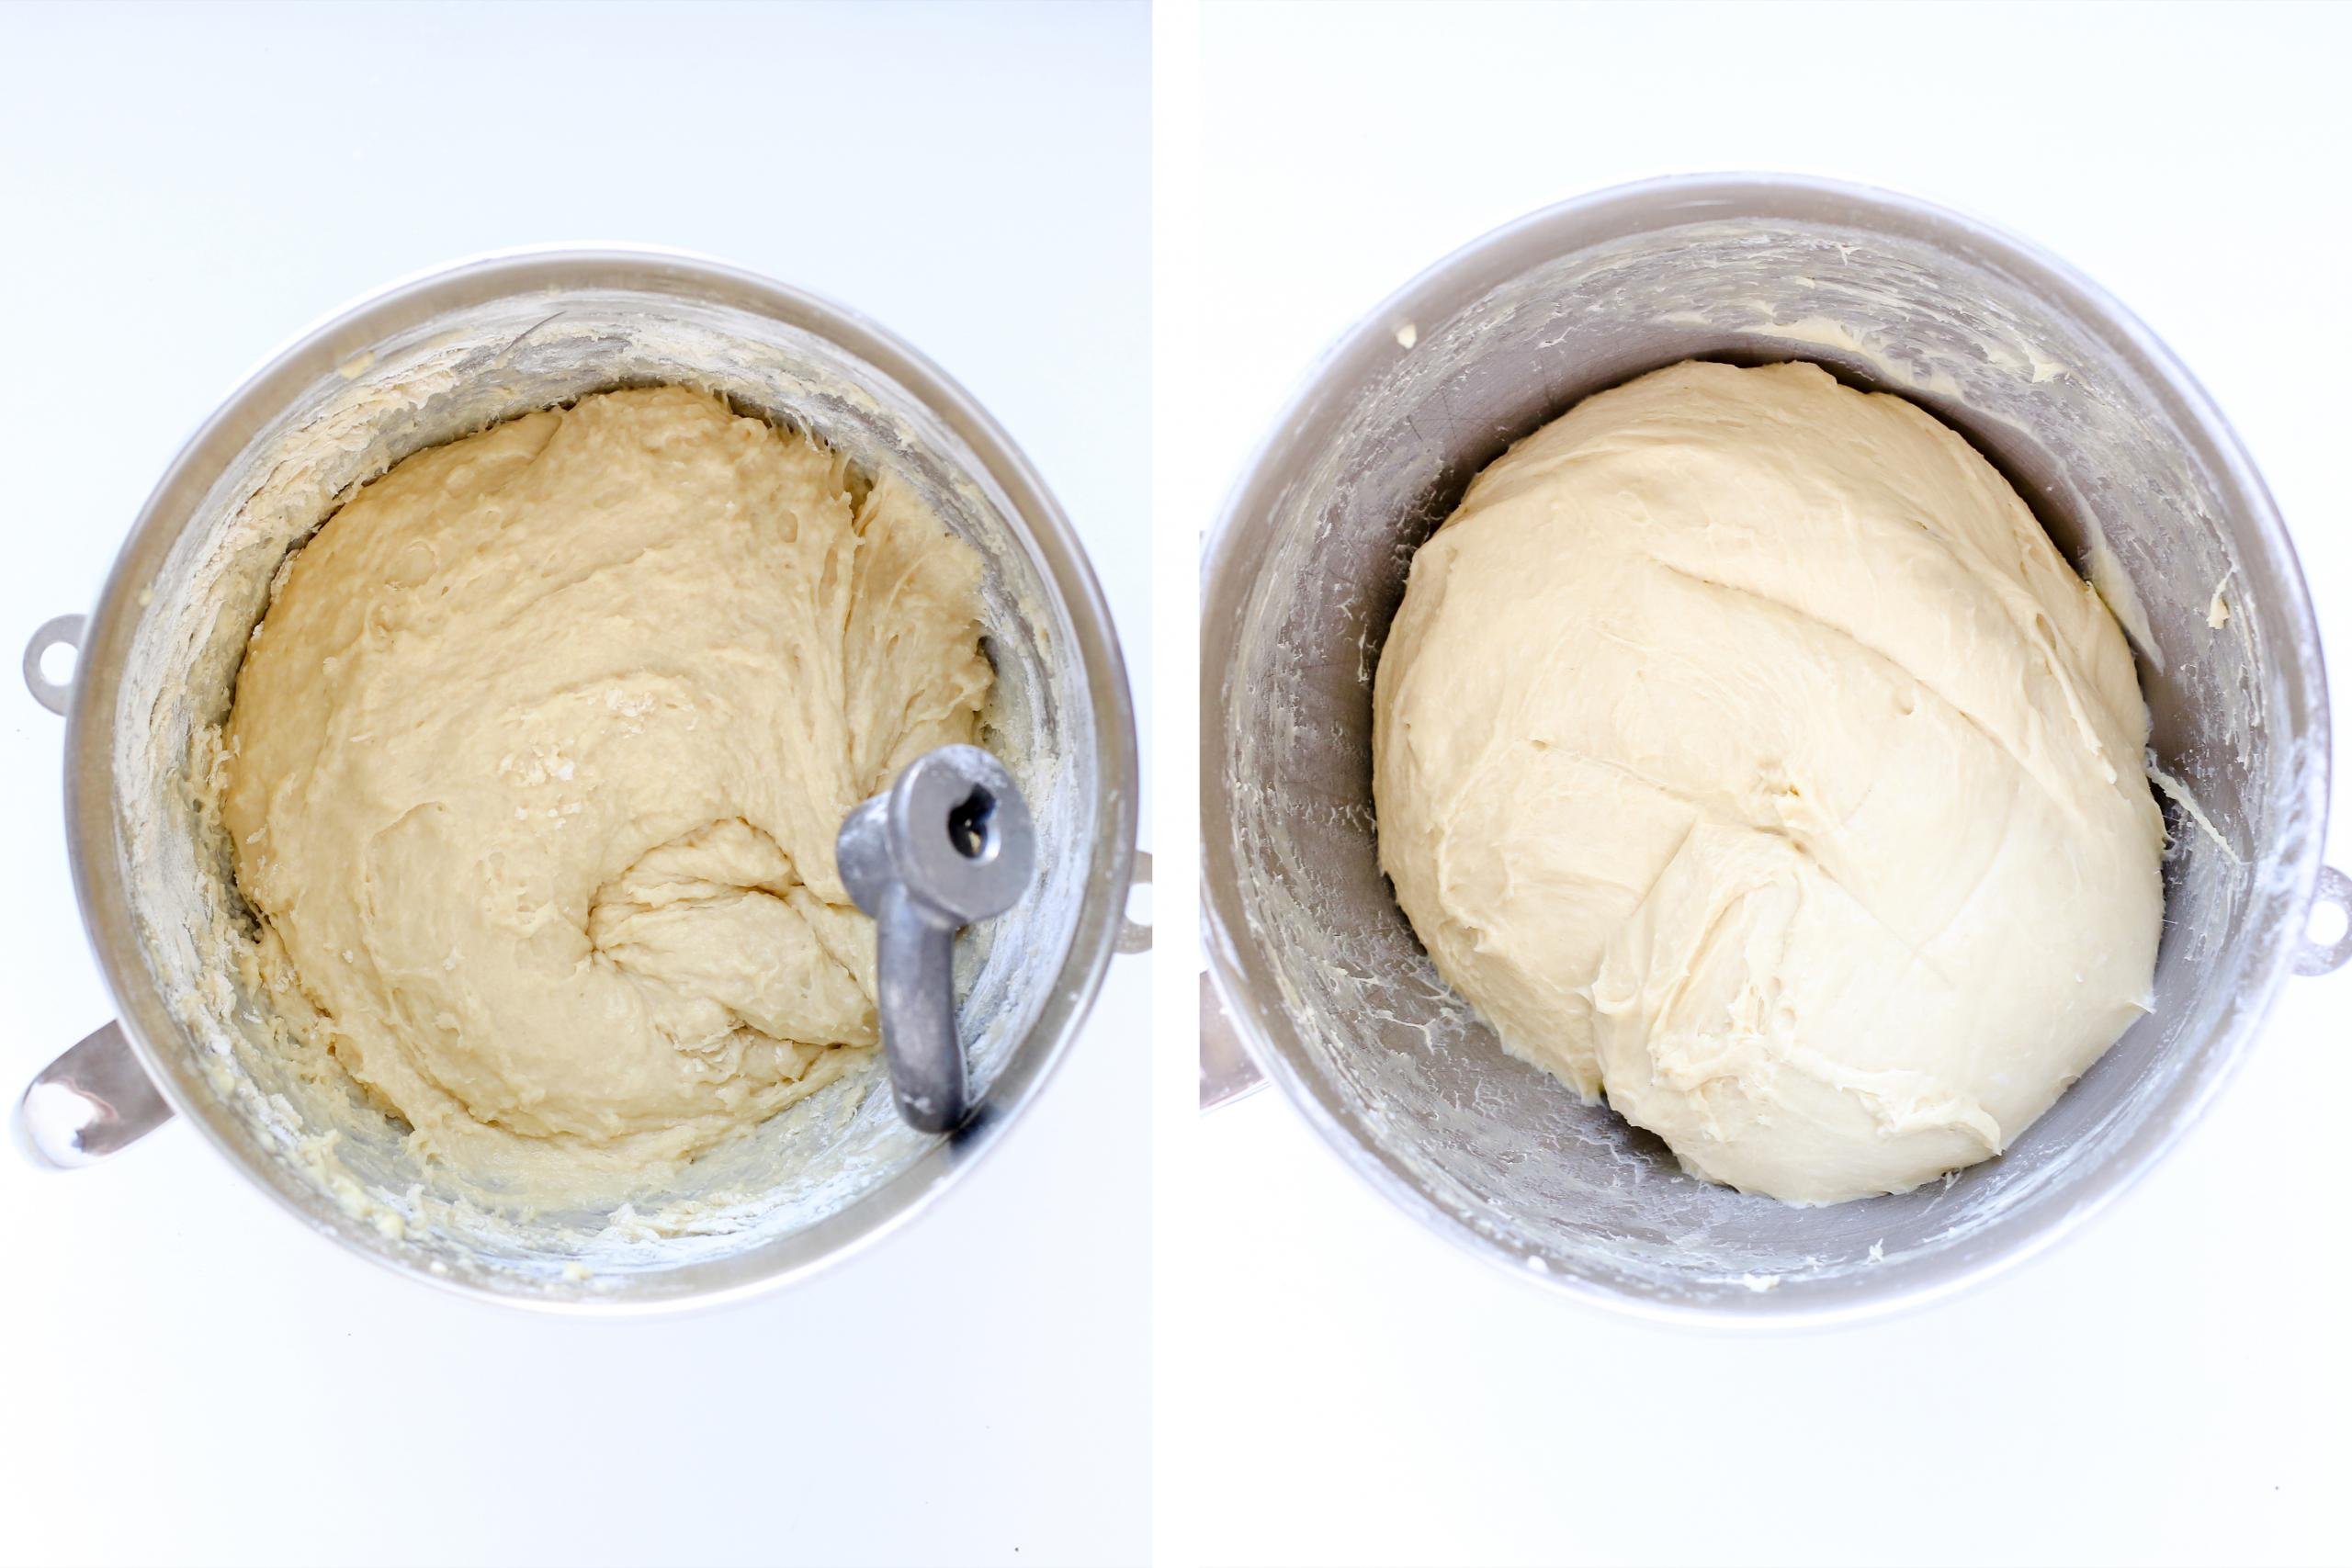
- Knead the Brioche Dough: Knead the dough by hand on a floured work surface or with your mixer until it becomes elastic (about 10-15 minutes).
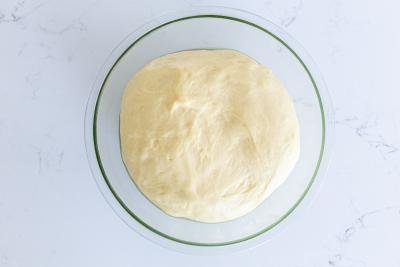
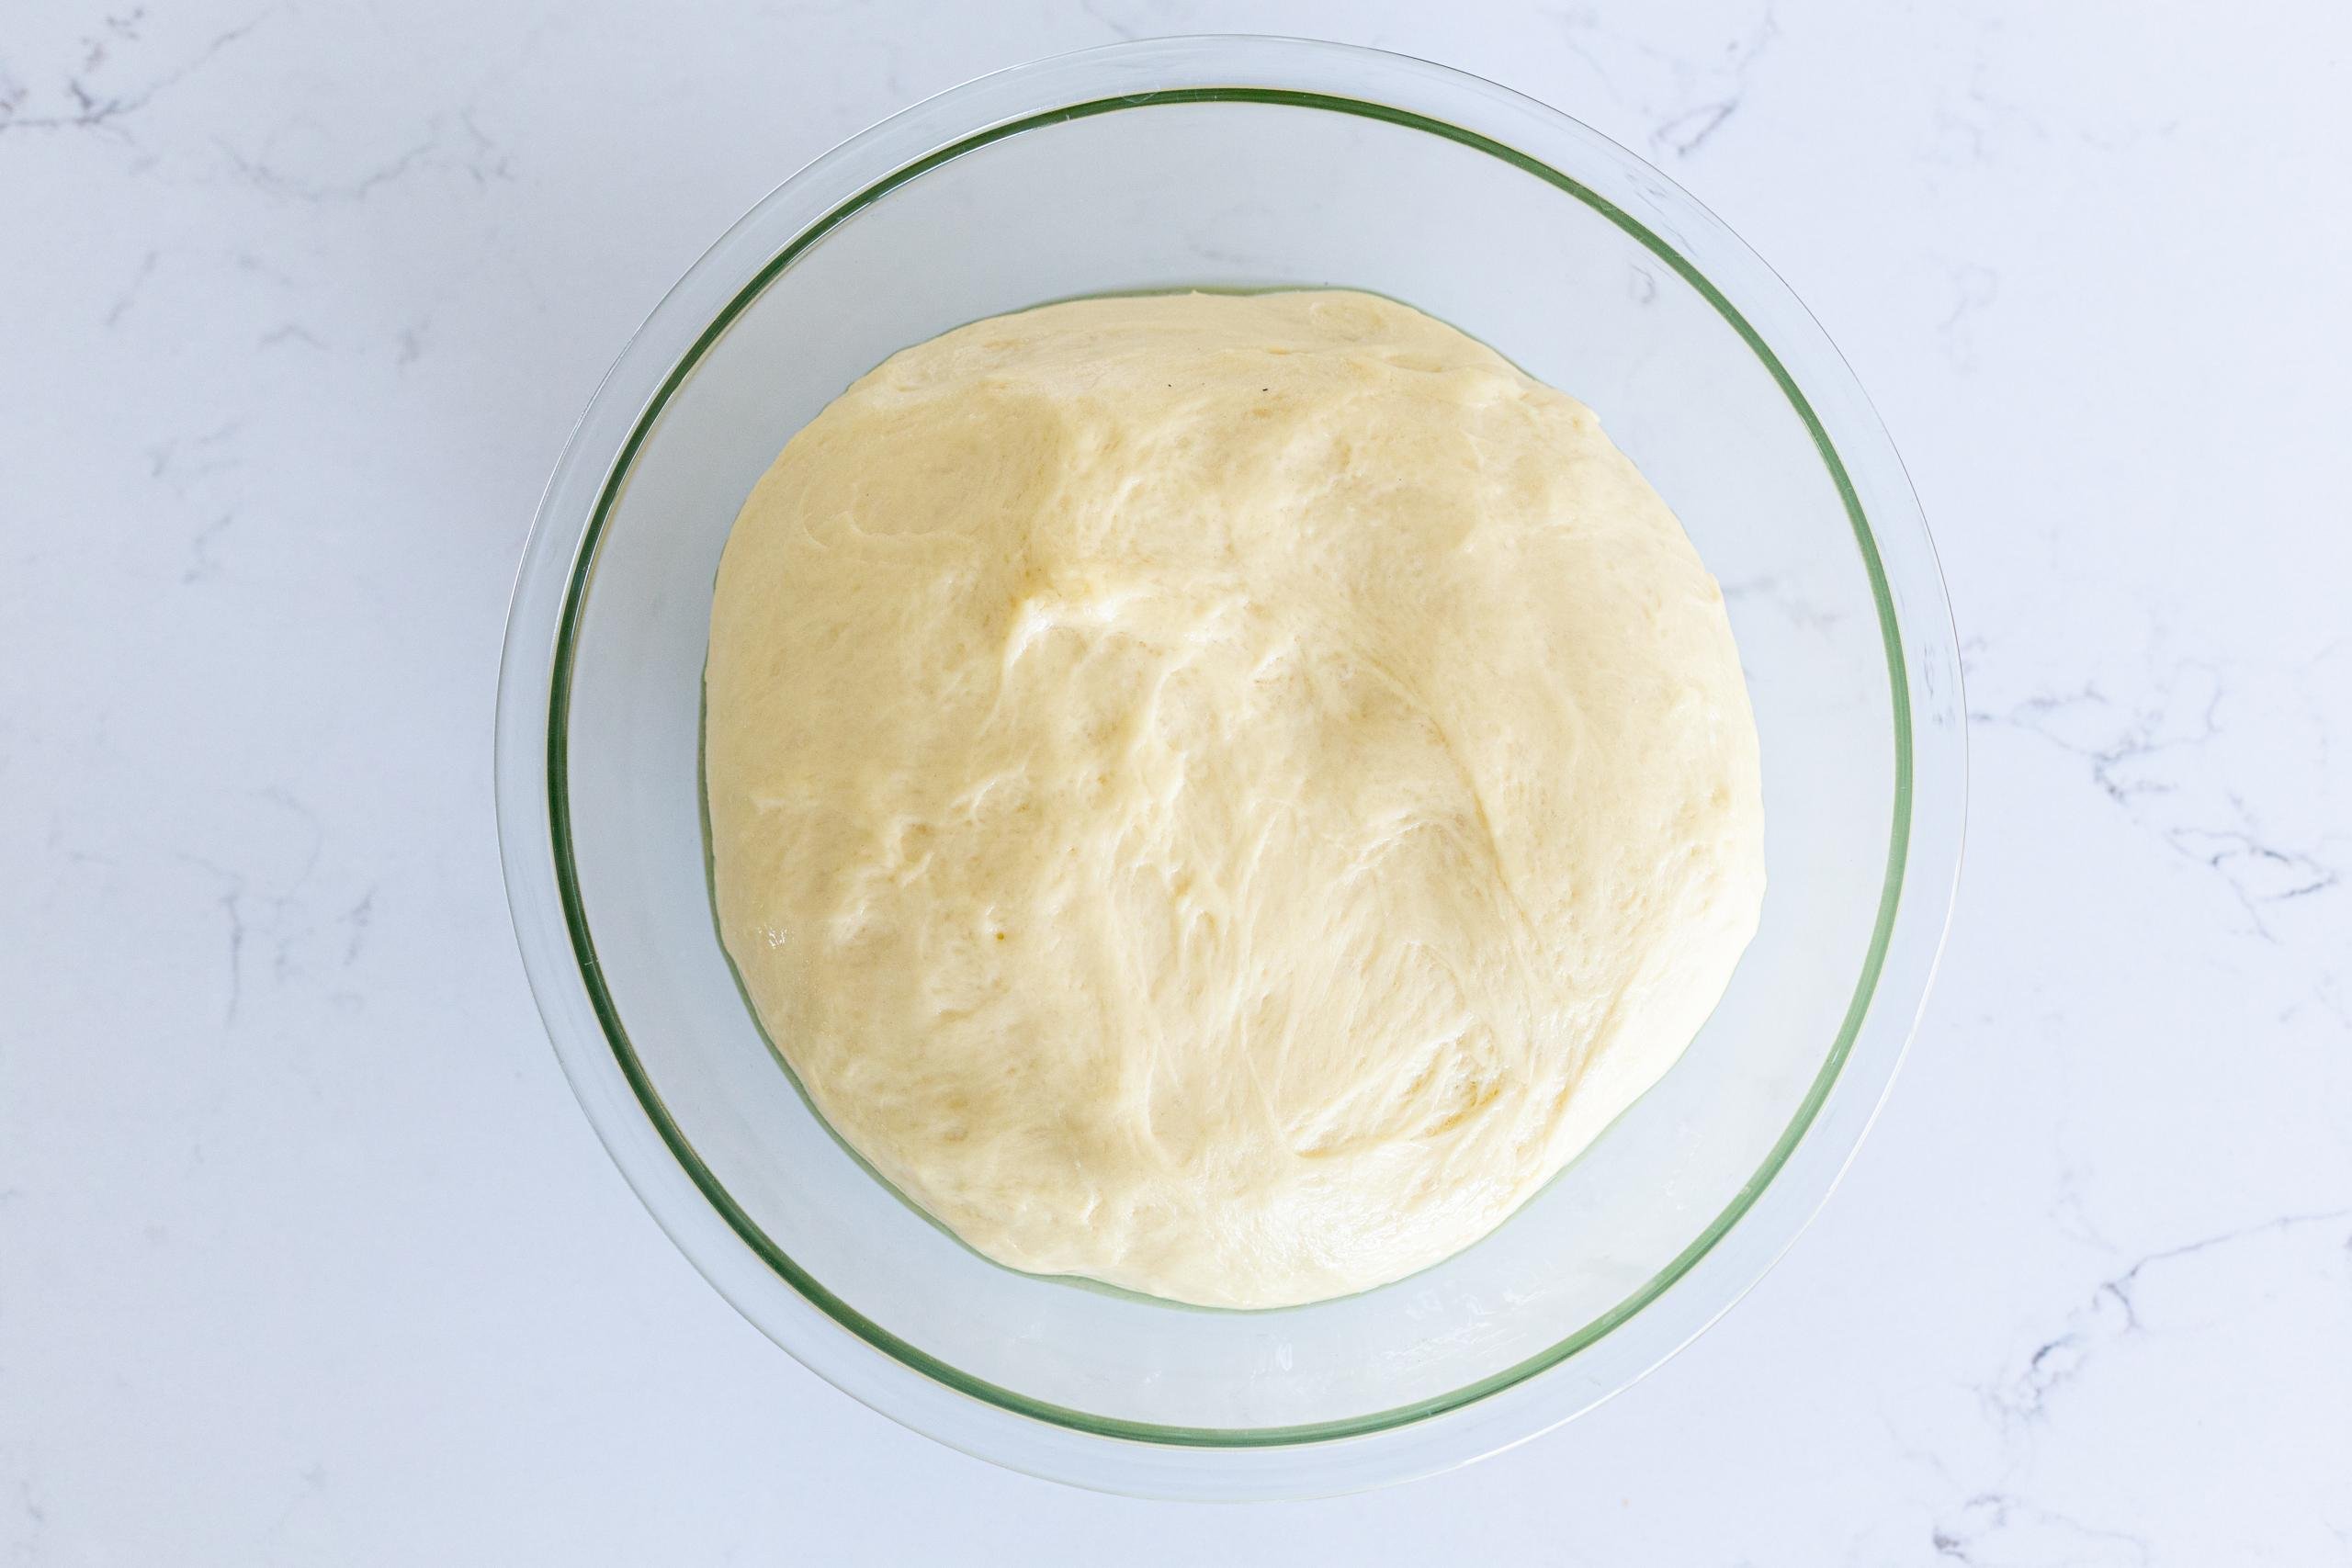
- Allow the Dough to Rise: Next, cover the dough and let it rise for about an hour.
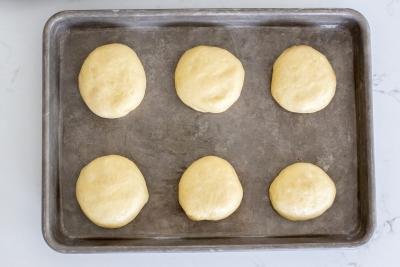
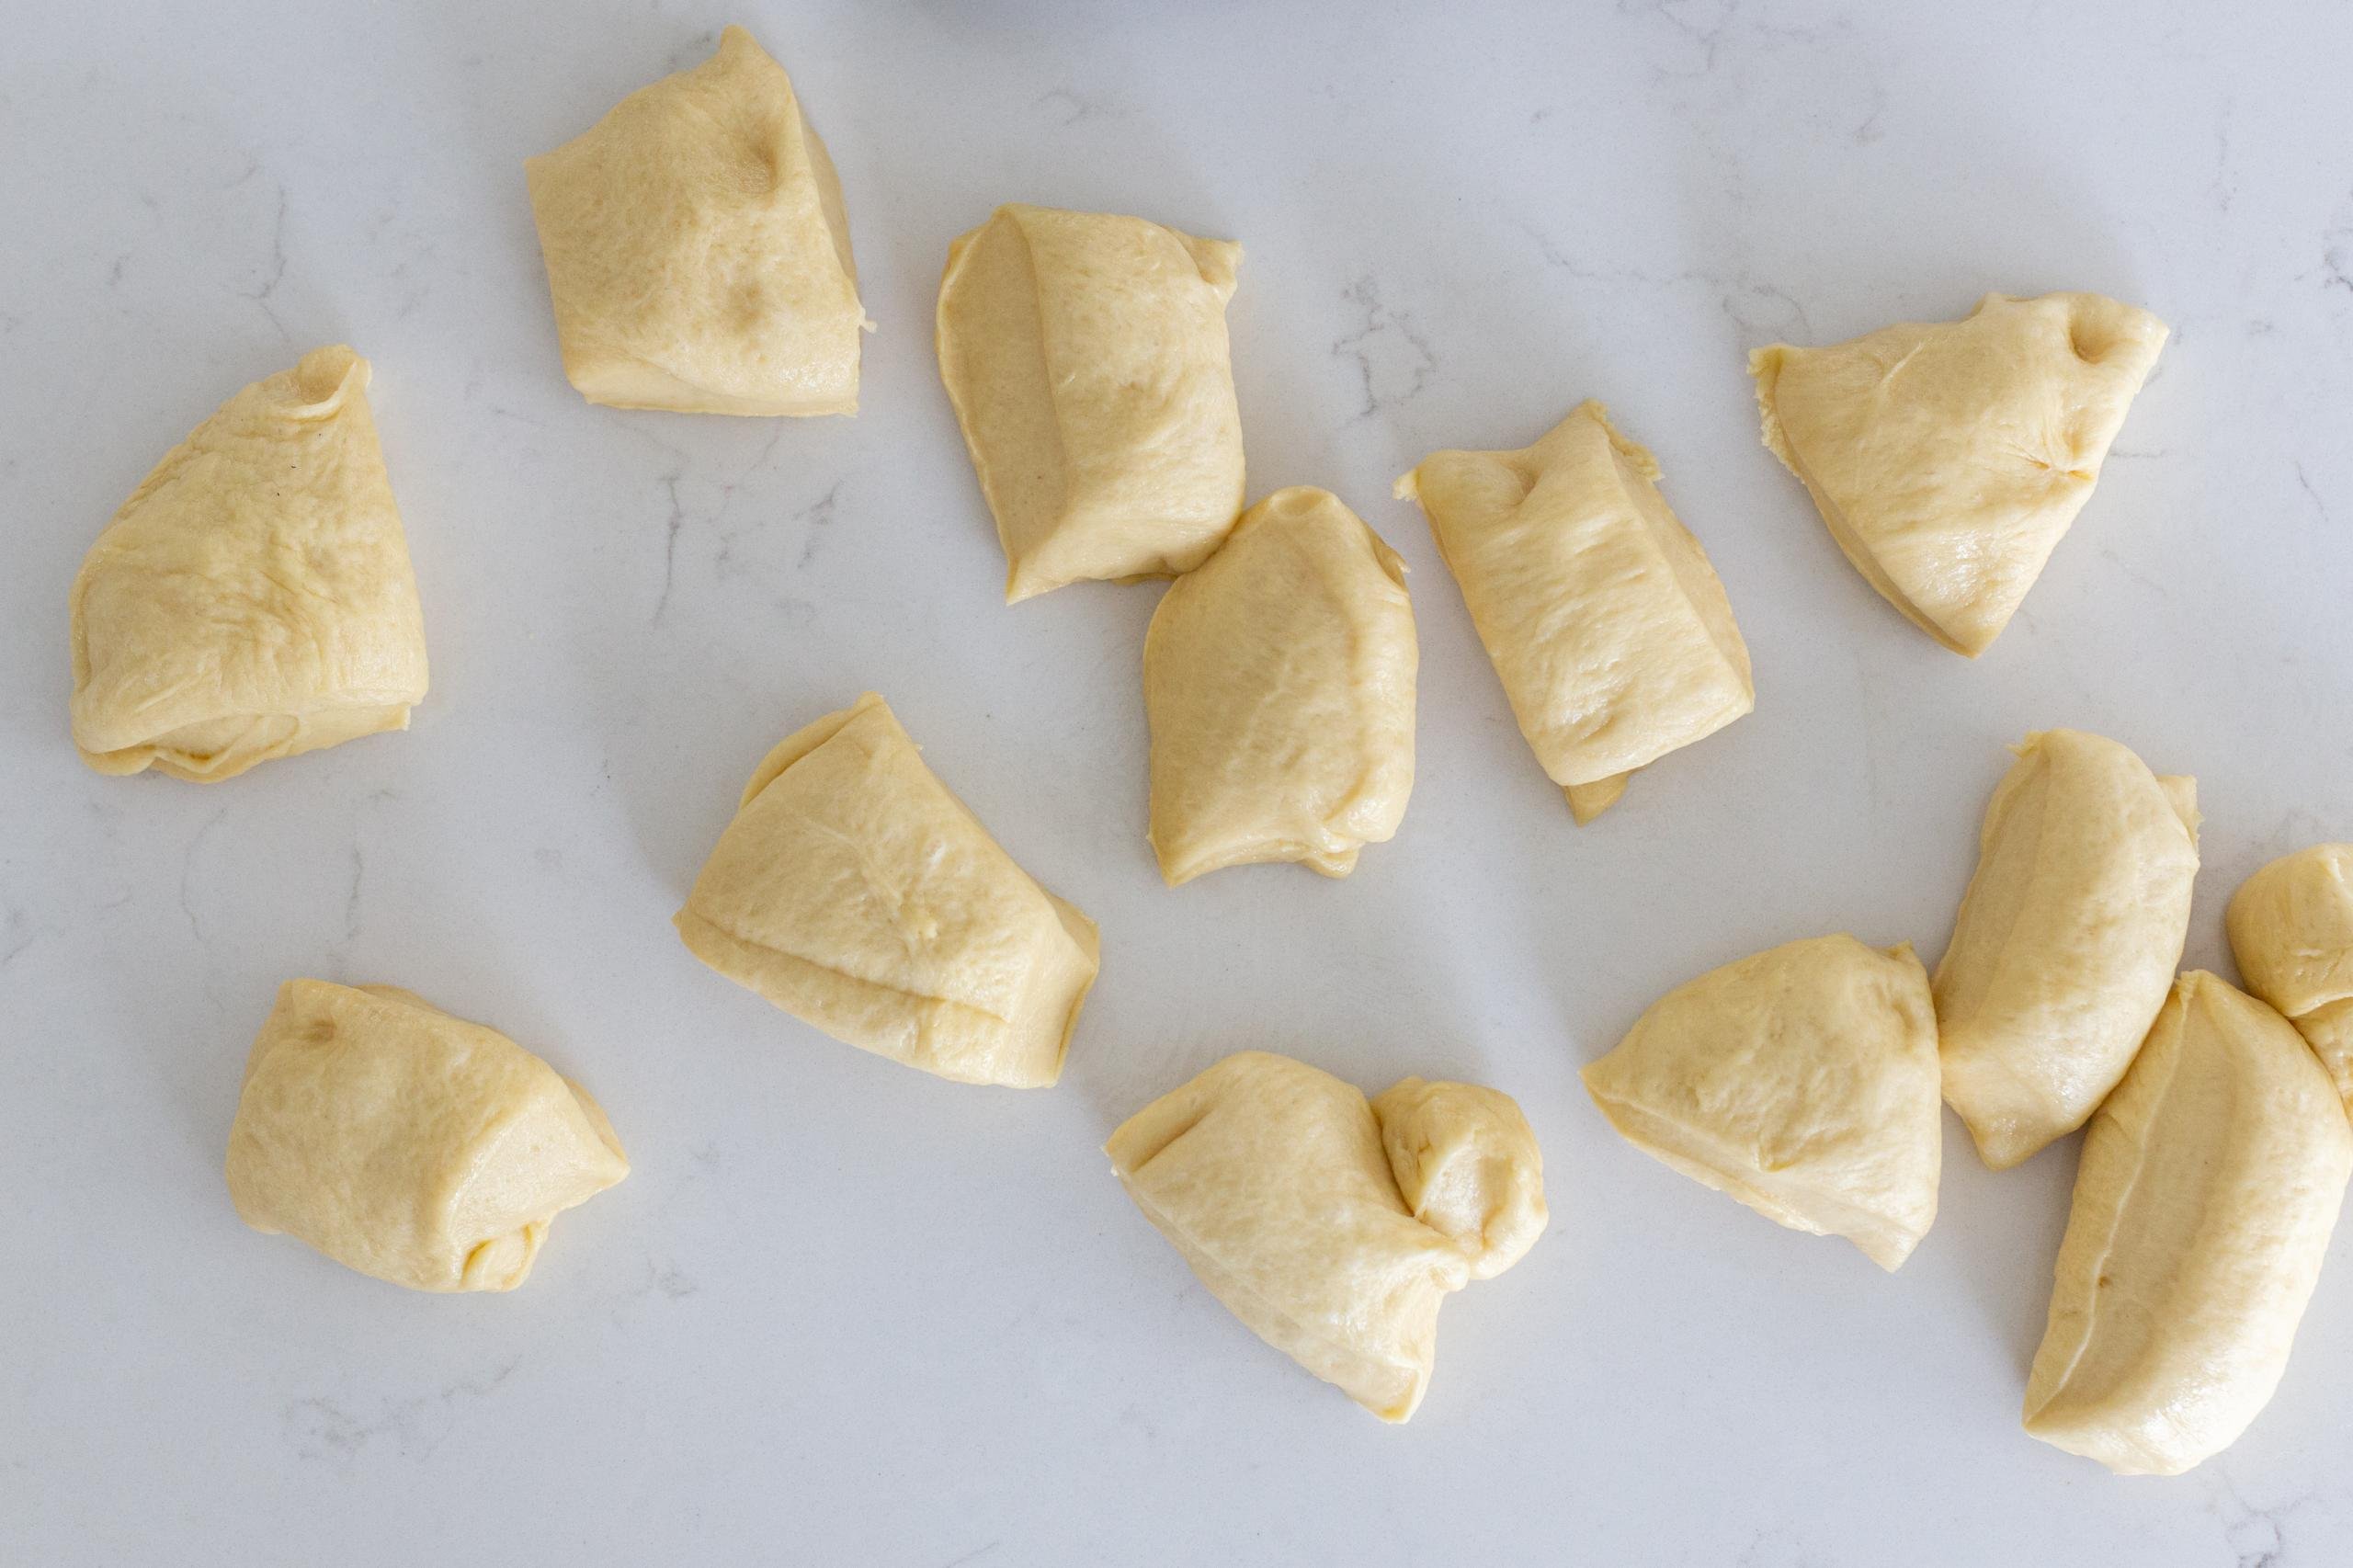
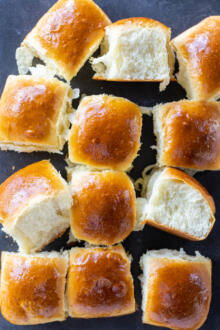
- Divide the Dough: Divide the dough into even pieces and flatten them out into round shapes.
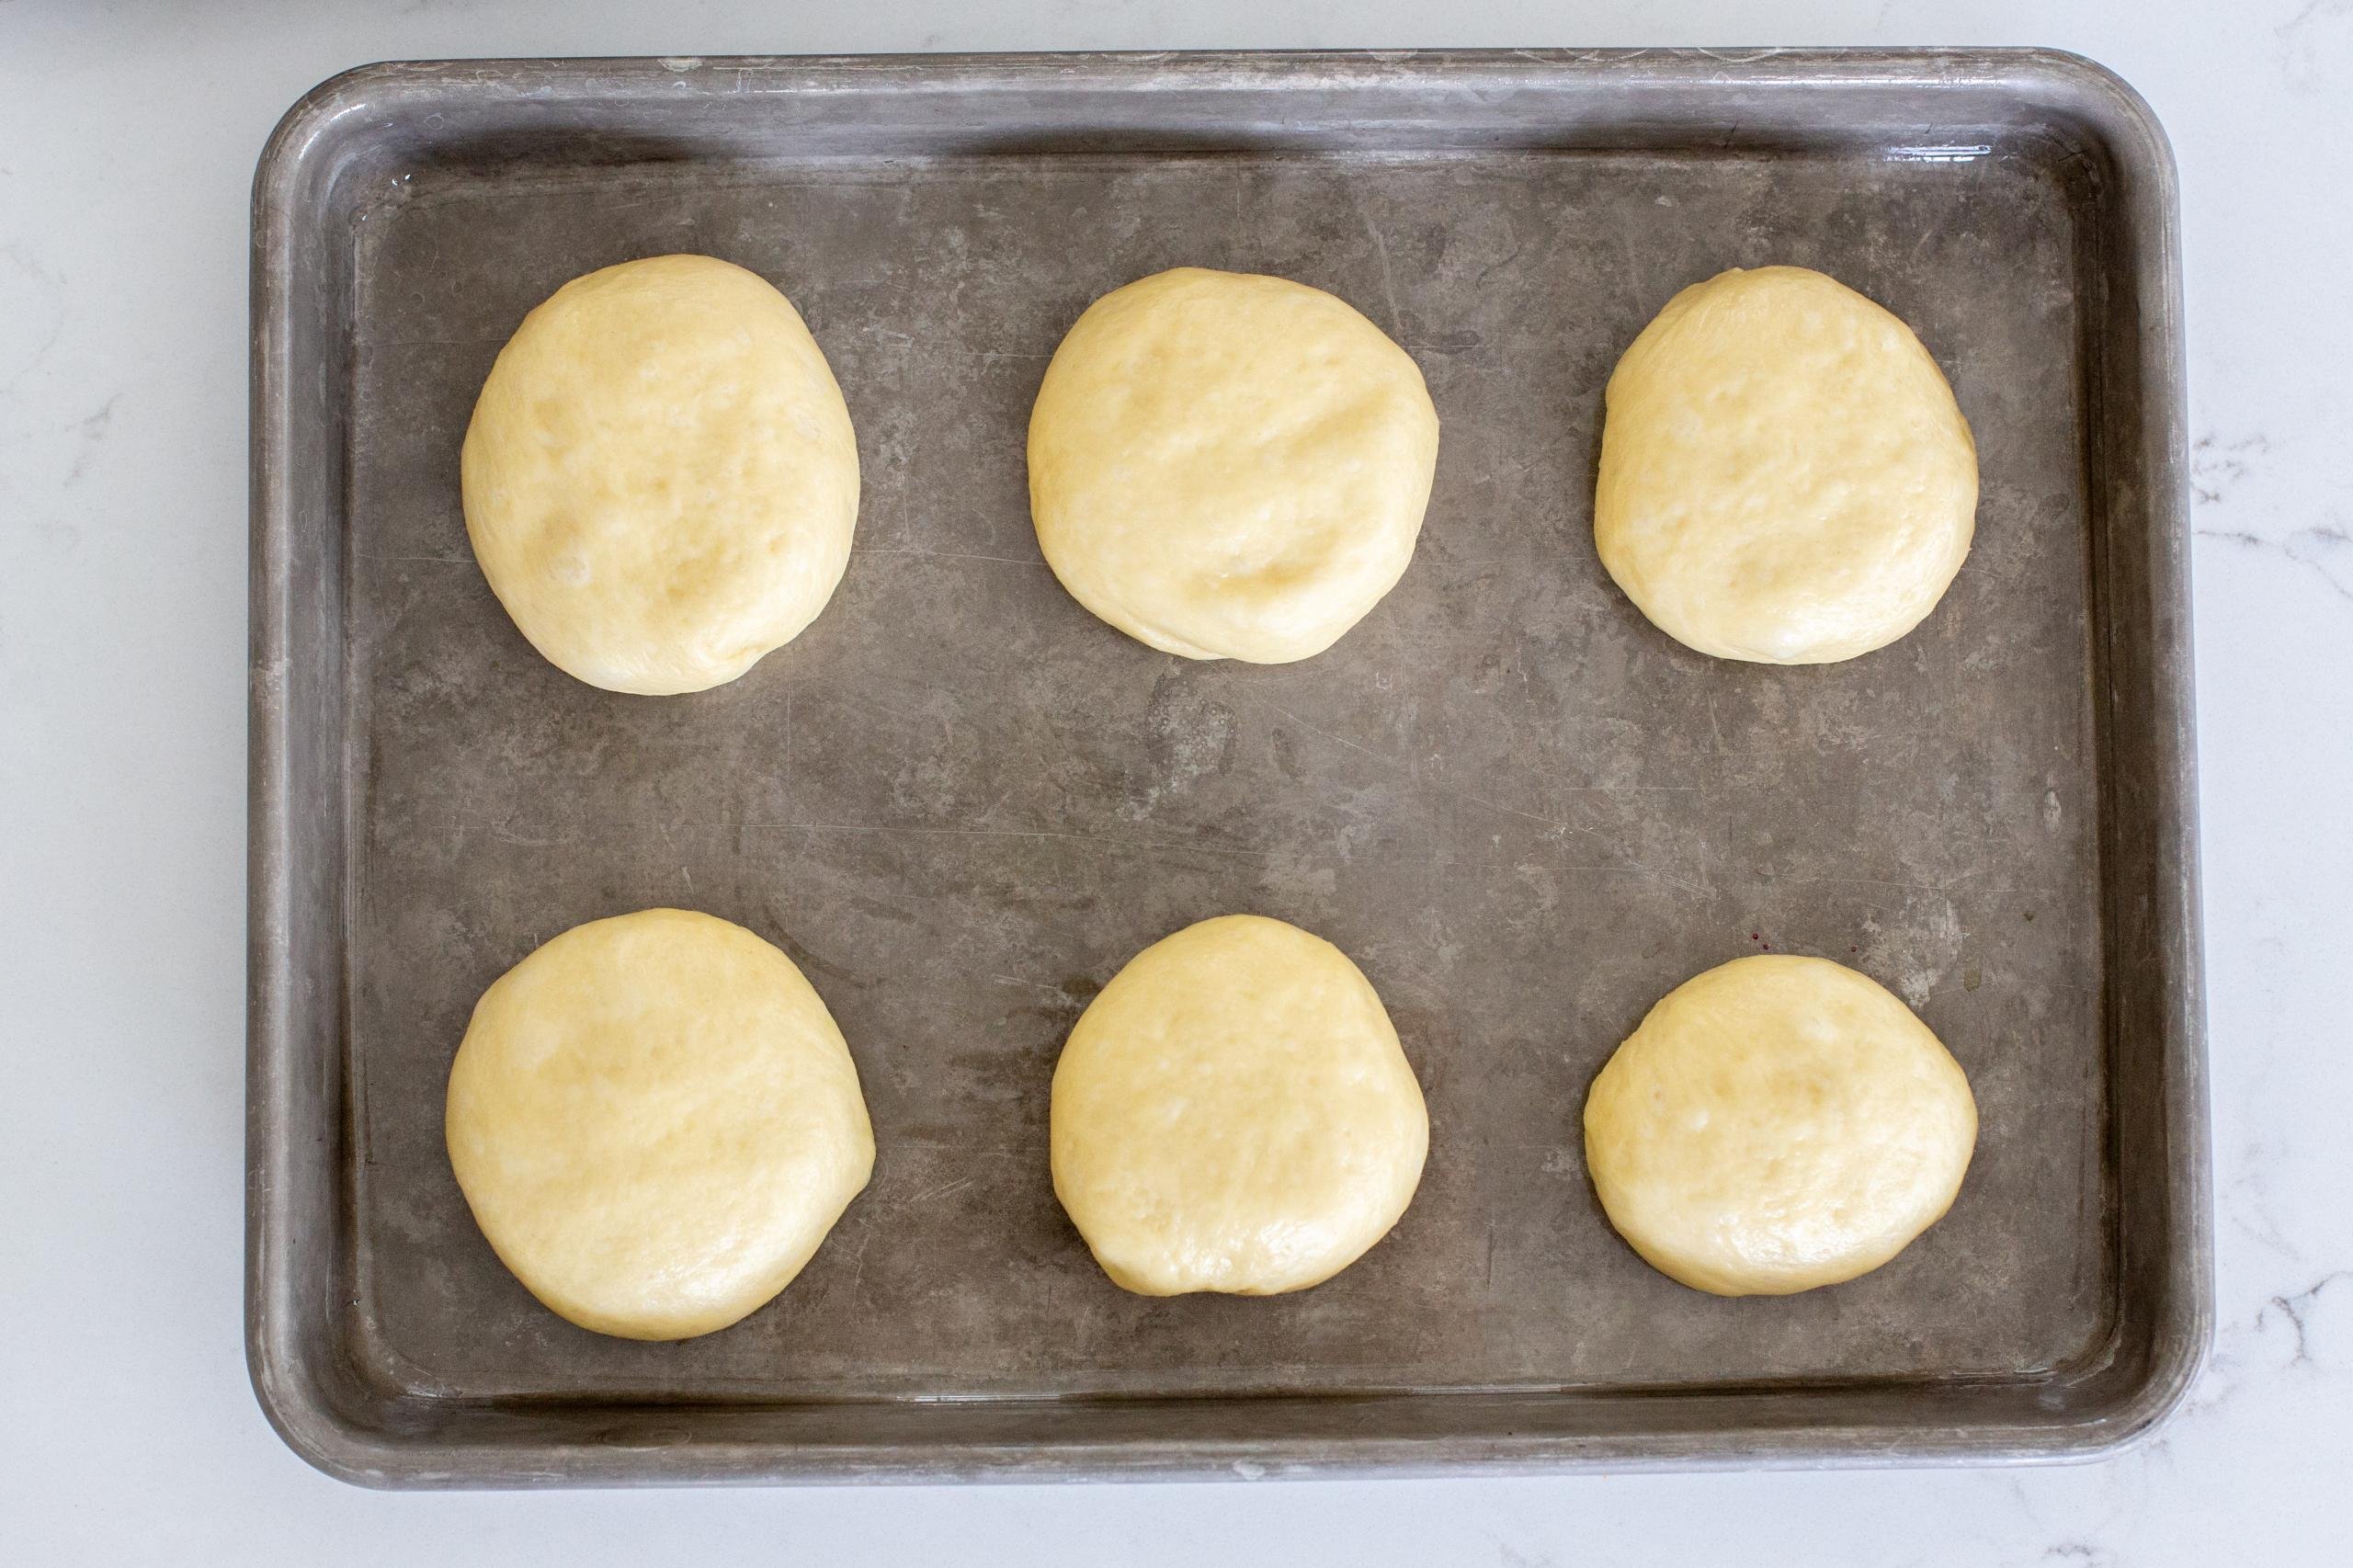
- Give the Dough a Final Rise: Place the dough pieces on a baking sheet lined with parchment paper, cover them with a towel, and allow them to rise for 30 minutes. In a separate bowl, whisk the eggs and water together and brush the tops with the egg wash.
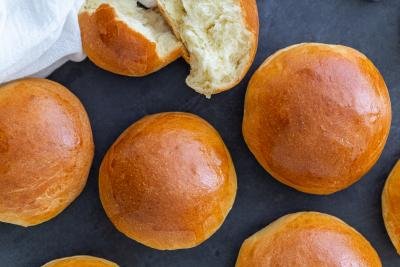
- Bake the Brioche Buns: Lastly, bake the brioche buns in the oven for about 25 minutes, or until the bread is golden brown. Eat them warm or allow them to cool on a wire rack on the counter. Enjoy!
Hot Tip: Make dividing the dough a million times easier by using a dough scraper (also commonly called a bench scraper) versus a knife or your hands.
Tips for Making this Brioche Bun Recipe
A couple of foolproof tips will help you nail this brioche bun recipe and get the fluffiest rolls possible.
- Make sure the temperature of your milk is right. 110 ℉ is the ideal temperature to help with rising and activating the yeast.
- Use eggs to get that bakery-worthy, shiny top. Brush the tops of your buns with whisked eggs to add a nice glossy top! You can also sprinkle some sesame seeds on top for a nice crunch and pretty presentation.
- Quality flour goes a long way. Great quality flour goes a long way. We like to use Bob’s Red Mill of Oregon. These flours have a higher protein content, yielding baked goods richer in flavor.
- Allow the dough to “proof” itself. “Proofing” is the process of letting the bread dough rise. Specifically, it refers to the specific time that the fermentation process needs to take place. Simply put, don’t take shortcuts. Your yeast needs enough time to expand your bread and create enough carbon dioxide bubbles to make it rise into fluffy goodness. The fermentation process also allows for the yeast to create a natural alcohol that gives the bread its flavor and aroma.
- Make sure the dough is the perfect texture. Soft and sticky dough is totally normal! In fact, it is what makes the buns taste so good.


Ideas for Serving
You can use this brioche bun recipe for homemade hamburger buns for grill night and serve the burgers alongside some crispy air fryer french fries or air fryer potato wedges. If you’re looking for something more fresh, use the brioche burger buns to make deli sandwiches for a picnic. They are also great for serving alongside a piping hot bowl of minestrone soup.
Storing Brioche Buns
We love making a large batch and storing these buns for a rainy day. Double, triple or quadruple the recipe!
- Room Temperature: These buns have a propensity to get a bit stale, so make sure to store them in a plastic storage bag or airtight container at room temperature. They will keep for up to 3 days when stored properly.
- Freezing: When kept in an airtight container or plastic freezer bag, these buns will stay good for up to two months frozen. To thaw them, simply place them on the counter for a couple of hours until soft.
Hot Tip: Bring your buns back to life by zapping them for a few seconds in the microwave or for a few minutes in the oven.
FAQ
What makes brioche buns different from traditional bread?
Brioche bread has fluffy, airy sweet layers of dough. Traditional bread is made with water, flour, yeast and salt. This results in a lighter, more mild flavor dough. Brioche, on the other hand, is made with eggs, butter and milk.
What are the key ingredients in homemade brioche buns?
They key ingredients in any recipe for brioche buns are flour, butter, yeast, milk, and a ton of eggs. In fact, the eggs are what make a brioche a brioche and can be credited for that beautiful yellow hue to the bread.
What are some good toppings for brioche buns?
If you want to spruce up your brioche buns, some good toppings include a dusting of flour or a sprinkle of flakey kosher salt, sesame seeds, poppy seeds or flax seeds.
Other Simple Bread Recipes
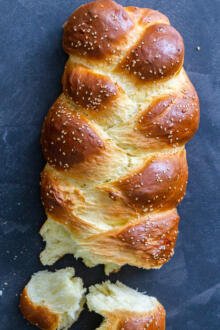
- Easy Brioche Bread – Classic braided brioche
- No-Knead Easy Bread – Easy overnight bread recipe (video included)
- Easy No-Knead Dinner Rolls Recipe – Simple buns for burgers or sandwiches
- Hot Cross Buns – Soft and lightly sweetened buns
- Easy Homemade Flatbread Recipe – Cheese and herb flatbread
Recipe

Ingredients
- 2 cups whole milk heated to around 110 °F
- 1/2 cup granulated sugar
- 1 1/2 tbsp active dry yeast
- 6 cups all purpose flour depending on the brand of flour, you may need 7 cups
- 6 eggs
- 200 grams unsalted butter
- 1/8 tsp salt
For Brushing the Tops
- 1 egg
- 3 tbsp water
Instructions
- Using a stand mixer or spoon, combine the warm milk (about 110 °F) with yeast, sugar, and two cups of flour. Whisk the ingredients together. Cover the bowl with a towel and set it aside in a warm place for about 30 minutes.

- In a separate bowl, whisk the eggs together. Add the eggs, salt and melted butter to the dough mixture. Whisk in the remaining flour in small portions. (Depending on the brand of flour, you may need an extra cup of flour)
- Knead the dough by hand or with your mixer until it becomes elastic (about 10-15 minutes).
- Cover the dough and let it rise for about an hour.
- Divide the dough into 18-24 pieces (depending on the size you prefer). Form a flattened, round shape out of each dough piece.

- Place the dough pieces on a lined baking sheet. Cover them with a towel and allow them to rise for 30 minutes. In a separate bowl, whisk the eggs with water and brush the tops of the buns with the mixture.
- Bake the brioche buns at 350°F for about 25 minutes, or until the bread is golden brown. Enjoy!


Woops?
So i was a bit late to making dinner and ive used this recipe before, and im pretty sure ive always over kneaded them. Well this time since I was in a rush I cut the rest time in half and these are the best rolls ive made 😂 there fluffy, still a little dense but so much better.
What a sweet surprise! That's kinda funny that it took this to help you realize what to do to make them even better for you, Gigi! Good luck next time, too!
I think someone already mentioned it but it needs way more salt the 1/8 tsp isn’t nearly enough. It also would have been nice to know what size to make them smaller and rolls
Thanks Kimberly for sharing your feedback! I'll definitely be taking this into consideration when I update this recipe! 🙂
Honestly unreal recipe!!! I accidentally added all the flour in the first stage lol but luckily it didn’t ruin it! They turned out perfectly, I even used some of the dough to make little loaves too 🥰
Oh no, Anika! That sounds like a stressful mistake (in the moment), but I'm so glad it didn't mess with your final result, and that you loved the brioche buns so much!
I just made these for the first time and they came out great. But I do have to say the seven cups of flour maybe turned into 10 and I'm using King Arthur unbleached flour. I too thought this was going to be a mess because it was not tighting up but after it rested for and hour it was fine.
Hey CJ! I'm glad your brioche buns turned out great in the end. 🙂 This is a high hydration dough, so it definitely does look super wet and sticky, but once it's kneaded for that 10-15 minutes and rises for an hour, you'll be surprised how much more manageable it gets!
I followed this recipe to the T, and watched the video (very helpful!) - the buns came out PERFECT. So soft, a little sweet, golden brown. And I was surprised at how many and how large they were! I made a total of 16 large buns (for sloppy joes). Next time I will cut the recipe in half. To those reading comments about the ratios being off - I think people just don't understand its supposed to be a wet sticky dough. Trust the process, it works!
Thanks so much, Anna! I'm so happy that the video was so helpful for you and helped you make such great brioche buns. YAY! Enjoy your sloppy joes, and anything else you eat with your buns. 🙂
My favorite bun recipe ever! Making this recipe for the 4th time in less than 2 months, so good with pulled pork, breakfast sandwiches, BLTs and warmed with some honey butter. I live at 7,000 ft and the recipe is pretty accurate for me, I definitely use about 1 1/2 cups extra.
Wow! 4 times in 2 months is an honor! I'm glad you've found your favorite bun recipe, Sadie!
My absolute favorite recipe for brioche buns! These are a staple in our house. I was wondering if these can be made into hot dog buns, and if so, would the baking time change?
Hi Amanda! I haven't tried it myself, but I think that can work. If you make them smaller, it may change the baking time a bit, so I recommend just watching for that golden brown color. Let me know if you give it a try!
I should have read all the comments vs just seeing 3k reviews and 4.73. I don’t know how that rating is possible. These measurements are wildly off. I’m upset at the amount of eggs, butter and flour I just had to throw away. I went up to 10 cups of flour and it was still way too wet and I was out of room in the mixer. And I wasted an hour. There was not even a dough ball to call wet, it was just a sticky blob of a mess.
Hi Danielle, I'm sorry the bun dough didn't turn out for you after so much time and effort. A common issue readers have is they feel their dough is very wet/sticky, which this dough is definitely that. If you have a chance, take a look at the video of me making this recipe at the top of the page. That can help you really see the consistency of my dough and compare it to yours. Hopefully, we can find a solution together!
Could the issue be in the recipe list ....you have 2 cups of milk listed in recipe but on video with all the ingredients gathered ; there is clearly only a cup of milk in measuring cup.
Hi Paul. I like your inquisitive eye! I double checked the video, and I definitely had two cups of milk there (good view at 34 seconds!). I believe the majority of the issue is in that the dough is naturally stickier/wetter than what most people expect it should be. 🙂
Awesome recipe! Just finished mine and they turned out lovely. The wet sticky dough made me nervous that I did it wrong, but everything went great, and they taste very nice! The bottoms of the buns came out pretty dark in my oven, any tips for keeping those from burning? Thanks!
I find that using a baking stone keeps the bottoms a nice even color. I’m not a sales rep, but I love the pampered chef baking stones.
Yay, Lydia! The wet sticky dough does make some people nervous, but you just have to trust the process. 🙂 You can try moving the rack up one level in your oven, or place an empty baking sheet on the second rack under the buns. Let me know if this works for you next time!
I made this recipe and it’s a HIGH HYDRATION DOUGH it is meant to be on the wetter sticky side. I followed this recipe and only added additional 1/2-1 cup of flour during the shaping process after all the rises. And it came out fantastic! The lightest airiest buns I’ve had. I had so many compliments this is now my go to recipe.
Amaya- thank you for the feedback! I'm so glad you enjoyed the recipe!
Way too much liquid! Maybe try 1/2 the amount of milk. I ran out of flour so had to top up with oat flour! Mine will be dense but hopefully the flavour will still be there.
Hi Jenny, what kind of flour did you use originally? I find that the issue is often in the kind of flour. Also, have you had a chance to check out my video on how I made the buns? It gives a lot of great visuals and pointers that might help you on your next try. How did yours turn out this time?
I have to agree, the proportions on this are hilariously off. I wound up at 10 cups of flour, which made for a ridiculously giant batch of dough that kept flying out of my 5 quart kitchenaid mixer. I had to finish the mixing and do all the kneading by hand. I also upped the salt to 2 teaspoons, but it still came out on the bland side. I would recommend at LEAST a tablespoon, if not more. You could half this recipe, but if you do, I recommend using 5 cups of flour and upping the salt to 2 tsp. Or, you could just find a better recipe for brioche buns until Natalya makes this recipe again and makes the necessary adjustments.
Hi Alan! I'm definitely going to be re-testing this recipe again soon. In the meantime, what was the reason why you felt it necessary to keep adding more flour? In the end, did the buns turn out well texture-wise? (I know you mentioned you felt they were still bland, however). Thanks!
Hi, Natalya! Yes, honestly my family really liked the texture and even the flavor, though I would have liked a bit more punch. I kept adding flour because it was still soupy (more liquid than dough) at 7 cups. At 8 it was very sticky and unworkable. I might have been able to stop at 9 and still kneaded, though it would have been a sloppy endeavor. I think that by adding that much dough, it diluted the other ingredients, possibly affecting flavor.
Looking forward to hearing about your future experiments on this.
Quantities in this recipe need to be adjusted. I read some of the comments and increased the salt to 1 tbsp and I increased the flour to around nine cups cups. I lost track. It might have been 10 cups.
Thanks for the suggestions, Tanya. With those additions, how did your brioche buns turn out? Tasty I hope? 🙂
I am looking forward to making these and am ready to make this, but only have instant yeast on hand. Will that work or ruin the recipe?
Hey Sue! You commented on another comment that you got your answer, but I wanted to write something here in case anyone sees your question first! Here's what I mentioned in the other comment: "In this recipe, I use active dry yeast and I "proof" in the first step by mixing it with the warm milk, sugar, and flour. If you use instant yeast, I would still do step one, but I don't think you'll need to wait the full 30 minutes before continuing on with the rest of the recipe. This is because instant yeast usually works faster than active dry." Enjoy!
The proportions of ingredients in this recipe are off.
Hi Nata, could you clarify why you think the proportions are off? What happened when you tried to make these brioche buns? I'd love to try to troubleshoot!
Just made these today to have with some home ground burgers and I found this recipe easy to follow and the results were amazing. It made a lot of dough so I made a small loaf with some of it that I'm going to make into french toast in the morning. I already know it's going to be so good.
It's good to hear from you, Bobby. I'm glad this recipe worked super well for you and right on time, too! Enjoy the burgers and the French toast in the morning!:)
i am currently making this recipe, would it be okay to leave the dough after step 4 in the fridge until im ready to shape them?
Hi Alex, I don't usually do that, but it could work, depending on how long you refrigerate it? If I were you, I'd put it in the fridge after it rises in step 4. Then, when you're ready, remove it from the fridge and shape the dough into buns and continue with the recipe. I'm not sure how long you're planning to refrigerate the dough for, as this can be the deciding factor on if it works or not. Let me know if you give it a try!
Hi just a question, would it mess with the results if you made the dough the night before to proof, and then baked it the next day? Or is two hours the only amount of time for the recipe to be the same.
Hi Nayeli! I think letting the dough proof overnight might be too much, where it would overproof. In that case, it would definitely mess with the bun texture. Also the two hours is three different "resting times" combined. First the 30 minutes to let the yeast activate, then an hour for the dough, and another 30 minutes after shaping the buns. Hope you can figure out a good time to make the buns yourself!
Hello, would the process be the same using instant yeast as opposed to active dry yeast?
Hi Tatyana! The process would still be very similar. In my recipe, I use active dry yeast and I "proof" it a bit in the first step by mixing it with the warm milk, sugar, and flour. If you use instant yeast, I would still do step one, but I don't think you'll need to wait the full 30 minutes before continuing on with the rest of the recipe. This is because instant yeast usually works faster than active dry. Hope this helps!
I just submitted this same question. Thanks for the answer!
Of course, Sue! I love it when we all help each other!
Rolls looked beautiful the first time I made them but they tasted like nothing. After comparing this recipe to many others it seemed really light on salt. The second time I made this recipe I bumped up the salt to 1Tablespoon. They turned out so good and received many compliments! Plan on making them again tonight and trying an overnight proof in the fridge and baking them tomorrow. Thank you for sharing your recipe!
Have to agree with Mindy. Salt was way off. I will have to retry to higher quantity of salt.
Hi Mindy, this is amazing feedback. I really appreciate it and plan to retest the recipe and adjust the salt accordingly. I truly appreciate you coming back to share your feedback!
The buns looked great, but tasted so much like nothing. There’s definitely some ratios off here, needs more salt and maybe sugar? 3 hours of work for good looking but cardboard tasting buns. Bummer.
Hey! Thank you for giving them a try and for the honest feedback. I’m so sorry they didn’t turn out flavorful for you — that’s always such a letdown after all the work. I personally loved them when I made them but now I want to test the recipe again. I really appreciate you sharing your experience.
This is a WOW recipe to me! Appreciate the detailed steps and pictures. As well as the video: my buns rose very well the first time but not the following ones. So the video helped me fix it. I am a brioche lover and this is my best alternative.
Yay, Floriane! That's great that the video helped you troubleshoot. I find videos to be super helpful sometimes, too! Enjoy!
Curious, do you think honey would be a fine replacement to the sugar? I saw comments saying it can lack flavor and thought this may help with that. I am also trying to cut back on refined sugars. I’m going to try this recipe tonight!
Hello Sierra! I haven't tried adding honey, but I'm worried that might mess with the rise and texture. A lot of readers have mentioned adding in a bit more salt, which can help to bring out more flavor.
Out of curiosity can nut milk be used instead
Hello Christian! I have never tried using nut milk in these buns, so I can't say for certain. It might also depend on the type of nut milk. If you try it, let me know!
Can I make this dough the day before?
Hi Chiarra, I don't typically do that, but I think it could work. I would place it in the fridge after it rises in step 4, then remove from fridge and shape the dough into buns, allow to rise and then bake. Let me know if it works out well!
Great recipe, thanks so much for sharing! My buns turned out great but I feel like they lack flavor. Anything I can add more of to improve the taste?
Hey Skylar! I'm planning to test this recipe out again soon, but in the meantime, the best way to add more flavor is to add more salt! I would start with half a teaspoon next time you make them. Enjoy!
I made this last night for my first time as we have family dinner set for tomorrow and I thought they'd be perfect pulled pork buns and I have to say they turned out so good! The dough was so nice and so good to work with and it's definitely a lot quicker than my regular bun recipes. Thanks!
Yay, Raeleen! I'm so happy your brioche buns turned out so well and they're going to be enjoyed by all! Have a great time and thanks for the comment!
Natalya,
I am cooking this recipe tonight, cutting it in half as we spoke about earlier today. I was wondering if there is a trick to get the dough on the final rise as buns to rise vertically to create the nice, rounded top. Mine have risen some vertically and also expanded in width. Any suggestions would be appreciated.
Hi! What you can try is to roll each one into a tight ball by placing a hand on top and moving it in circles! Tight rolls should rise higher!
Can you cut the recipe in half to make just 8 or so buns?
Absolutely, Rhett! Or, if you want to make the full recipe, you can also freeze leftover buns to have on hand for next time!
I have only a 5-quart Kitchenaid mixer, and I was worried that it may not be able to handle the amount of dough in the full recipe. I hope to get a bigger one sometime soon. Thank you for your reply. And you can disregard the messages I sent on Facebook Messenger.
No worries, Rhett! Hope it works out well!
This is a great recipe, my 9yr old loves baking and is able to follow this recipe easily. We have never had a bad batch. Always fluffy and perfectly golden.
Oh wow, thanks for the comment Heather! It make me happy to hear that your 9 year old is having fun and doing such a good job at making these buns! I'm truly impressed!