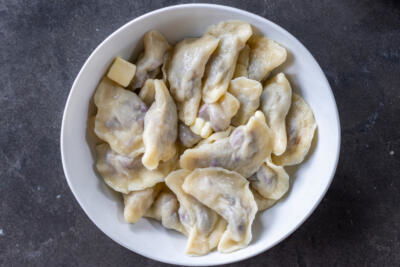
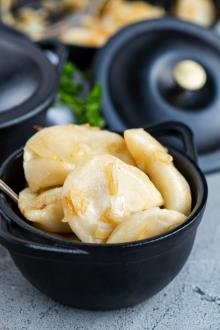
Bursting with fresh cherry flavor and a hint of sweetness, these cherry vareniki (aka dumplings) are irresistible. You’ll fall in love with this authentic Slavic treat!
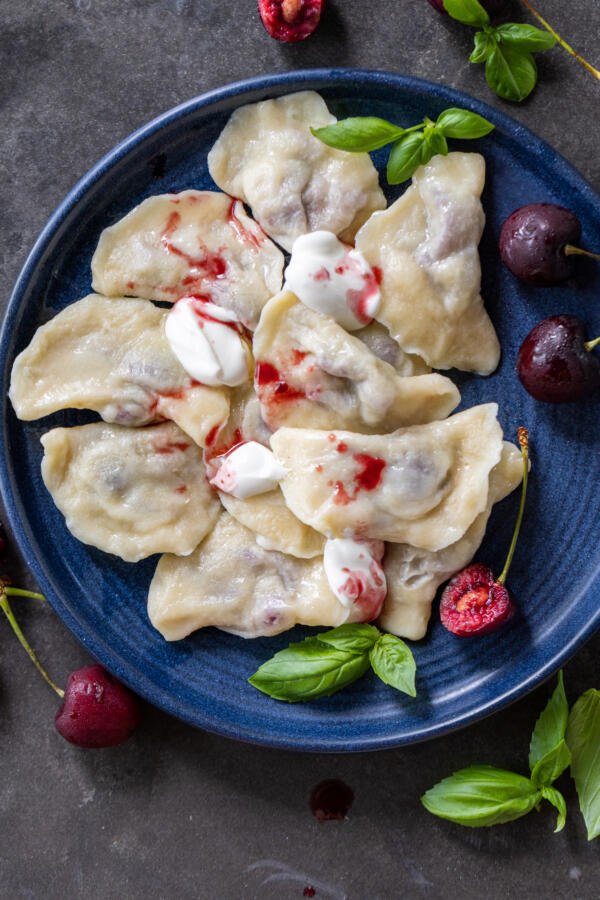
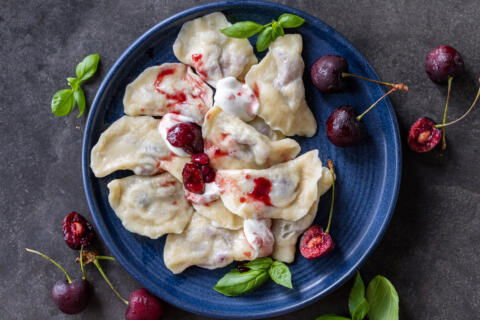
Cherry vareniki have traveled with me all the way from my childhood in Ukraine to my family life in Tennessee. As a kid, I remember spending hours handcrafting these sweet, soft dumplings with my mom. Now, I make them for Tim and our boys… the nostalgic feeling is surreal. Tim is especially fond of them, especially when topped with butter, sour cream, and plenty of extra cherries and sugar! According to him, cherry vareniki are right up there with our farmers cheese vareniki (which is saying a lot — those are Tim’s all-time favorite).
So what makes these cherry vareniki so good? I’ve been using this dough recipe for over 15 years and I swear by it! I’ve tested so many other recipes and this one is truly the BEST out there. The dough is stretchy, easy to work with, and so tasty. Even my mom switched to this recipe after trying it, and she’s been cooking for over 50 years… are you convinced yet??
Did you know? Vareniki are Slavic dumplings made with a variety of sweet or savory fillings. The dough is usually steamed or boiled — which is where the name “vareniki” or “boiled things” comes from. Vareniki are also called pierogi, depending on the region of Europe.
Cherry Vareniki Video
How To Make Cherry Vareniki
Making vareniki may seem complicated, but let me put your mind at ease. If you have an hour to spare and follow the instructions carefully, you’ve already succeeded. I’m cheering you on!
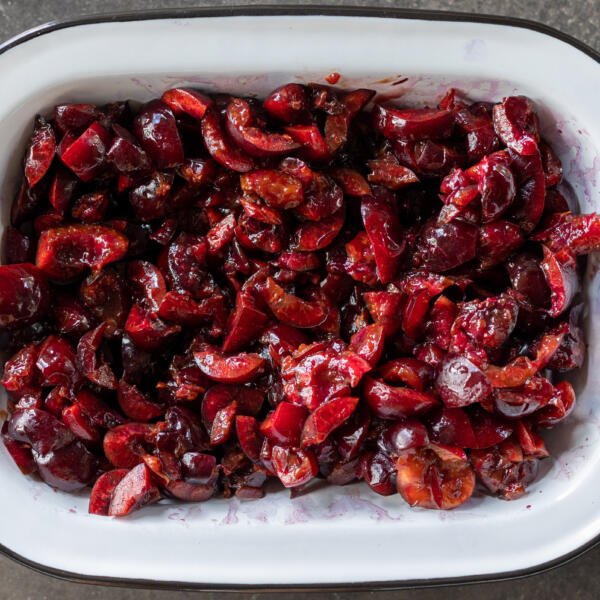
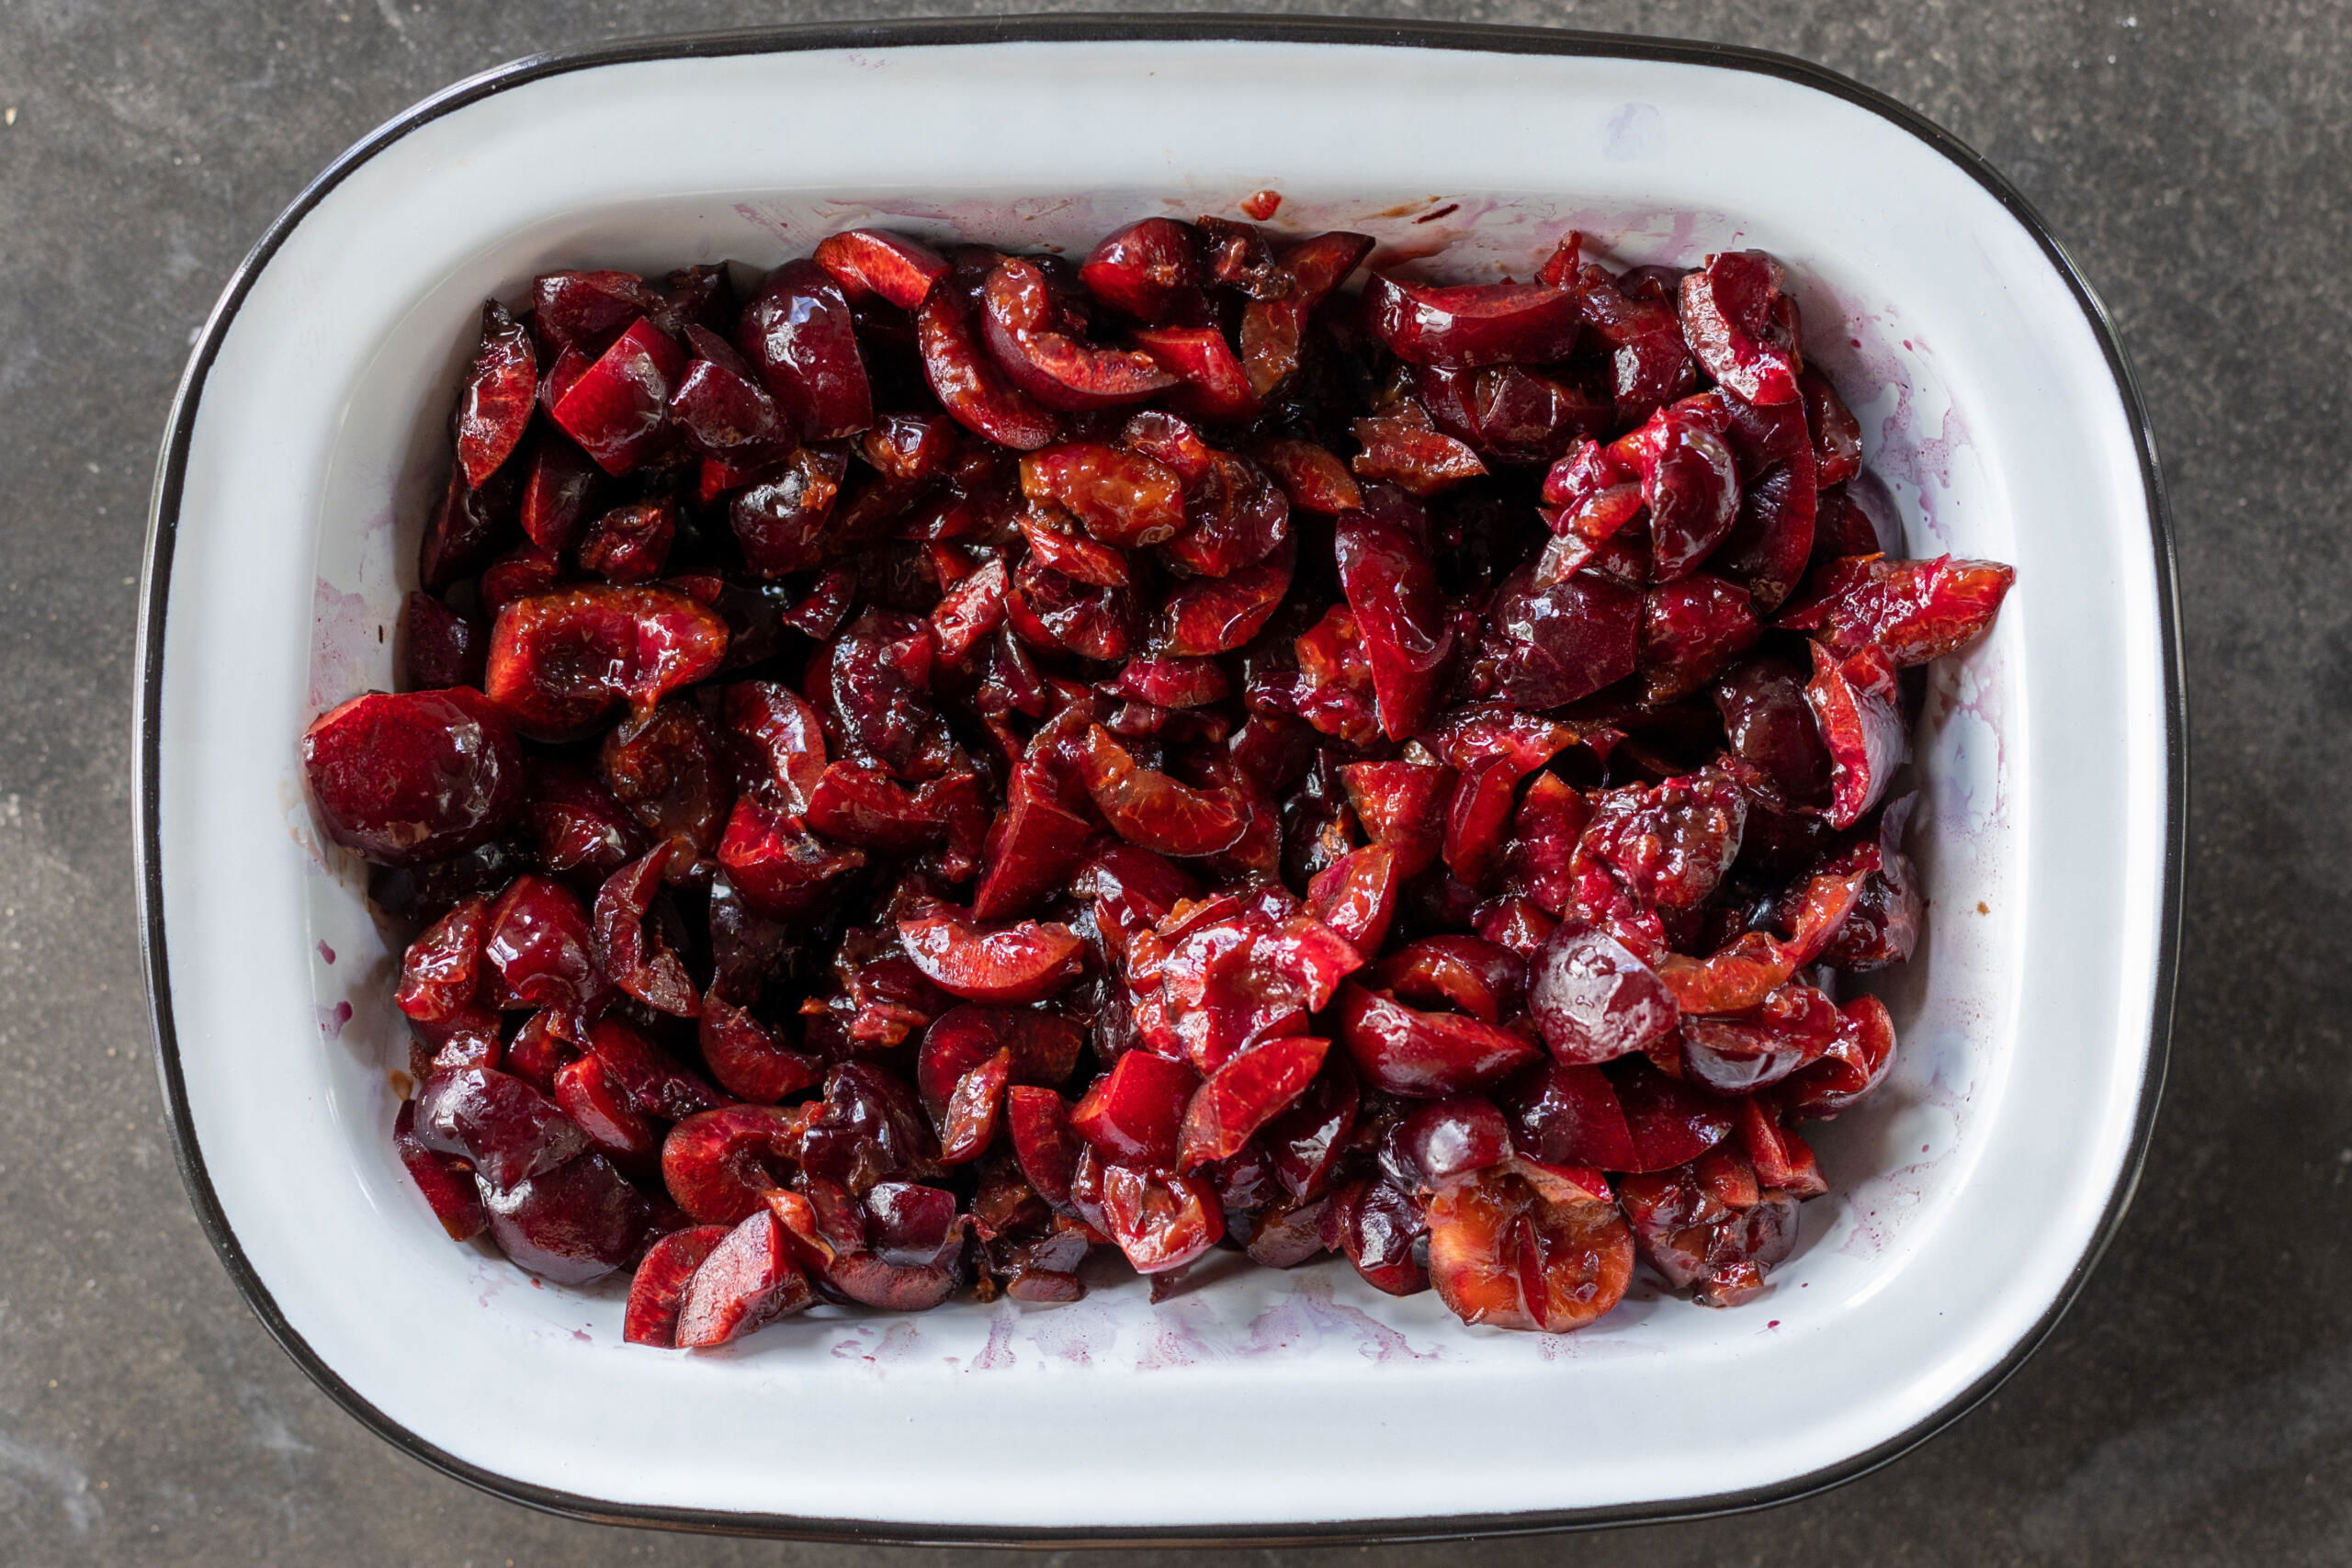
- Prepare the filling: Pit the cherries and cut them into halves or quarters. Measure out the sugar in a separate bowl.
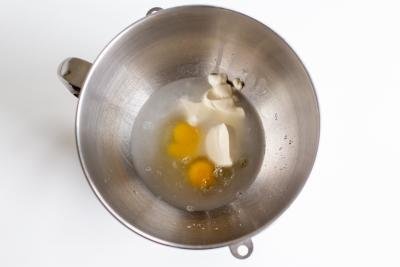
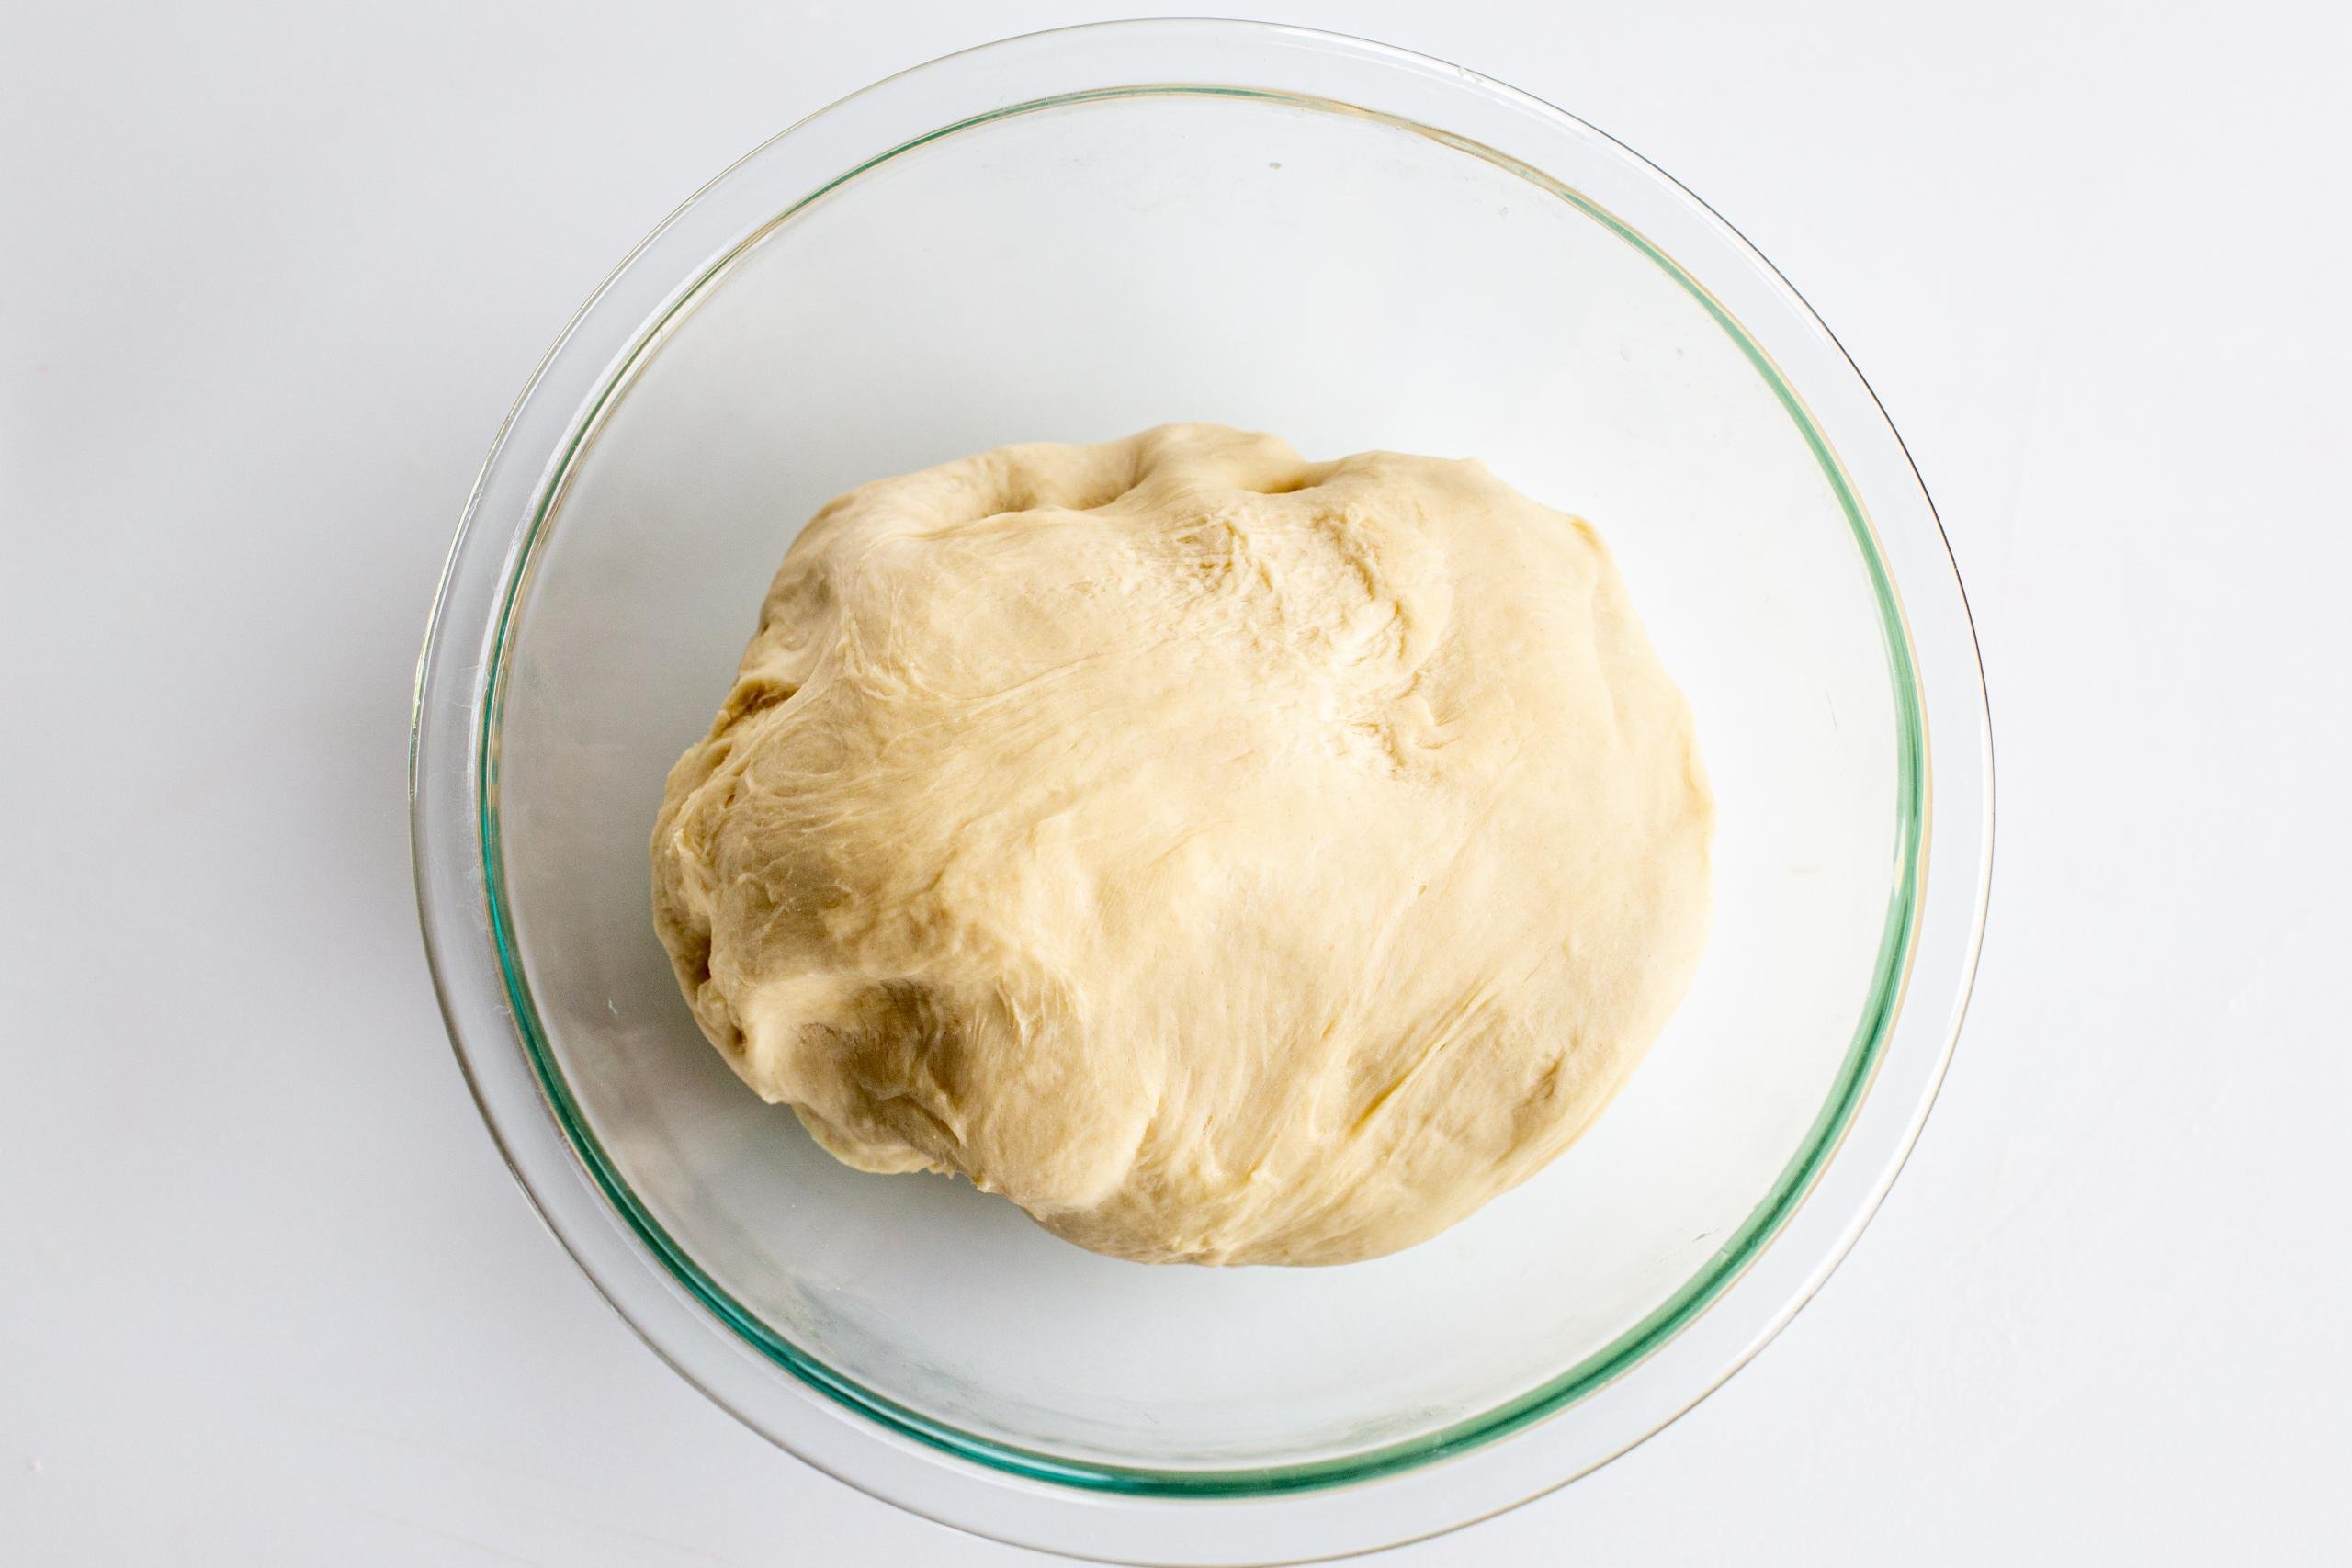
- Make the dough: Whisk together the eggs, sour cream, water, and milk in the bowl of a stand mixer or a large bowl. Add the flour, sugar, and salt, and knead the dough with the dough hook attachment or your hands until it’s no longer sticky.
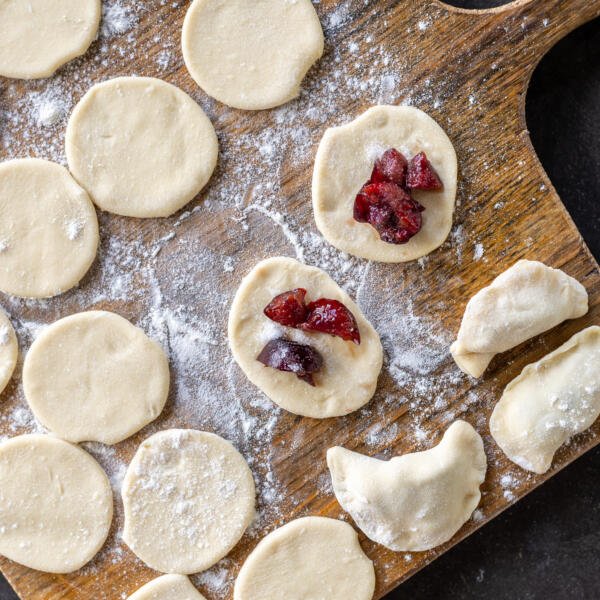
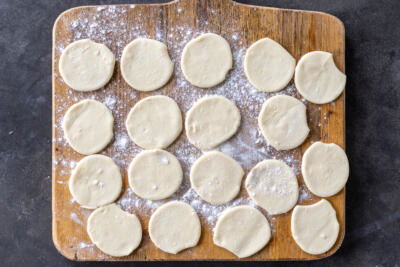
- Roll and cut out the circles: On a well-floured work surface, roll out the dough thinly. Use a glass or a biscuit cutter to cut out circles.
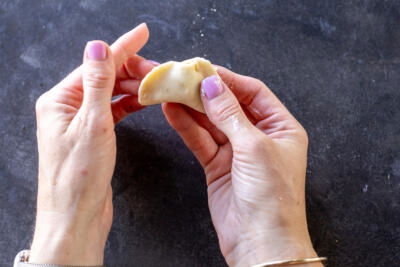
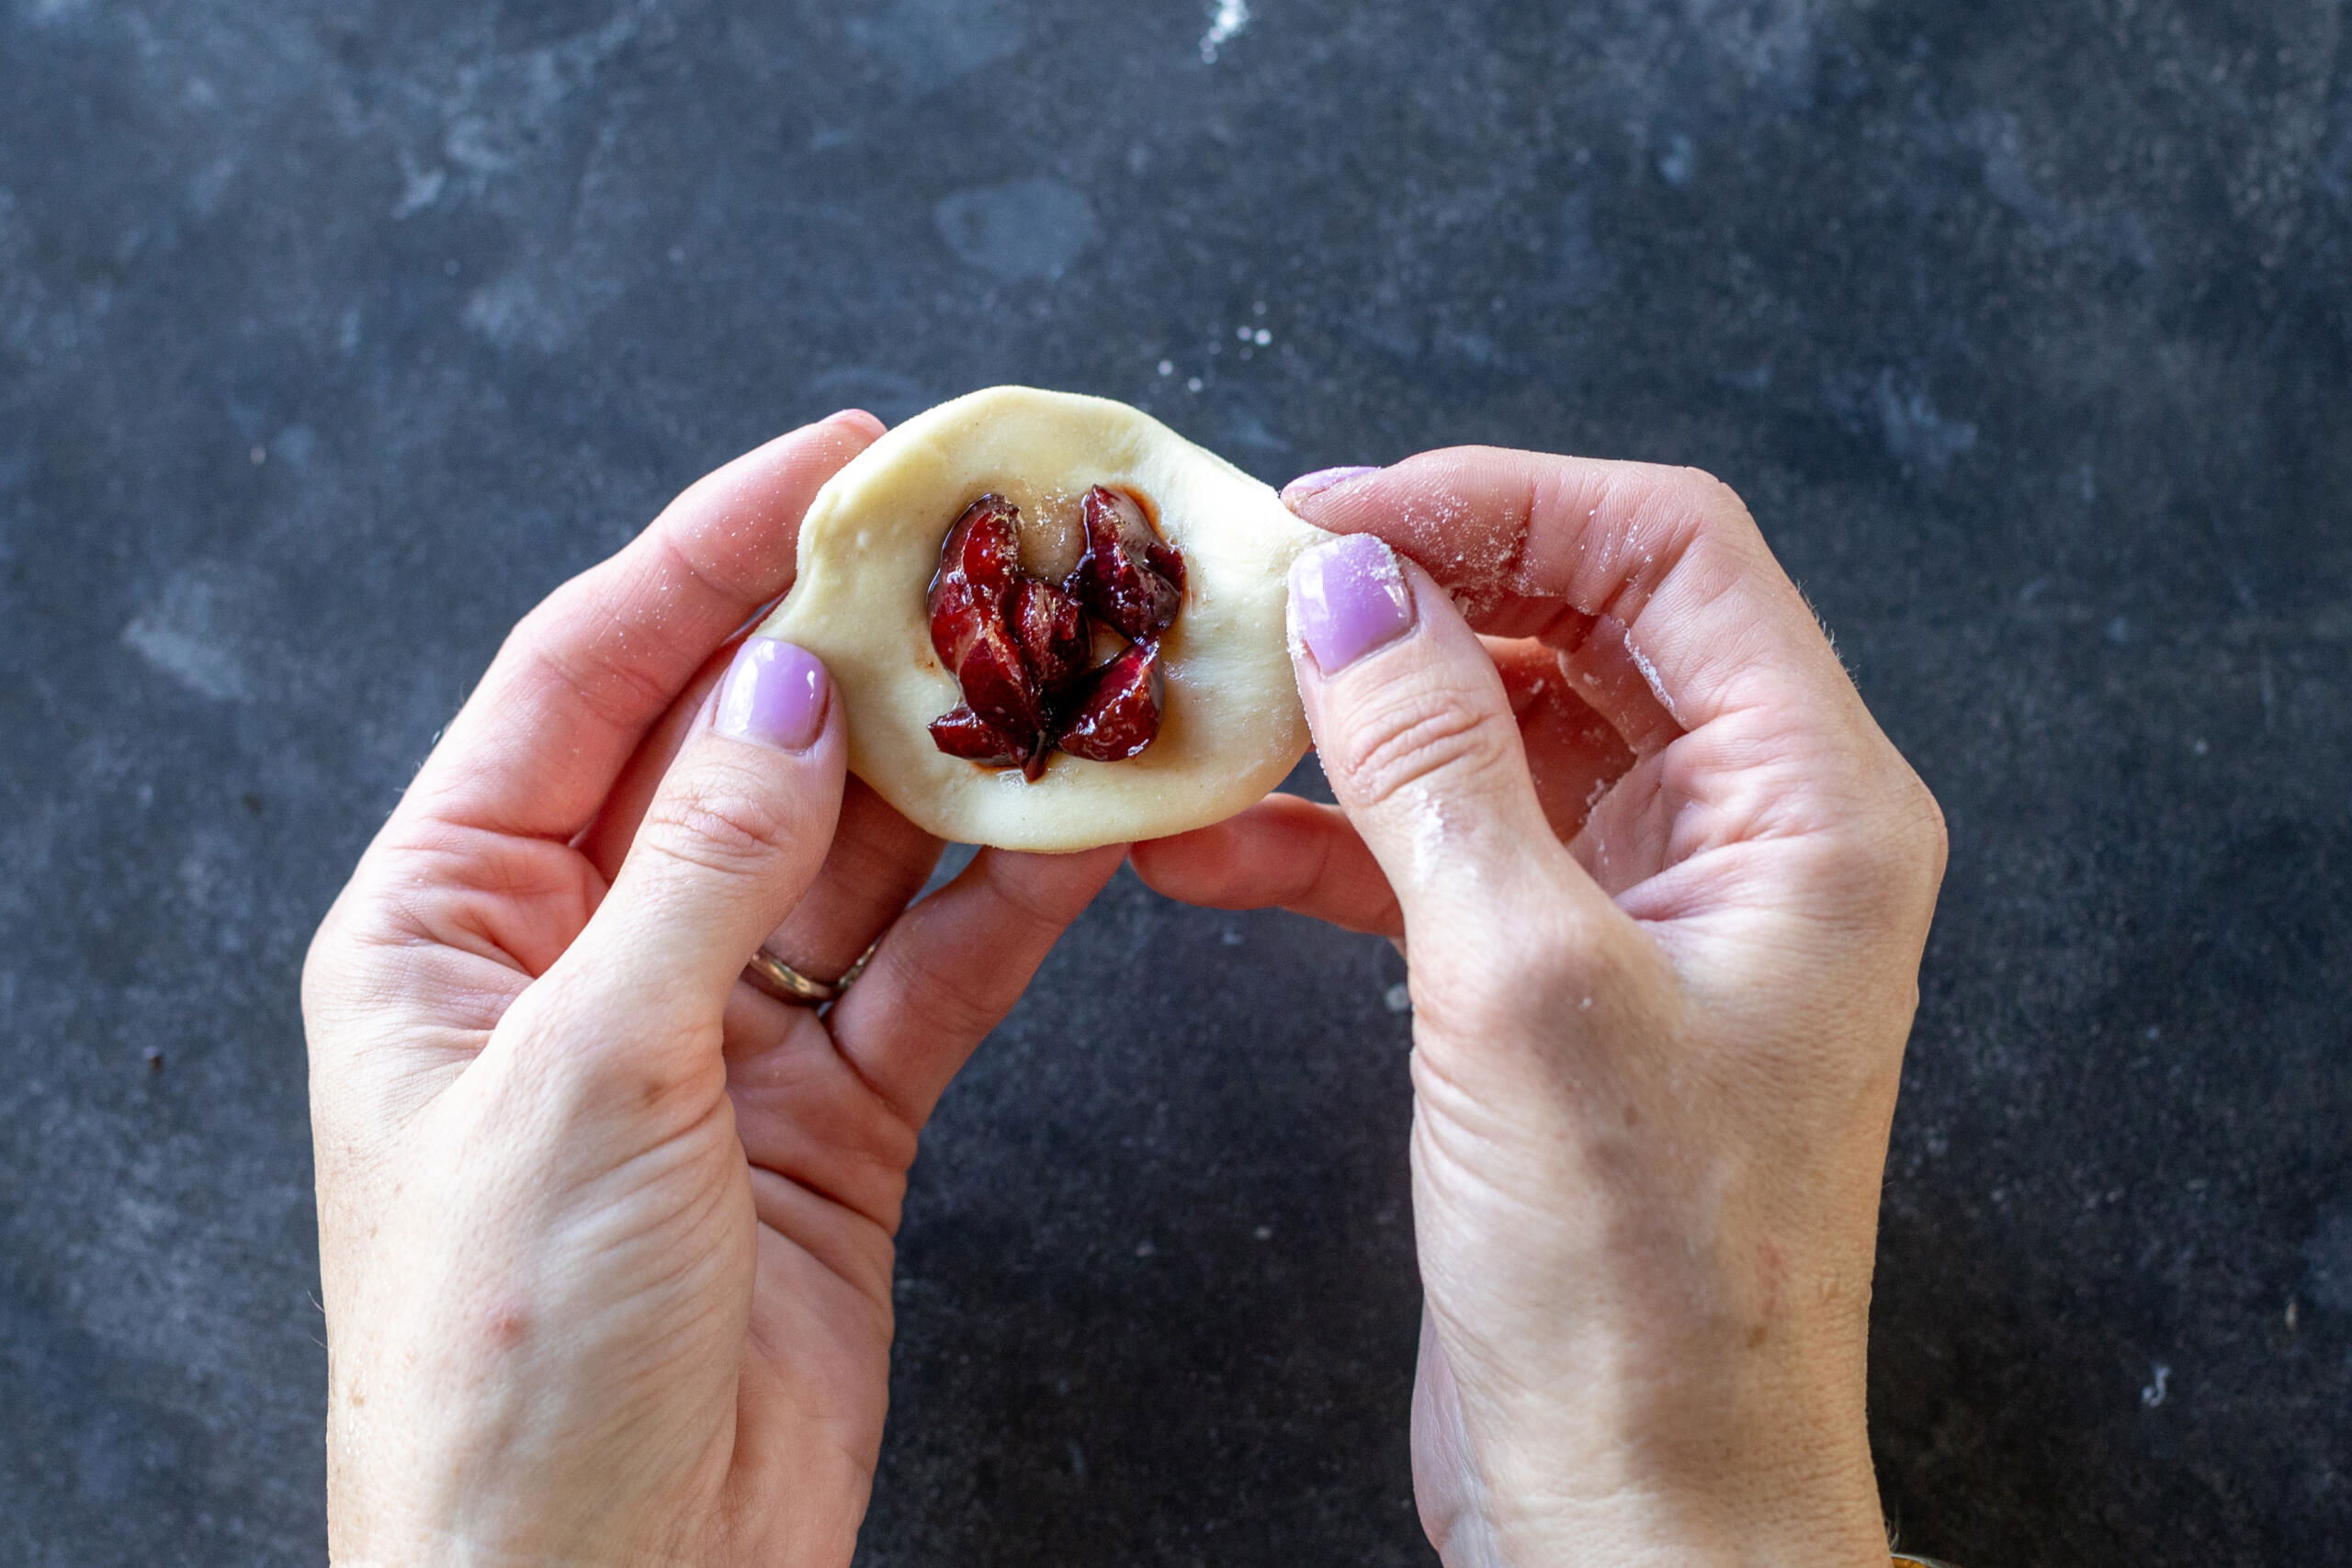
- Add the filling and seal: Add a spoonful of cherries and a sprinkle of sugar to the center of each dough round. Fold the edges of the dough over to form a half-moon shape, then pinch the edges tightly together to seal.
- Boil the vareniki: Bring a large pot of water to a boil, then add 10-20 vareniki. Cook the vareniki in batches until they float to the top, then remove with a slotted spoon or drain the water.
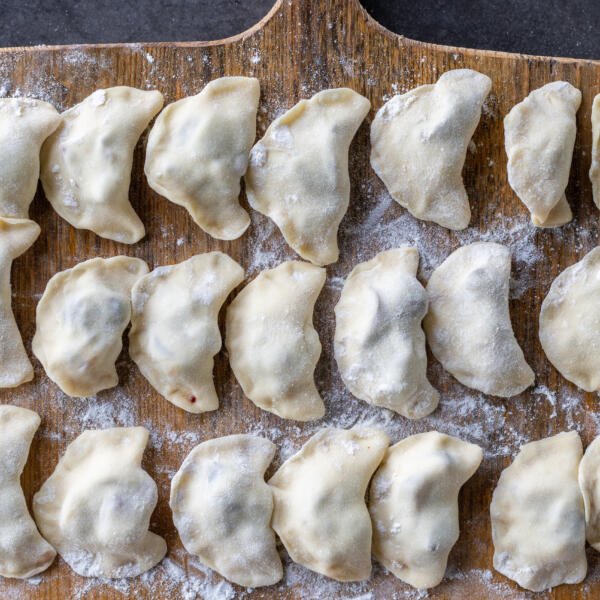
Hot tip: This recipe makes about 70 vareniki. If you want a freezer stash for whenever hunger cravings strike, refer to the storage guidelines below!
Tips For the Best Cherry Vareniki
I’ve designed this recipe to be accessible to beginner cooks — the dough is stretchy enough not to break so you are guaranteed to have great results! Let’s go through a few tips for even more foolproof vareniki.
- Choose your cherries carefully. Dark cherries tend to be sweeter, while sour cherries are — you guessed it — sour. Pick the cherries that best suit your tastes! Avoid using canned or frozen cherries, as they’re too watery.
- Keep the cherries and sugar separate. After lots of frustrated efforts to keep the juices from leaking out of the vareniki, I stumbled upon this hack. It seems easier to mix the cherries and sugar together for the filling, but sugar actually draws water out of the cherries (it’s all chemistry) and results in a more liquidy mixture. A pinch of sugar in each dumpling right before sealing does the trick!
- Knead the dough thoroughly. To attain the trademark soft and chewy texture of vareniki, knead the dough until it no longer sticks to your hands or the dough hook attachment. I prefer letting the stand mixer do the work of kneading to save time and energy.
- Rest the dough. Before shaping the vareniki, rest the dough for at least 15 minutes to allow the gluten to relax. This makes the dough less resistant and easier to work with.
- Use a 3-inch biscuit cutter. Through my experience, I’ve learned that three inches is the perfect diameter for vareniki — it creates a balanced ratio between the dough and filling and is the easiest size to work with. I love this set for cutting out the circles.

Storing Cooked vs Raw Vareniki
Whether you have leftover cooked vareniki on hand or extra raw vareniki to cook another time, this is your complete storage and reheating guide!
- Cooked: Store leftover cooked vareniki for up to three days in an airtight container in the refrigerator. To reheat, warm the vareniki in the microwave. If you prefer them crispy, reheat the vareniki on an oiled skillet over medium heat.
- Raw: After you’ve assembled the vareniki, place them in a single layer on a well-floured baking sheet and freeze until solid. Then, transfer the frozen vareniki to a freezer-safe bag or airtight container and freeze for 3-6 months. When you’re ready to enjoy, cook as directed.
More Pierogi/Vareniki Recipes
- Potato and Cheese Pierogi — Classic vareniki stuffed with cheesy mashed potatoes
- Strawberry Pieorogi — The best way to use up freshly picked strawberries
- Farmers Cheese Pierogi — Lightly sweet and mouthwatering
- Steamed Blueberry Pierogi — If you love blueberries, you’ll be obsessed with these!
- Lazy Pierogi — Similar to gnocchi, but made with farmers cheese
Recipe
Ingredients
Cherry Filling
- 1 lb cherries pitted
- 1/3 cup sugar
Vareniki Dough
- 2 large eggs
- 2 tbsp sour cream
- 1/2 cup lukewarm water
- 1 cup lukewarm milk
- 4 cups all purpose flour depending on brand may need a bit more
- 3 tbsp sugar
- 1 tsp salt
Instructions
Cherry Filing
- Pit the cherries and cut each one into halves or quarters, depending on their size. Measure out the sugar in a separate bowl.

Vareniki Dough
- In the bowl of a stand mixer or a large bowl, whisk together the eggs, sour cream, lukewarm water, and milk until evenly combined.
- Add the flour, sugar, and salt to the liquid ingredients. Using the dough hook attachment or your hands, knead the dough until it is no longer sticky.


Making Vareniki
- Transfer the dough to a well-floured surface and roll it out to about 3 mm thickness (or two stacked pennies) with a rolling pin. Using the floured rim of a glass or a biscuit cutter, stamp out circles in the dough.
- Working with one circle at a time, lightly stretch out the dough in your hand. Fill the center with a spoonful of cherries and a sprinkle of sugar.
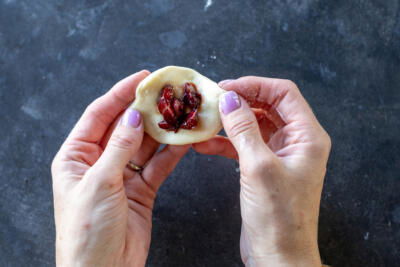
- Fold the dough over to form a half-circle and firmly pinch the edges with your fingers. Make sure the edges are tightly sealed so the filling doesn't leak out.
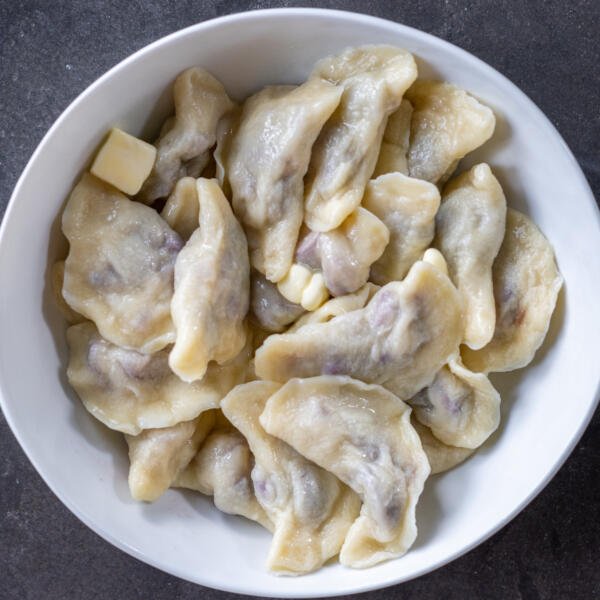
- Bring a large pot of water to a boil. Add 10-20 vareniki and cook until they float to the top. Drain the vareniki or take them out with a slotted spoon, then immediately top them with a few small slices of unsalted butter. Optionally, serve them with sour cream, more cherries, or sugar.


This did not work out... Flour continued to be extremely sticky no matter how much flour I kept adding and how long I let it knead. At one point it seemed it was fine so I took it out unto a well floured surface and tried to roll it out, became a sticky mess. Added a bit more flour again and kneaded some more and it got even stickier
I'm sorry to hear that, Ana. 🙁 How much flour do you feel like you ended up having to add? I've noticed sometimes the brand of flour affects how much flour I need to use. I've also had readers mention how they've noticed humidity plays a role in how much flour they add until the dough is no longer sticky! Let me know if I can help in any way!
I make these with my 4 year old daughter. This recipe is perfect and so easy to follow. Дуже смачно
That's the best -baking with kids! Such a great way to spend time together and enjoy a delicious dish!
Yum! I just made this with freshly picked blueberries and they were a hit! Thank you!
I'm so happy to hear that the recipe was a hit with freshly picked blueberries! There's nothing like the taste of fresh fruit in homemade dishes. Enjoy!