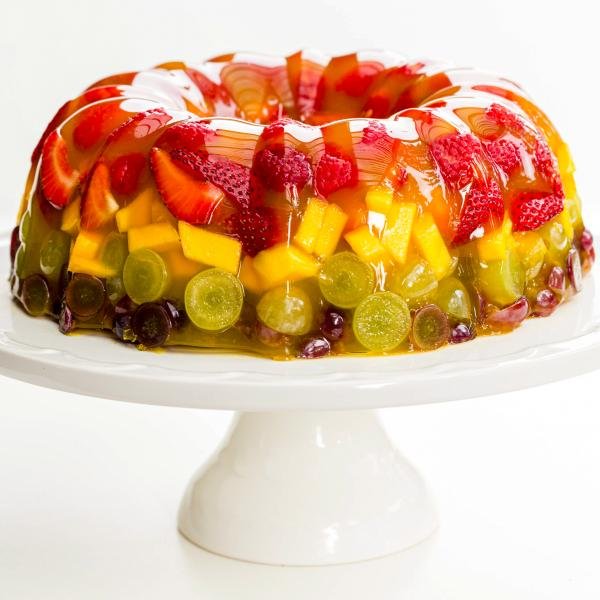
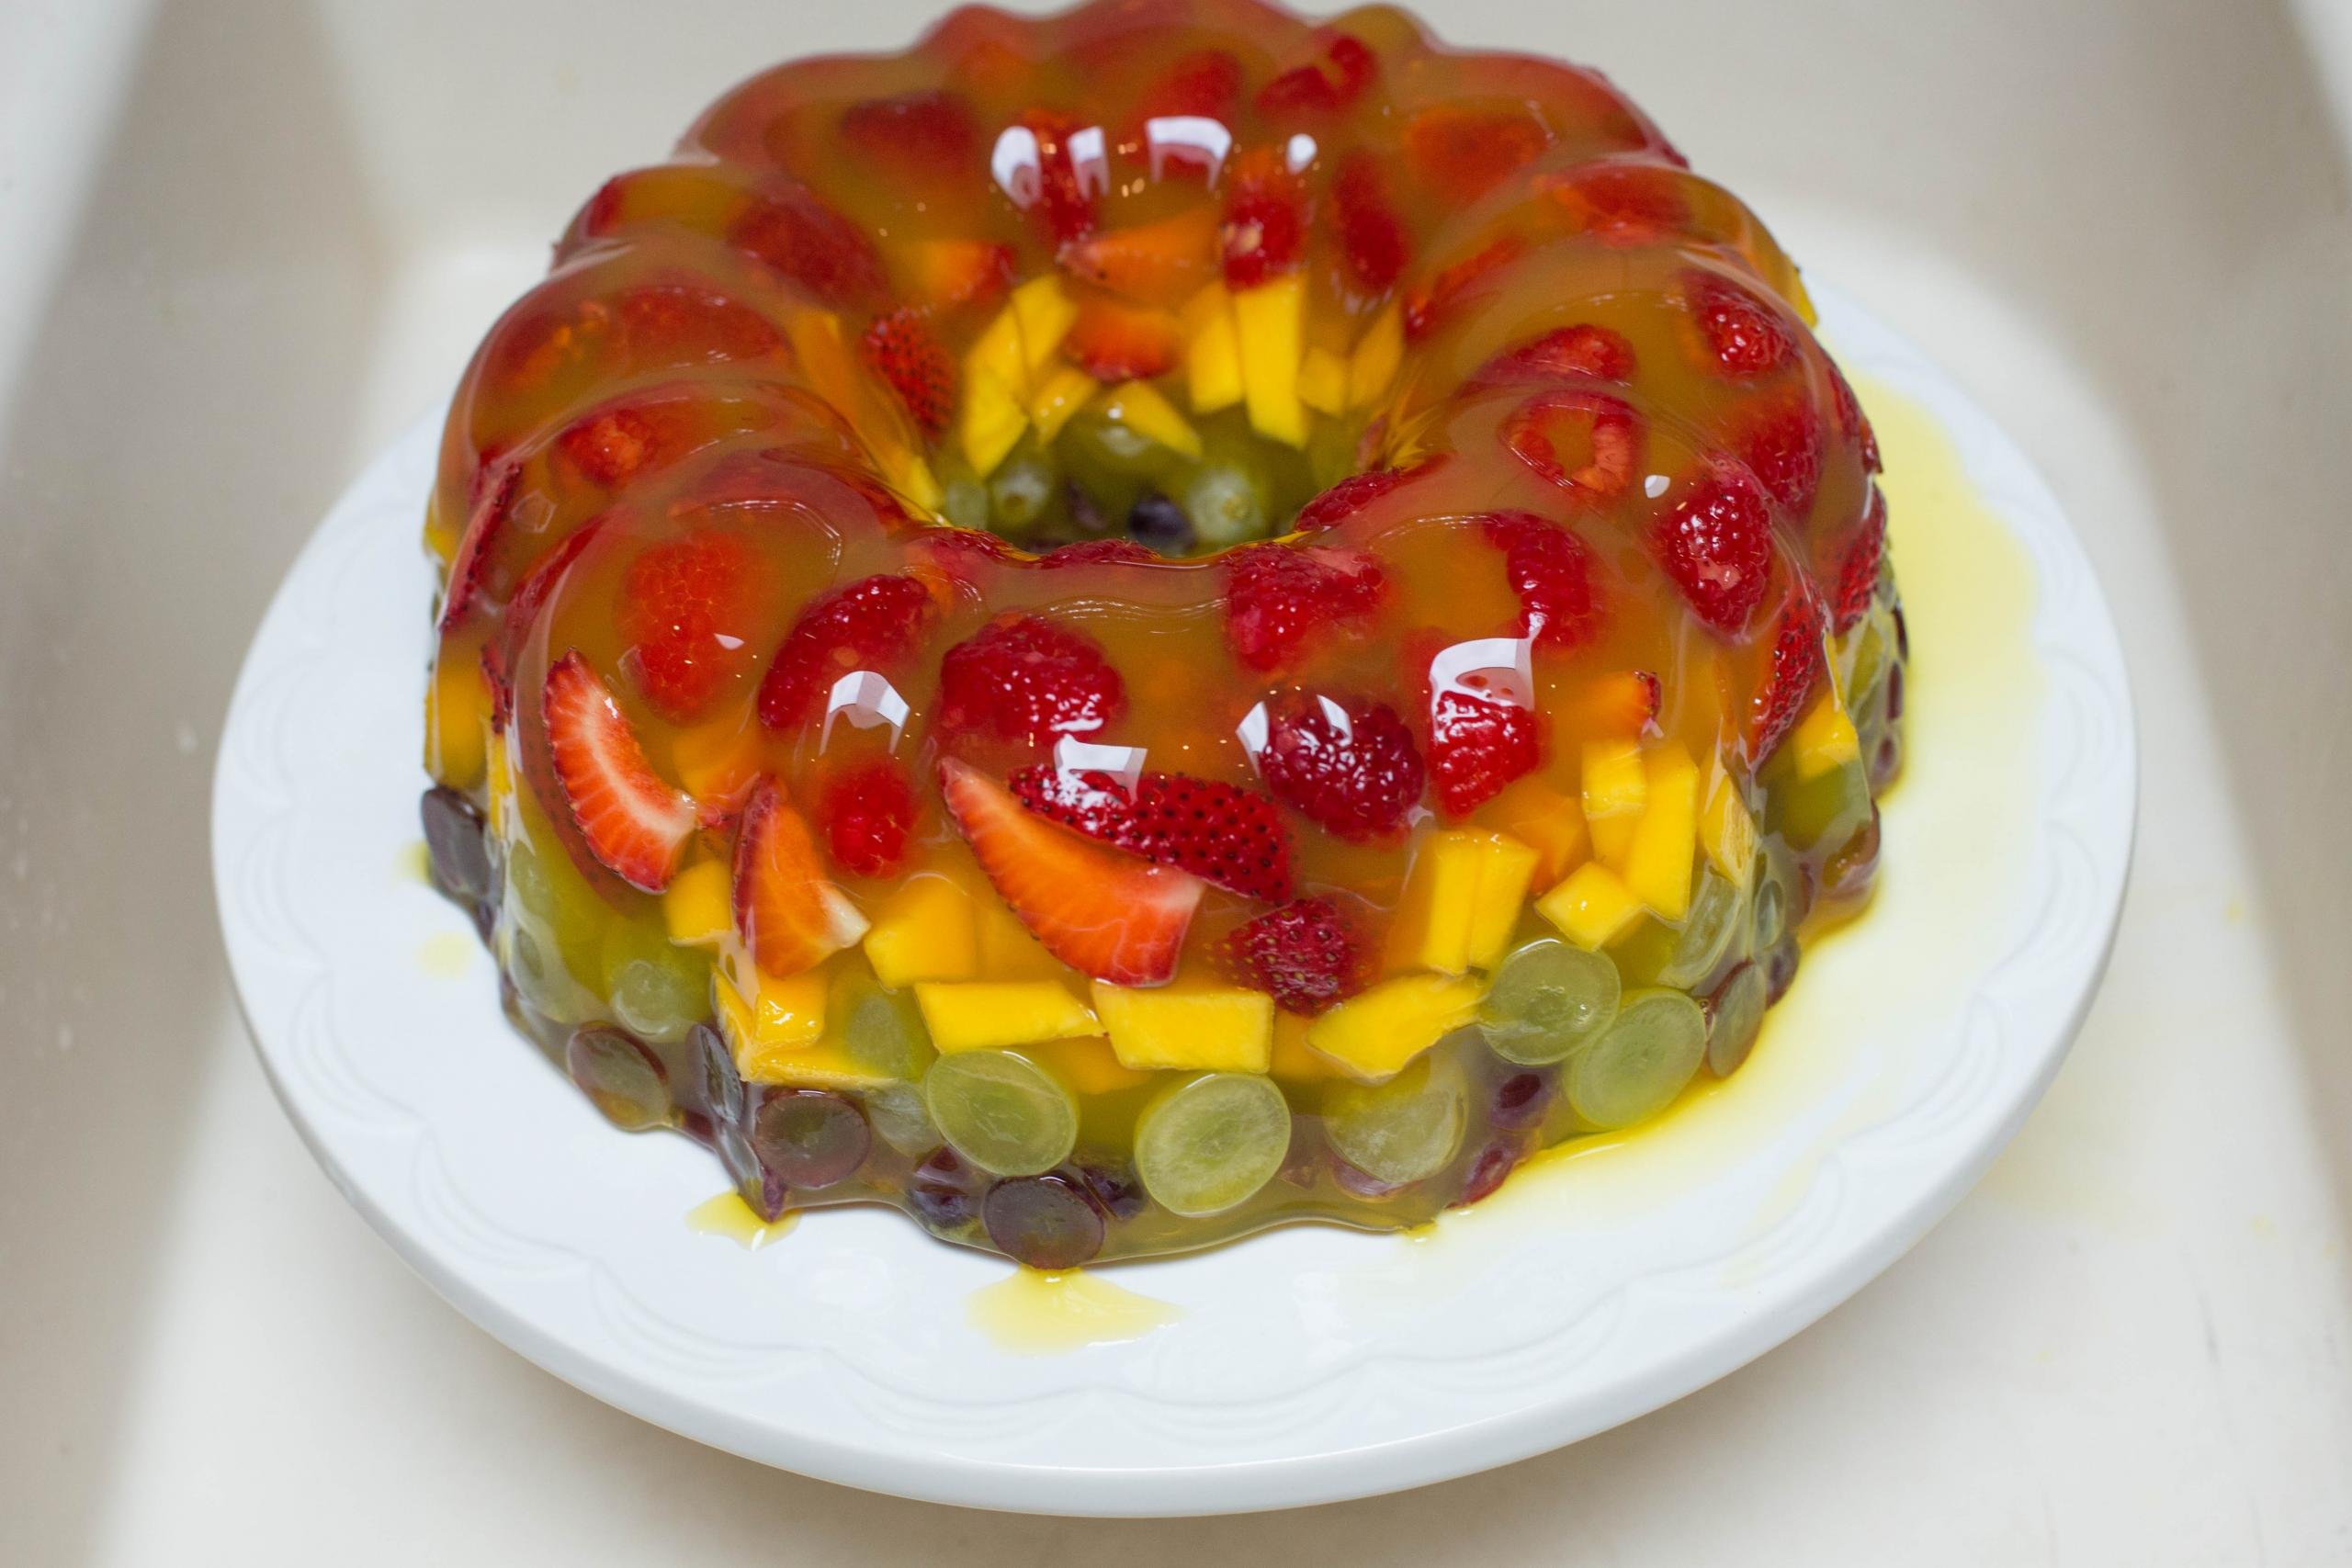
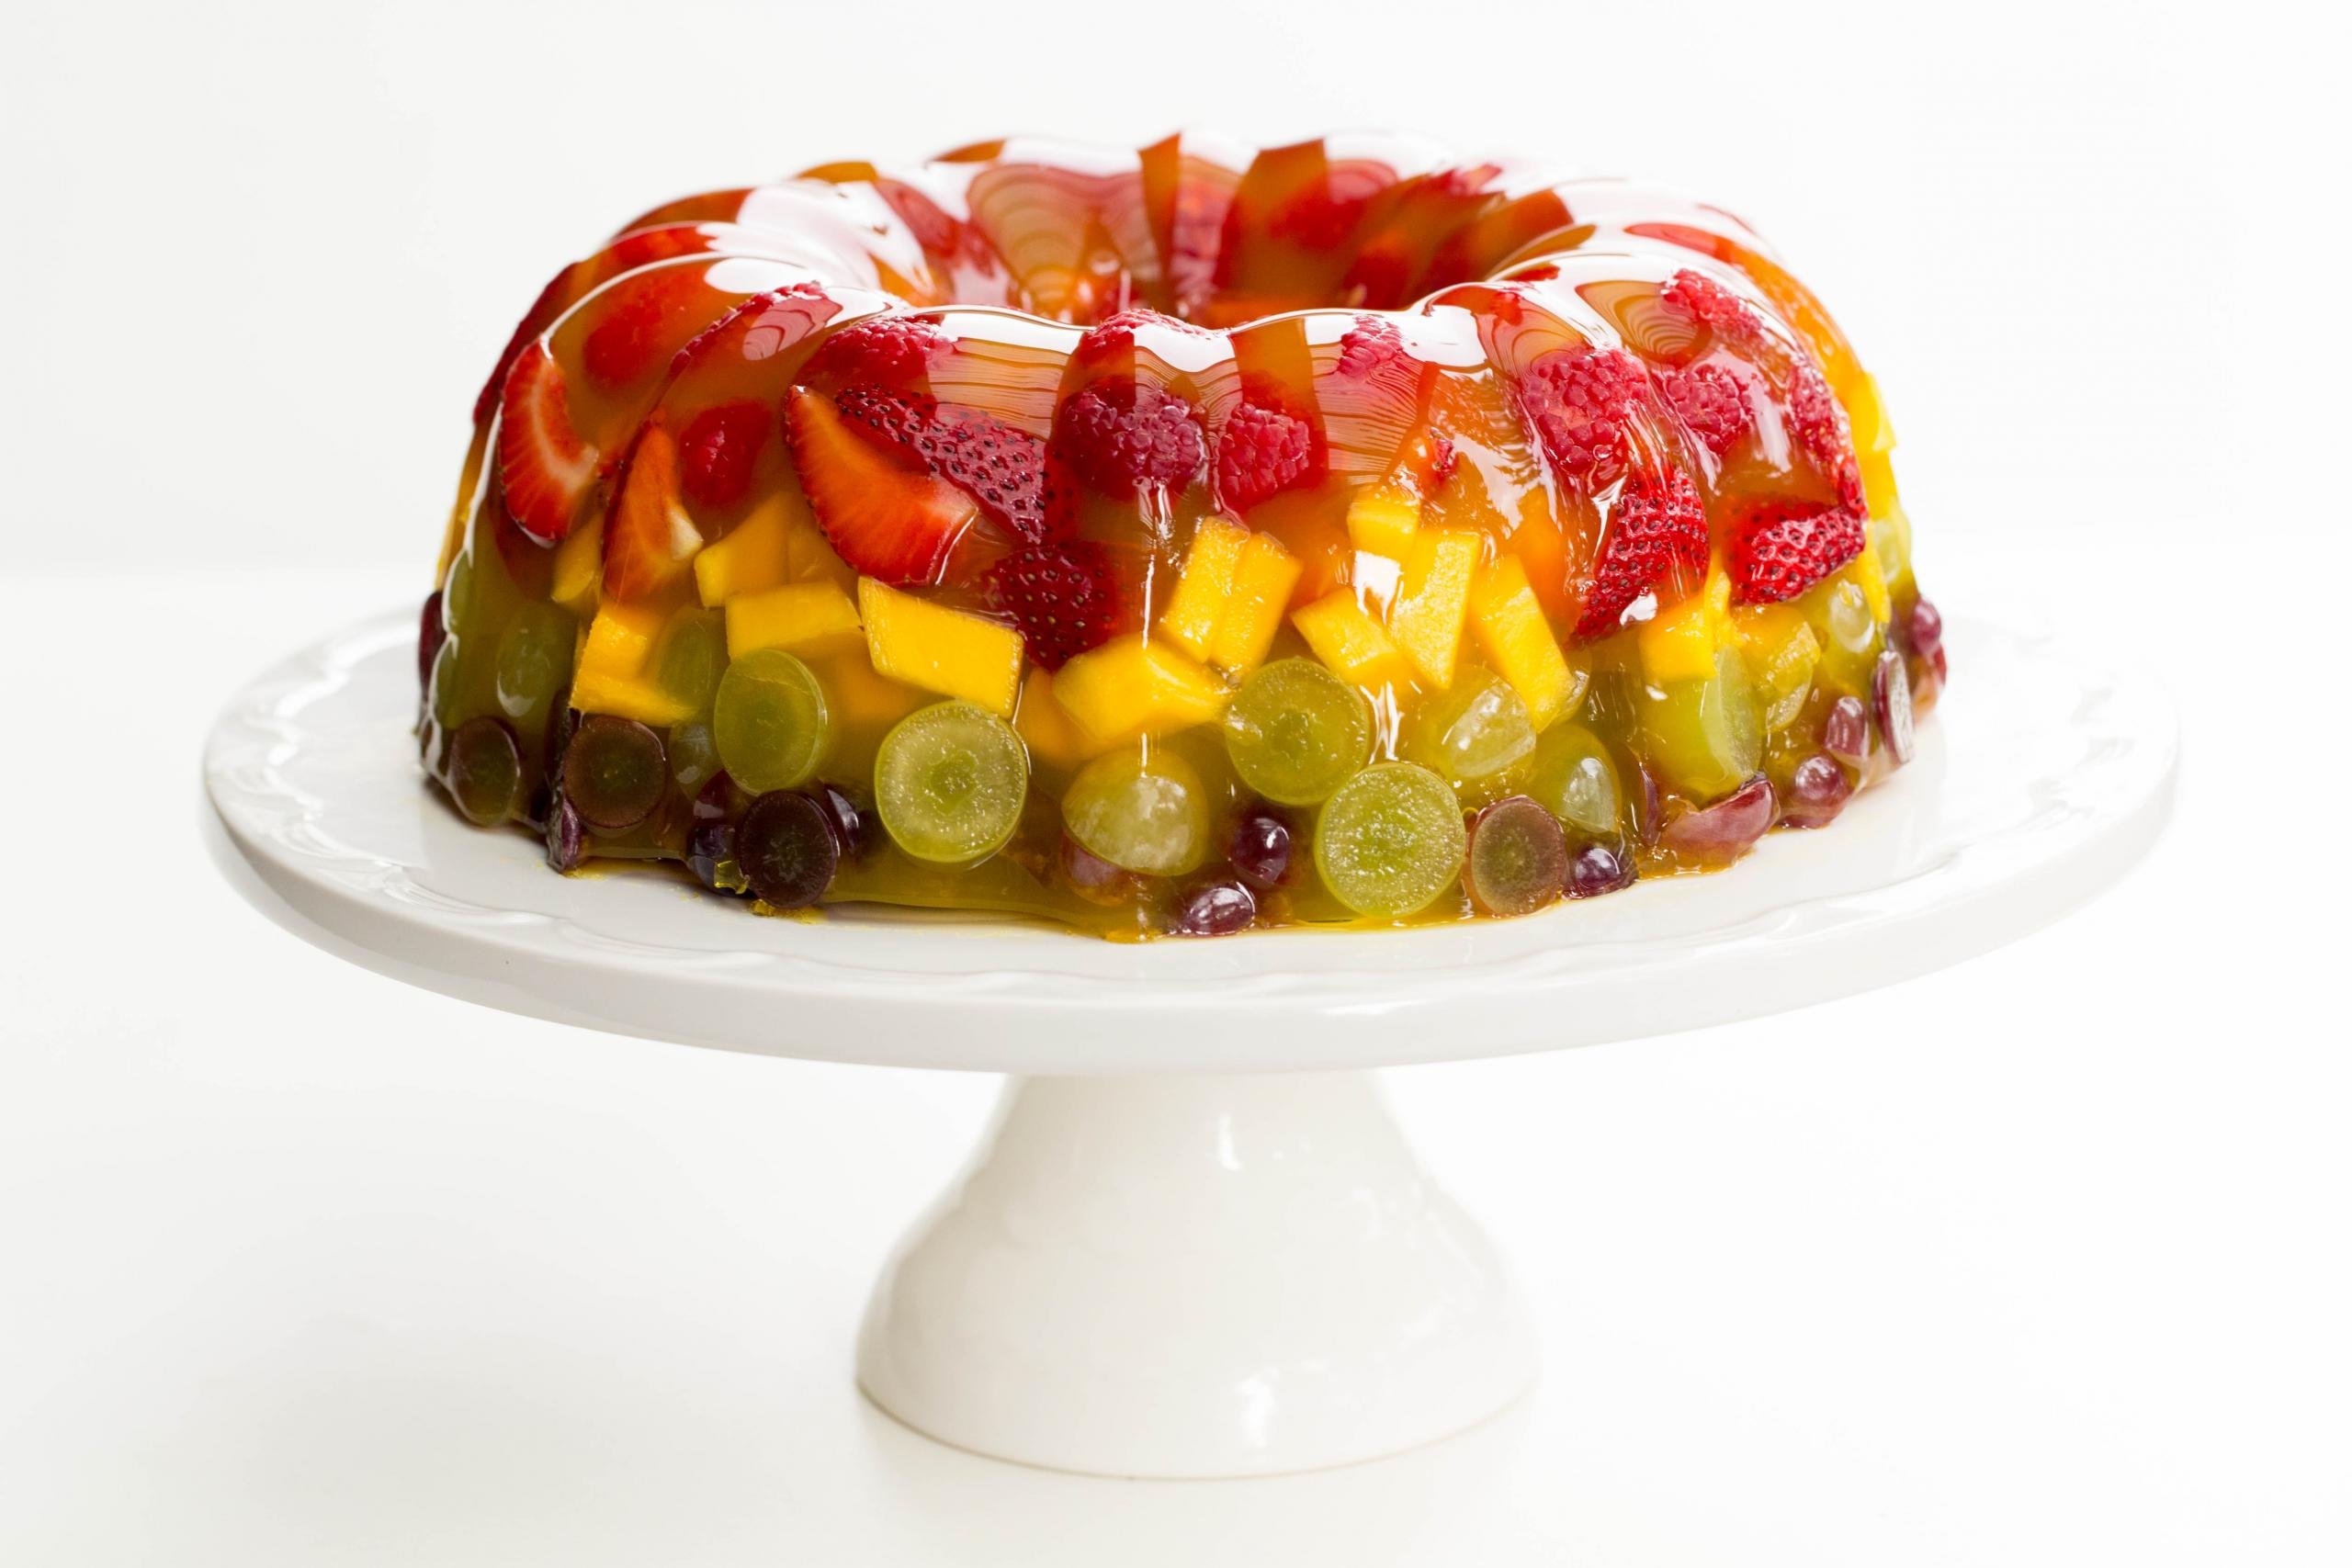
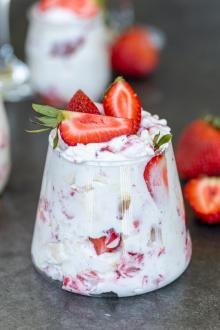
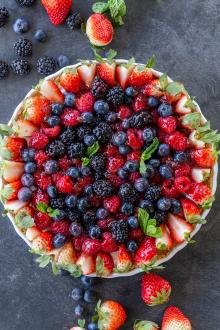
This jello fruit cake dessert is colorful, refreshing, effortless, and a blast from my past! Get ready to “WOW” everyone with this fruity family classic!

When this jello fruit cake was first introduced to my family, it was the #1 dessert for a while. For a whole year, my sister would bring it to EVERY family party. At first, I didn’t give in to the hype, because after all, it’s just made of gelatin and fruit! But I quickly started to notice that her jello fruit cake would be devoured before all the other desserts on the table — and we always had so many delicious Slavic desserts! I finally gave in and tried it myself. It was so easy to make and looked so festive no matter what fruits I used! Lets just say I’ve been hooked ever since.
Hot tip: For the most festive-looking cake, I like using a bundt cake pan. A good substitute is a large glass bowl.
How To Make Jello Fruit Cake Dessert
I personally think making this gelatin cake is therapeutic. It’s crazy easy, takes very little time, and satisfies the artsy/creative side of me. See for yourself!
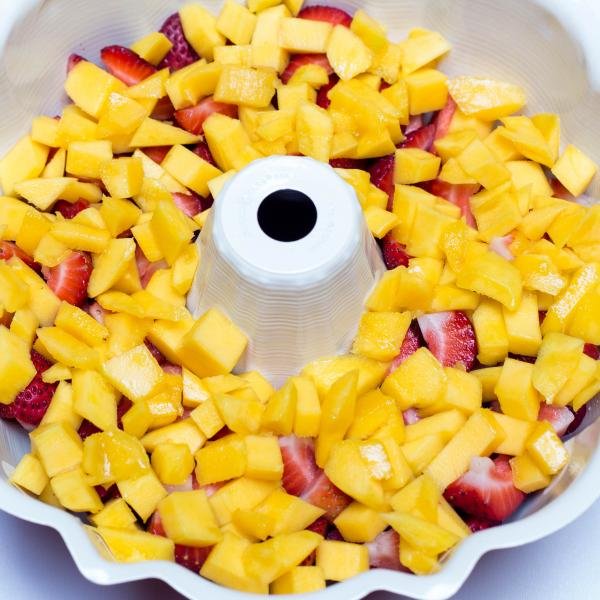
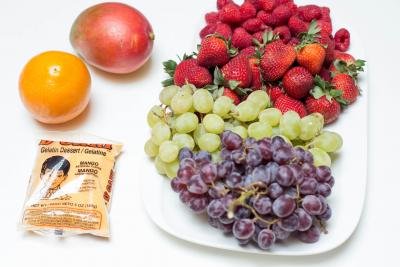
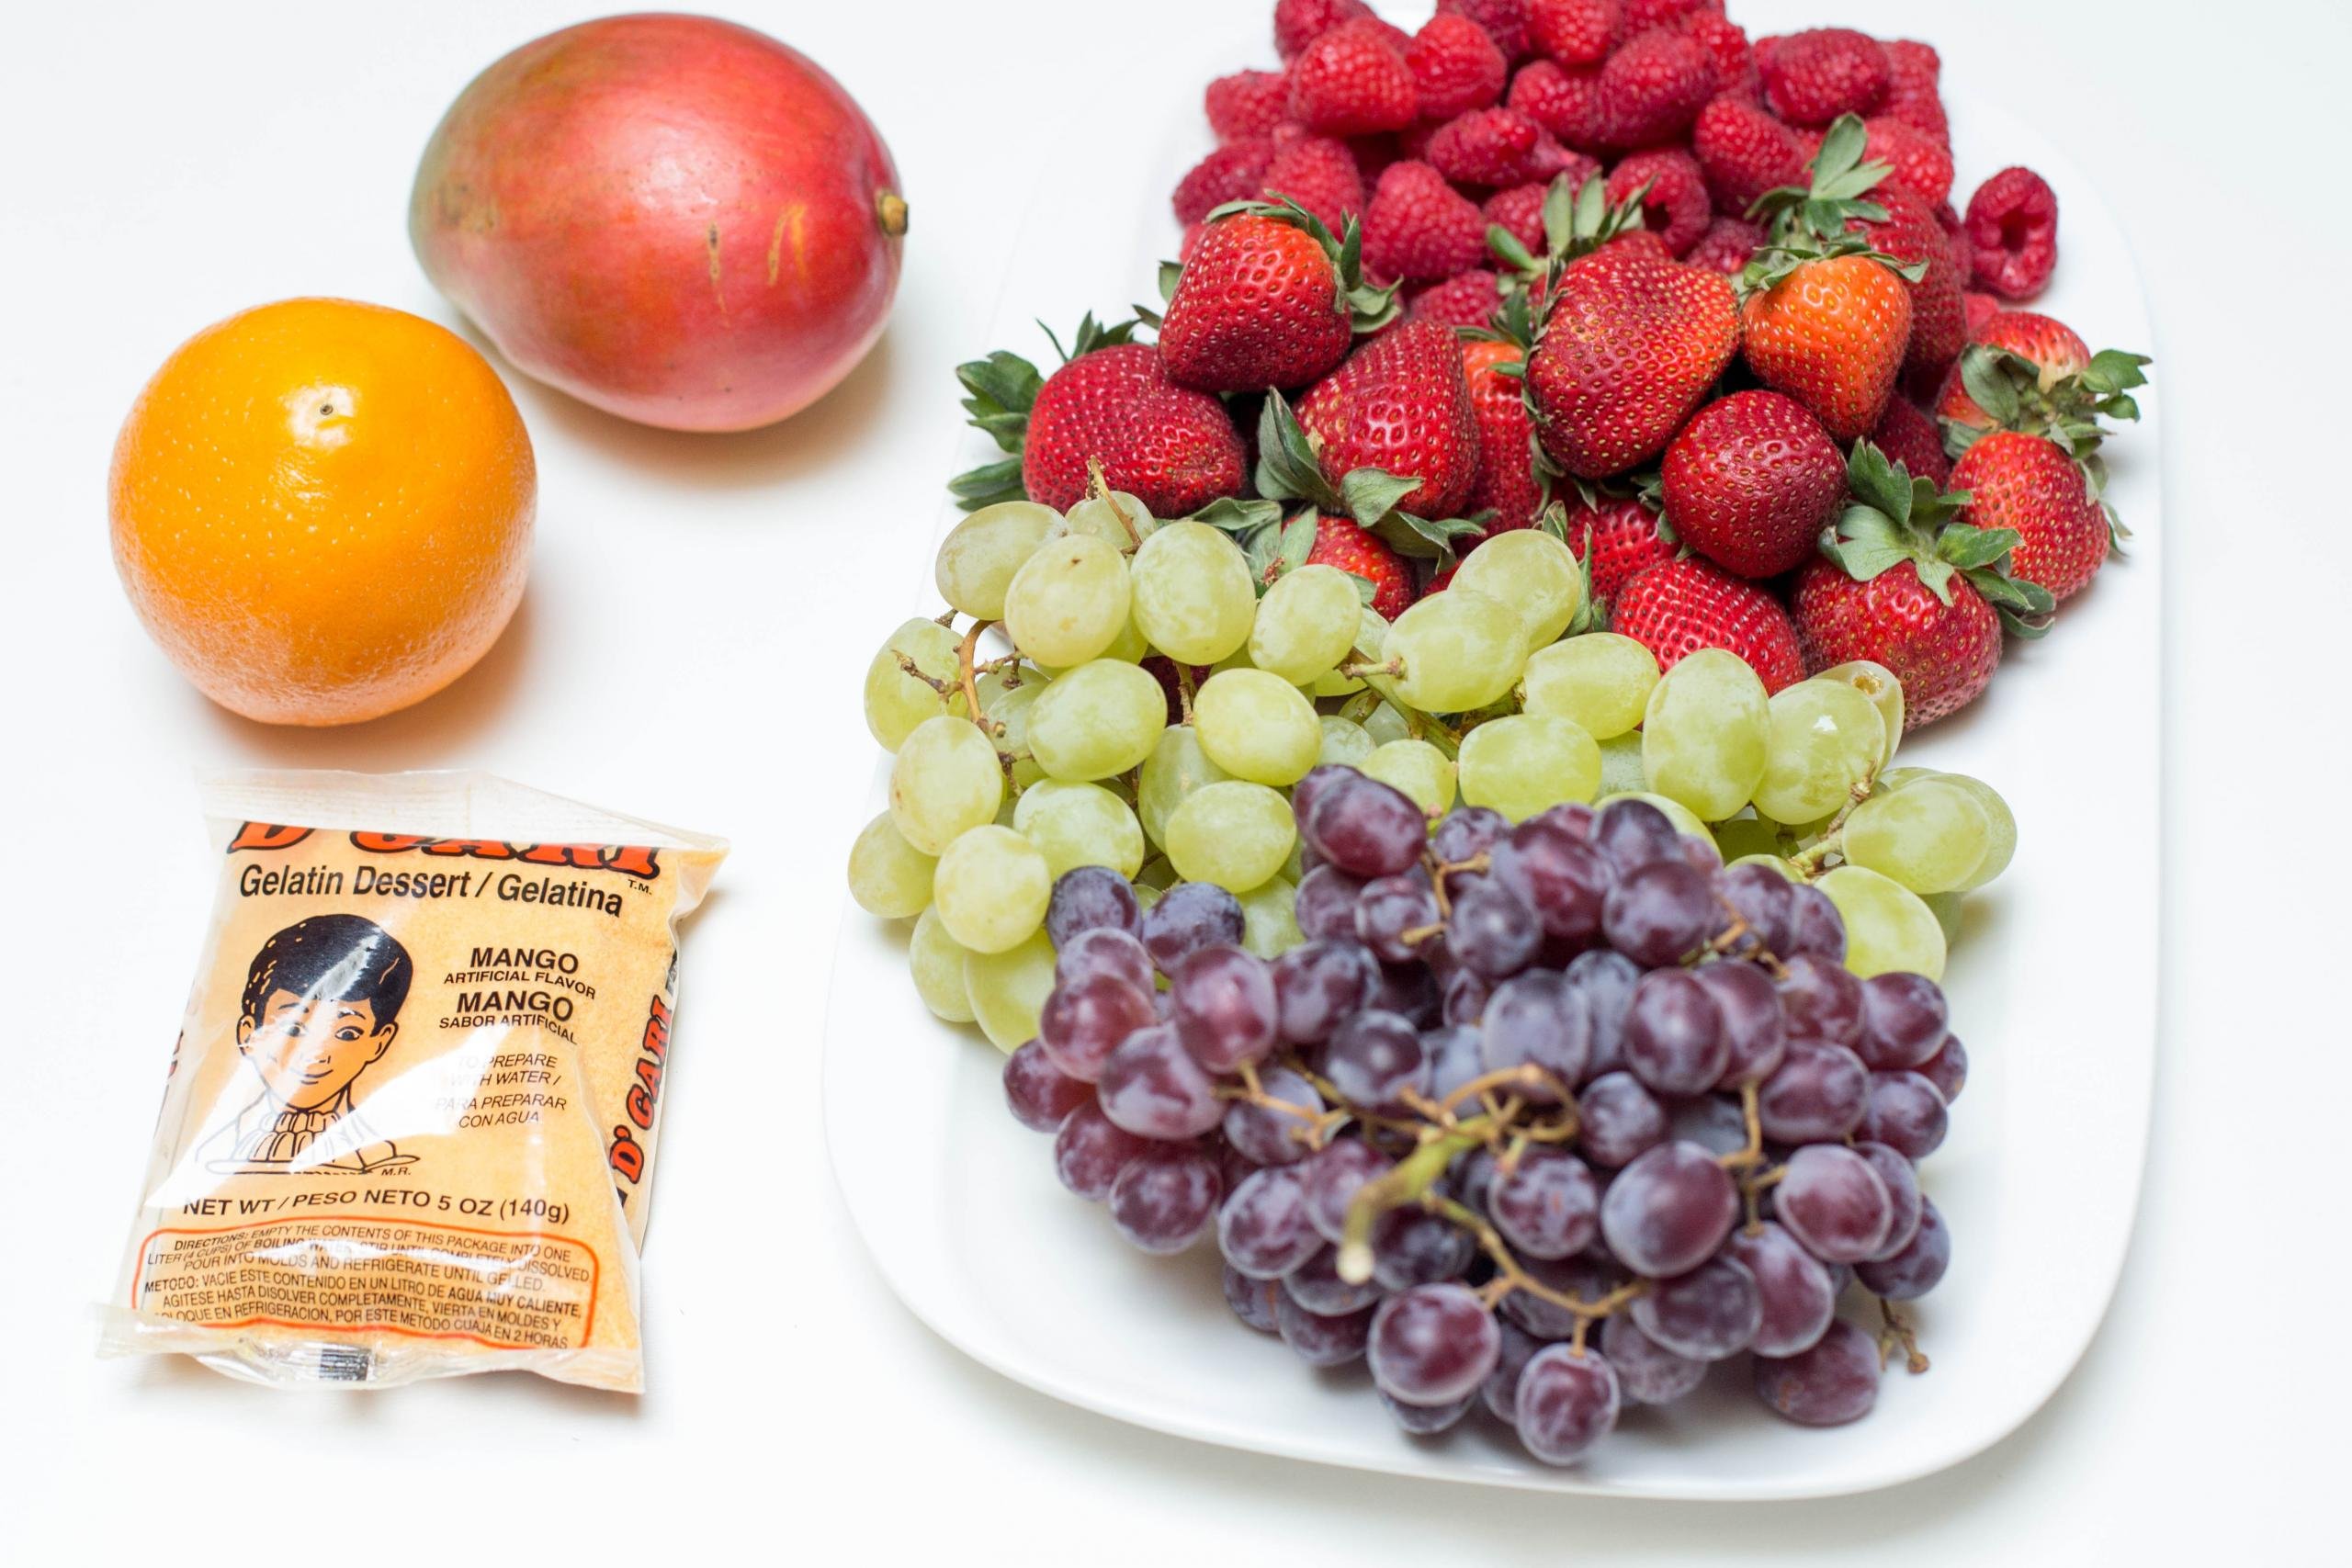
- Prep the fruits: Wash and cut the fruits into equal sized pieces. Some fruits (like raspberries) don’t need to be cut.
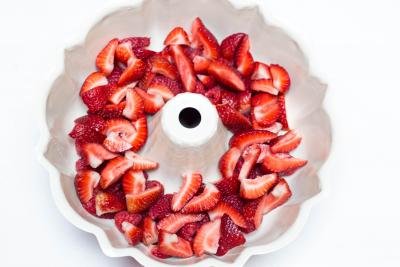
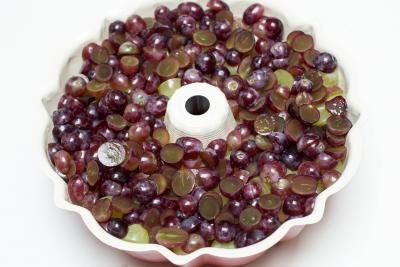
- Begin arranging the fruit: In the prepared cake pan/dish, arrange the raspberries, followed by the strawberries.
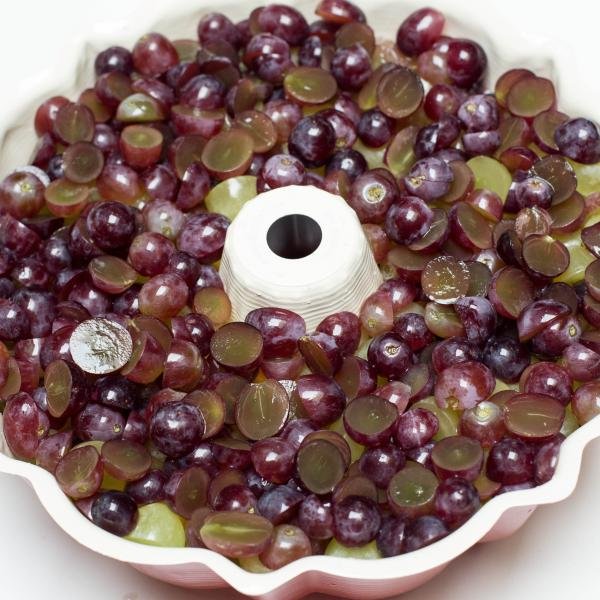
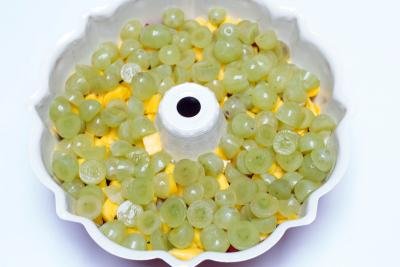
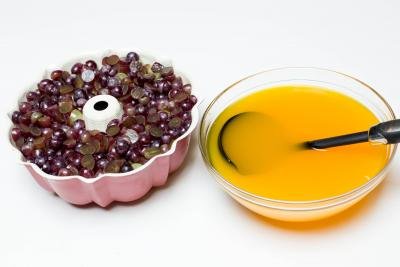
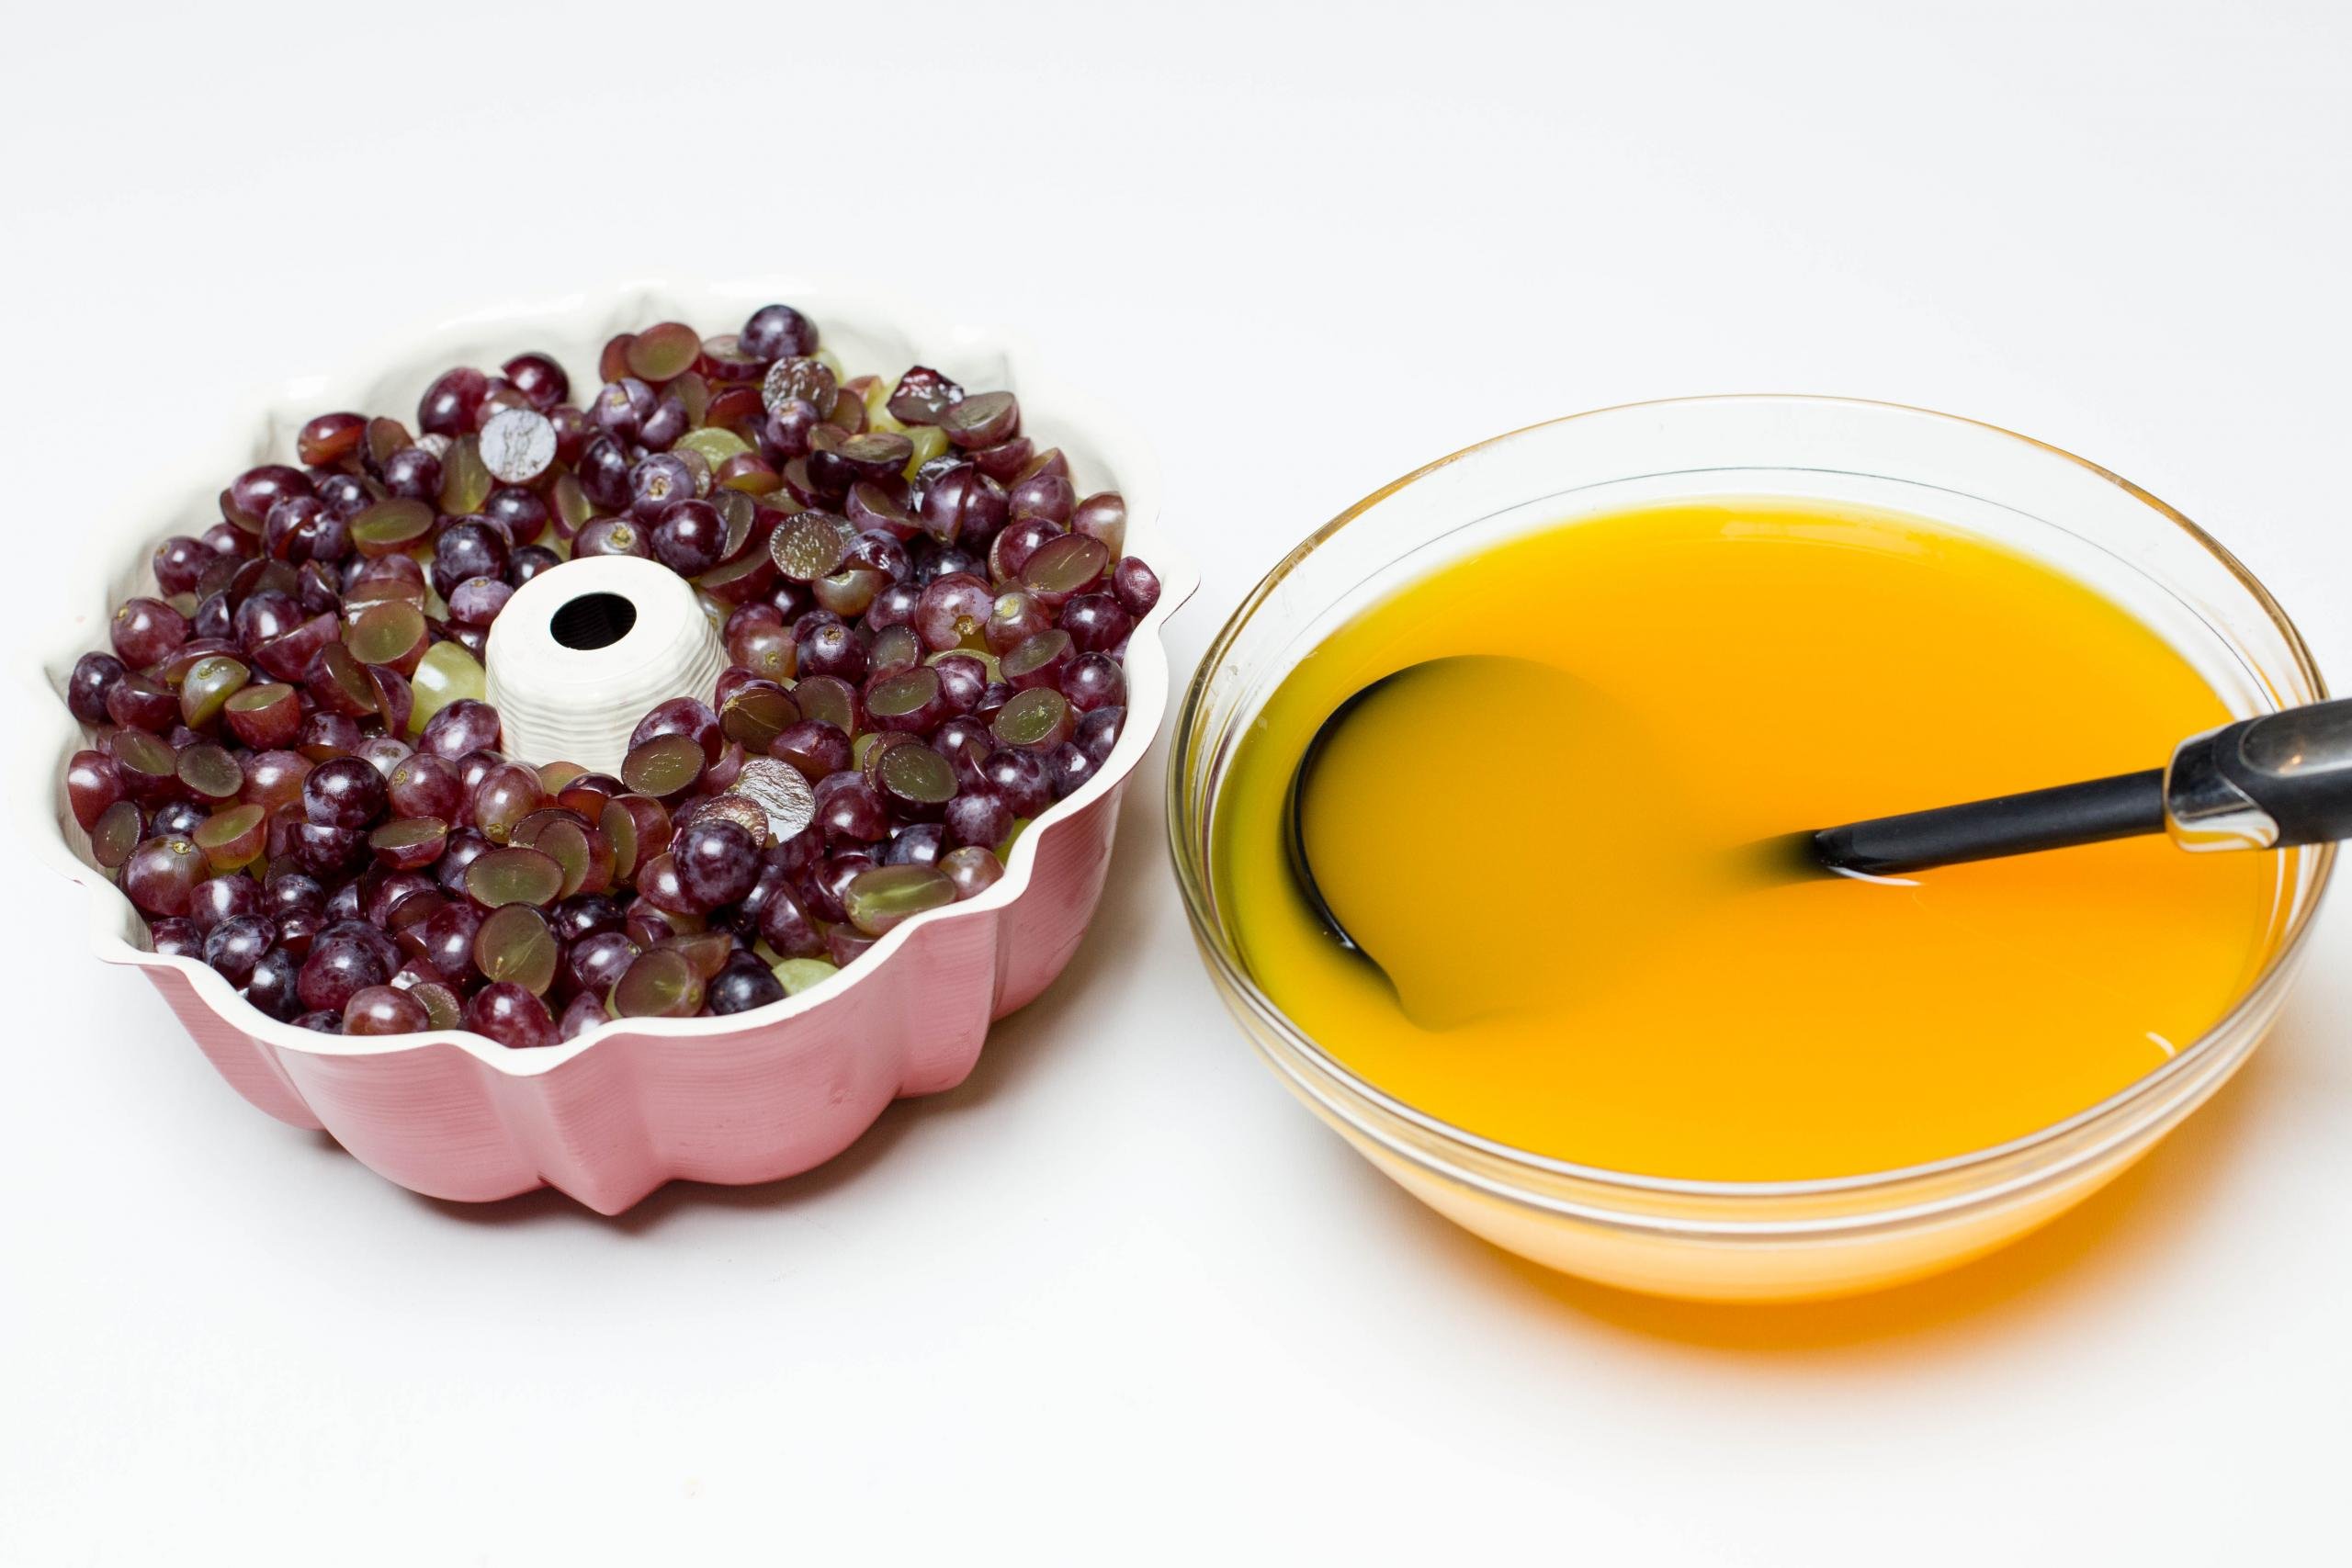
- Continue with the rest of the fruit: Next, add the mango, orange, green grapes, and purple grapes (or whatever fruits you are using).
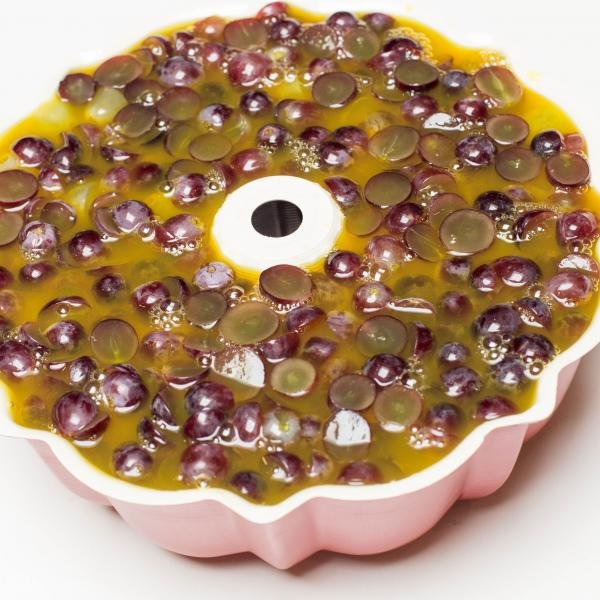
- Mix the jello liquid: Dissolve the jello in hot water according to package instructions. Allow the liquid to cool completely.
- Pour the liquid over the fruit: Slowly pour the jello liquid over the fruit. Shake the tray slightly to ensure the liquid enters all the nooks and crannies. Submerge all of the fruit in the liquid jello.
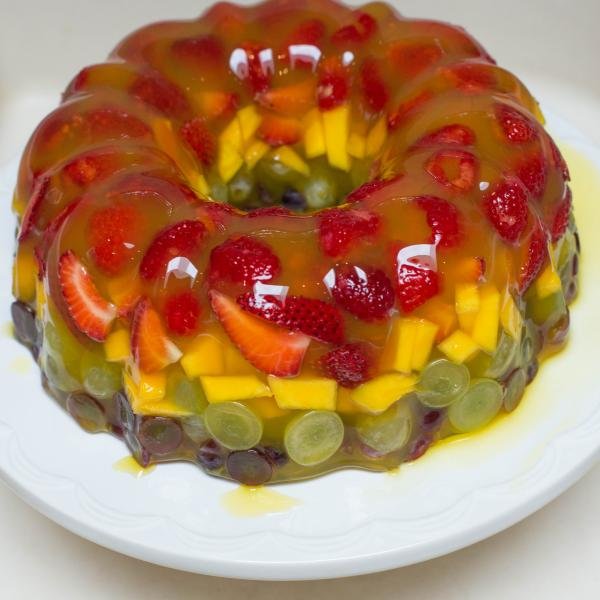
- Refrigerate the jello cake: Refrigerate the jello cake for about two hours, or until it is completely set.
- Remove the cake from the mold: When ready to serve, pour hot water into a slightly larger bowl and carefully place the fruit cake dish inside the hot water. As soon as you see a small amount of melting from the cake, remove the fruit cake dish from the hot water, cover it with a serving plate, and flip it upside down. The jello fruit cake should easily slide out.
Fruit usage tip: My go-to’s are mango, berries (blueberry, strawberry, raspberry, etc.), apples, honeydew or cantaloupe chunks, grapes, and mandarin oranges. It is best to avoid banana (it tends to turn brown and slimy). If using fruits like pineapple, kiwi, mango, and/or guava, opt for a canned version because the fresh varieties have enzymes that sometimes affect jello from setting.
Tips for a Great Jello Fruit Cake
Combined with my sister, she and I have made this cake at least a hundred times by now. We’ve learned a few things along the way, so don’t skip this part!
- Opt for my favorite jello brand: Hispanic brand jellos are the best to use for this recipe. D’Gari fruit jello (especially the mango and strawberry flavors) are my favorite because they’re super flavorful and colorful. The mix is usually found in the Hispanic aisle of the grocery store or on Amazon (keep in mind, you will need 14 liquid oz of prepared liquid jello for this recipe, not 14 oz of powder).
- Wait for the jello liquid to cool fully before pouring: Don’t rush pouring the jello mixture over the fruit until it is completely cooled. Otherwise, the hot liquid will cook the fruit and make the pieces soggy.
- Choose a variety of colored fruits: Just about any fruit can be used in this jello cake, but the key to a stunning and vibrantly colored cake is a good color contrast between the jello and the fruits. Pick fruits that will pop best against each other and the jello.
- Fill the entire cake pan with fruit: Make sure to fill the entire cake pan to the top with fruit. This ensures that the fruit doesn’t sink and set only at the very top of the cake — and you won’t weirdly have a layer of lone jello at the base of the cake.
- Use a sturdy cake pan/mold: I’ve found metal or glass bowls/pans work the best. Rubber or silicone molds are flexible and sometimes don’t stabilize the jello very well.
- Check that the jello is fully set: To check that the cake is ready, carefully cut into it with a knife. If you see any liquid seeping out, it’s not quite ready yet! You only get one shot at flipping, so make sure the cake is ready.
- Remove the fruit cake with a hot water bath: To loosen the cake from the mold, pour hot water into a separate large bowl and set the mold inside of it. Make sure the bottom of the mold is in the hot water but no water gets on top of the jello itself. As soon as you see a bit of melting from the sides of the jello cake, cover the mold with a serving plate and invert the mold on top of it. If necessary, wipe the sides of the cake delicately to remove excess liquid.
Storing Jello Fruit Cake
I’ve always made this cake no more than a day in advance so the fruits taste super fresh when we enjoy it. If there are any leftovers, refrigerate in an airtight container and enjoy within two days.
More Jello Recipes
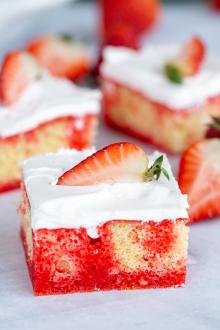
- Strawberry Jello Poke Cake: Sponge cake filled with strawberry flavor
- Strawberry Jello Cake Dessert: 3-ingredient strawberry mousse cake
- Bird’s Milk Cake: A popular Slavic mousse cake
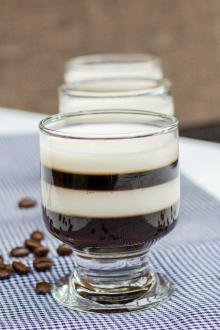
- Espresso Jello Shots: Rich coffee jello? Yes, please!
Recipe

Ingredients
- 8 oz Raspberries
- 1 lb Strawberries
- 1 Mango
- 1 Orange optional
- 1 lb Green Grapes
- 1 lb Purple Grapes
- 14 oz D'Gari Gelatin Dessert prepared liquid in any fruit flavor
Instructions
- Prepare the fruit for the cake. Clean and cut them into equal pieces, leave the raspberries whole.
- Place the raspberries into the prepared dish, followed by strawberries.
- Add mango, oranges, and green grapes.
- Finish off by laying out the purple grapes. Dissolve the jello in hot water, following the instructions on the box. You will need 14 oz of prepared, liquid jello (not 14 oz of powder). Let the jello mixture cool completely. Note: I only recommend the D'Gari Gelatin Dessert brand for this recipe. Using other brands of flavored jello may not set well.
- Slowly pour the cooled mixture over the fruits. Shake the tray a little, so the liquid goes through all the sides. Cover the fruit completely with the jello liquid.
- Refrigerate the cake until the jello is completely set, about 2 hours. In order to remove it from the tray, pour hot water into a separate large bowl, and place the jello cake mold into it. As soon as you see a little bit of melting on the sides, cover the jello with a serving plate and turn it over. If necessary, wipe off the sides around the jello.

- Return the cake to the refrigerator to keep it cold, until ready to serve. I would only remove the cake from the tray a few hours before serving.


Hey Natasha, it looks very appetizing, and if there is no such form to pour it into, can I try it in a glass bowl?
Hey Nadia, yes, that should work. Hope you love it! Its such a show stopper. 🙂
Could you pls update this recipe. It says to use 14 oz of jello. I didn’t see anywhere in the recipe that we need 14 oz of liquid. So 14 oz of jello means 14 oz of jello powder. It is very misleading. I just wasted 3 packages of jello because of this mistake in the recipe. If you update your recipe other people won’t make the same mistake. Thank you. Otherwise it is a very delicious jello recipe.
Hey Valentina, Thanks for the feedback. Throughout the blog, I mention in a couple of spots that it's 14 oz. of liquid jello. I can see how it'll also be useful to say it in the ingredients list. Great suggestion!
Hey Valentina, Thank you for your feedback. It depends on the package size you get thats whey we listed it as prepared liquid but I can see how its very confusing. We will update this recipe ASAP and make better notes. Thanks for looking out for everyone.
The jello fruit cake was easy to make & it came out so nice! I used on packet (4.2 oz.) of D’Gari pineapple gelatin. Thank you for sharing your recipe.
I'm thrilled you loved this dessert! Enjoy!
Does it also work with chuncks of hotdogs?
Hotdogs with jello isn't something I would recommend Emmy. LOL, but you let us know if you enjoyed that combo!
Does it turn out as well with plain gelatin.
Hi Lia, I have not tried it with plain gelatin. If you do experiment with it, please let us know how it works out! 🙂
Delicious and easy to make!! Thank for sharing the recipe.
I ordered the D'Gari Mango Gelatin from Amazon. The package size was 4.2 oz. I followed the directions on the package and added my jello to four cups of boiling water. That amount was perfect to fill up my bundt pan.
Hi Angela, thank you so much for sharing your process with me. Sounds like it turned out incredible! Enjoy it!!
How many cups of mango flavored liquid did you have in that bowl?
Hi Svetlana, thank you for reaching out. There is 14 oz, or 1.75 cups.
I am ready to make this Divine hello dessert 🍮 I’ll let you know how it comes out and how people like it ❤️😋🍒🍇🍓
Hi Lori, your comment made me smile. Thank you so much for taking the time to leave your review!
There seems to be some confusion in the comments here regarding the "14 oz" of gelatin in the recipe. The term "ounce" (which is abbreviated as "oz") can be ambiguous and misleading. An "ounce" can refer to a unit of weight that is 1/16 of a pound (in other words, 1 pound = 16 ounces). But "ounce" can also refer to a fluid ounce, which is a unit of volume that is 1/8 of a cup (in other words, 1 cup = 8 fluid ounces). These two types of "ounces" are NOT interchangeable. For example, 1/8 cup of flour = 1 fluid ounce of flour (volume). This same amount of flour weighs about 0.52 ounces (weight). For other substances (water, sugar, butter, etc.), the conversions will be different, as the relationship between ounces (weight) and fluid ounces (volume) depends on the density of the substance being measured.
On a food package, if the number that's listed refers to a volume, then it will typically say "FL OZ." If the package just says "OZ," then that is a weight. One way to verify this is that there is usually a metric equivalent given. If the metric equivalent is in grams ("g"), then the "OZ" refers to a weight. If the metric equivalent is in milliliters (mL) or liters (L), then it refers to a volume. But again, for a volume, "FL OZ" (not just "OZ") will always be used on product packages.
Flavored gelatin powder is sold by weight. For example, when the box says "3 oz," that means that the dry powder inside *weighs* 3 ounces. That number is NOT a volume, which would be listed as fluid ounces (fl oz).
You mention in the comments that the recipe needs "14 oz of prepared Jello liquid." If water has been added to the gelatin powder, then presumably this mixture would be measured as a volume (fluid ounces). However, a single 5-oz package of D'Gari gelatin is prepared with 4 cups of water (32 fluid ounces). Jell-O brand is sold in 3-oz and 6-oz boxes, which use 2 cups (16 fluid ounces) and 4 cups (32 fluid ounces) of water. All of these volumes are larger than 14 fl oz, and yet if we are referring to a weight, then 14 oz seems like too much (and not an easy multiple of any of the package sizes). So, it's not clear where the "14 oz" comes from, and it's not clear whether that's 14 oz (weight) or 14 fl oz (volume).
If you are intentionally making the gelatin-water mixture more concentrated by adding less water than the package says to add, the recipe would need to specify both the weight of dry flavored gelatin powder (in "oz") and the volume of water to be added (in "fl oz"). Nothing can be assumed here, since the amount of flavored gelatin powder per package varies by brand, and even within the same brand — for example, D'Gari has 4.2-oz and 5-oz sizes.
NOTE: Sugar-free Jell-O brand powder weighs much less than regular Jell-O powder. This is because sugar makes up most of the weight in the regular version, and the artificial sweetener that's used in the sugar-free version weighs very little in comparison. The 0.3-oz box of sugar-free Jell-O is equivalent to the 3-oz box of the regular version with sugar.
Hi Blair- thank you for taking the time to leave such detailed feedback! This is an old recipe that needs some updates. We will do our best to update it with as many details as possible in the near future.
I know when given a recipe to follow like ounces and so forth I usually add more, I think recipe should be as much as you want. And like this recipe of jello with fruit that bananas can be added as well.
Hi Yolanda! I usually don't like to add bananas because they brown so easily, but it is totally up to you! Thanks!
I was surprised to see that your recipe includes fresh mango fruit, and I wonder if that's part of the reason why some of the commenters said their gelatin didn't set properly.
There are certain fruits that will prevent gelatin from setting due to enzymes that they contain. These include FRESH or FROZEN versions of the following: pineapple, mango, kiwi, papaya, guava, ginger root, and figs. If the fruit is canned or cooked, this supposedly deactivates the enzymes and makes it ok to use with gelatin.
Hi Blair- this is true! I used relatively less mango compared to the other fruits so mine didn't have problems setting. We will make sure to leave a note in the recipe to beware of this though. Thank you!
Hello Natalya, so I would need about 4 of those packages of jello?
Hi Lana, depending on the package size. You will need 14oz of prepared jello liquid. I think 4 should be enough but sometimes they change their sizes.
14 oz of gelatin? Or do you mean one 4 oz pack of gelatin?
Hey Jennifer, I would follow the liquid instructions on the package. You will need 14 oz of prepared "jello" liquid.
How can you make this diabetes friendly?
Use sugar free jello
Hi Lori - Thanks for the note. I've never made this cake diabetes-friendly before, so I'm not entirely sure. Perhaps a sugar-free sweetener? Hope this helps!
I couldn’t find the suggested brand jello at my local grocery store so I used jello brand pineapple flavor. I made 3 boxes per the jello package instructions and chilled it in the fridge 1 hour before pouring it over the fruit in my mold. It set perfectly and turned out great.
I'm so glad it worked out well, Kim, thank you for sharing your feedback!
Hi, this looks great! we are always looking for great new recipes for our restaurant, was thinking of doing individual portions, how long do you think they would last in the fridge?
May I ask, as I love your website. Which of your other deserts are favorites with good non perish ability?
Thank you very much in advance!
Gabrielle
Hey Gabrielle, I think about 5 days would be best for freshness. Macarons would be a good one, they stay fresh for so long.
I was only able to find 2 packets, each 4.2 oz or 120 gl. How much water should be added? I found different replies in similar circumstances. Please advise. Thanks.
Hey Carme, I would follow the liquid instructions on the package. You would need 14 oz of prepared "jello" liquid. Hope this helps
Hi, I followed all the steps, used the same brand as you suggested, (only one pack of mango). It filled up the pan to the top. Problem is, it's been over 4 hours in the fridge and it's still not set. The regular jello doesn't take that long for me. What went wrong?
Enzymes in fruits sometimes inhibits the gelatin or you did not put enough gelatin in proportion or the gelatin was not bloomed in cold liquid first.
Hey, which fruits did you add?
Absolutely love how gorgeous this jello comes and and super delicious!
Quick question- on the ingredient list it states 14oz jello. One packet is 5 oz. did you use 3 packets? That’s 12 comes of water for 3 packets
Hi Laura, We use one packet of jello and mix it with 14 oz of water.Hope this helps
Your ingredients list says 14 oz jello, but one packet of jello is 5oz. So did you only use one packet of 5oz and 4 cups of water for entire jello cake?
Hey Alla, I would follow the liquid instructions on the package. You would need 14 oz of prepared "jello" liquid. Hope this helps
So so good!! I just made this using the d gari berry flavored jello & strawberries, kiwi & purple grapes. So refreshing for this heat wave in CA & guilt free to go back for seconds!
Diana, this is awesome! So glad you got to make this recipe. Thank you for sharing!
This dessert comes together so quickly and it’s so delicious. I love that it’s a light dessert. Only problem is you keep on wanting more! Thank you for the recipe Natalya!
Julie, thank you so much for sharing this. I am so happy to hear that.
Can I use the Jell-O brand?
I haven't tried using a Jell-O brand. I don't think the turnout would be the same.
Mine came apart the moment I tried putting it on a tray and it was in fridge for a day.
Hey Gina, which brand of jello did you use?
Ur recipe states follow instructions on the box for jello which states use 4 cups of water per pack but the jello only works if you use about 2 cups of water per pack or 4 to 4.5 cups of water total depending on the mold size. I heard from few friends who said jello didn’t turn out and that was the reason why since the jello didn’t get hard enough due to excess water if you would add that into ur recipe that would be great
Hey Oksana, in this case, we are using D’Gari jello and it does work if you follow the packaging instructions. I haven't used regular jello brands, I think this will help others for sure.
Package instructions say 4 cups of water (32 oz)
Your instructions say 14oz
Which is it?
Hey Tina, it's 14oz of powder but 32oz of water.
I'm interested in making this! Could I use frozen fruit or would that affect how it sets?
I wouldn't recommend frozen fruit because they tend to be watery.
I added raspberry, strawberry, mango, pineapple, grape and blueberry. Did not set at all. End up putting everything into a bowl as a fruit salad. Momsdish Have you try adding pineapples to your jello?
You cannot use fresh because they have enzymes that can break down and not allow the jello to set. You can how ever use canned, because they are cooked in the canning process and those enzymes are cooked off. There are a few other fruits that so the same also. A quick google search should help.
I think I tried kiwi before but not pineapple. Wa a huge amount of pineapple? I know its acidic and can affect it. Also, which brand of jello mix did you use?
I used about a a cup of fresh pineapples. And the jello brand was the one in your recipe.
That's interesting. I will remove pineapple as an option. I know some pineapples can be more acidic.
You can use canned pineapple but not fresh. During the heating in the canning process the enzymes (that keep the Jell-O from setting) are killed off. That's rule number one when making Jell-O. It's the only time I prefer canned over fresh.
Oh wow, thank you for sharing! 🙂
I made it! So easy!
Awesome, that was the goal 😉
How would you store this cake for two hours at a birthday party? How cold does it need to stay?
it really depends where the Birthday party is at. If it's 60-70F it should be ok at room temperature. Otherwise, keep the cake in a cooler with ice packs on the bottom. But it is best when it's cold so I would try and find a way to refrigerate it.
I followed directions exactly and the jello never set up. It was refrigerated for 8hrs and was our liquid. The recipe is off, it should allow for the water in the fruit and cut back on the water in the hello directions. Quite disappointed as I was having a dinner party and desert was a flop...
Did you use the same brand of gelatine? I know hundreds of people have made this recipe and this is my first feedback that it didn't set up. Also, can you tell me which fruits you used?
Would strawberry and mango taste good?
Yes, that would be a great combo. Maybe add another fruit for a tart flavor.
This looks amazing! How would it taste with peaches and/or blueberries in it instead of raspberries and/or mangos?
Hi Lori, I think that would be a great combo, especially if you love the fruit. The cake is very forgiving and you cna adjust the fruits as you wish. Only one I would worry about is banana because it would brown a bit.