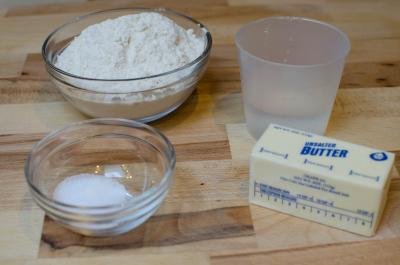
Never be disappointed with your pie crust again! This knockout flaky pie crust recipe requires only four ingredients and yields awesome results each time — guaranteed.
This pie crust is perfect for all pies — cream pie, apple pie, pecan pie, pumpkin pie, and even savory pies! Get that pie dish out and dust off your favorite decorative pie plate. If you’re here, it means you’re already craving a sweet or savory pie. So, my friend, you have come to the right place.
Pie Crust Video
Why Make This Pie Crust?
If you’re making any kind of pie, a flaky pie crust is a must. Knowing how to make your own crust is a necessary skill to put in your home chef tool belt. Whether you are baking an apple pie or using up leftover veggies to make an impromptu quiche, this recipe makes a perfect butter pie crust.
I have spent lots of time perfecting this pie crust. Pies are perfect for every season and I find myself making one about once a month. So, because of this year-round pie obsession, I knew I needed a reliable pie crust recipe and I am so happy to share the fruits of my labor with you.
Why Is This the Best Flaky Pie Crust Recipe?
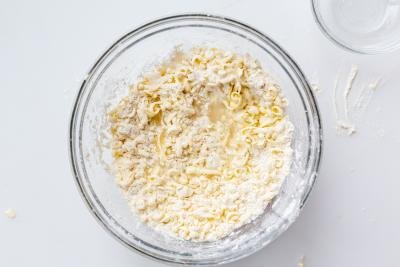
Many pie crust recipes call for shortening, but we have a better alternative — butter! Butter is the key to achieving a flaky buttery crust! More specifically, frozen butter is the key. Have you ever used room temperature butter and ended up with a super flat and dense pie crust? That happens because room temperature butter melts very quickly in the oven.
Here’s our favorite hack: Instead of using room temperature butter, grate frozen butter into the dough. Why? The tiny, frozen pieces of butter melt slower while baking, making the signature flaky layers everyone desires in a pie crust.
How To Make the Perfect Pie Crust
It takes even less time to make this homemade pie crust than it does to go to the store and buy store-bought crust.
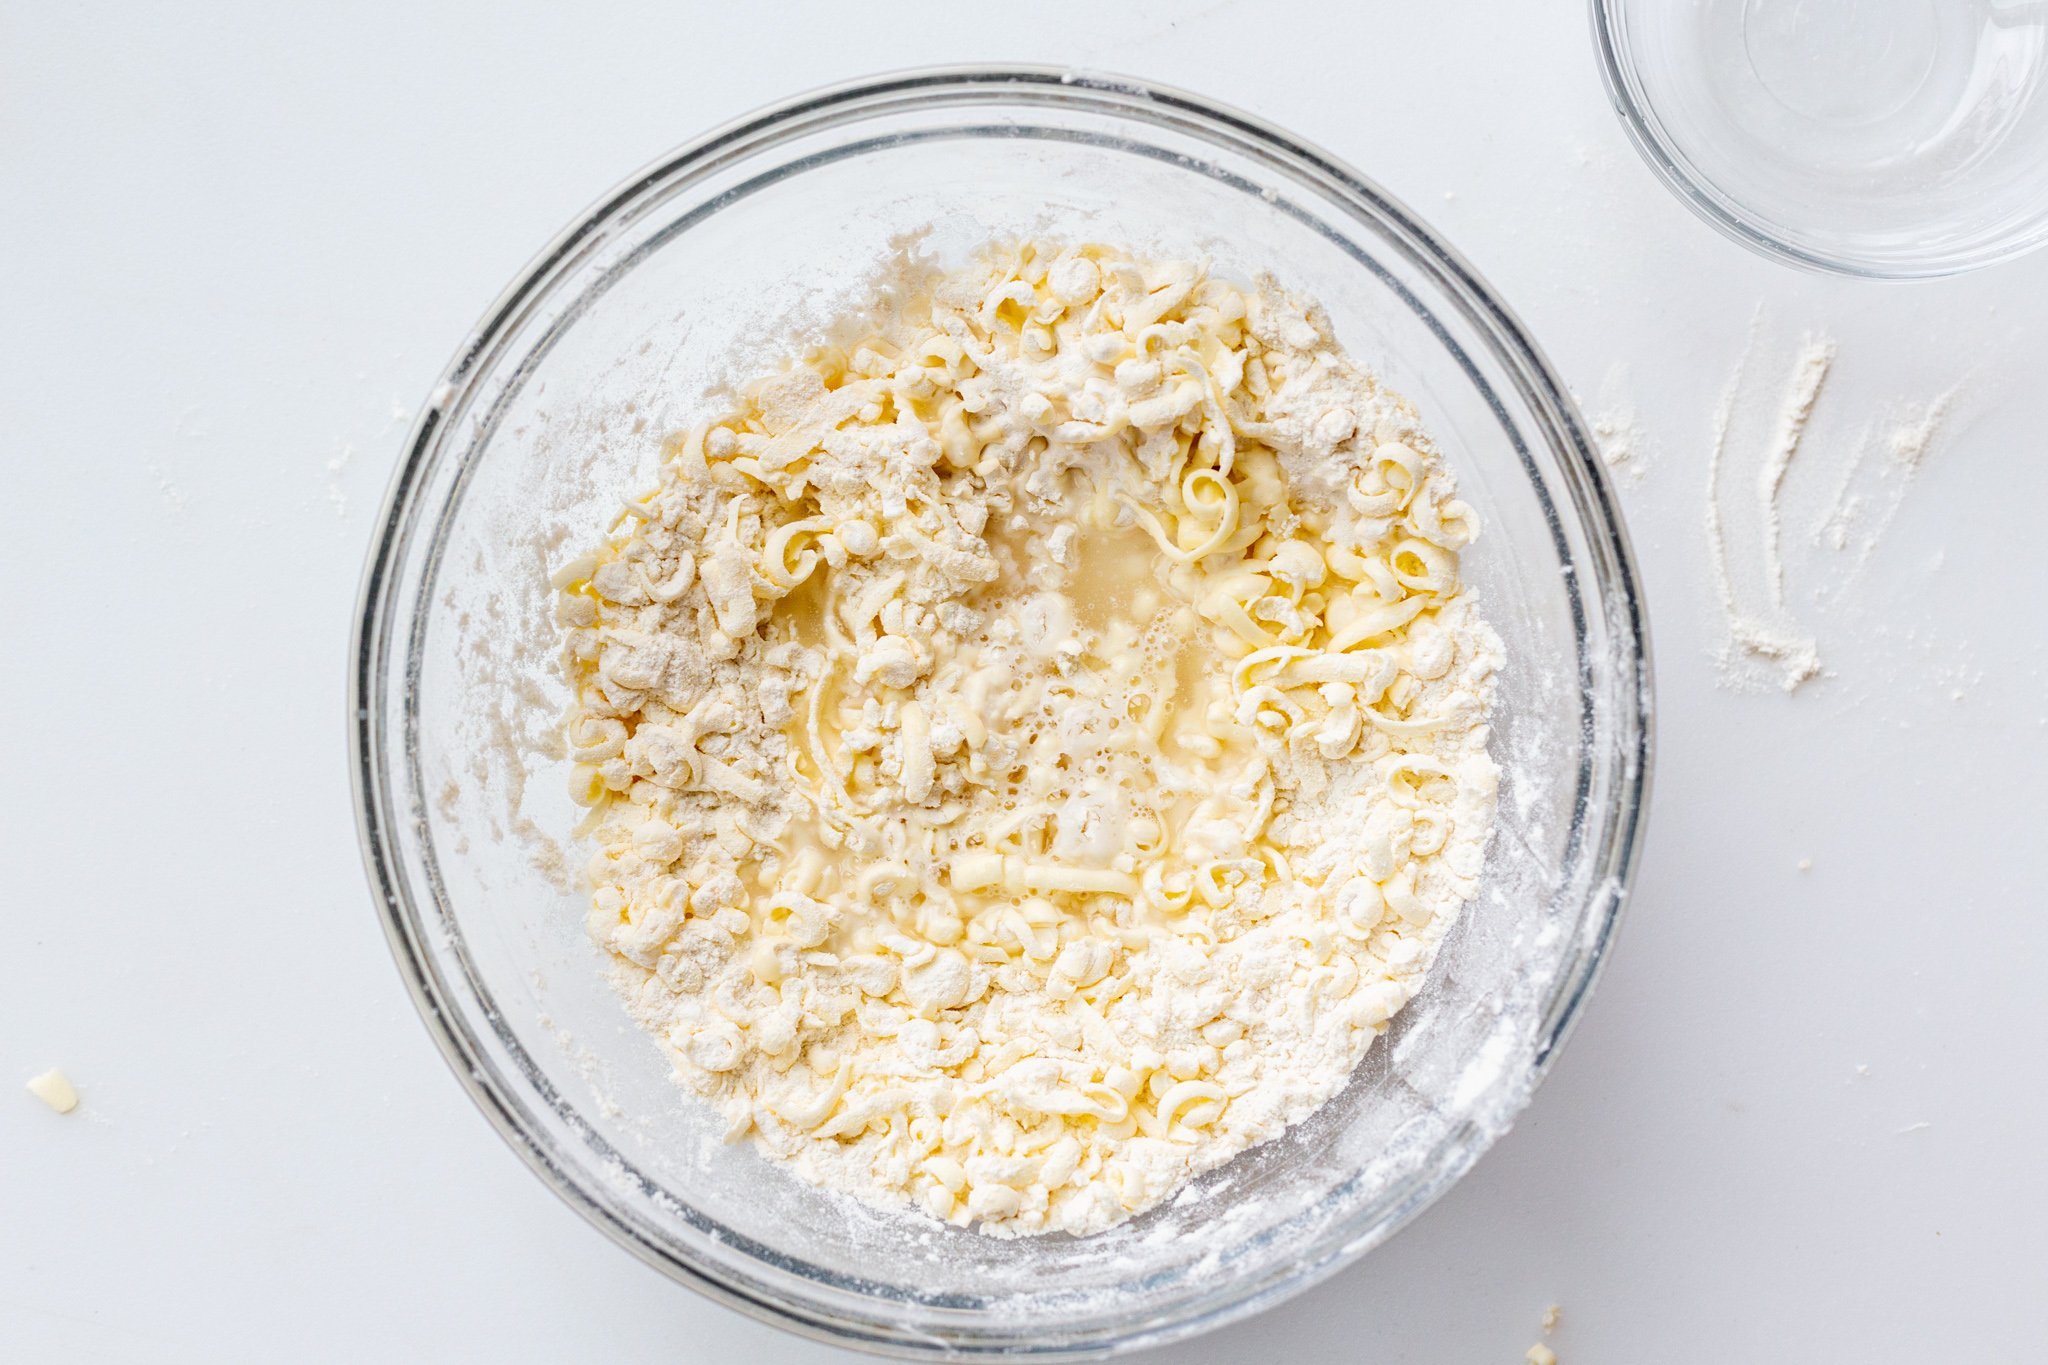
- Combine the dry ingredients: In a medium size bowl, whisk together the flour and salt.
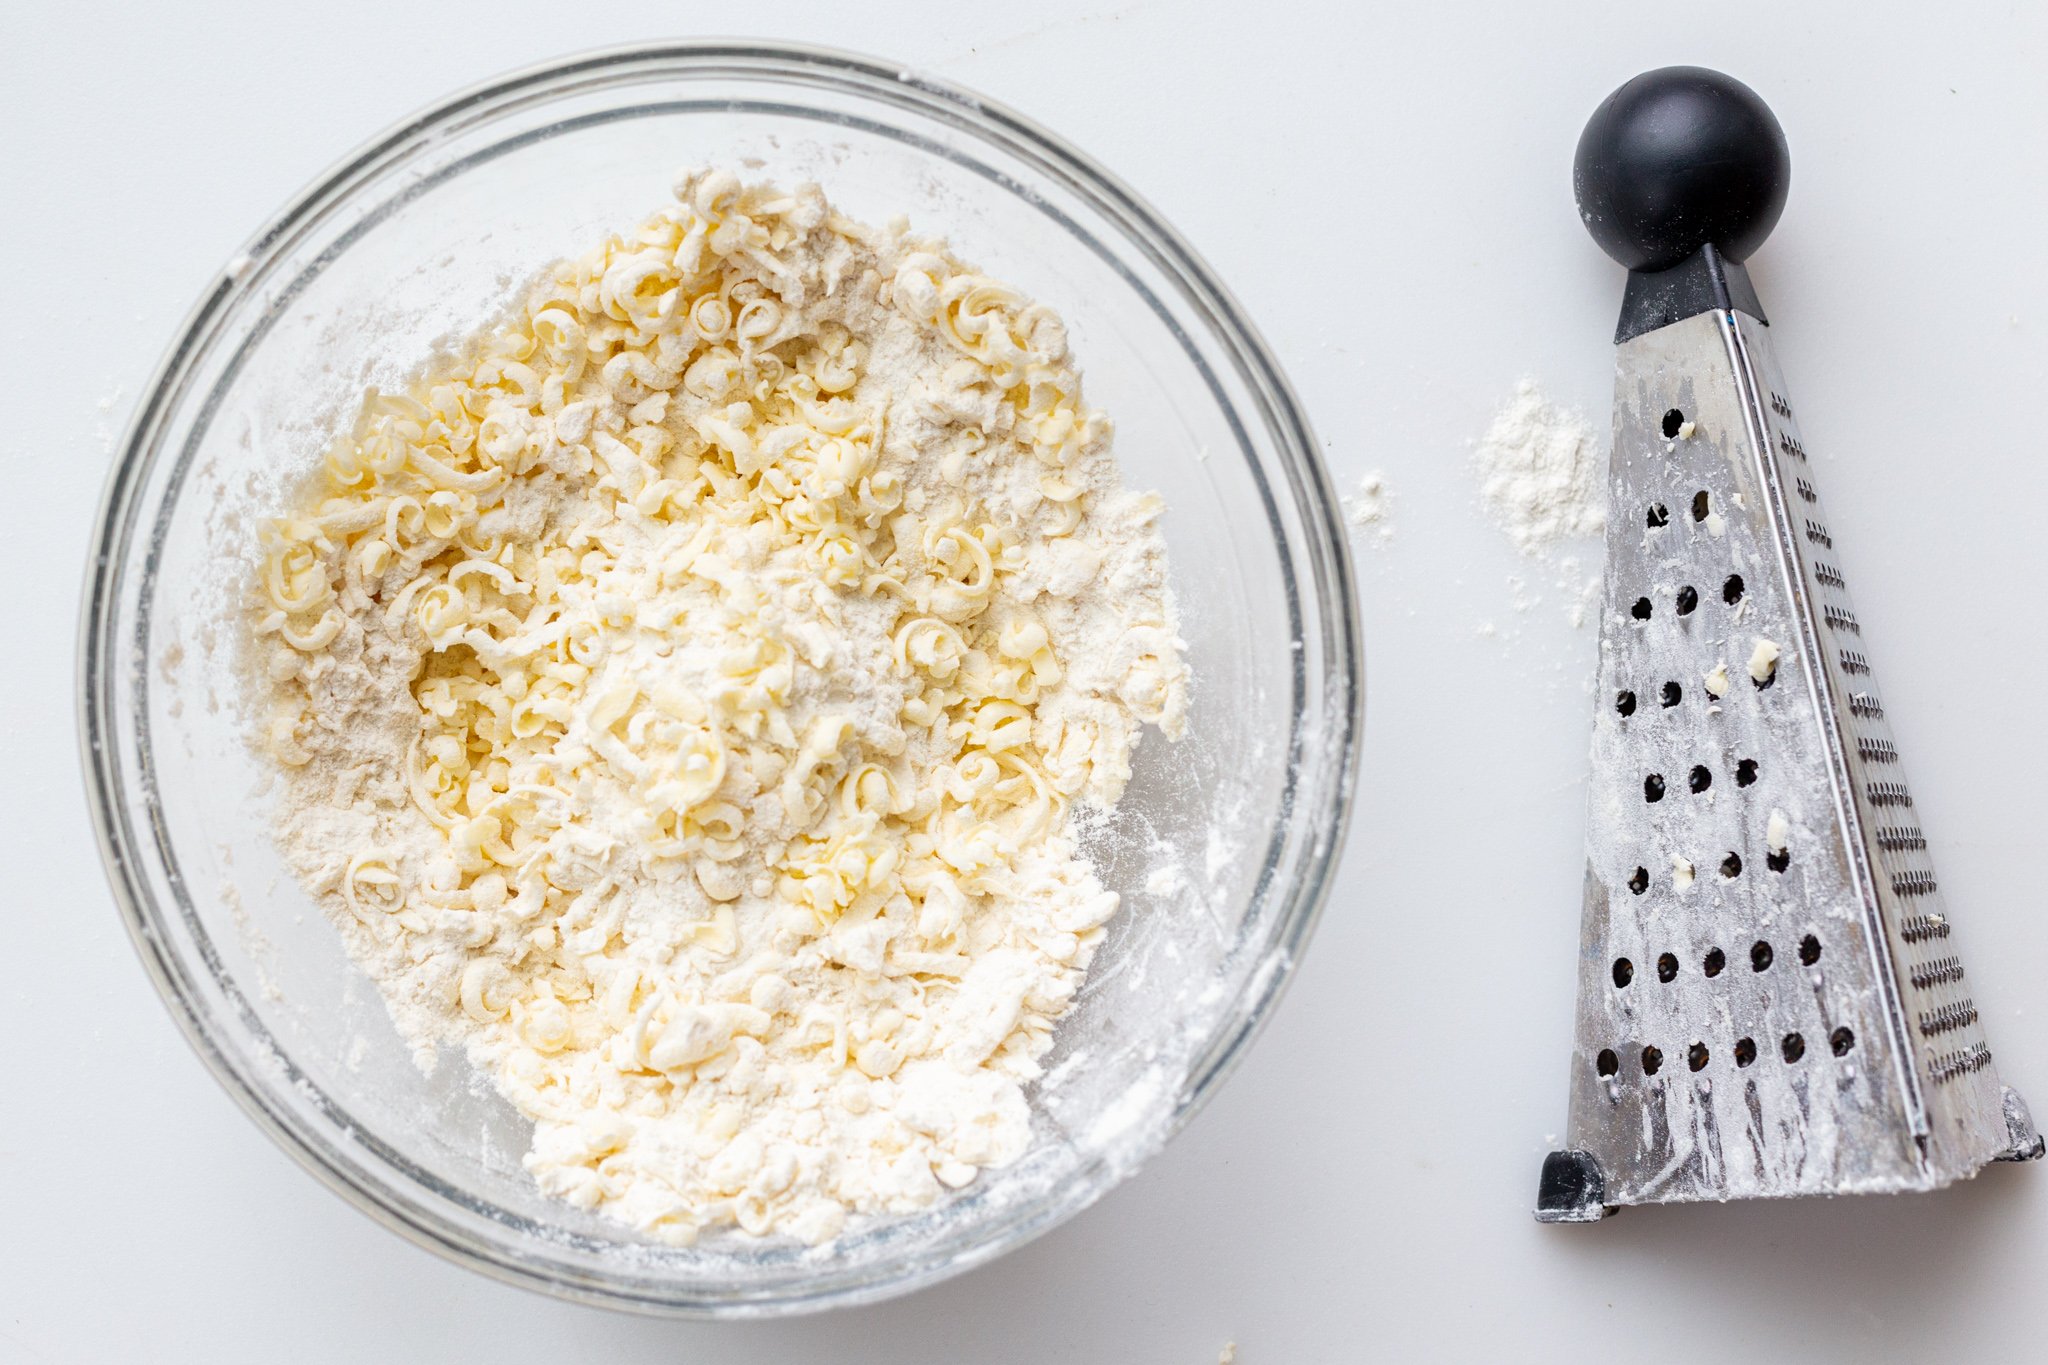
- Add the butter: Using a box grater, grate the frozen butter into the flour mixture. Using a spatula, frequently toss the butter in with the flour to prevent the butter from sticking. Or, mix the butter with the flour with a pastry cutter.
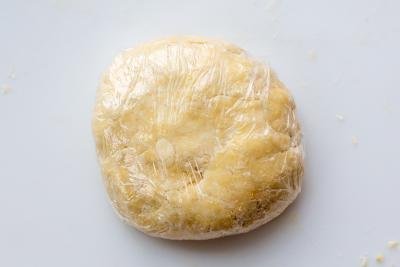
- Slowly pour in the water: Add the water in slowly, working the pie dough with the spatula or your hands just enough for it to all stick together. The dough will be hard.
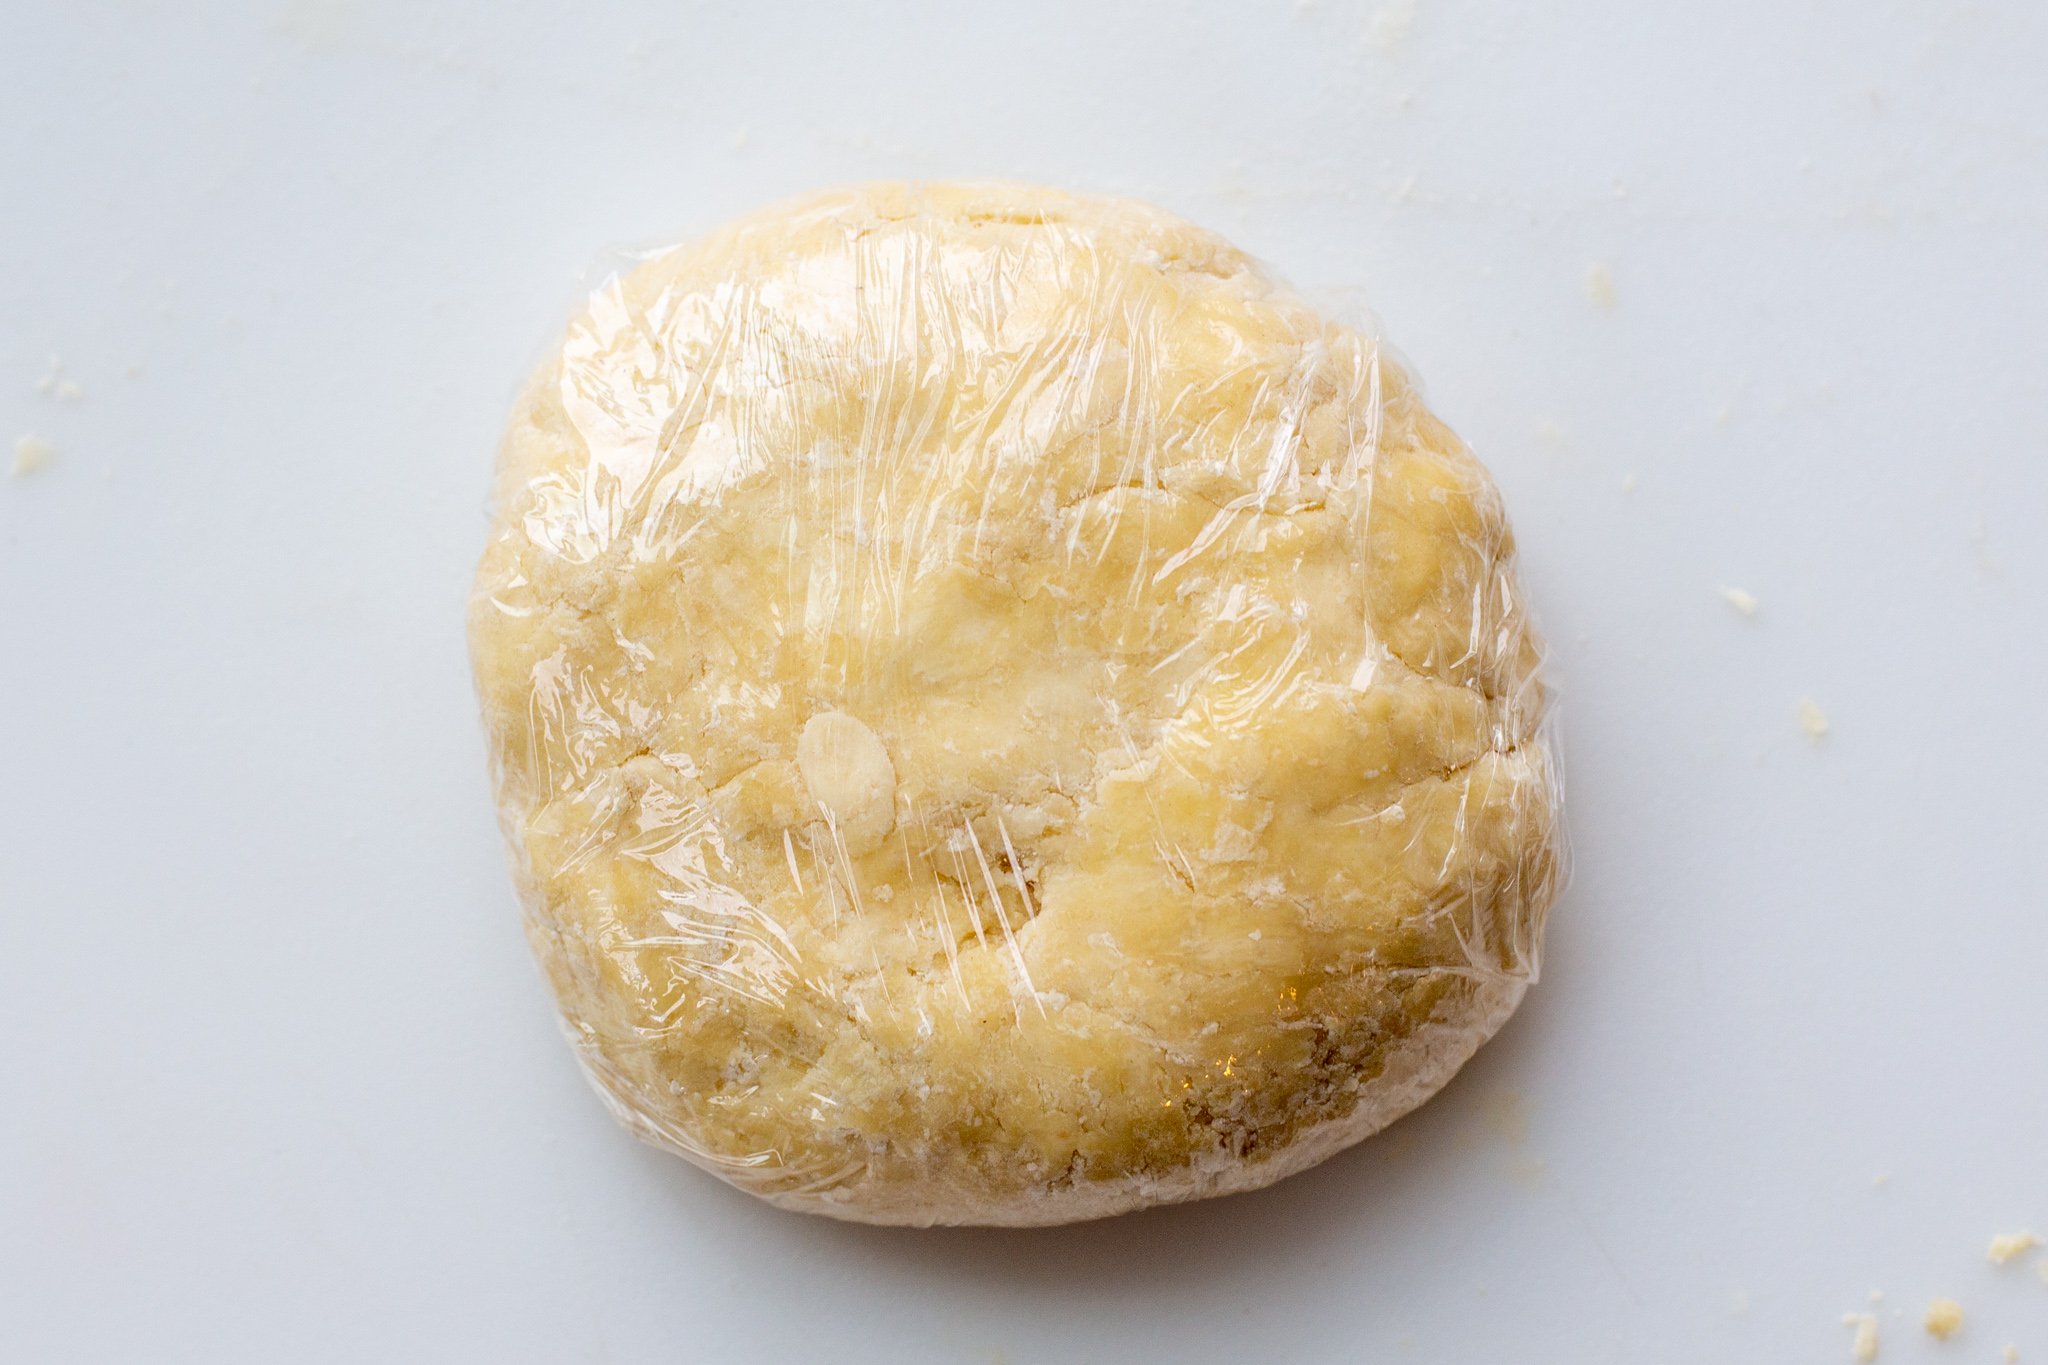
- Store the dough: Wrap the dough with plastic wrap and place it in the refrigerator for at least four hours, or overnight.
Hot tip: If you’re low on time and need to chill the dough faster, put it into the freezer for about 30 minutes.


Tips for the Best Pie Crust
Beyond using only four ingredients and following the recipe instructions, what else should you keep in mind when making this pie crust? We’ve got you covered with six tips to make it the BEST crust you’ve ever made.
- Use frozen, grated butter: Make sure you use not just “cold butter”, but frozen butter. Use a box grater to grate the frozen butter into little slivers. These slivers are the key to the flaky crust.
- Pour in ice-cold, filtered water: Since we want to keep the butter as cold as possible until the pie is in the oven, it’s important to use cold water as well. The colder the water, the less likely it is to melt the butter and affect the flakiness of the crust.
- Toss the butter as you grate it: While grating frozen butter into the flour, frequently toss the butter lightly in the flour mixture to prevent sticking and clumps.
- Opt for top-quality butter: Butter is king when making pie crust. Avoid skimping here, so purchase a high-quality European butter — the kind that has a beautiful golden hue to it.
Hot tip: Keep in mind, this recipe makes enough crust for a single crust pie in a 9-inch deep-dish pie pan. If you need more, double the recipe.
What’s Next? Roll Out the Crust & Bake!
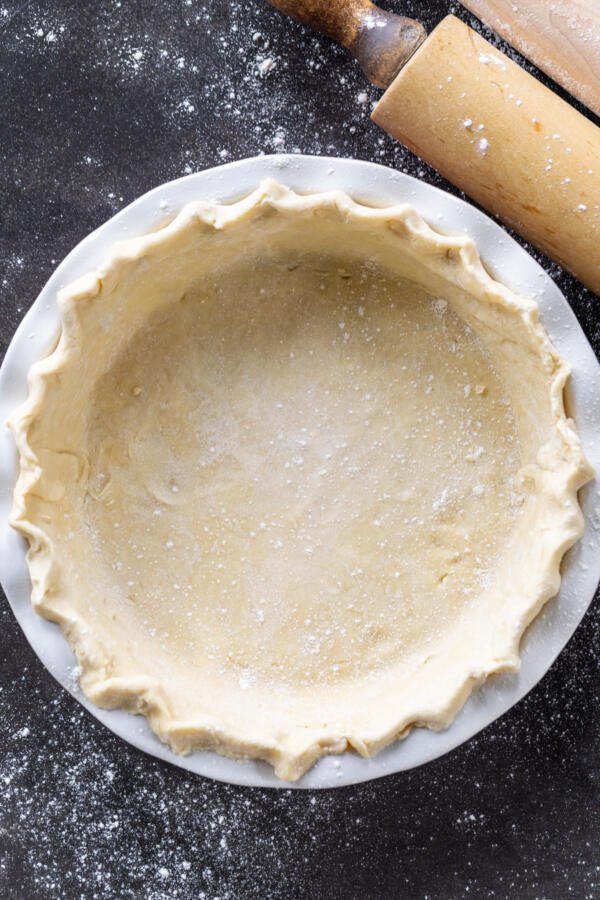
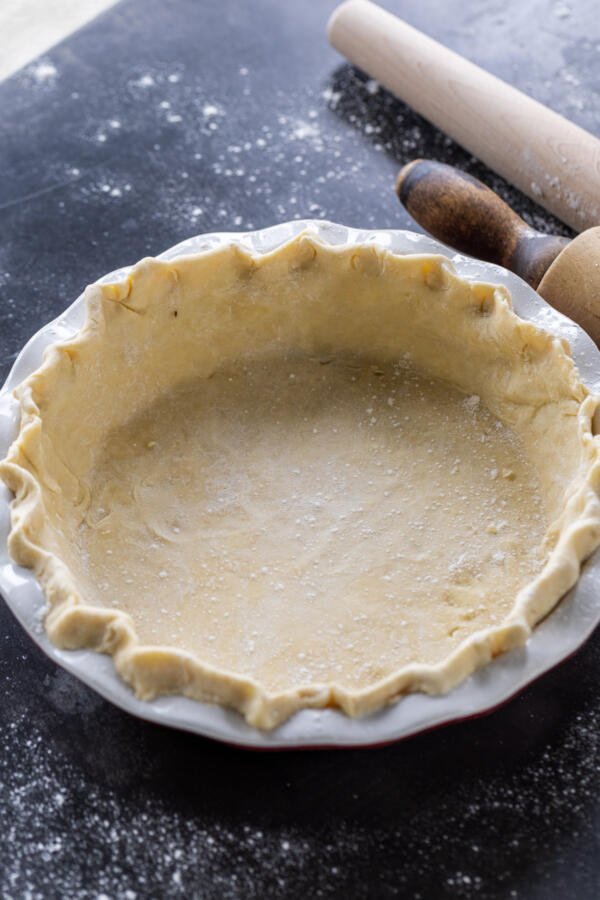
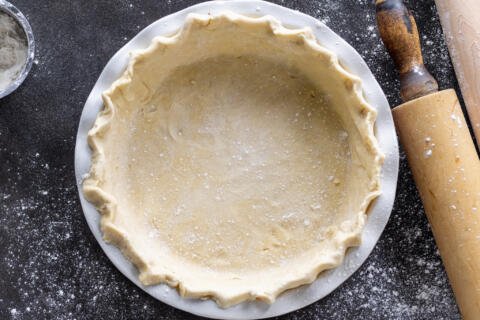
So, you’ve made the dough, wrapped it tightly in plastic wrap and let it set it the refrigerator for at least four hours. Now it’s time to get rolling. Don’t worry — it’s crazy easy! Before starting, make sure to flour the surface well. If you don’t, you’ll have an icky-sticky mess that will drive you nuts.
- Position the dough on the floured surface: Pull out the chilled dough from the fridge, then place it on a well-floured surface.
- Roll out the dough: Applying an even and gentle pressure with your rolling pin, flatten the dough from the center to edge. Be mindful not to tear the dough.
- Lift the dough: Using a dough scraper (or careful hands), lift the dough and turn it 90 degrees (make sure to re-flour the surface to prevent sticking).
- Repeat as needed: Repeat this process of rolling and turning your dough until it is as flat and even-textured as possible.
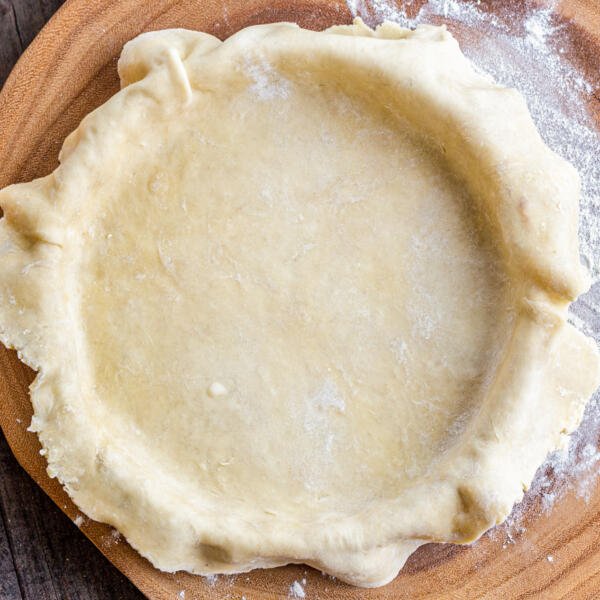
- Place in a 9-inch baking pan: Once the crust is flat and even, place it into the bottom of 9-inch pie pan. Leave a little bit of overhang to allow you to make a decorative edge (if desired).
Hot tip: While you’re rolling out the dough, you may notice chunks of butter fat. This is exactly what you want! These are the frozen butter shreds hard at work, making sure you get the perfect buttery flaky crust!
Blind Baking vs Par-Baking the Crust
Depending on the type of pie, you may need to blind bake or par bake your crust — so check the recipe first! Blind baking (or pre-baking) means to fully bake the crust before filling it, whereas par baking is partially baking the crust before filling.
When To Blind Bake or Par-Bake
Blind bake your pie crust when making a pie whose filling doesn’t require much (if any) baking — such as banana cream pies. On the other hand, par bake (partial bake) the crust when making pies with pumpkin, custard, and/or pecans.
How To Blind and Par-Bake
The process to blind or par-bake the crust begins the same way. For par-baking, remove the crust after about 15-20 minutes. However, to blind bake (fully bake), keep the pie crust in the oven until the edges are golden brown and the bottom is very dry.
- Place pie dough into the pan: Begin with the raw pie crust nestled tight into the baking pan.
- Pierce the dough: Take a fork and prick the bottom and sides of the pie dough to keep the dough from puffing up too much while it bakes.
- Chill the pie dough: Place the pie crust back in the fridge for 10-15 minutes to firm up the butter again. This helps the gluten relax and prevents the crust from shrinking.
- Put weighted parchment paper into the empty shell: Place a sheet of crumpled parchment paper into the empty shell. Fill the parchment paper with these pie weights or dried beans and rice (just a reminder— don’t try to eat them afterwards!).
- Bake the pie per recipe instructions: Preheat the oven to the temperature as specified by the recipe instructions. Usually, this is at or around 350°F-375°F. Then, bake the crust.
- Remove the weights: About 15-20 minutes short of fully baking, remove the weights from the pie crust and return the pie to the oven. Continue baking a few minutes for a par-baked crust, or longer for a fully baked crust.
Storing
Whether you made one or two pie dough balls or you’ve done the next step and baked them, we have you covered on ways to safely store both of these.
Pie Crust Dough Ball
- Refrigerator: To store for up to a week, place the dough ball wrapped in plastic wrap into the refrigerator. It is better to store the dough before it is rolled out to keep it from drying out.
- Freezer: To store for up to six months, wrap the dough extremely tightly in plastic wrap and place it into the freezer. When ready to use, thaw in the refrigerator until you’re able to roll it out.
Baked Crust
- Refrigerator: To store a baked crust for up to a week, tightly (but carefully) wrap the crust with plastic wrap and place it into the fridge. Be careful that other items in the fridge do not put pressure on and crack the crust.
- Freezer: To store a baked crust for up to a month, wrap the crust tightly with plastic wrap and place it into the freezer. According to recipe instructions, you may not need to thaw the frozen pie crust before using.
FAQ
What’s the difference between using lard, butter, or shortening in pies?
Lard, butter, and shortening are three common fats used in pie crust making. Per most bakers, butter produces the best tasting pie crusts that have a flaky texture, while shortening (and lard) produce less tasty flavor.
Can I use a food processor to make the dough?
Some recipes do instruct to pulse the dough in a food processor to make pie crust dough, but it is hard to get the best texture this way. Also, using a food processor means more dishes to wash!
What do I do if the pie crust puffed up?
If at any point the pie crust puffs up, take a fork and poke through any bubbles.
Why is my pie crust shrinking?
Pie crust may shrink if the pie dough was overworked or if the pie is being baked at too high of a temperature. Mix the dough just until just enough for everything to be well incorporated and sticking together, then bake at about 350°F or per recipe instructions.
Where To Use Your Flaky Pie Crust
From savory pies to sweet desserts and everything in-between, this flaky crust is the perfect choice.
- Asparagus Quiche — Made with asparagus, feta cheese, and mozzarella
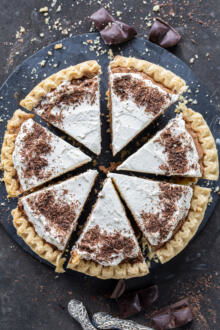
- French Silk Pie — Decadent chocolate pie
- Plum Pie — Full of fresh plums
- Peach Galette – Round/freeform cake with a tasty peach filling
- Breakfast Quiche – Filled with mushrooms, bacon, eggs, and cheese
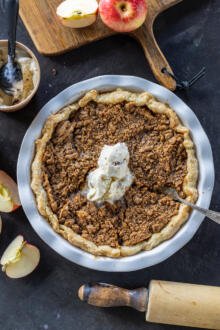
- Dutch Apple Pie – A holiday staple filled with spiced apples and a delicious crumb topping
Recipe
Ingredients
Instructions
- Prepare the ingredients for the recipe.
- Combine the flour together with salt. Using a grater, grate the frozen butter into the flour mixture, tossing with a spatula occasionally to prevent the butter from sticking together.

- Add water to the ingredients, then work the dough with your hands just enough for it all to stick together. The dough will turn out hard.
- Seal tightly with plastic wrap and refrigerate for at least four hours, or overnight. This recipe yields one pie crust.


I only have regular Irish butter. Not unsalted. Ok to use that?
Yes, that's totally fine. Enjoy!
What would happen if I pressed the dough ingredients into a pie pan instead of putting it in the refrigerator and rolling it out?
Hi Wendy, Chilling the dough results in a flakier crust. If you're pressed on time, I would recommend freezing the dough for 30 minutes or so before using it. I hope this help!
First time ever making my own pie crust, and it was absolutely the best I've ever eaten. Also best quiche ever! I'm using this always. Next is baked chicken pie! Recommend this to all!!
Michael, this literally made my day. I am so happy to see this feedback. Glad that you got to try it.
You mention that this recipe is for a Single Pie Crust. Is it for a 9" or 10" pie? If it is for a Regular 9", how much do I increase it for to do a Deep Dish 9"? Or for a Regular 10" or 10" Deep Dish?
Thank you in advance for sharing your AMAZING tips and recipes.
Hey Robbie, this recipe will make enough for a deep dish. Hope this helps. Thanks
Thank you Natalya for the quick response; is it for a 9" Deep Dish pie?
Yes, it is. Thanks for reaching out!
Is this recipe for one piecrust just for the bottom of the pie or will it cover the top or for lattice?
Hi Rodney! This recipe makes a pie crust that's perfect for a 9 inch deep pan. If you want to have enough for the lattice, I would suggest doubling the recipe.
I don't see in the instructions on how long to bake & what temperature 🥴
Hi Stella- that is correct. We left that information out because you can use this dough for any pie recipe- some call for pre-baking the crust and some do not. Hope this makes sense 🙂
Hi! This is my first time making a pie crust. I tried a different recipe and it didn't go as well as I hoped. Iam not sure where I messed up at but my whole entire dish was ruined. I was attempting to make homemade chicken pot pie. I was wondering if you could help me with this. I am wondering if I can use this recipe to make a "double" crust? Like have a crust on the bottom of the pie dish and then put one on top? Also since stick butter is used for this (forgive me for asking a stupid question) how many sticks would i use for 1/2 cup? I also use Land o Lakes stick butter. I hope you are able to help me out. Thanks!
Hi Jattra! You can use this pie crust recipe for ANY pie- sweet or savory. It would work great with chicken pot pie, but you will need to double the recipe because my recipe only yields one pie crust.
As for the butter- so 1/2 cup of butter is actually 1 stick of butter!
1 stick of butter = 1/2 cup = 4oz = 8tbsp (all these measurements are usually on the butter wrapper if you forget). Now you know! 😀
Have you pre-baked this crust before? If so, have you used foil and pie weights?
Hey Joan, yes, I would suggest prebaking for most recipes. I do use parchment paper and pie weights. Hope this helps.
Will this work with pumpkin pie?
Hi Kathleen! 100%.This pie crust is great for pumpkin pie. Hope you love it and thanks for reaching out.
Thanks! Trying this years Thanksgiving…I’ll let you know 🙂
Wooohooo! Amazing, Kathleen. I'm craving pie now lol...
I've been looking for a reliable pie crust recipe! Thank you!!
Hey Alisha, so glad you found it. Keep me posted on how you like it! 🙂
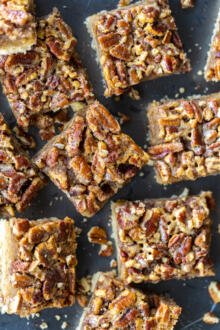
I love the flavor of the butter instead of shortening. It was great for our pecan pie!
Hey Kara, good quality butter makes all the difference. I am so happy you loved it with a pecan pie! That sounds amazing.
Honestly, pie crust can make or break a pie, and this pie crust is amazing! I loved how easy it was to make! I just found my new go to crust.
Julie, thank you for sharing the most amazing review. I am so glad you loved this recipe!
Pie is all about the crust for me. If it's not good then it ruins the whole thing. This one turned out so great! Much more simple than I would have thought too. Thanks!
Hey Krissy, I am so glad you love this recipe. Thanks for sharing your feedback!
Love this crust! Made it once, now on to my second one in less than a week. Thanks for this recipe!
That is so cool! What kind of pies are you making?
could i freeze this dough? Or could i keep in fridge for 48 hours and then use it?
Yes, totally. Sometimes I make a lot of the dough, you can keep it in a fridge for up to a week.
perfect crust and easy to make!
So awesome!!
What if you use the dough right away?
It should be fine but colder dough is always better.
The crust was easy to make, it turned out tender, buttery and flaky, but in my case at least half of the water wasn't needed, so my suggestion is to mention that you don't need to pour the whole amount of water in the dough, but rather add it gradually. It is worth mentioning that this crust doesn't work with sweet fillings (I've made a fresh strawberry tart and despite the sweetness of all other products, it didn't work well). And finally the crust made of this dough is yummy, but it doesn't hold shape very well (like some other variations - patee sucree, etc). All in all very good recipe, will make it again with savory filling.
Hi Elena, thank you for the tip on this recipe. When typing things up its hard to think of every detail. When people give feedback, it really helps to look at other prospective. I'll definitely add notes to the recipe.
I would think you would do all the research on a recipe you post. It’s really not up to us to find your errors. You should be doing this before you post so we don’t waste our time and ingredients.
Duhhhhhh. It’s not shameful to post the downside of your recipe.
Hi LJ, I share what works for me and my family, but everyone is entitled to their preferences. I don't view it as an error when someone shares what tweaks they made to a recipe. I like learning what works for others or what they prefer, and sometimes add that to my recipe notes. There is usually more than one "right" way when it comes to baking and cooking. 😉
Natalya, thanks! I liked it even more the next day - the crust didn't soak and stayed crispy and light which is just great. So, next time I'll just add a couple of tablespoons of confectionary sugar to the dough to make a sweet variation. Have you tried something like this?
I haven't tried that because we usually use sweet filling. But I am sure that the recipe would work just fine.
I use grated butter in my biscuit recipe ever since I tried it. It makes an incredible difference in the ease of mixing the biscuits and their flakiness.
Cheese grater! What an excellent idea! I just made pie a week ago and had the worst time trying to figure out how to cut butter into small little cubes. Thanks 😀
Galina
I love the cheese grater too. I will never go back to cutting the butter into cubes.
Hint …I found when using the frozen butter… roll it in the flour mixture and grate small amounts at a time. It doesn’t stick so much to the grater. I hand mix the butter and flour as I go. Then I add the egg mixture and combine. This makes mixing so easy.
Hi Pam, this is such an amazing tip. I like to freeze my butter as well. It really helps. Thank you for sharing your feedback!
I cant take the credit for the idea, came from Martha Stewart 🙂 but now you can also find it useful.