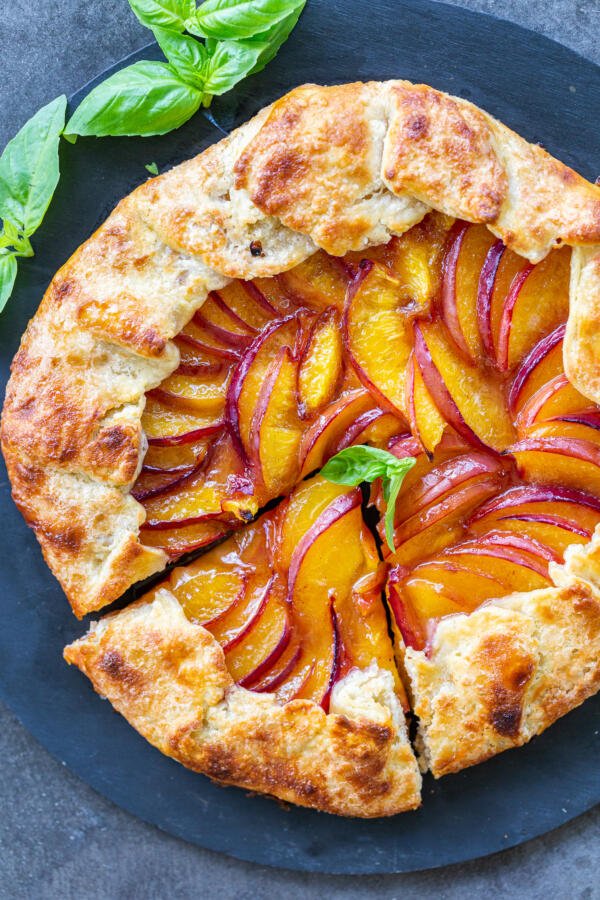
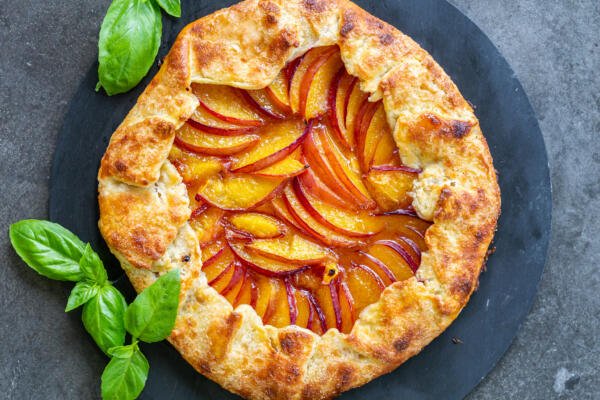
This peach galette is bursting at the seams with juicy sliced peaches and syrupy cinnamon sugar. It pairs perfectly with a heaping scoop of vanilla ice cream or fresh whipped cream!
Ahhhhhhh, peach galettes! If you don’t understand the beauty and simplicity of these free-form pies yet, get ready to become addicted to how delicious and forgiving they are. Plus – they’re so easy to customize (which is super important for me and my family!).
Before I knew the name “galette”, I called this rustic peach pie my “lazy version peach pie”. I often lacked the energy and motivation to make the top crust of a pie, so I made it easy on myself and just made a bottom crust and topped it with peaches. Little did I know I was already making an easy peach galette before I even knew it!
This rustic peach galette is teeming with juicy peaches, cinnamon, and sugar. Unlike pies and tarts, galettes are baked directly on baking sheets and don’t require any difficult shaping or technique. For those of you out there who don’t prefer to bake (I’m right there with you!), this dessert is accessible, fun to make, and no pressure! So, strap on your apron and let’s get started!
What is a Galette?
“Galette” is a French term that describes various types of flat round or freeform crusty cakes with sweet or savory fillings. While some galettes are made with a puff pastry dough base, others (like this peach galette) are made with a simple, buttery pastry crust. I personally enjoy cooking more than baking, so when it comes to baking, I look for easy desserts — and galettes are the ultimate “less is more” dessert. Below, find an overview of the flavor, texture, and cooking time.
- Flavor: The filling of these peach galettes is a little sweet from the peaches and a little spicy from the cinnamon.
- Texture: The filling is soft with a little bite, while the crust is flakey and irresistible.
- Cooking Time: From prep to finish, these galettes take about 2 hours to make.
Note: This recipe makes two mini peach galettes. If you prefer to make one large galette, simply skip the step of separating the dough into two equal pieces and follow the recipe as instructed.
Peach Galette Video
How to Make a Rustic Peach Galette
This “lazy peach pie” is almost all I make for dessert in the summer months. It’s that delicious and so crazy easy that I simply can’t stop… and won’t stop! Making a rustic peach galette from scratch only requires a handful of wholesome ingredients and a few, simple steps.
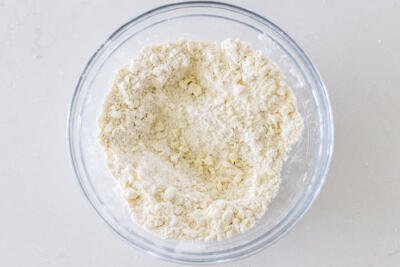
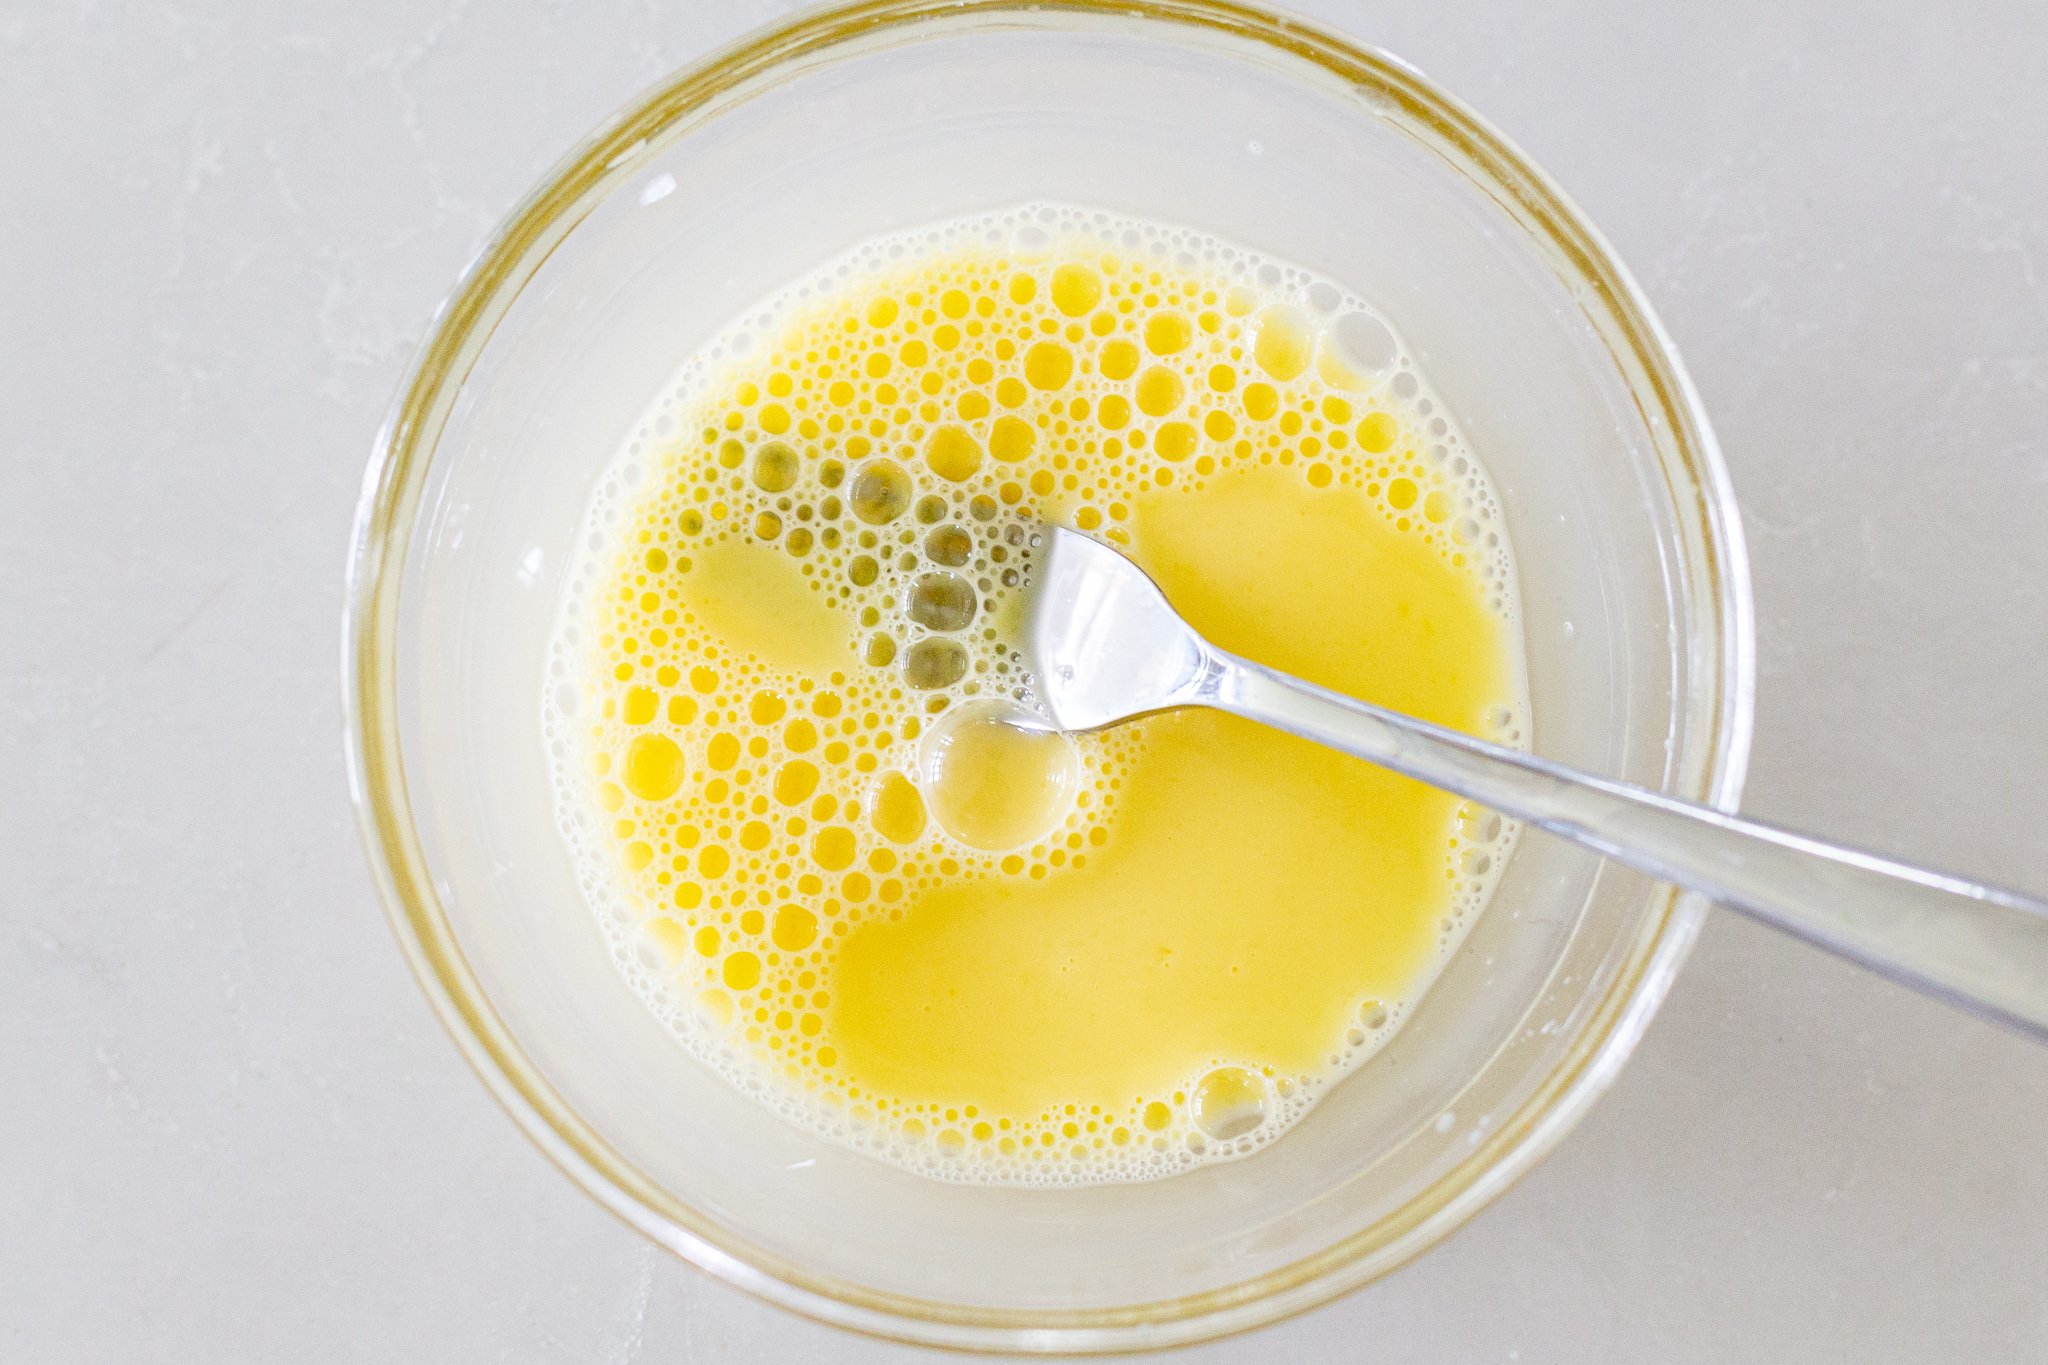
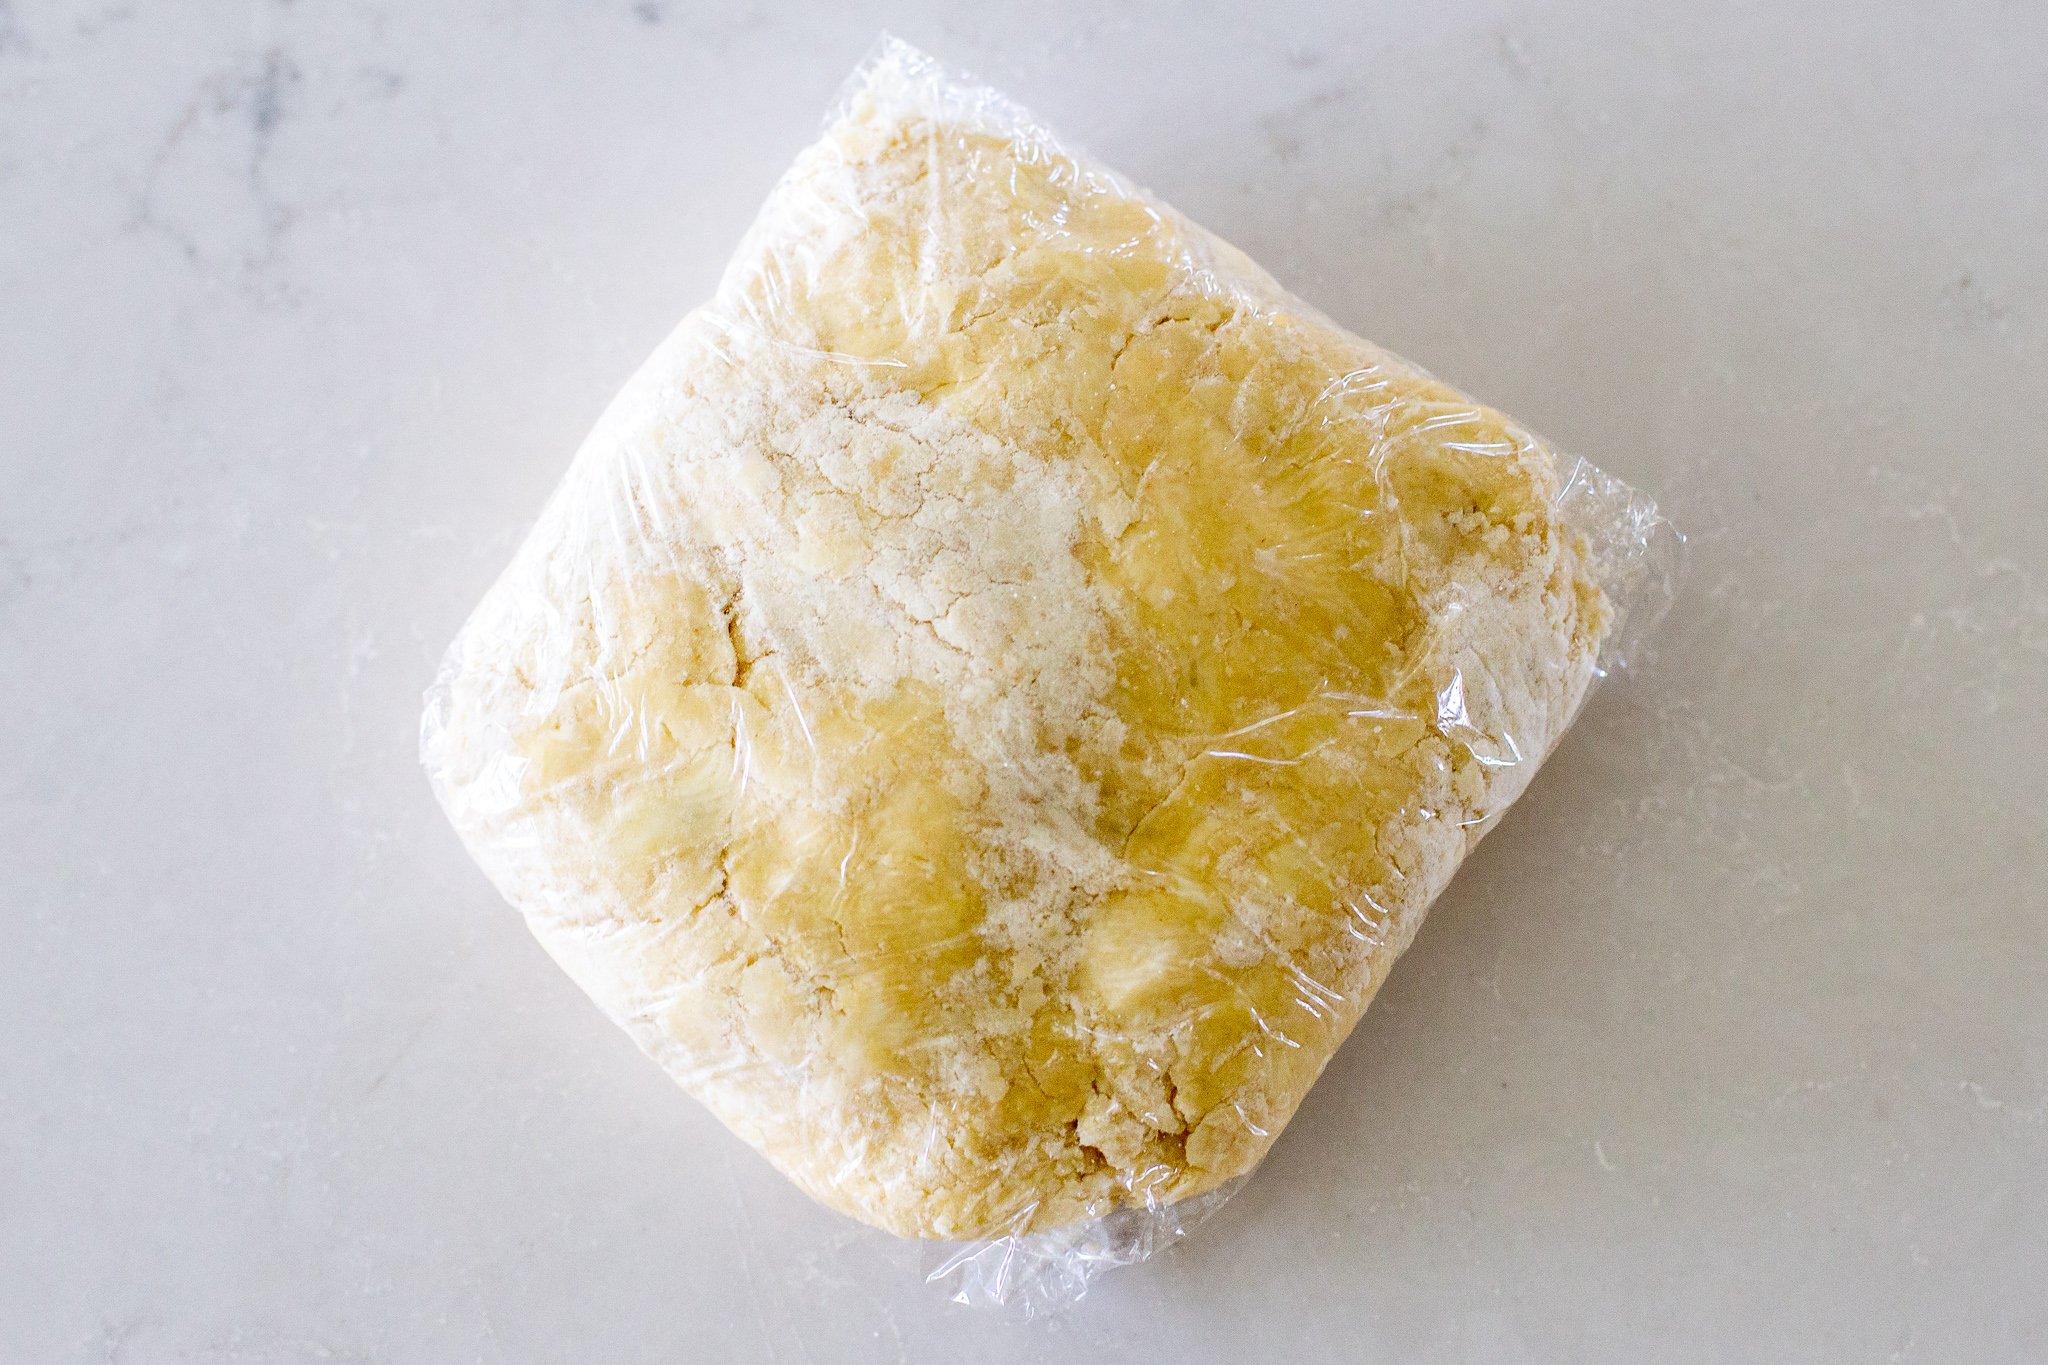
- Make the pastry dough: Combine the flour and salt in a small bowl and grate the cold butter into the mixture. Stir until combined. In a separate bowl, whisk together the egg, water, and vinegar. Combine the wet and dry ingredients together to form the dough. Roll dough into a ball, wrap it in plastic wrap, and refrigerate for at least 30 minutes.
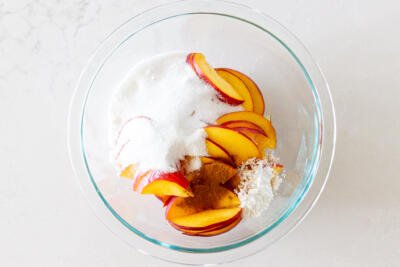
- Make the galette filling: Slice the peaches thinly and toss them with sugar, corn starch, and cinnamon in a bowl. Toss until well coated.
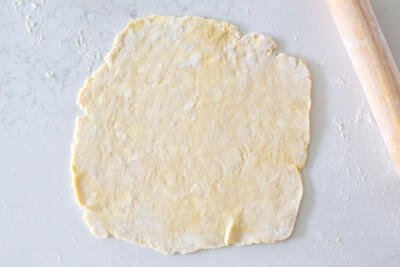
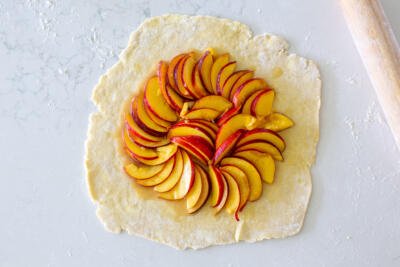
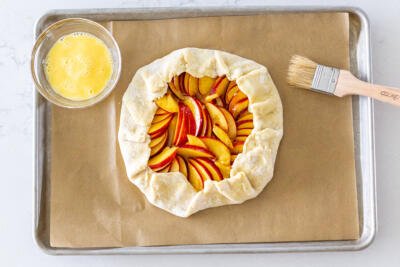
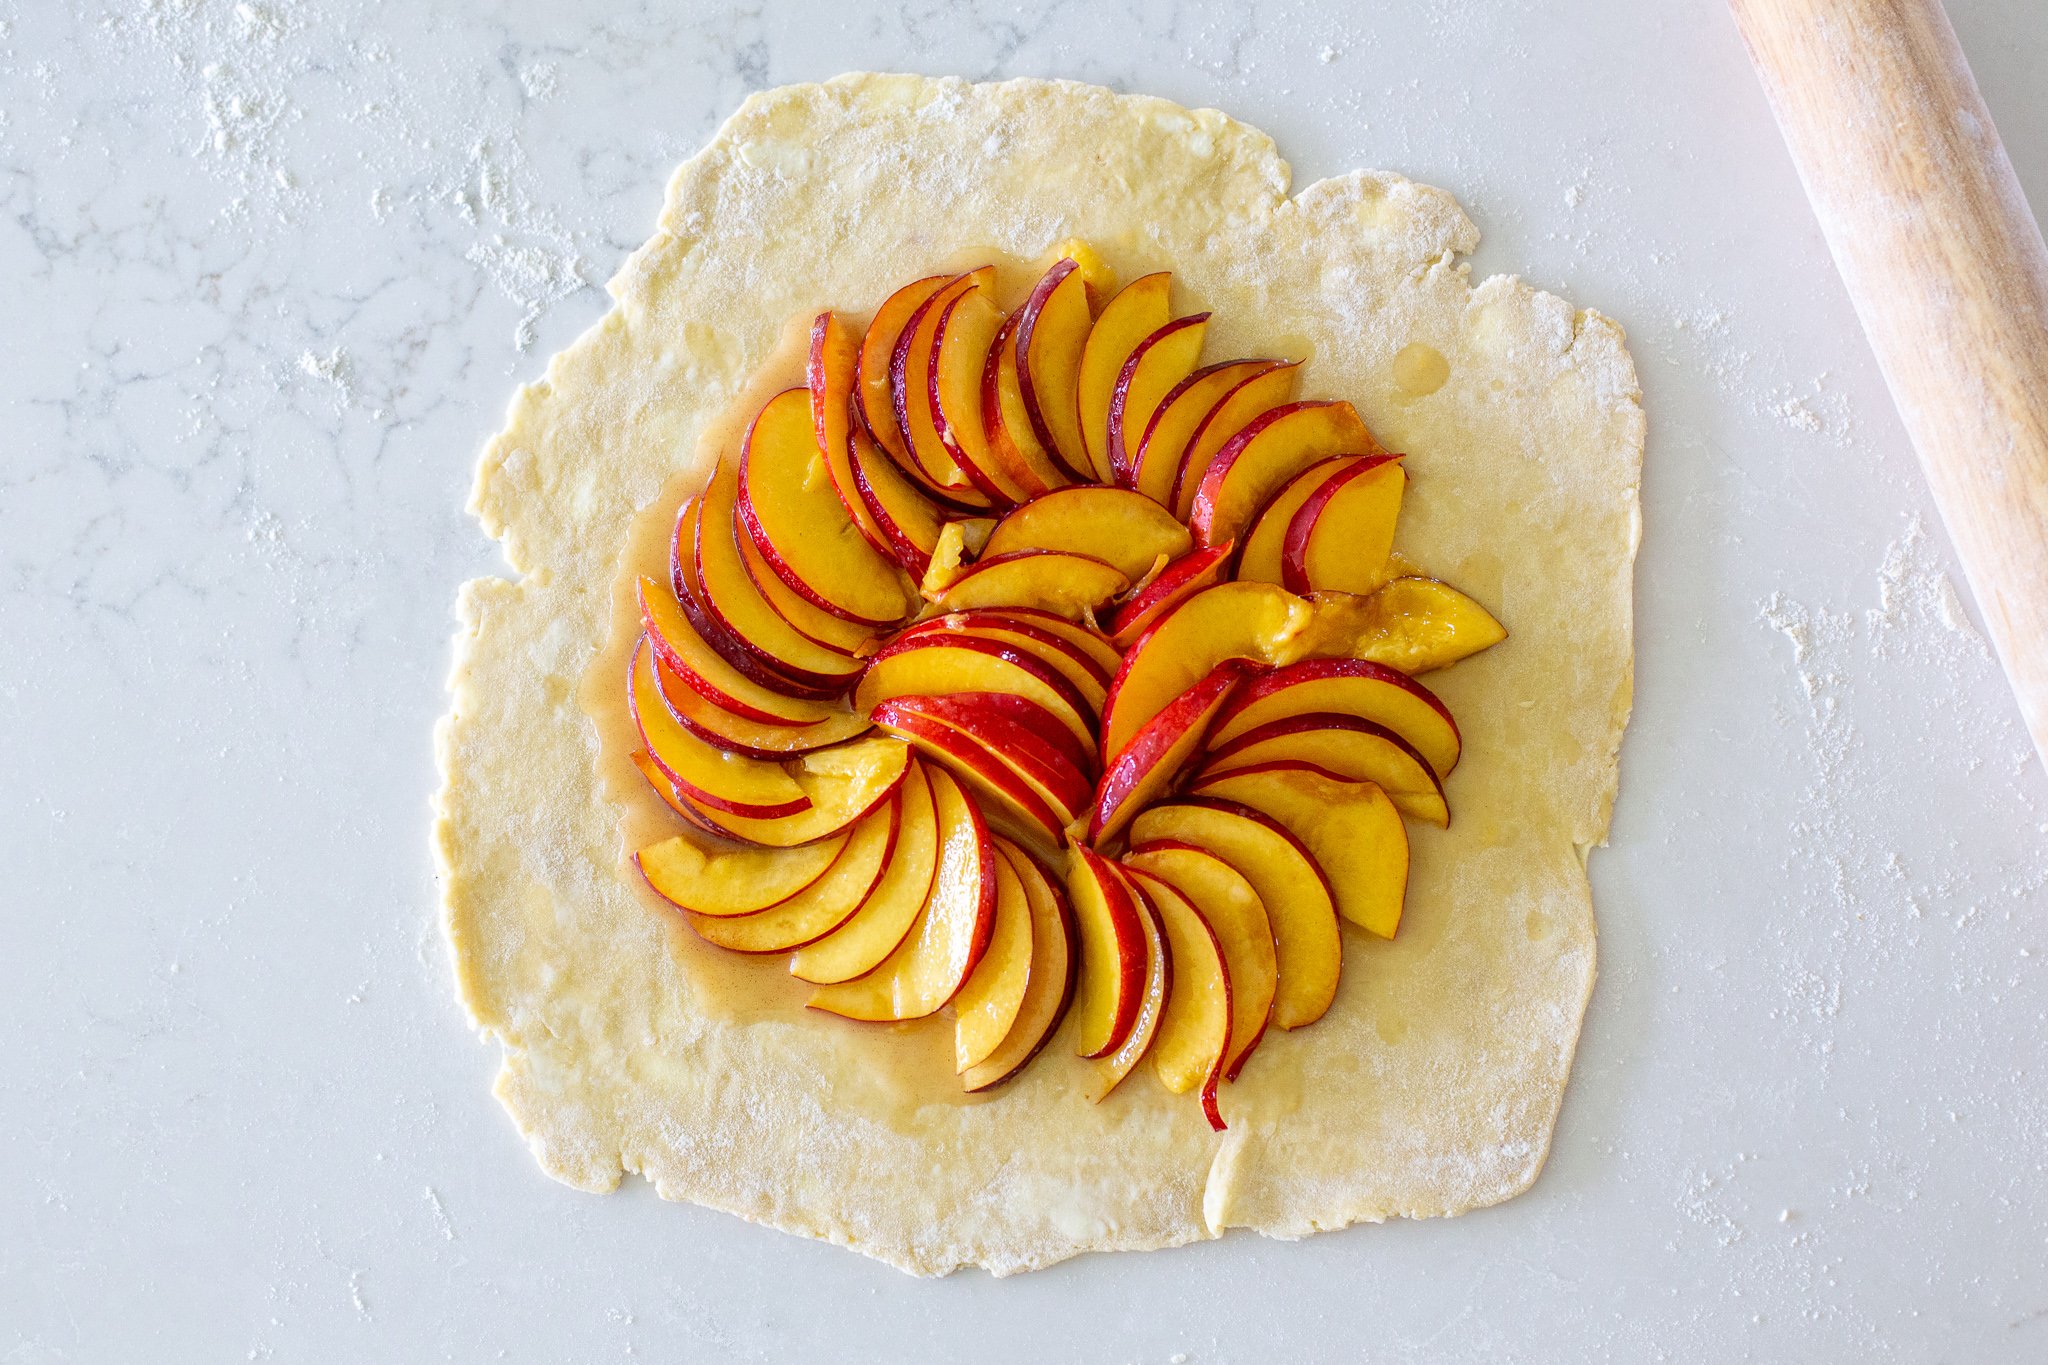
- Assemble the galette: Divide the dough into two equal pieces for two smaller galettes or keep the dough intact for one large galette. Form the dough into a roughly circular shape on a lightly floured surface using a rolling pin. Arrange the peach slices in circular layers, leaving enough space on the outer edges to fold the dough over and create a small crust. Whisk the eggs together and brush the egg wash all over the crust. Finish with a sprinkling of sugar.
- Bake the galette: Bake the galette at 425°F for 20 minutes or until it turns golden brown. Enjoy as-is, or topped with ice cream or whipped cream!
Hot Tip: Use extra coarse sugar to sprinkle on the dough for a professional, bakery-worthy galette.


Tips for Making a Peach Galette
I’ve made galettes well over 50 times by now, so here are my collection of tips tips and tricks to ensure you make the best rustic peach galette on the planet.
- Slice the peaches evenly. The more even the peach slices, the more even they will bake.
- Let the dough set for at least 30 minutes. Allow the dough time to set in the refrigerator for at least 30 minutes. You can even make it several days ahead of time if you want to prep ahead!
- Use fresh peaches versus frozen. Frozen peaches release a ton of moisture during the baking process, making your galette soggy. Alternatively, you can use canned peaches, but make sure to drain all the extra liquid out first (or it’ll be too soggy).
- Avoid overstuffing your galette. Resist stuffing your galette with too many peaches. You want to leave enough space at the edges so you can fold the dough over and create a nice crust.
- Use very cold water and butter for the crust. The colder the butter and water, the flakier the crust will be.
- Peel extra fuzzy peach skin. If the peach skin you are using is extra fuzzy, feel free to peel it.
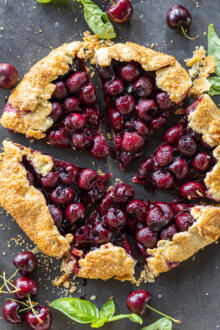
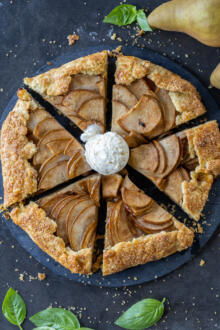
Want to swap out the peaches? This galette recipe will work with almost any fruit. We’ve made apple galettes, strawberry galettes, and blueberry galettes.
Serving Ideas
This rustic galette can be served for breakfast or dessert. In fact, it is my go-to dessert when hosting! Pair it with a piping hot cup of coffee or tea. If you are into toppings, pop on a scoop of vanilla ice cream or a heaping pile of fresh whipped cream. Galettes are also an awesome addition to an elaborate brunch spread.
Storing & Reheating Guide
This recipe makes about 12 servings, so in the case you have leftovers, you’re in luck. Check out our storing and reheating guidelines to enjoy the pie for days to come!
- Refrigerator: Store leftover galette in an airtight container in the refrigerator for up to five days. Be careful not to stack individual slices to prevent sticking.
- Freezer: We recommend freezing the galette before baking rather than after. To freeze, place it on a baking sheet uncovered in the freezer for an hour. Then, wrap it in plastic, transfer it to a freezer bag or airtight container, label it with the date, and freeze it for up to three months. Bake as directed (keep in mind, frozen galette may need a bit more time to bake fully).
- Reheating: To reheat the galette, place it in the oven for about 20-30 minutes at 425°F, or until the center is bubbly and the crust is crispy.
A Few More Yummy Pies
- Dutch Apple Pie – Spiced apples with a delicious crumb topping
- Plum Pie – Popular Ukrainian desert
- Quick Apple Pies – Mini puff pastry pies
Recipe

Instructions
Pastry Crust
- Combine the flour and salt. Cut the butter directly into the flour. Stir to combine.
- In a separate bowl, whisk the egg, water, and vinegar.

- Combine all the dough ingredients together. If the dough is too dry, add a little water just until it sticks. Wrap the dough in plastic wrap and refrigerate for at least 30 minutes.


Pie Filling
- Slice peaches into thin slices. Place them into a bowl and sprinkle them with sugar, corn starch, and cinnamon. Toss until well coated.

Assembling the Pie
- Divide dough into two equal pieces or keep it in one piece for a large galette. Roll out each piece into a circular shape (it doesn't need to look perfect, just ensure there are no holes).
- Arrange the peach slices in circles, starting from the middle of the dough. Be careful to leave enough space on the outer edges so you can fold them over to form the crust.
- Whisk the eggs together. Brush the crust with the egg wash and sprinkle on the sugar.
- Bake at 425°F for 20 minutes, or until the galette is golden brown. Enjoy!


Hi Natalya,
I have a ton of donut peaches. Would they work well in this recipe? Thank you!
I don't see why they wouldn't work. Happy baking and I hope you enjoy the galette! Let me know how it works out.
The kitchen smells delicious!! I love a galette! A couple changes that might help:
1) 1/2 cup sugar is plenty
2) 1 tsp of cinnamon
3) I used four peaches and I had plenty of fruit
I was confused about splitting the dough in two - as I didn’t see anything about there being multiple galettes. I might try one big one next time - was there a reason for making two small ones?
Thank for the recipe! 😀
Hi Carla! Thank you for sharing your tips! As for splitting the dough- this recipe will yield 2 smaller galettes or 1 larger one. Enjoy 🙂
Great recipe for summer! I used bob’s red mill gluten free flour and it worked perfectly!
Hi Jacqueline- thank you for commenting and letting us know! I'm sure other readers who are gluten free will find this tip helpful.
Would canned peaches work too?
Hi Nadine - You sure can! Just make sure they're drained of all excess liquid before you add them to the tart. You don't want it to come out soggy. The gallette will also have a slightly different taste and texture, but I'm sure it will be super tasty. Let me know how it works out!
This was so delicious and easy to make 💕
Hi Anya, I'm so glad you loved this peach galette, thank you for taking the time to comment!
I made this with x4 medium ripe mangos and x4 Tbsp (1/4 cup) of sugar. Turned out really good!
Hello Dori, ohh mango sounds amazing! I am so glad the recipe worked out and you loved it, thank you for taking the time to comment 😊
Hi NataIya
I made 25 of these peach pies since I have peach trees in my backyard. My friends can’t believe how good the crust is. Amazing flaky and not soggy. Delicious.
Now our apple trees are coming in. I made my first apple pie using the same crust and directions. I substituted apples for the peaches.
Also, since so many of our friends have to watch their sugar intake, I use 1/4 cup sugar or less in the filling. The fruit is sweet enough.
Also, just a hint for my filling I found 12 cups of slice fresh fruit works the best. I added 1 tbsp lemon juice to keep the apples white,
1 tsp cinnamon, and about 2 tbsp corn starch.
Tomorrow I’m making 3 apple pies to give to friends. I love making them because I know they will turn out beautifully.❤️👍
Thanks again from a very happy baker.
Pam
Wow Pam, you are a good friend to have! So impressive. Thank you for sharing your feedback, I like the idea of reducing sugar. Enjoy
It states to divide the pie dough into two pieces and do we divide the filling into these two doughs or just one dough ?
Hey Hatice, great questions. You should have enough filling for two pieces. If you want to, you can make one huge pie. Enjoy
Outstanding! Super receipt! Easy to make. The crust was so easy to make and not one bit soggy on the bottom!❤️I think I will be making this again tomorrow since I have so many peaches in my backyard. Do you have any other peach receipts?
I Love your step by step directions. The tips are great! Photos keep me on track.
I also made a banana zucchini loaf and added apricots and walnuts. Fabulous❤️
Pam, I am so glad you loved the recipe and that you found the instructions helpful. Here are some recipes in which you can use peaches. Cake 1: https://momsdish.com/recipe/4…. Cake 2: https://momsdish.com/recipe/5…. Hope you enjoy one of these recipes 🙂
Thanks so much for the new recipe.
This tastes like you've been slaving all day in the kitchen! It's delicious & not hard to make at all! If you have some peaches to use, then you need to try this!
Right easy and delicious 🙂
A friend gave me a bunch of peaches and I knew I had to make this! I liked it better than any other dessert!
That is so good to hear, thank you for your feedback!
We have plenty of peaches to make this! We made it earlier this year & the whole family loved it. The cinnamon with peaches is so comforting!
I am so glad you loved it, thank you for your comment!