This guide on Ukrainian Easter eggs will teach you the natural, old world way of making the holiday’s treat. All you need is onion skins, herbs and pantyhose!
You heard this right, herbs and pantyhose! This guide on making Ukrainian Easter eggs is the exact method my mom and grandma have used for decades. Back in Ukraine in the 1900s, food coloring wasn’t really available, but the desire to make Easter fun was high. We would collect onion skins for weeks and hoard all of the eggs from out chickens for the big day.
Did you know? Ukrainians will play “egg wars” on Easter, competing with each other to see who has the sturdiest egg by seeing whose egg cracks first. It can get intense!
A Quick Note on Pysanky
This recipe is not to be confused with pysanky eggs, aka pysanka, which are craft Ukrainian easter eggs decorated with hot wax (typically melted beeswax) using the batik method and a stylus of some sort. Typically made with raw eggs, these decorative eggs feature folk design motifs and religious iconography and are also made around Easter time. A decoration and not an edible treat, Ukrainians and Russians often gift them to family members. According to folklore, they keep evil at bay.
Everything You Need to Make Ukrainian Easter Eggs
To decorate Easter eggs the all-natural way, all you need is a couple of supplies and ingredients.
- Large Pot – You’ll need a large pot to boil all your eggs in. A Dutch oven will also work – the bigger the better!
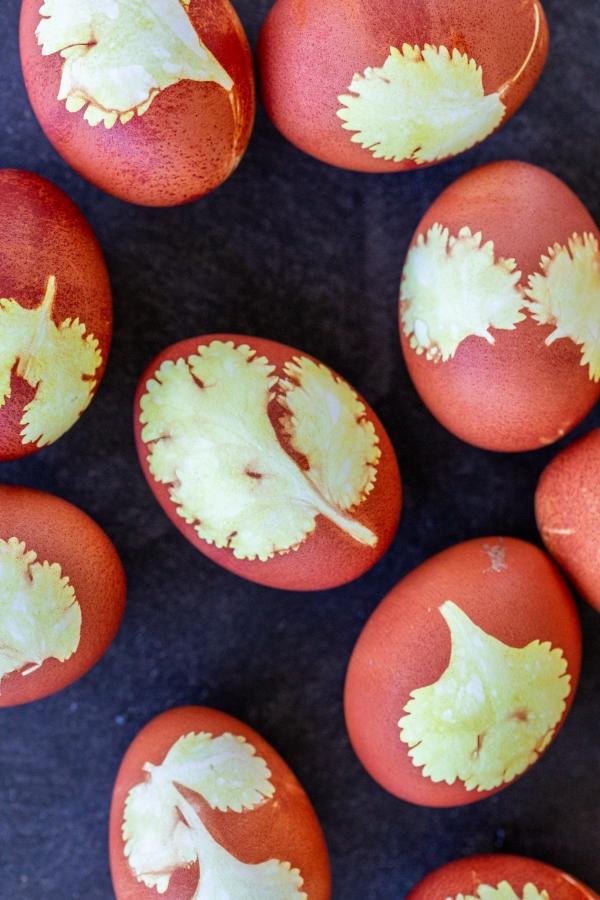
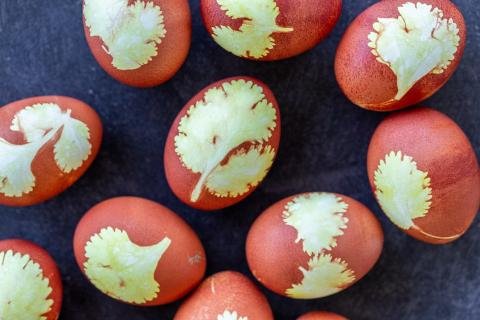
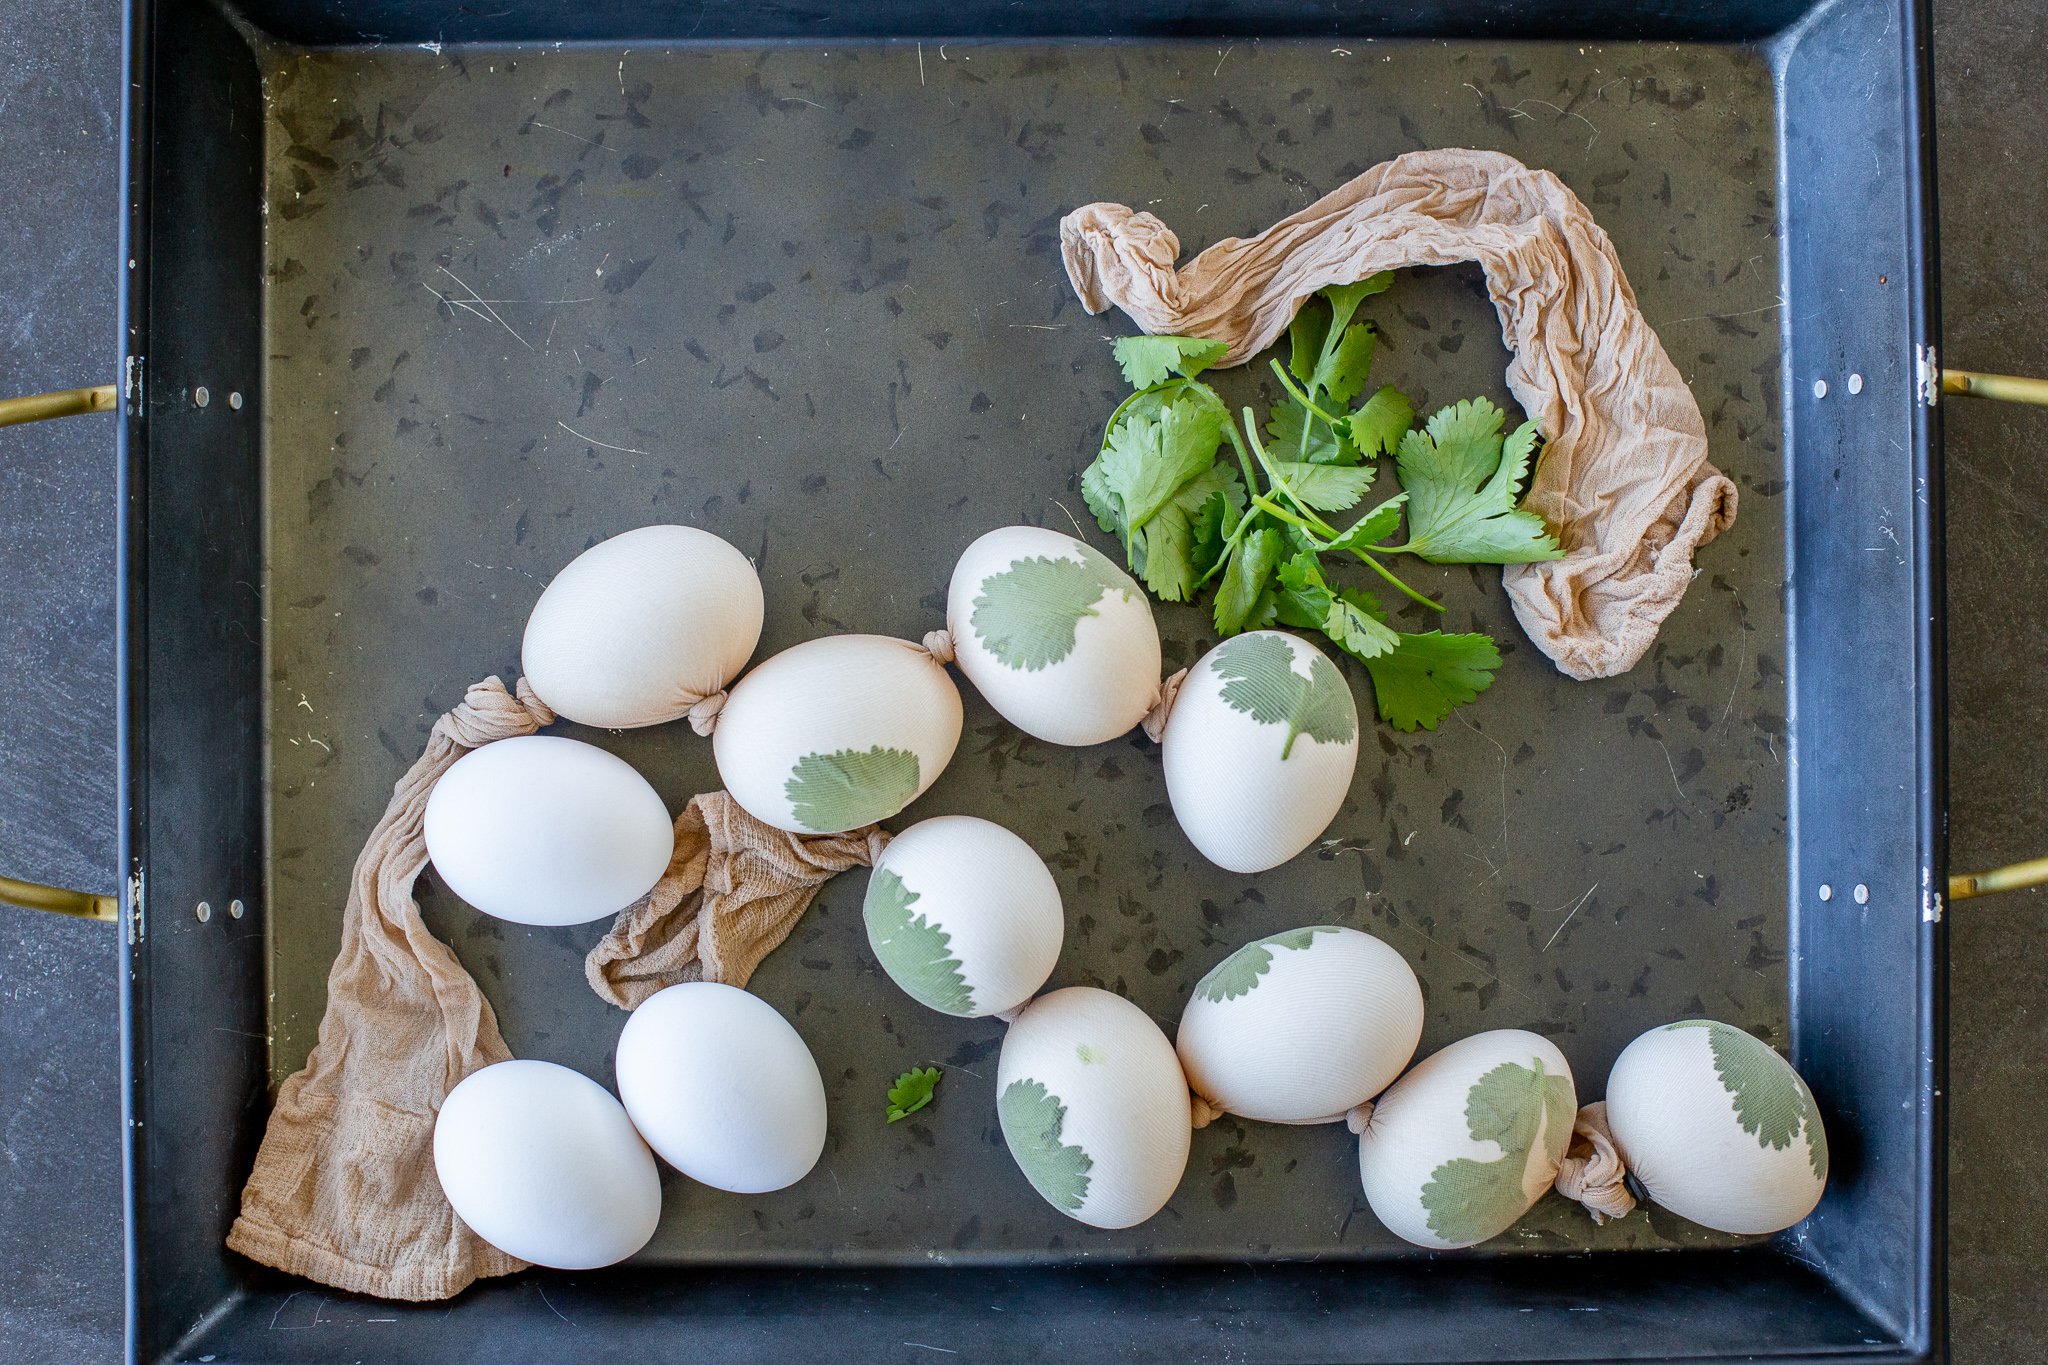
- Herbs – Flat leaf parsley, cilantro or strawberry leaves will work. You’ll use the herbs like a stencil to create a pretty pattern on the outside of the eggs.
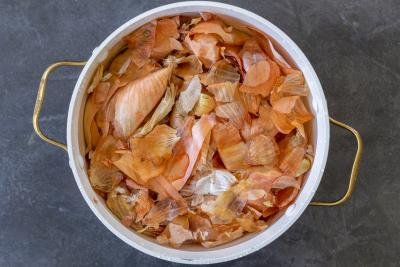
- Red Onion Skins – Red onion skins have a pigment that’s easily extracted to dye your eggs naturally.
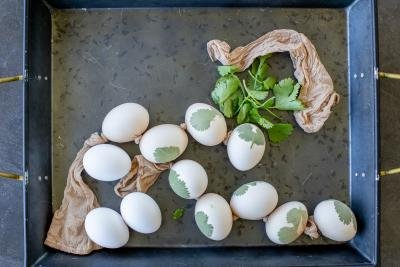
- Pantyhose – This might sound strange, but you need pantyhose to stuff the eggs into while they dye and imprint with the herbs.
- Rubber Bands – Rubber bands will help to secure the eggs in the pantyhose and make sure that the herbs don’t slip around.
Hot Tip: As kids, we would use rubber bands to decorate our eggs with a stripe effect. All you need to do is gently wrap a couple around the eggs!
Ukrainian Easter Eggs Video
How to Make Ukrainian Easter Eggs
Making Ukrainian Easter eggs is so simple. While there’s so many ways you can get creative with decorating them, the baseline process is straightforward.
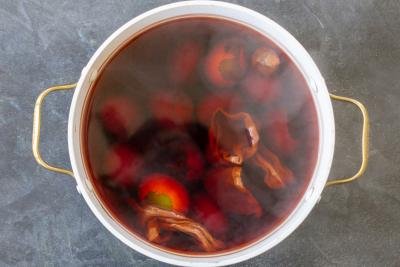
- Boil the Onions: First, boil the onion skins with salt and water. Turn the heat down to medium-low and simmer the skins for 10 minutes.
- Decorate the Eggs with Herbs: Next, use the herbs as a stencil by wrapping them around an egg and stuffing it carefully into the nylons. Tie a knot in between each egg, securing the herbs on the eggs tightly.
- Boil the Eggs: Bring the water to a boil and submerge the nylon-wrapped eggs into the water.
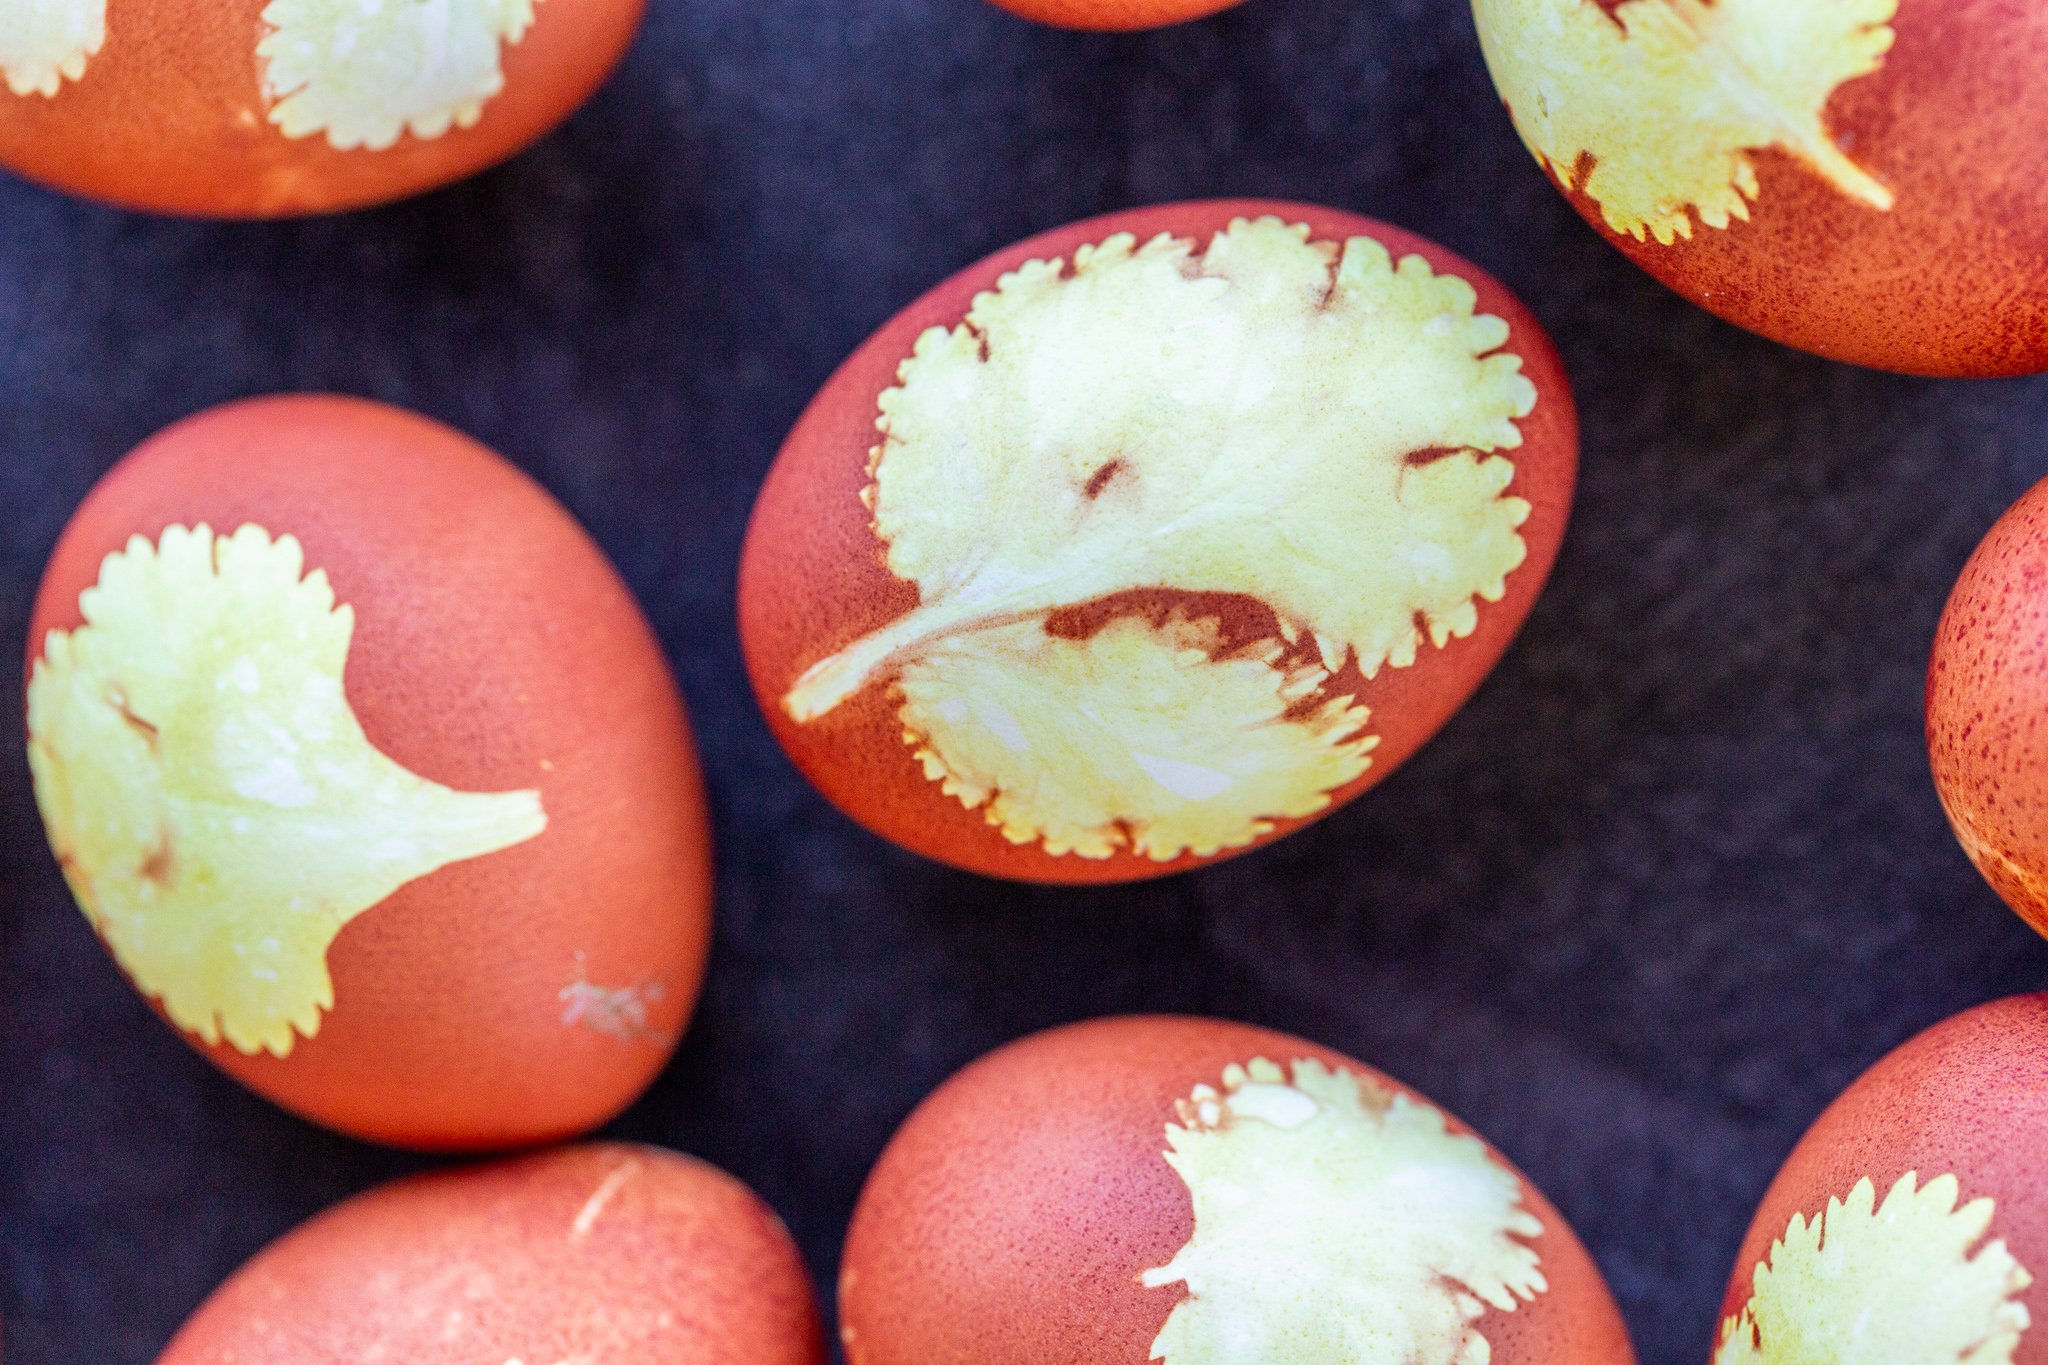
- Cool the Eggs: Next, remove the eggs from the boiling water and allow them to cool. Remove the nylon and herbs.
- Oil the Eggs: Lastly, brush the eggs with olive oil to give them a nice sheen. Hide them, snack on them and enjoy!


5 Tips for Making Traditional Ukrainian Easter Eggs
Just a couple of tips will help you make Easter eggs just like my mom and grandma.
- Pick up the extra skins lying around. When grabbing the onions from the supermarket, swoop up the onion skins that are lying around on the crate. Most grocery stores will just toss them, so they won’t have a problem with you snagging them up!
- Boil the skins for like 10 minutes. To get the most pigment out of the onion skins, simmer them for at least 10 minutes. You can go a bit longer if you’d like, but the color won’t change too much after 10 minutes.
- Prevent the herbs from folding over. When wrapping the nylon around the eggs, be extra careful to prevent the delicate herbs from folding over. You’ll want them to be completely flat to get the sharpest, most clear pattern on the eggs.
- Tie the nylons tightly. Make sure to tie the eggs tightly enough with nylon so that herbs don’t slide around. You’ll want them to be completely flush with the egg and pinned down to get the best pattern possible.
- Allow the eggs to cool completely. Before removing the nylon and herbs, let the eggs cool down completely. This will not only make them safer to handle, but it will also ensure that the herb has enough time to create a solid stencil.


Tips for Storage
To keep hardboiled eggs on hand for up to 7 days, store them in an airtight container in the fridge on top of some folded paper towels (this will help keep them from cracking). While the shell naturally helps to protect the egg from bacteria, the airtight container will prevent the eggs from soaking up smells in the refrigerator.
More Easter Recipes to Try
- Leg of Lamb – Roasted whole leg of lamb the easy way
- Easter Bread (Paska) – Traditional decorative Ukrainian easter bread
- Easy Brioche Bread – Braided egg bread
- Olivier Potato Salad – Slavic-style creamy potato salad
Recipe
Ingredients
Instructions
- Place the onion skins in a large pot with the salt and water. Bring them to a boil, then reduce the heat to medium-low and allow the skins to simmer for 10 minutes to extract the color.
- To create a stencil with the herbs, wrap the herbs around an egg. Place the egg inside the nylons and tie a knot. If you are decorating multiple eggs, make sure to tie a knot in between each to secure the herbs against the egg.
- Bring the water to a boil and add the nylon-wrapped eggs to the water, making sure the eggs are fully submerged.
- Remove the eggs from the boiling water and allow them to cool down. Remove the nylon and herbs.

- To make the eggs shiny, brush them with oil. Hide them and enjoy!


Oh, my, those look so pretty!! I am definitely making these with my kids!! What a nice change from traditional Easter eggs.
Oh how fun, hope you guys have a blast making them, Kristyn!
We LOVE this method for our Easter Eggs! This is our go-to decorating method and it brings back so many memories!
Right? These are a classic! 🙂
I am so happy I found this, your tips were just amazing and so helpful. Mine came out beautiful!
Hi Heather- these are so fun, I'm glad you gave them a try!