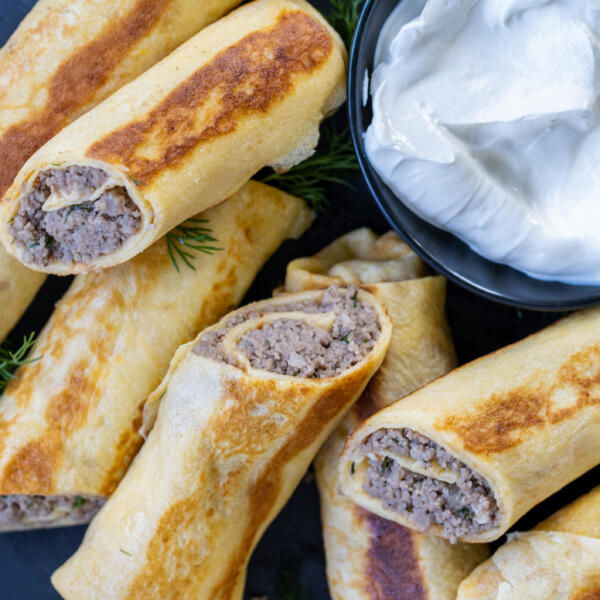
These authentic blinchiki with meat feature tender crepes filled with a savory beef filling and pan-fried to crispy perfection. Meet your new favorite comfort food!

I honestly can’t believe it took me this long to share my recipe for blinchiki with meat. If you’ve tried any of our sweet crepe recipes, you already know they get the most raving reviews. Now, it’s time to give the spotlight to this meaty version!
I’ve been making these blinchiki (aka nalisniki or nalysnyky) on repeat, and it’s quickly become a family favorite. What I love most about this recipe is how flexible it is — you can swap in any ground meat you prefer and easily adjust the seasonings to your tastes. And trust me… you’ll want to make a double or even a triple batch.
Looking for more creative crepe variations? Check out my original blinchiki recipe for tons of ideas!
Blinchiki with Meat Video
How To Make Blinchiki with Meat
This blinchiki recipe is a three-part process: making the crepes, prepping the filling, and frying them off. Get your kiddos involved for more fun!
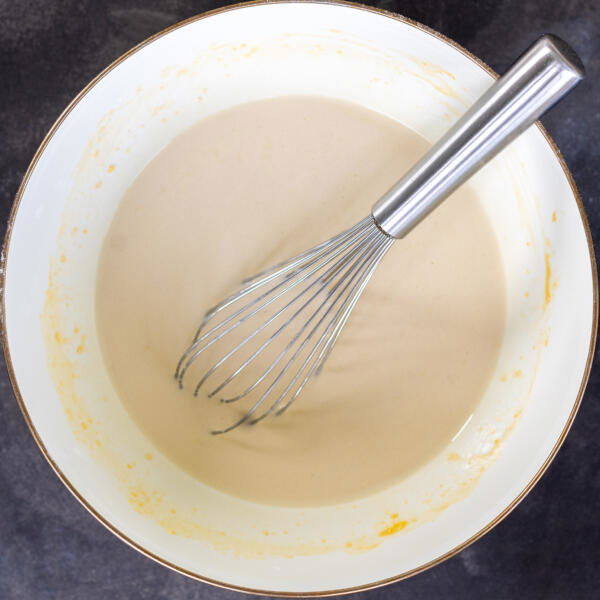
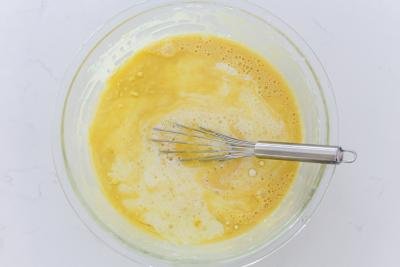
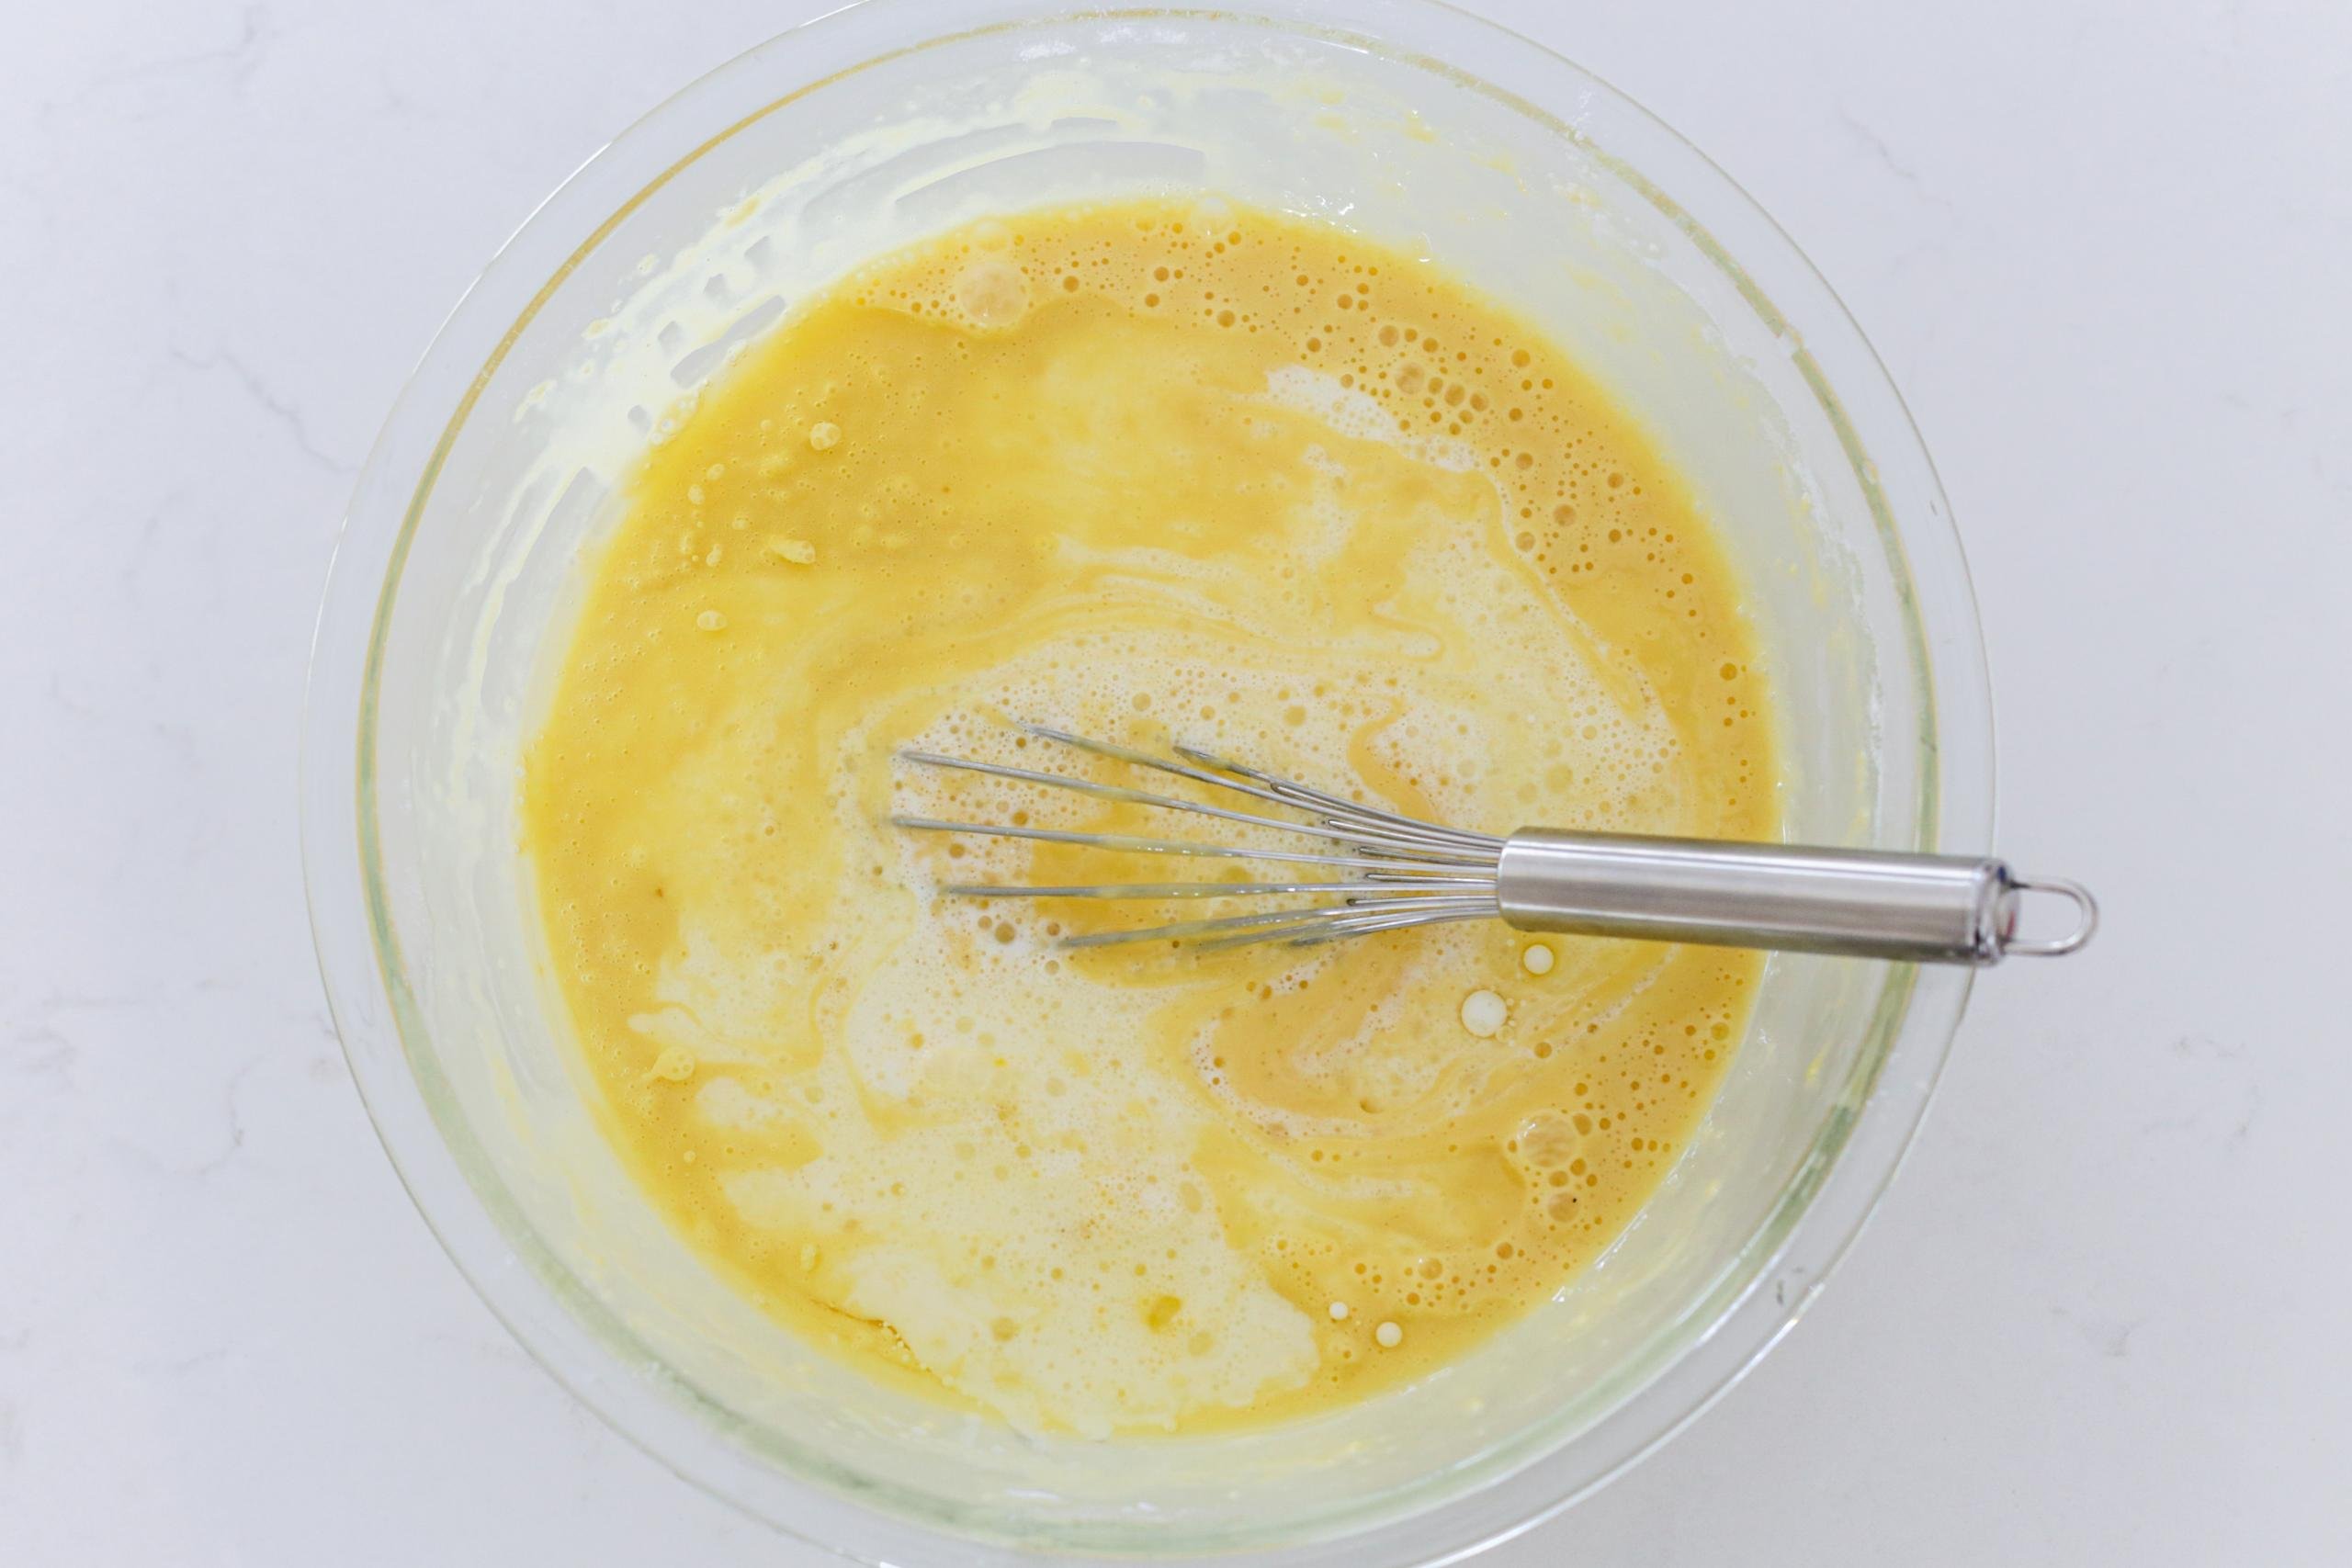
- Make the batter: Whisk together the eggs and flour in a large bowl, then mix in the milk, oil, and salt until smooth.
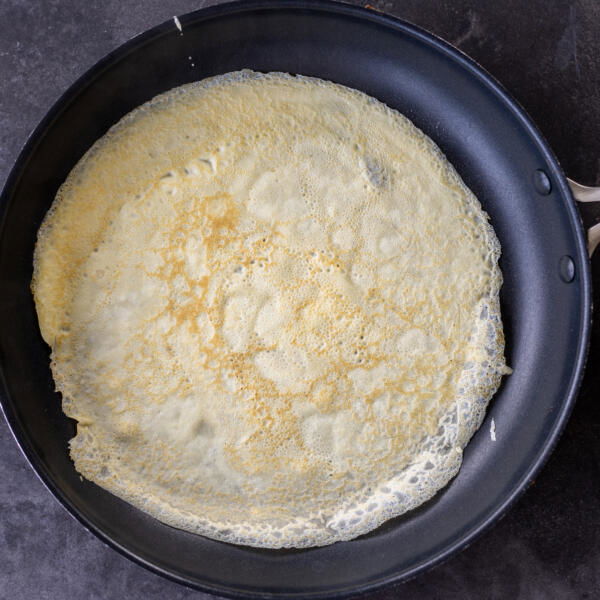
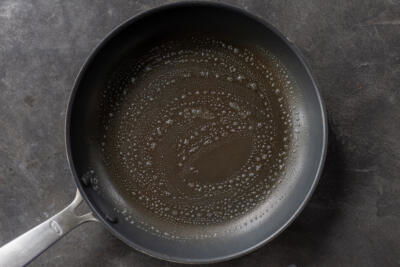
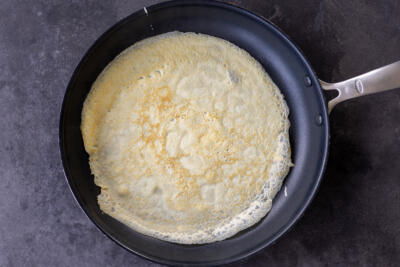
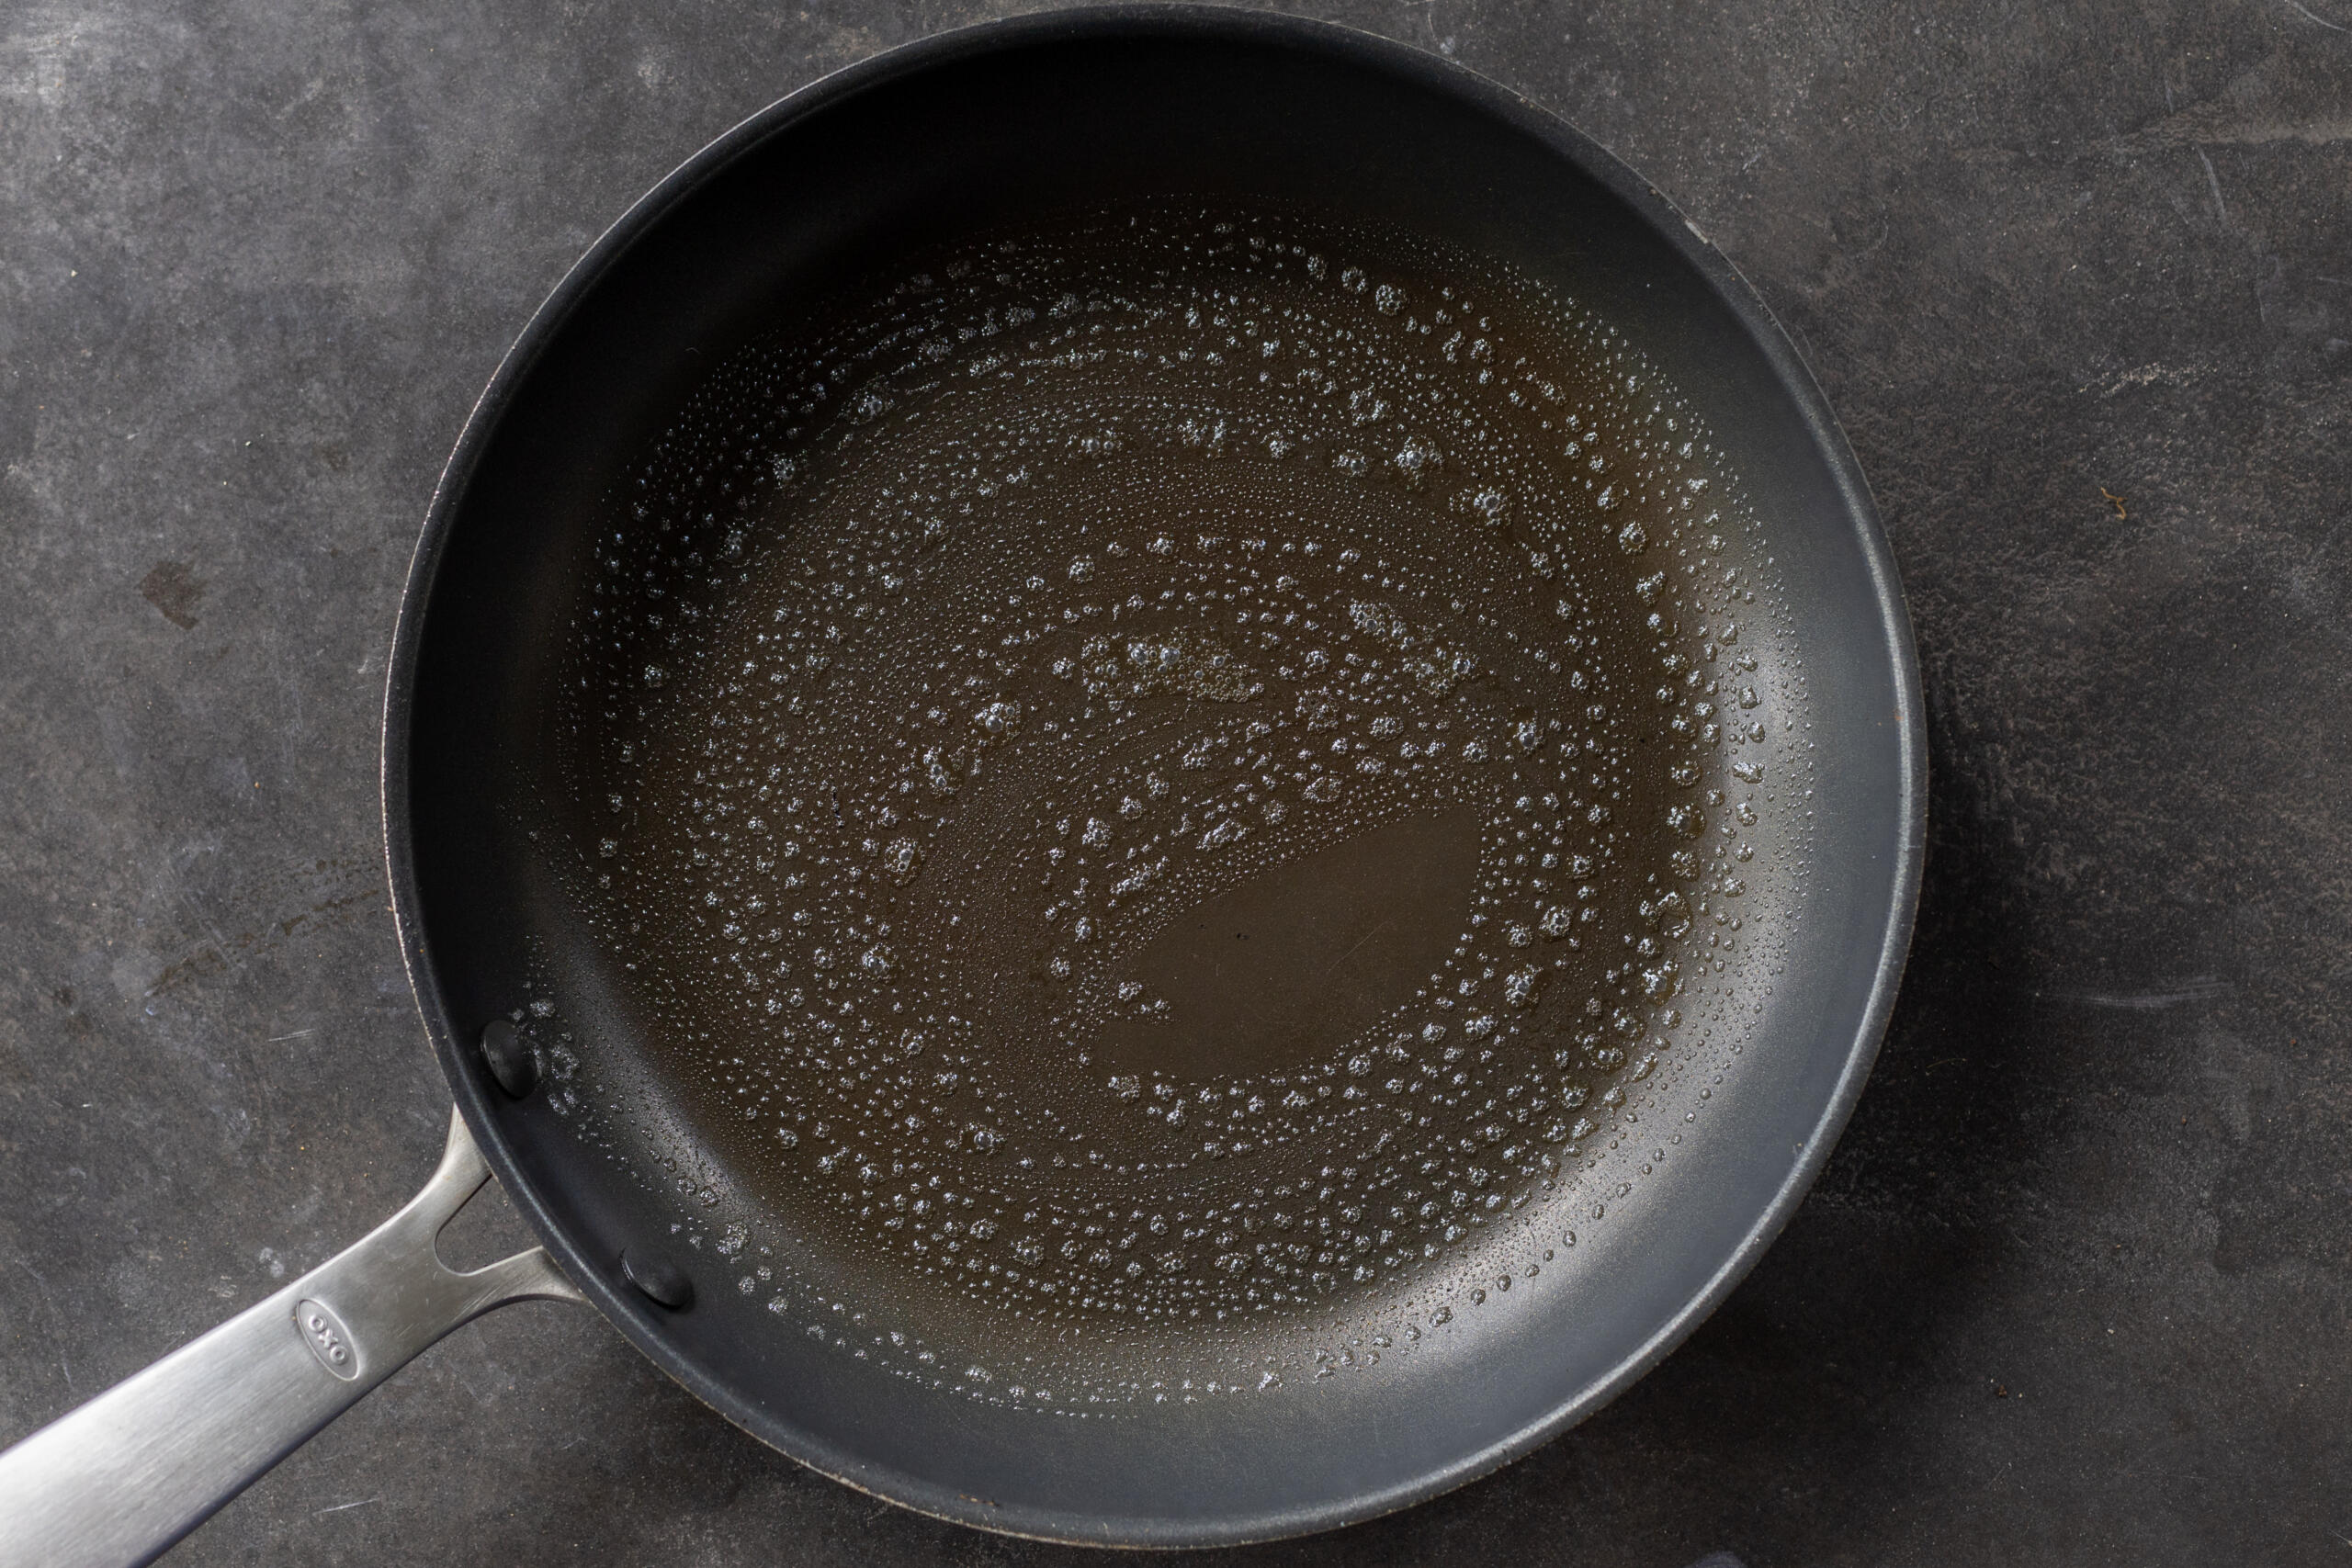
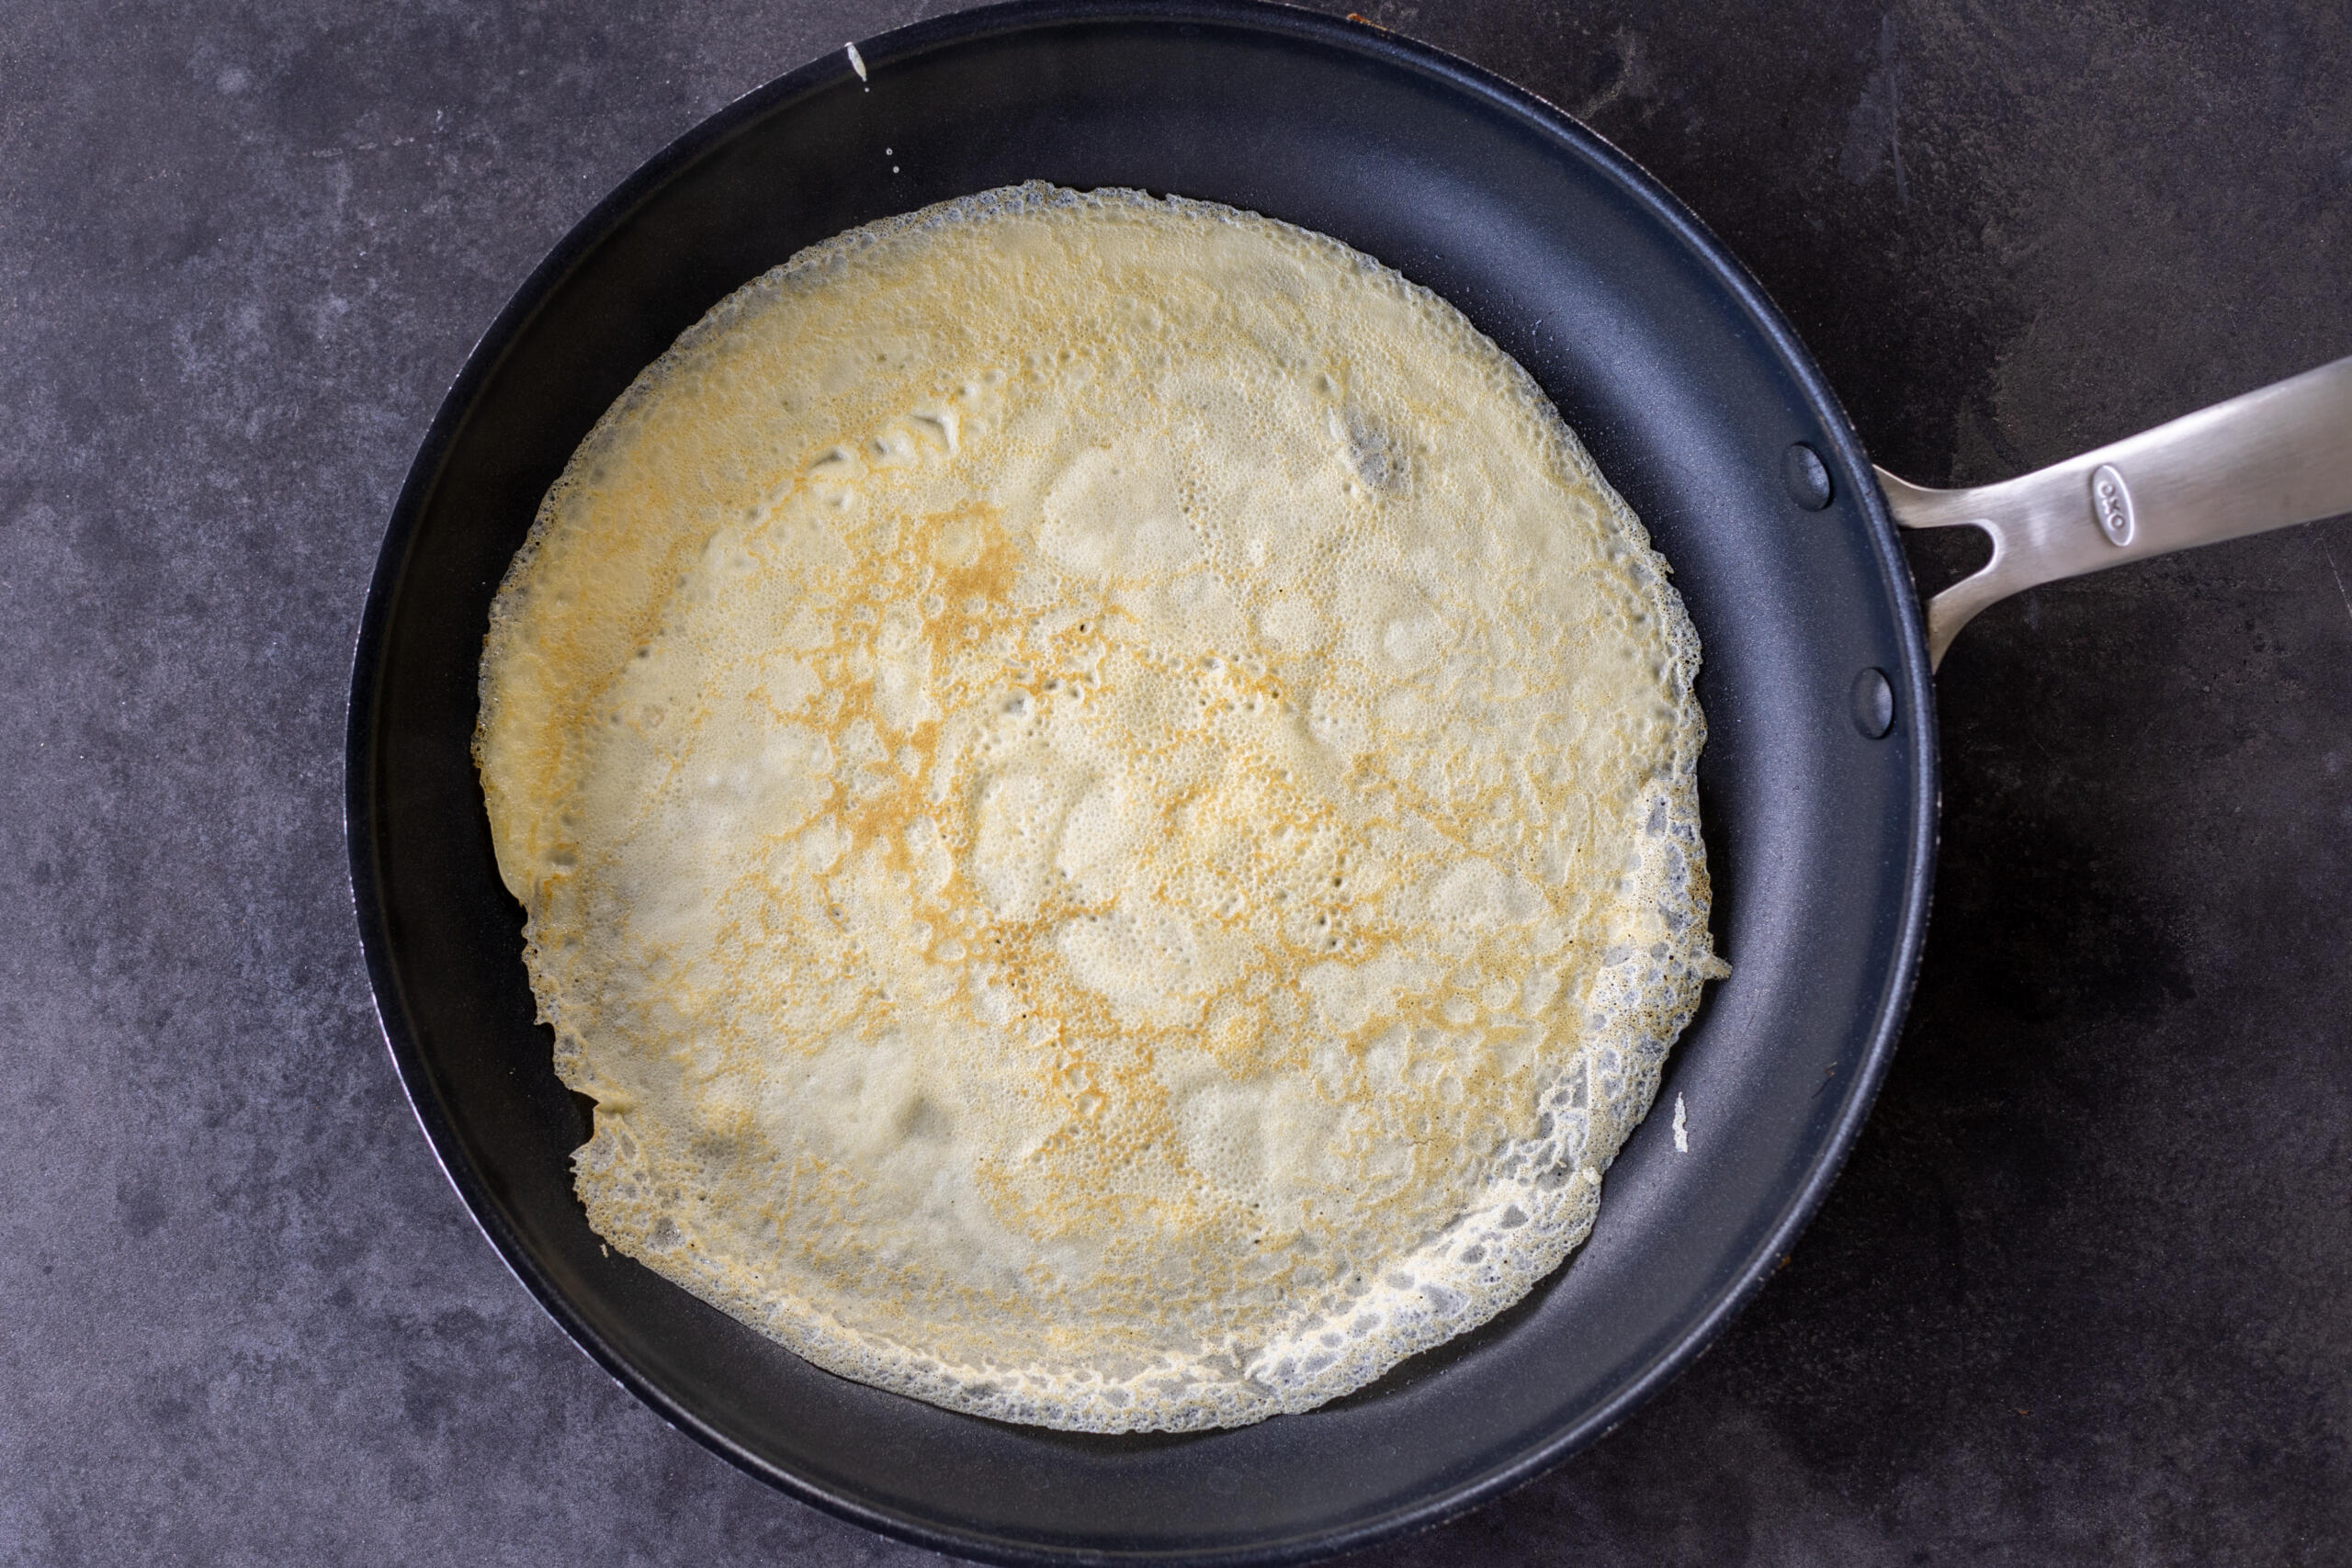
- Cook the crepes: Preheat a crepe pan or regular nonstick skillet on medium-high and brush it with oil. Working in batches, add the crepe batter and swirl the pan to coat the bottom. Cook both sides, then transfer the crepes to a plate.
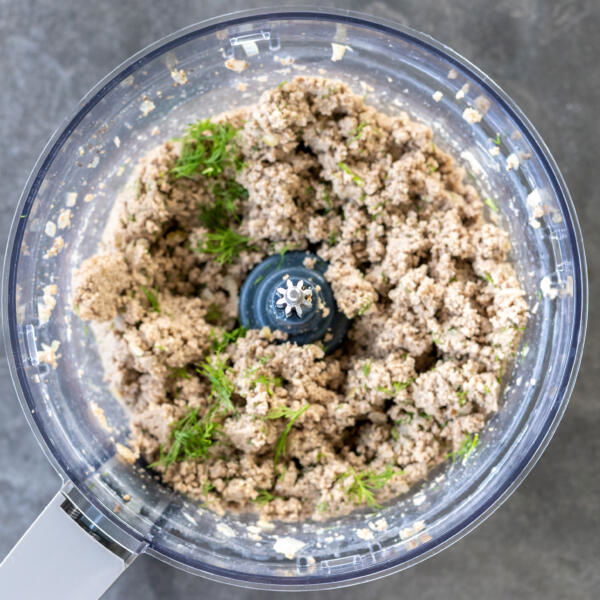
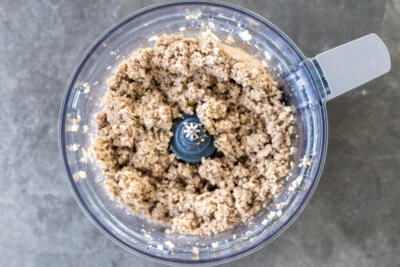
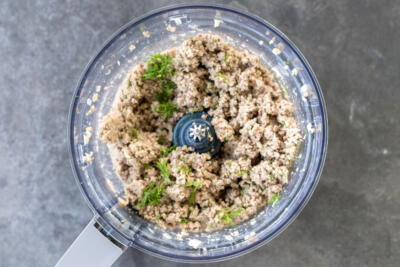
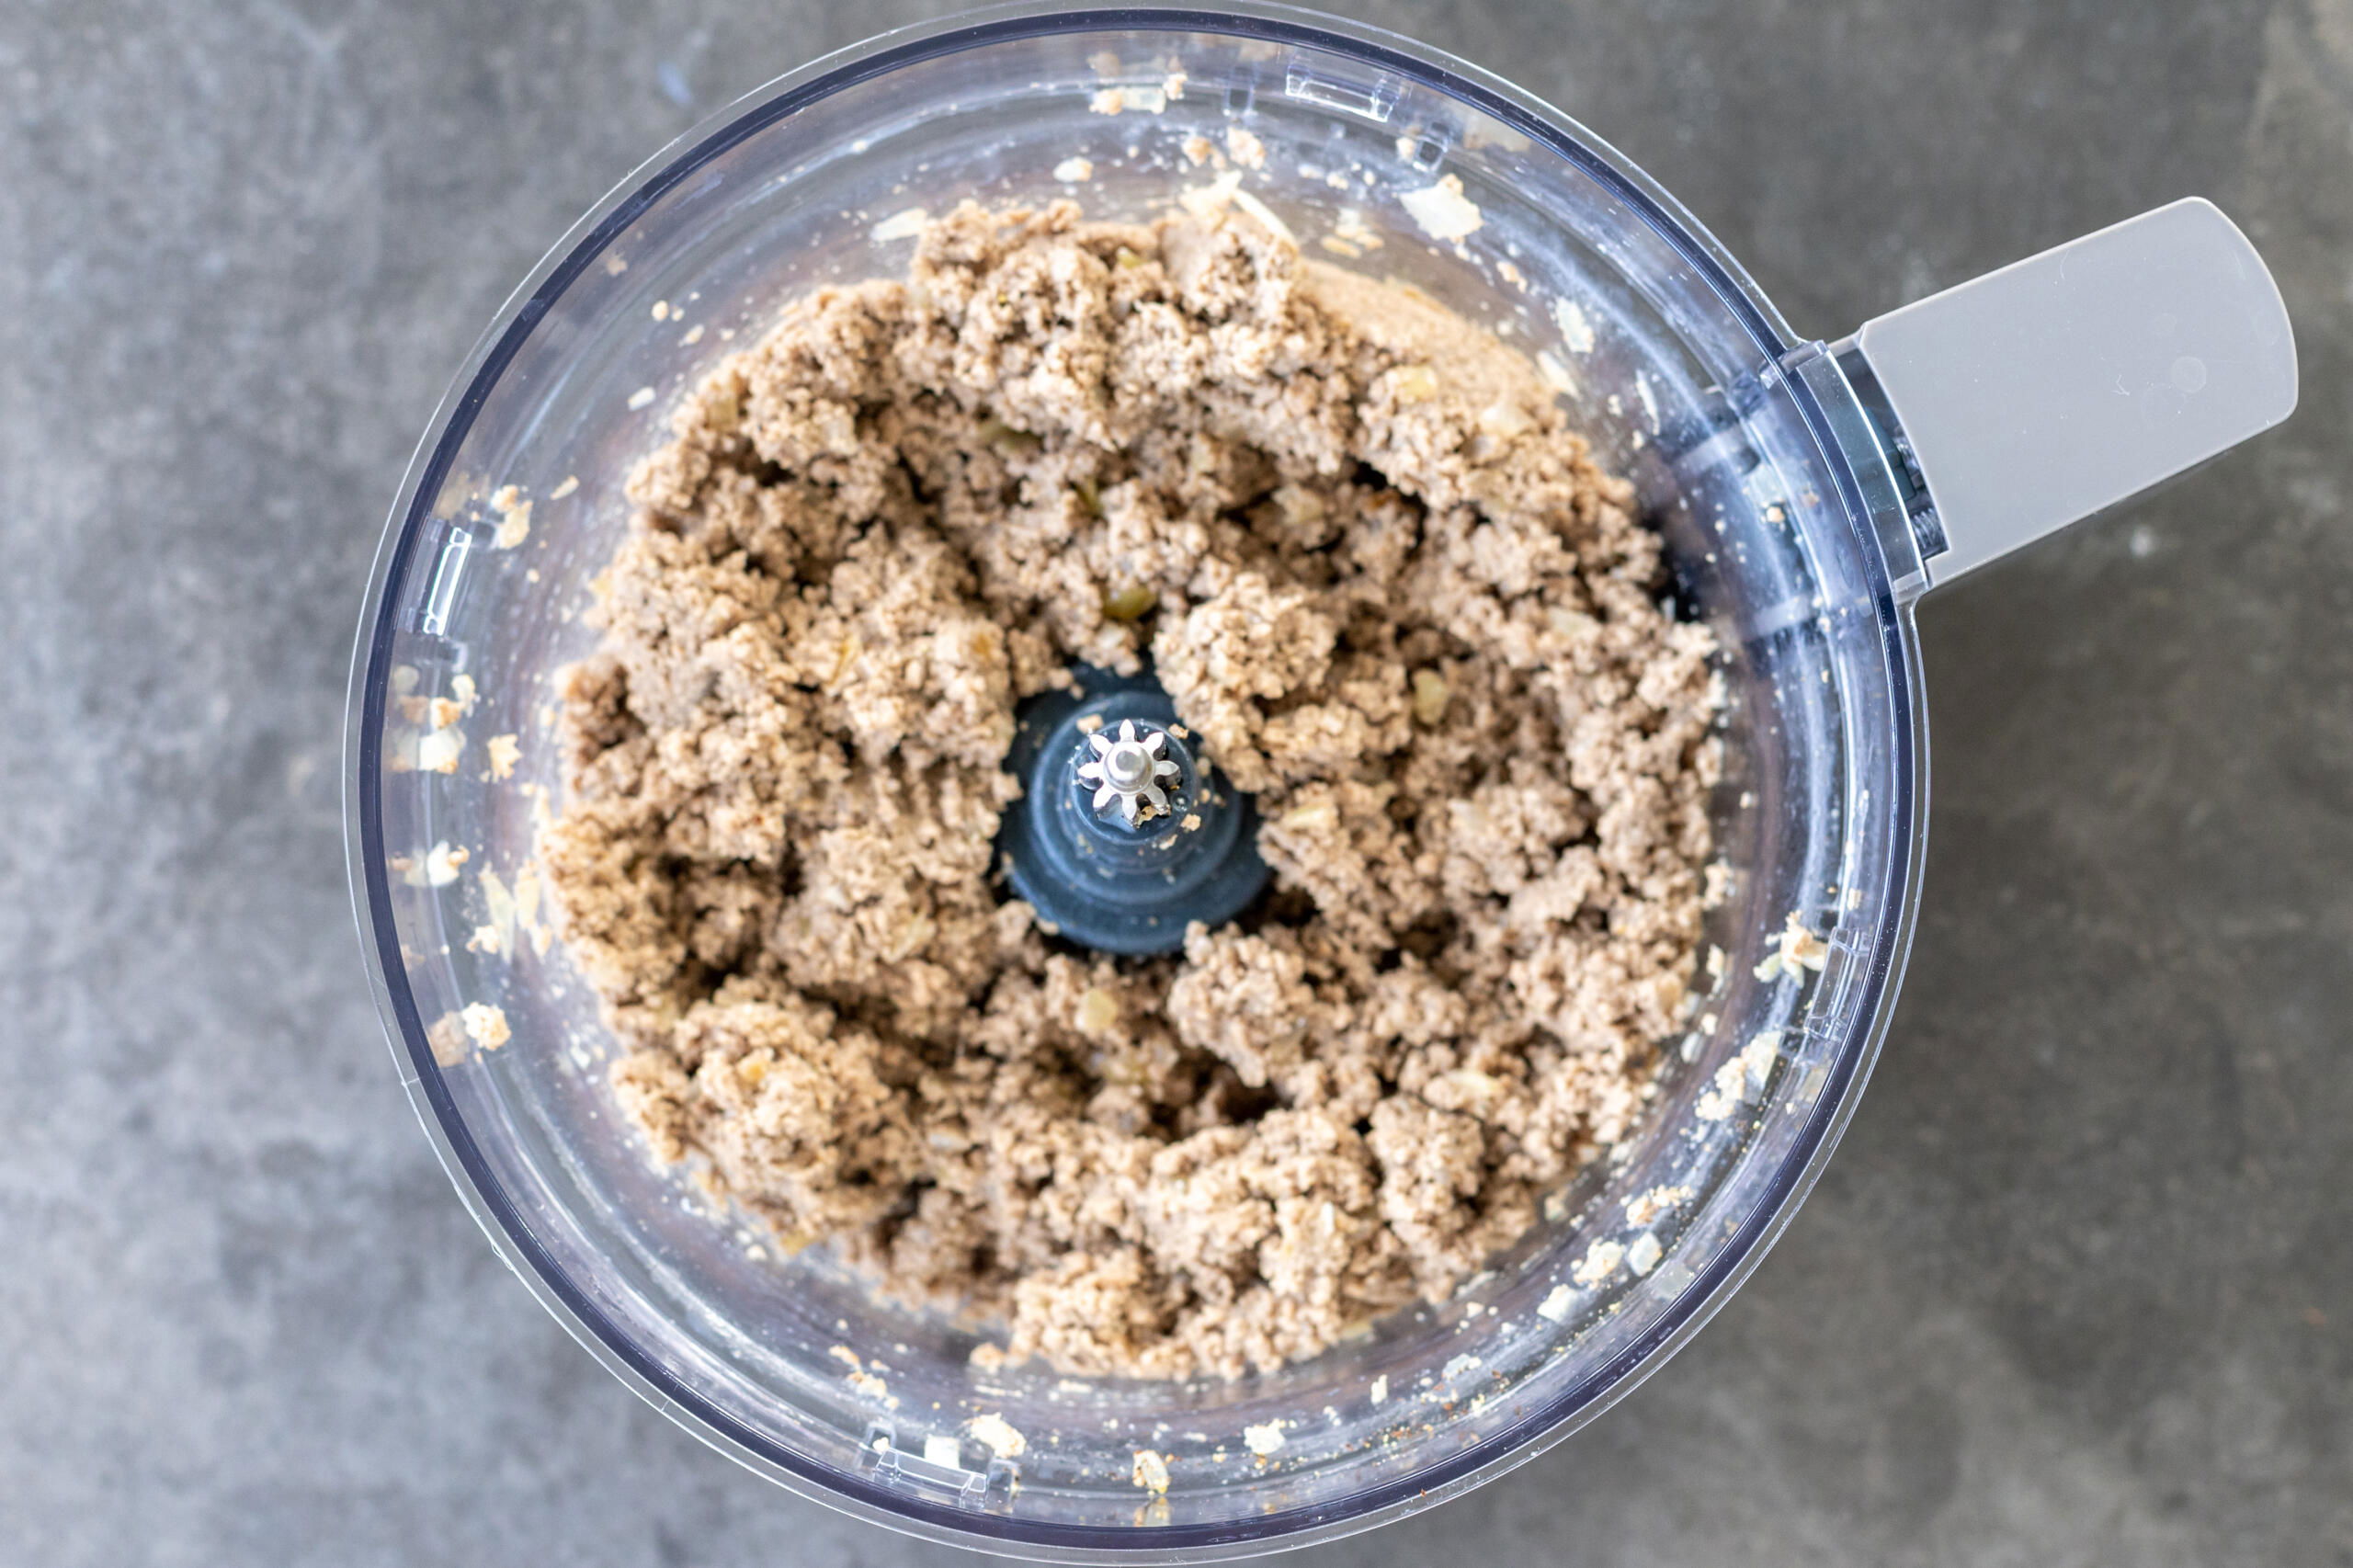
- Prepare the filling: In a separate skillet, melt one tablespoon of butter and sauté the diced onion. Add the ground meat, season it, and cook until it is fully browned. Pulse or grind the mixture in a food processor or meat grinder (these attachments are a lifesaver!). Stir the fresh dill in.
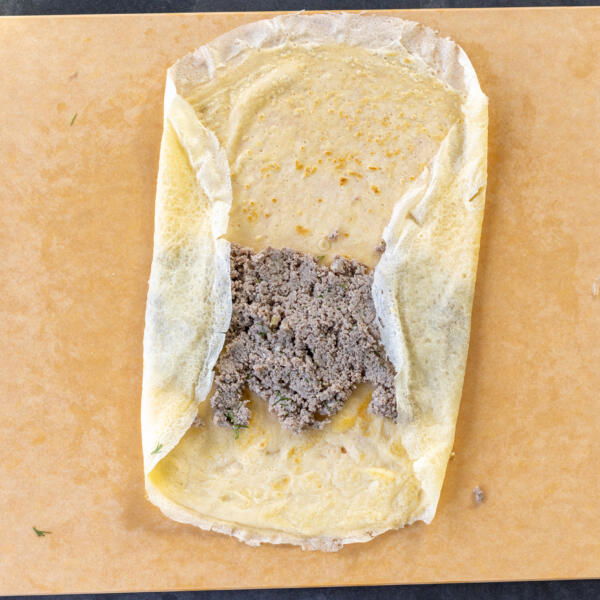
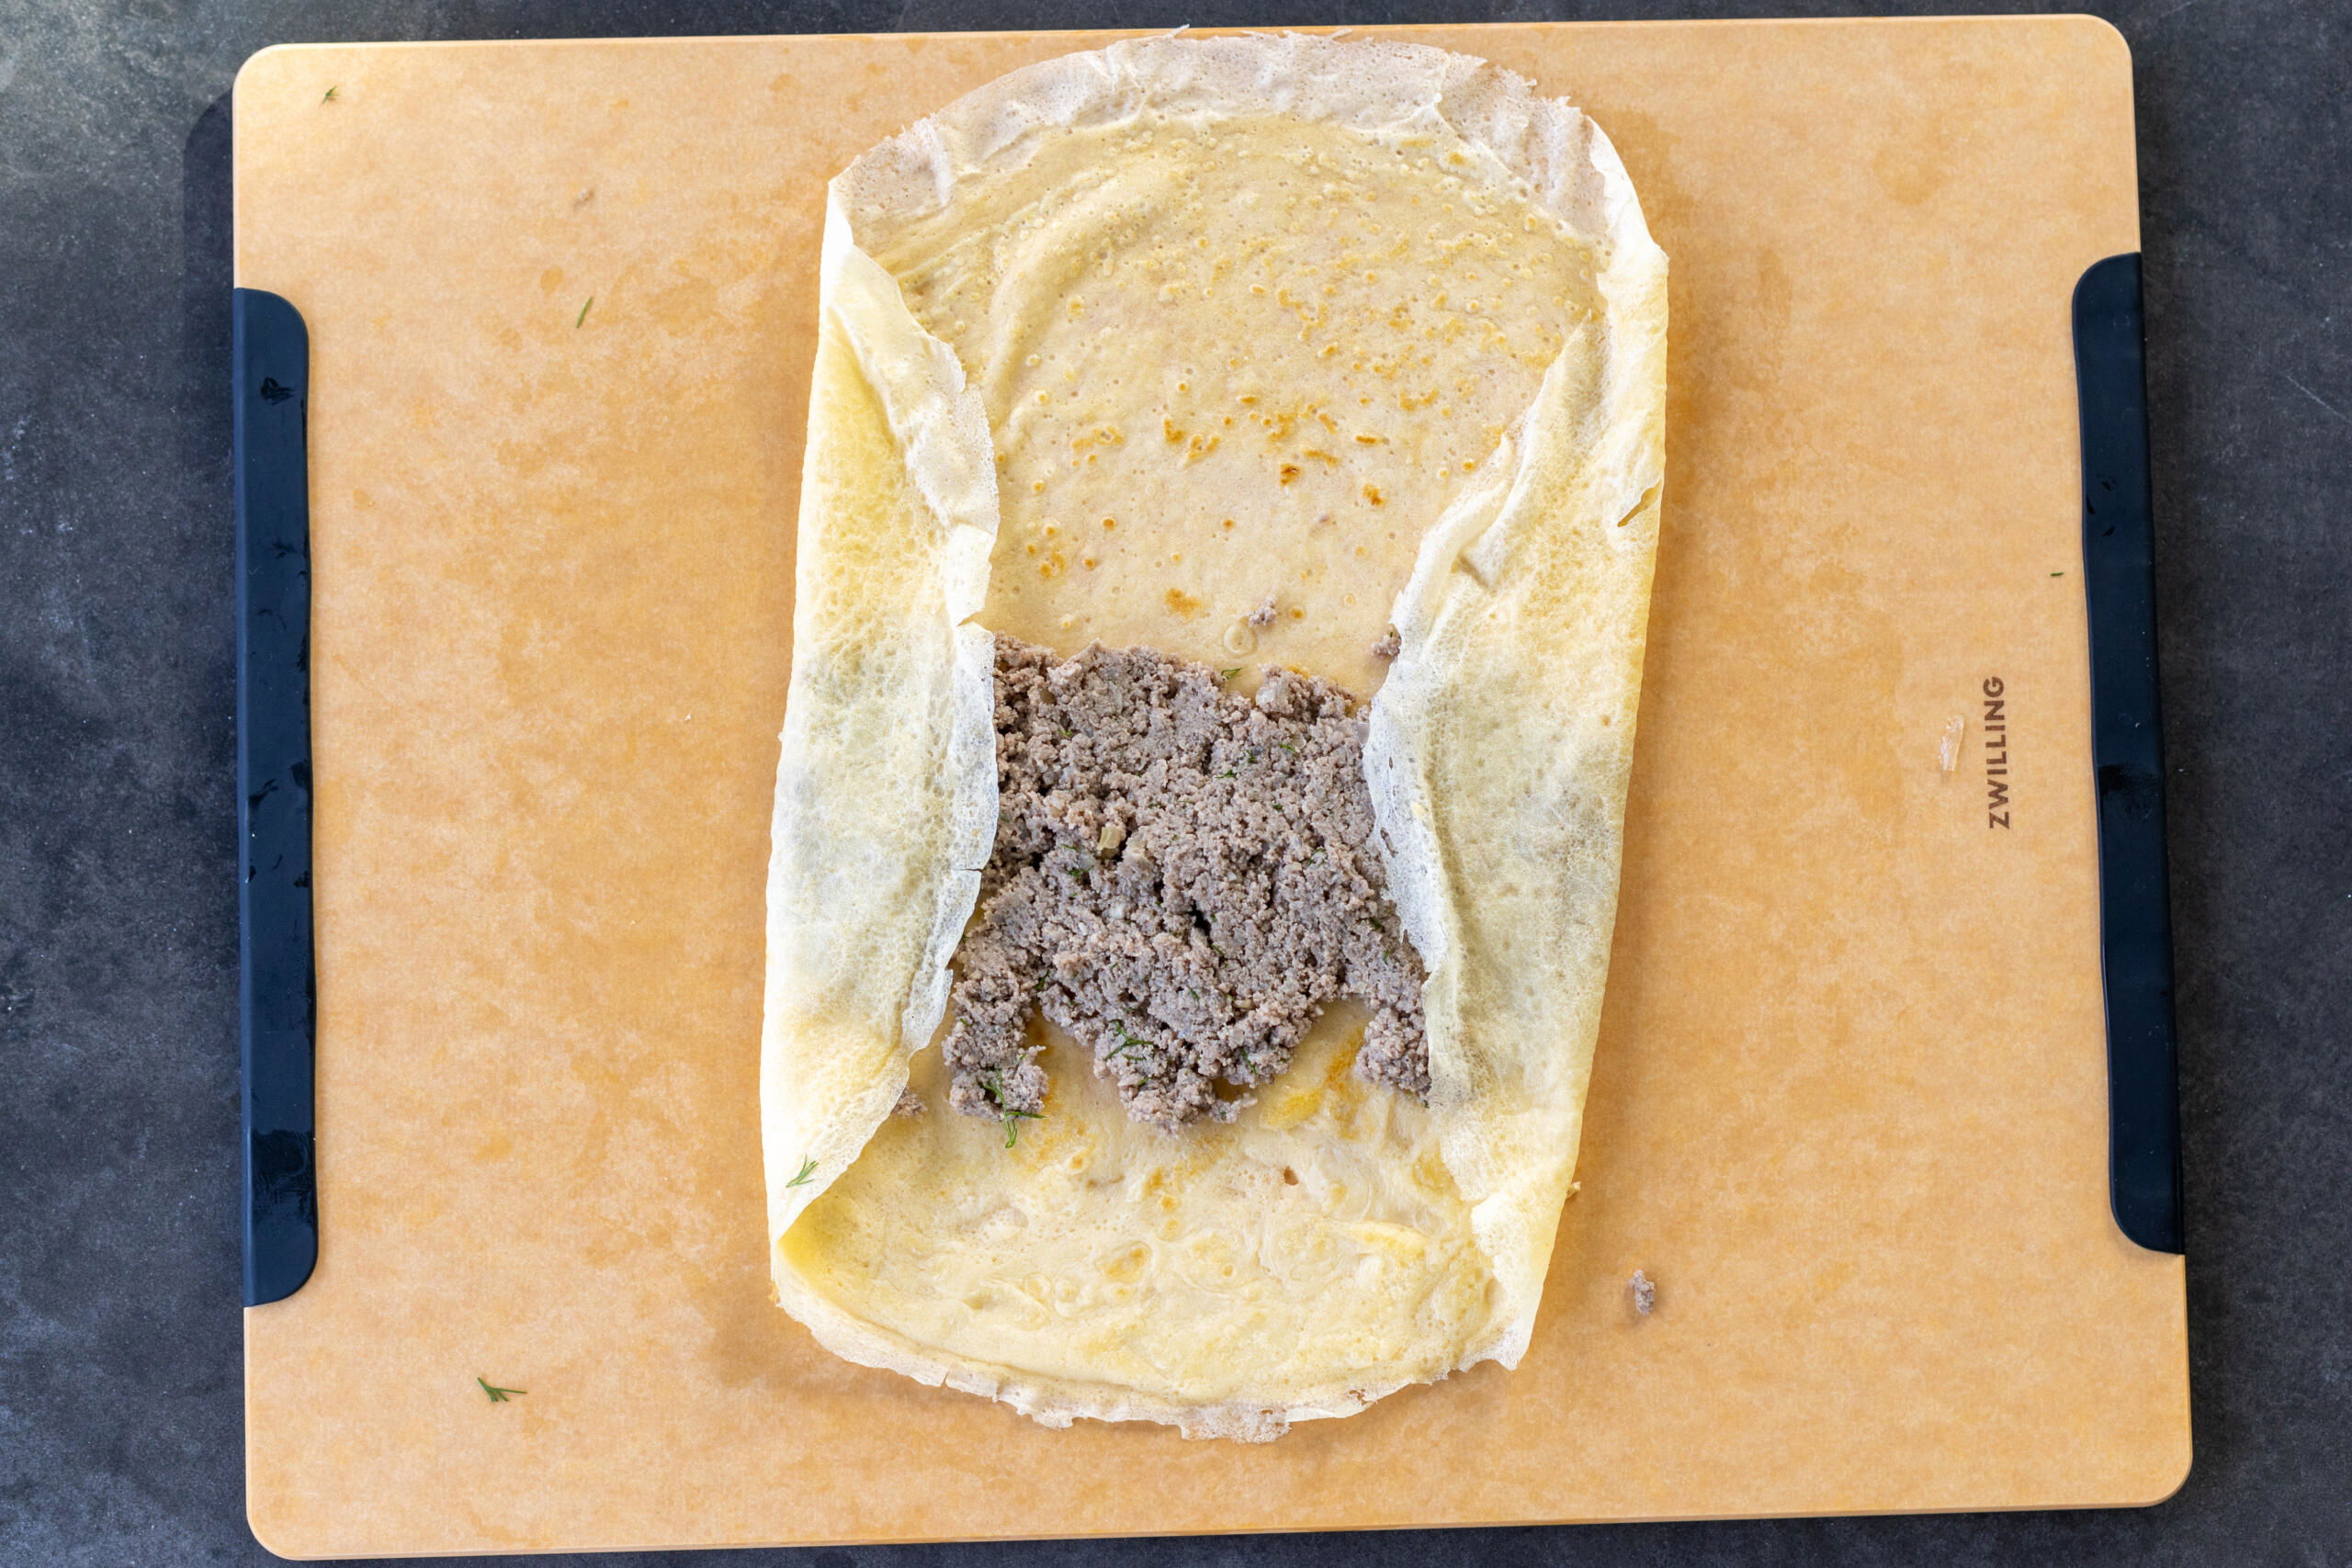
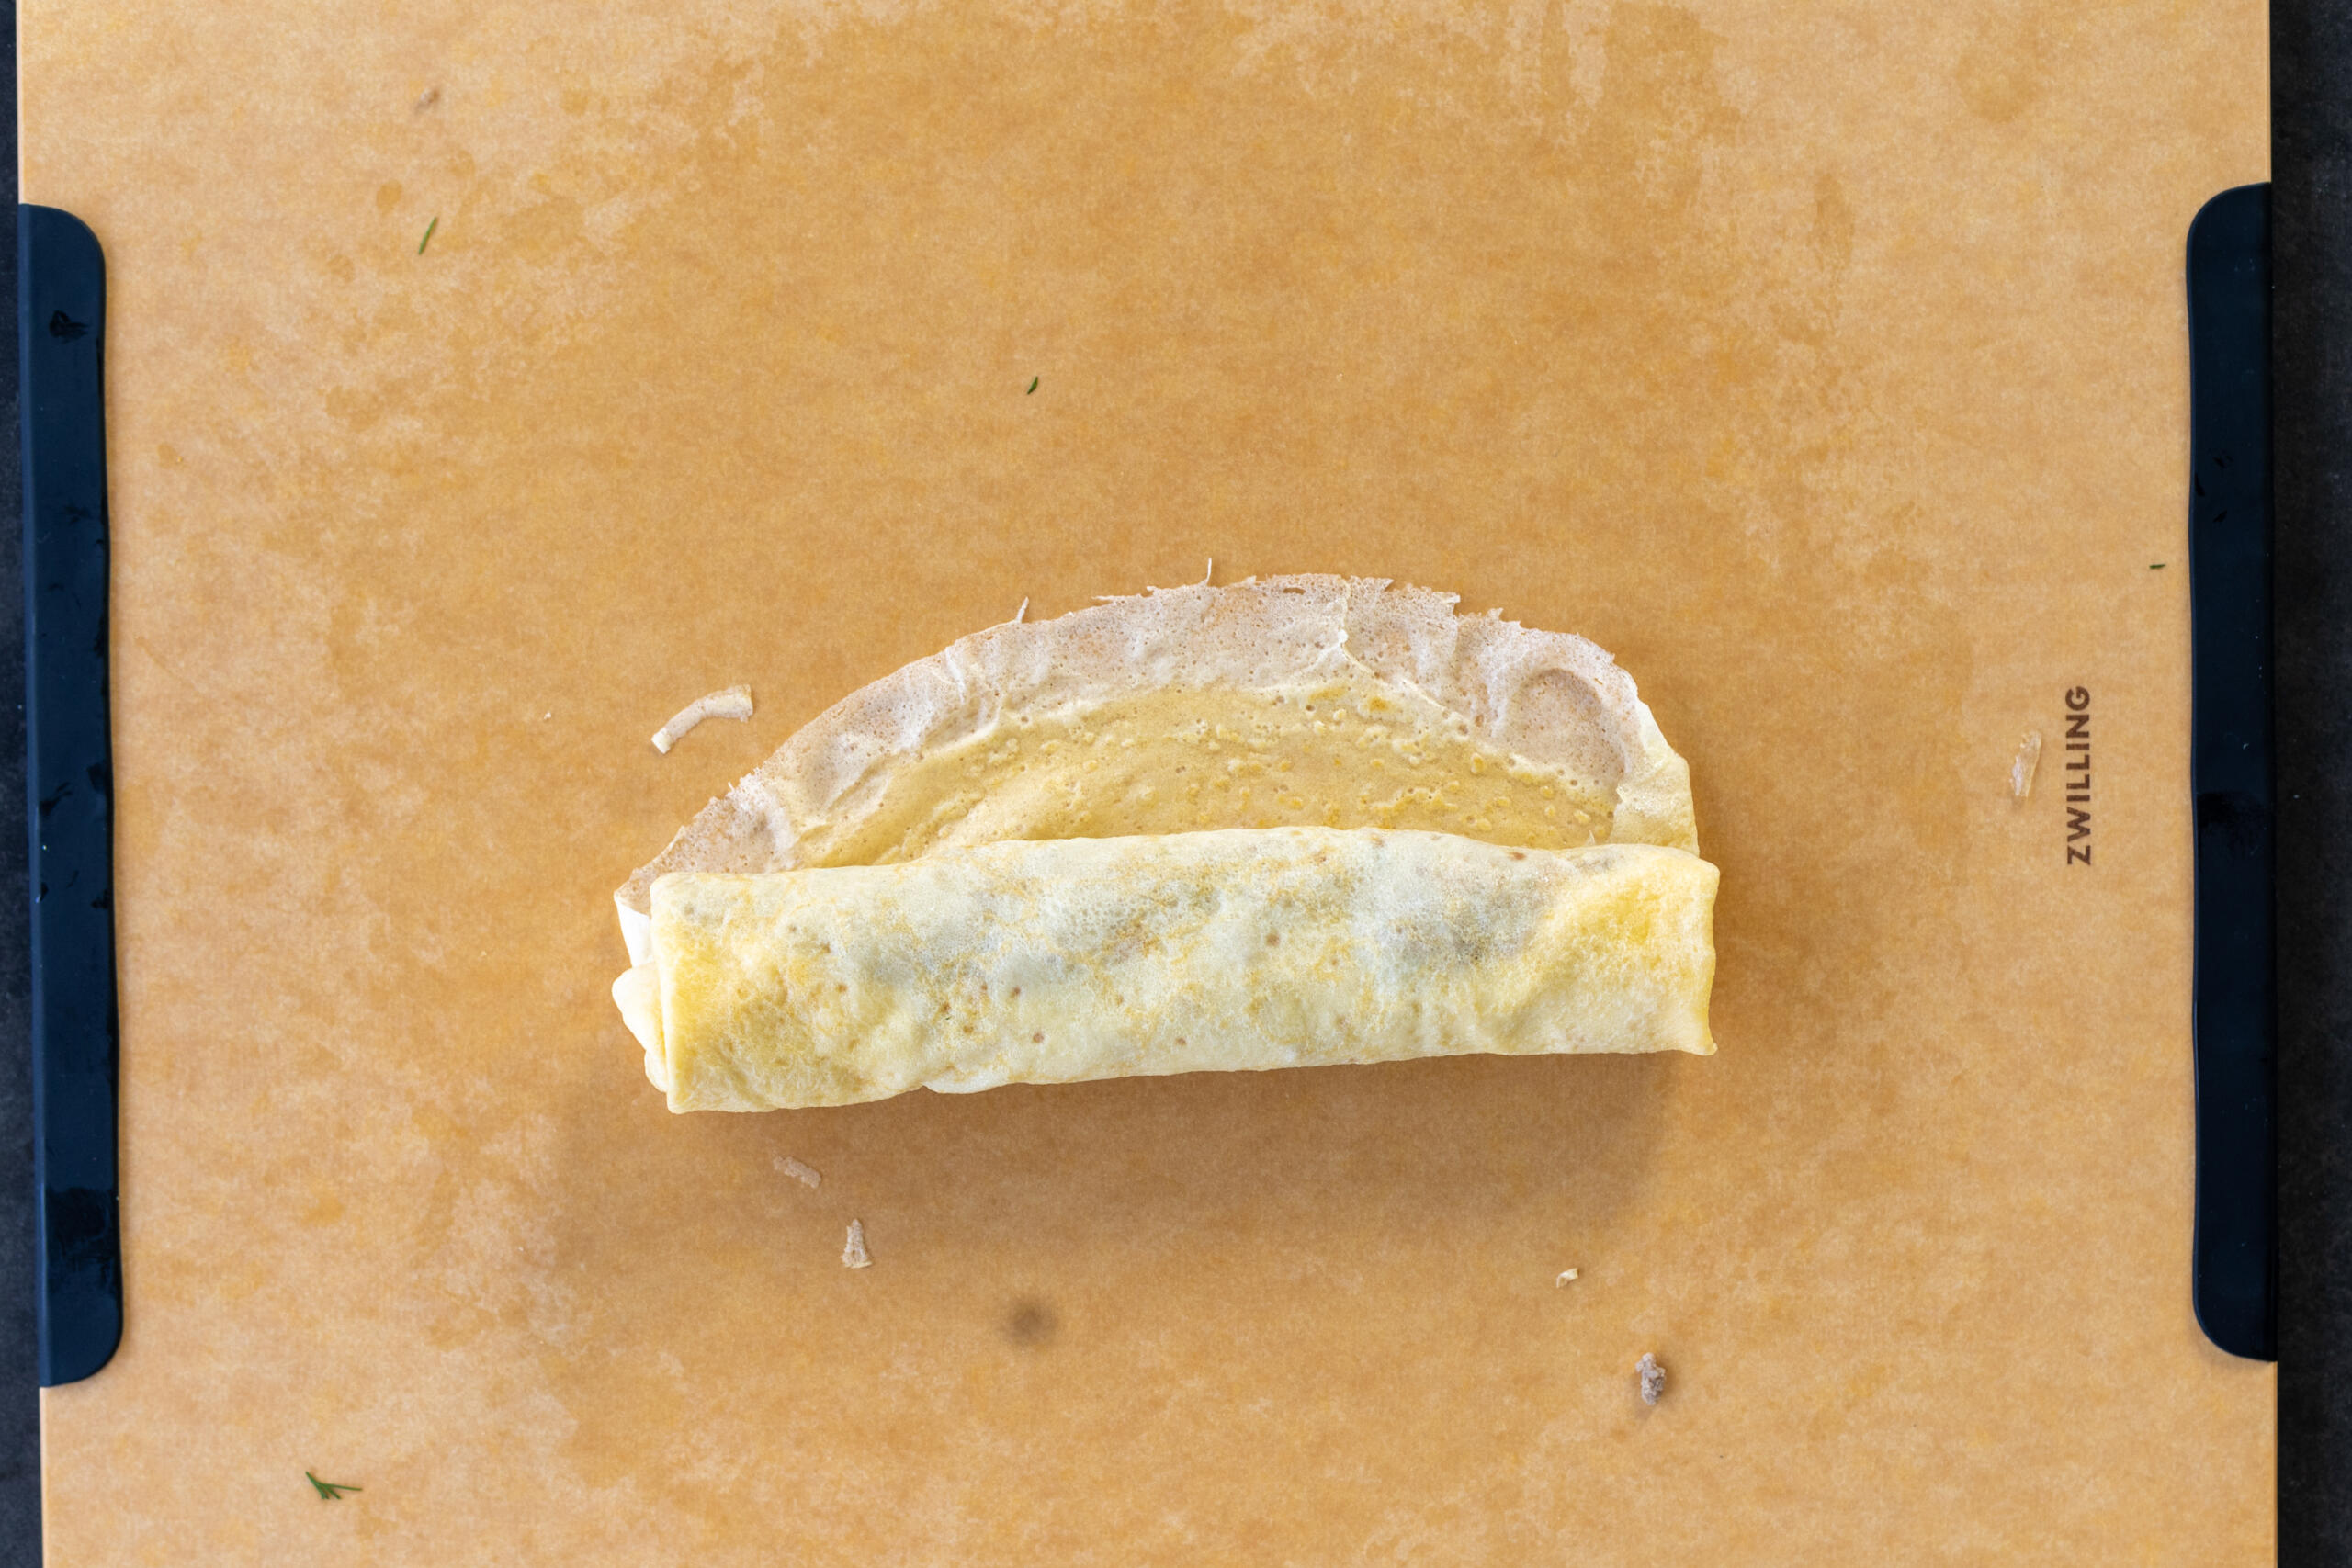
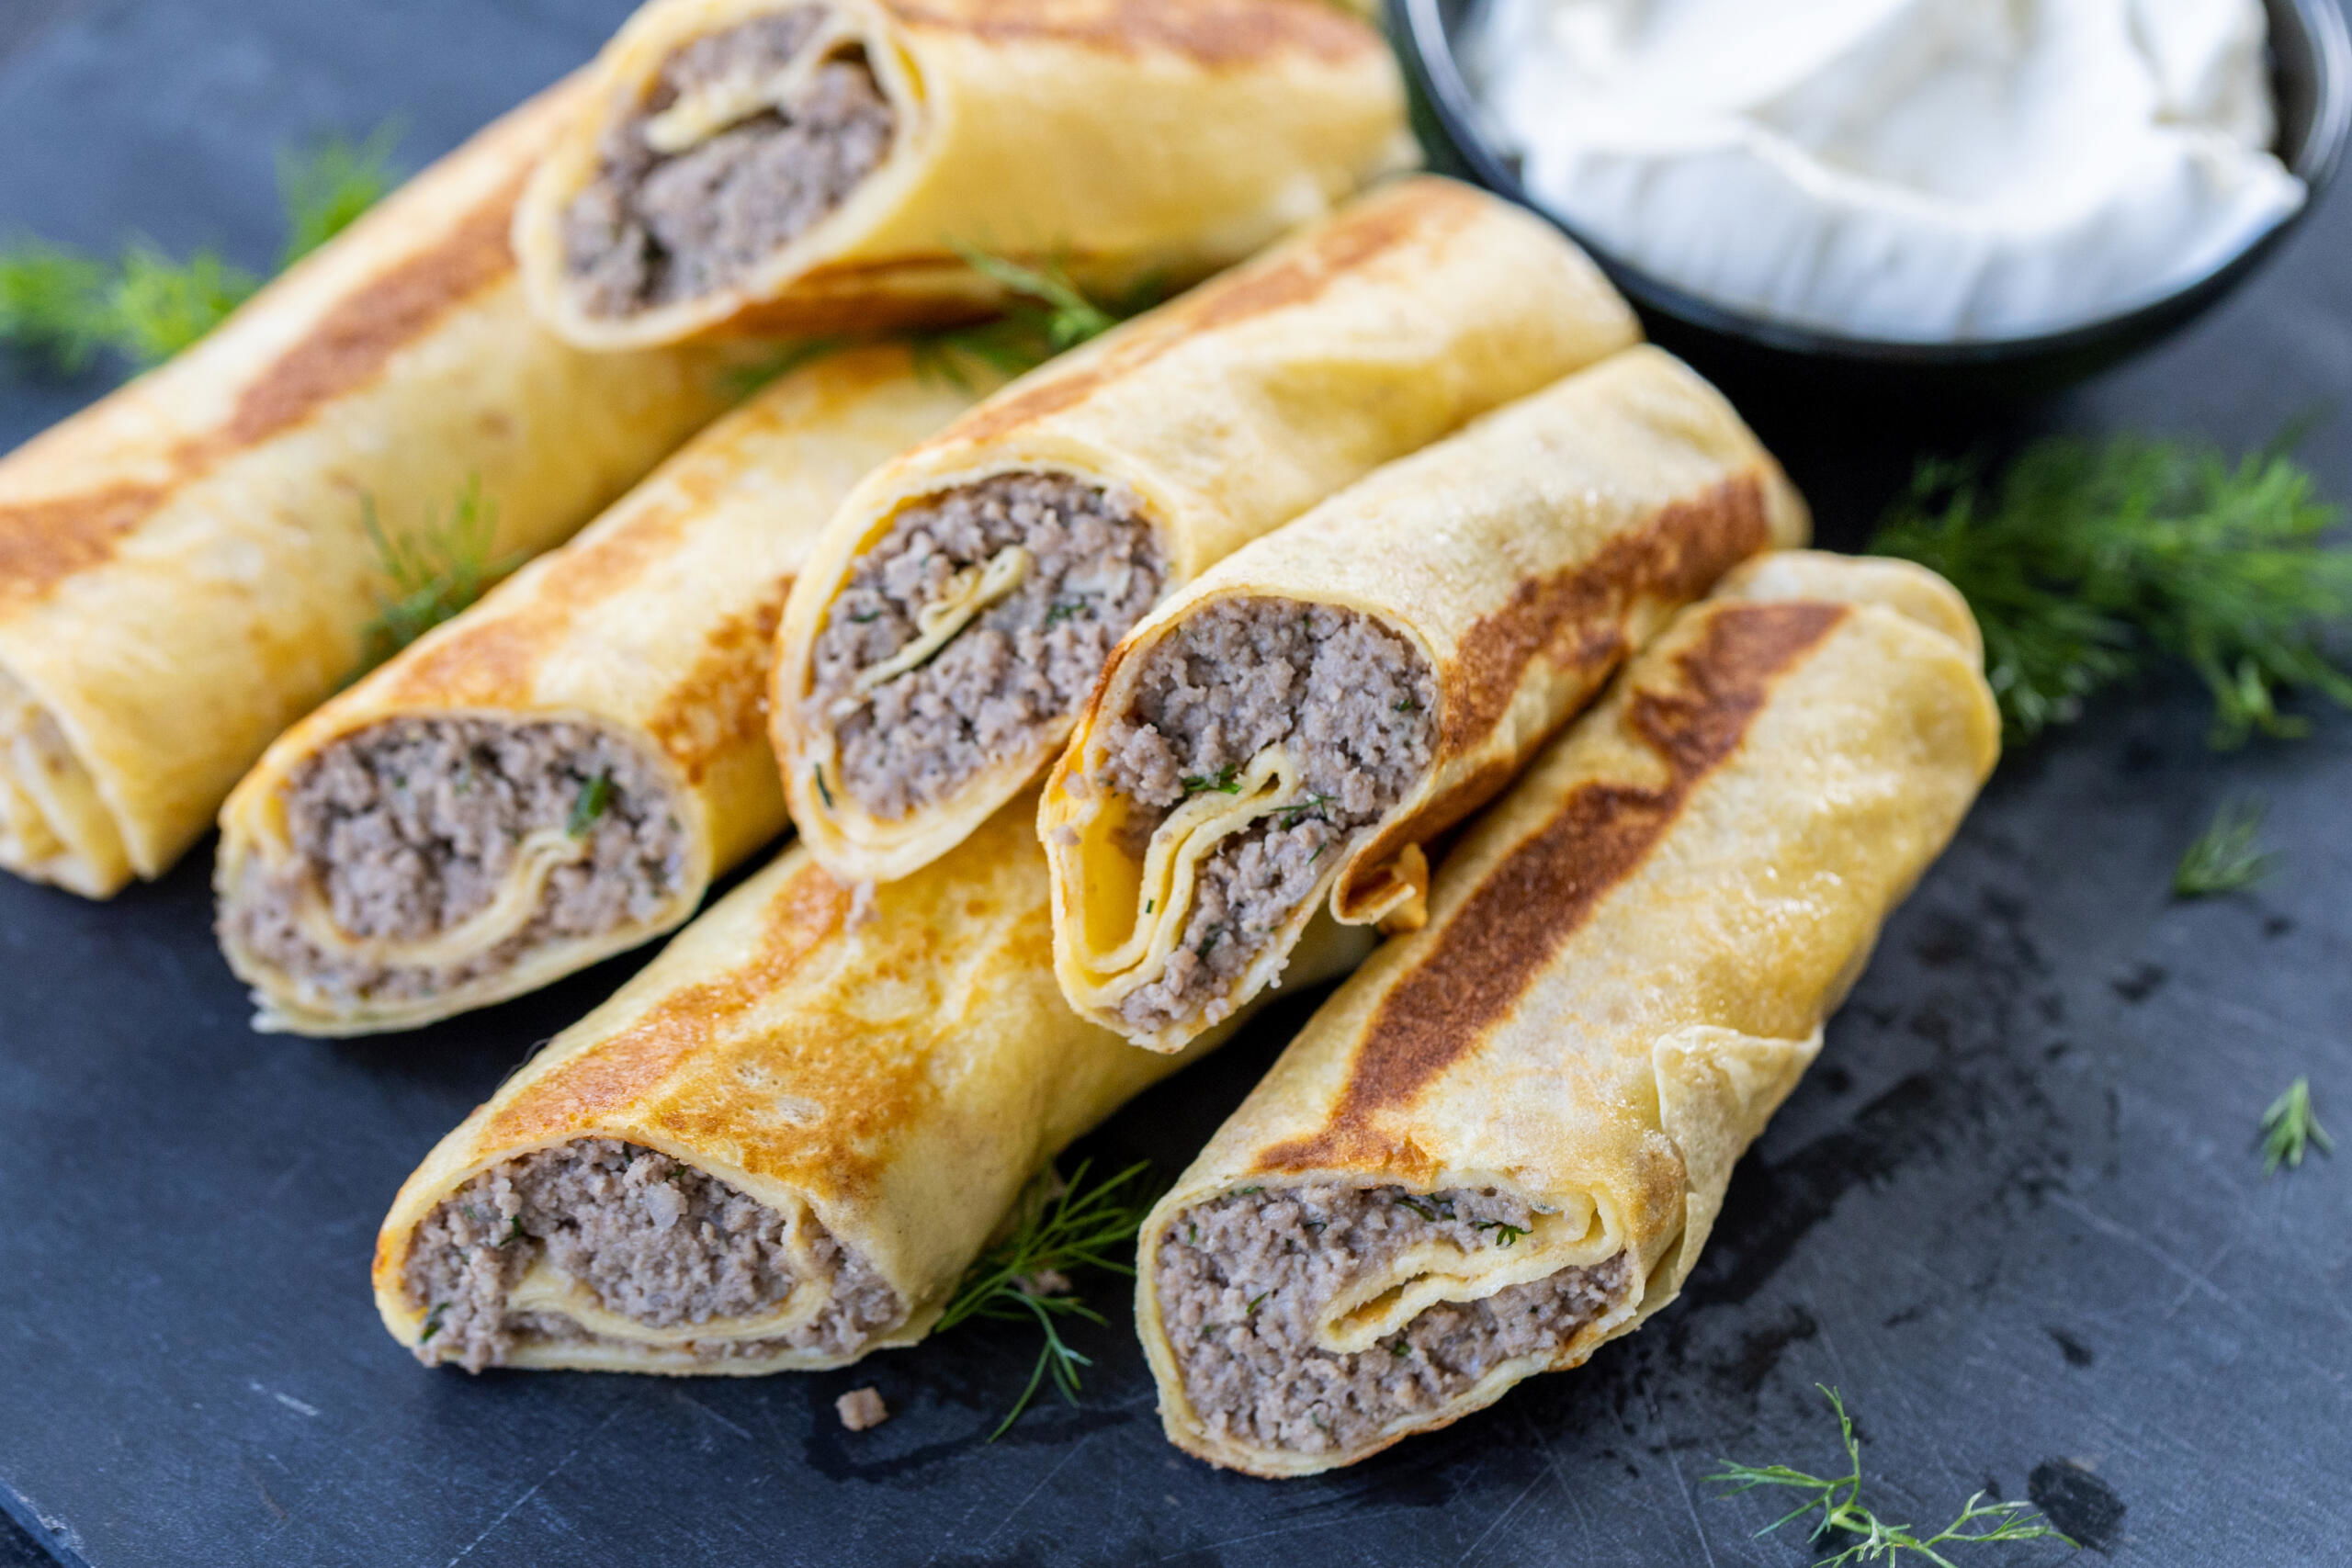
- Assemble and fry: Portion out the creamy meat filling onto all the crepes, then tightly roll them up. Fry the crepes in a buttered skillet until they are crispy on both sides.
Tips For the Best Blinchiki with Meat
Making blinchiki with meat is pretty straightforward, but I’ve learned that a few simple tricks go a long way. Here’s how I ensure that my crepes don’t tear and the filling stays perfectly juicy.
- Customize the filling. Freshly shredded cheese, sautéed mushrooms, and/or a bit of broth make delicious additions to the filling. Don’t be afraid to make it your own!
- Grind the meat filling. This may be the most important tip for authentic meat blinchiki. You want the filling to be as smooth and creamy as possible, so run it through the grinder twice if needed. If you choose to use a food processor, take care not to over-process, as this may result in a baby food consistency.
- Add the dill at the end. This way, it stays fresh and green. The Slav in me always needs to add dill to dishes haha… trust me, it really makes a difference in the flavor!
- Fry the crepes seam-side down. Sealing the seam is the best way to protect the crepes from unraveling once they hit the heat.
- Serve the crepes warm with butter and sour cream. My mouth is watering just thinking about this… dig into the blinchiki while they’re still warm with the classic toppings of melted butter and sour cream.
Storage & Reheating
Remember how I advised to make a double or triple batch of these meat blinchiki? They freeze incredibly well, so this is like my secret hack for putting a meal on the table even on the busiest days.
- Refrigerator: To store for up to four days, place the cooked blinchiki in an airtight container in the fridge.
- Freezer: To store for up to three months, freeze the cooked blinchiki on a lined baking sheet, leaving space between each one so they don’t stick together. Once the blinchiki are fully frozen, move them to an airtight container. Thaw them in the fridge overnight.
- Reheating: Reheat leftover blinchiki in a skillet to crisp them back up.
More Slavic Comfort Food Recipes
- Borscht — Beef, potatoes, cabbage, and beets in a rich broth
- Pelmeni — Soft and tender dumpling dough stuffed with meat and onions
- Cabbage Pierogi (Varenyky) — Savory cabbage dumplings that are finished off with a pan-fry
- Savory Piroshky — Crispy on the outside, fluffy on the inside
- Potato and Cheese Pierogi — A classic for a reason… the mashed potato filling is irresistible
Recipe

Ingredients
Crepe
- 6 eggs
- 3/4 cup flour
- 2 cups milk
- 1/2 cup vegetable oil
- 1 tsp salt
Meat Filling
- 1 lb ground beef or half beef/half pork
- 1 tbsp butter
- 1 medium onion finely diced
- 1 ½ tsp salt adjust to taste
- ½ tsp black pepper
- 2 tbsp fresh dill finely chopped
- 2 tbsp butter for browning crepes
Instructions
Crepes
- In a large bowl, whisk together the eggs and flour until smooth. Pour in the milk while stirring, then add the oil and salt.
- Preheat a 11 inch pan or crepe pan until it is sizzling hot, keeping the heat at medium-high. Spray the pan with oil, but just this once. You don't need to do this for the remaining crepes, as the batter already contains enough oil.
- Lift up the frying pan with one hand and pour the batter in with the other, rotating it carefully to evenly distribute the batter. Once the bottom is cooked, flip the crepe by lifting the edges with a fork carefully. After a few seconds, transfer the crepe to a plate. Repeat with the rest of the batter.
Meat Filling
- In a separate skillet, melt one tablespoon of butter. Add the diced onion and sauté until it is soft and lightly golden.

- Add the ground meat. Cook until it is fully browned, breaking it up. Season the meat with salt and pepper.

- Transfer the mixture to a food processor or pass it through a meat grinder (using the fine plate). Pulse or grind until the mixture is creamy but still slightly textured — do not puree completely.
- Stir the fresh dill into the meat mixture.


Assemble & Cook
- Place 2–3 tablespoons of the creamy meat filling onto each crepe and form it into a log in the center.
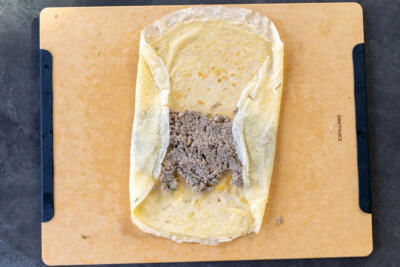
- Fold the sides in, then tightly roll the crepe up like a burrito.

- Melt two tablespoons of butter in a skillet over medium-high heat. Place the crepes seam-side down in the pan and fry until they are golden brown and lightly crisp. Flip and brown the other side. Enjoy!


I made these for an easy protein to grab on the go. They are very tasty.
Yes, exactly, Alexis! I love on the go protein options, too!