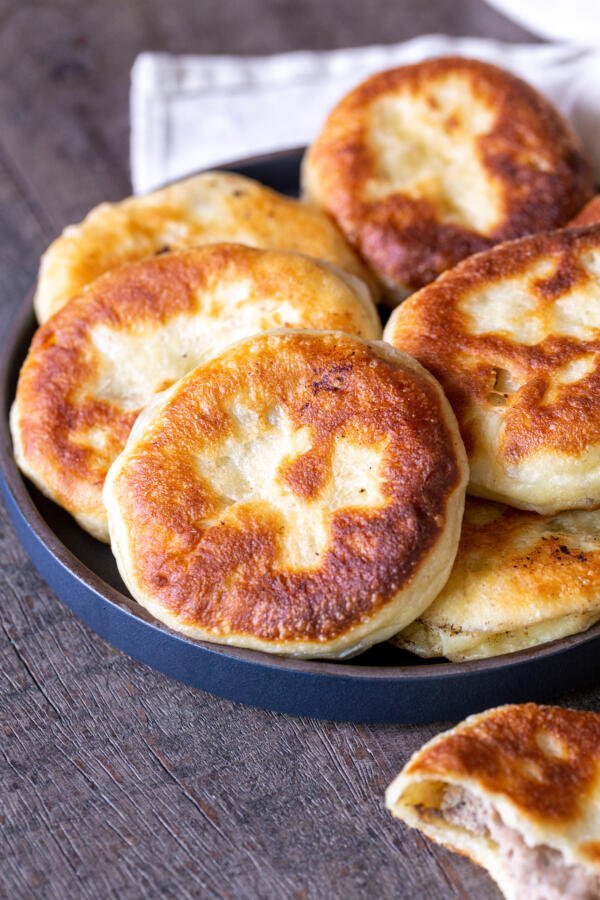
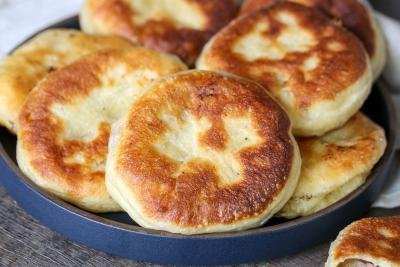
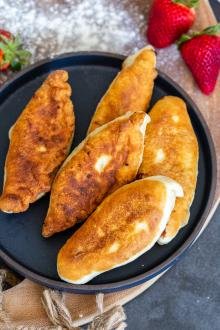
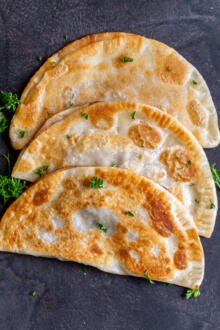
These savory piroshki are made with our favorite filling of ground meat and onions. They are an absolute treat and you’ll definitely be wanting seconds (and thirds)!
Love this recipe? If you love the savory flavor of these piroshki, you will go crazy over the deliciousness of these chebureki!
What are Piroshky/Piroshki?
Piroshki (or Piroshky), are baked or fried mini bread buns loaded with a savory or sweet filling of meat, veggies, or fruits — similar to hand pies or bierocks. In this piroshki recipe, the dough is made with sour cream (making the dough more moist and rich), while the filling consists of ground meat, onion, and your favorite meat seasoning.
The word “piroshki” translates most closely as “small pies.” These pies are highly popular in almost all Slavic or Eastern European countries. Each nation has their own spin on the dough and filling ingredients. No matter what the filling is made of, the end result is an irresistibly delicious fried comfort food that is hard to resist.
How To Make Piroshki
Piroshki (or piroshkis) take just under three hours to make — but the taste more than makes up for it! Plus, they’re great to double up on to store for later.
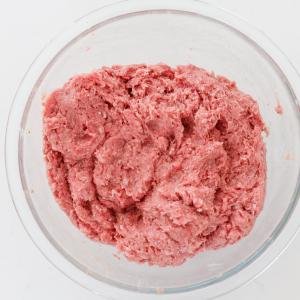
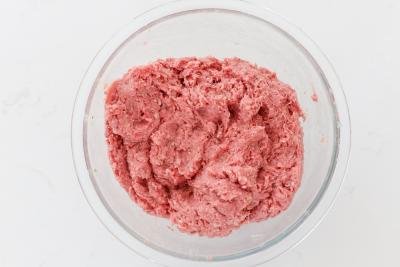
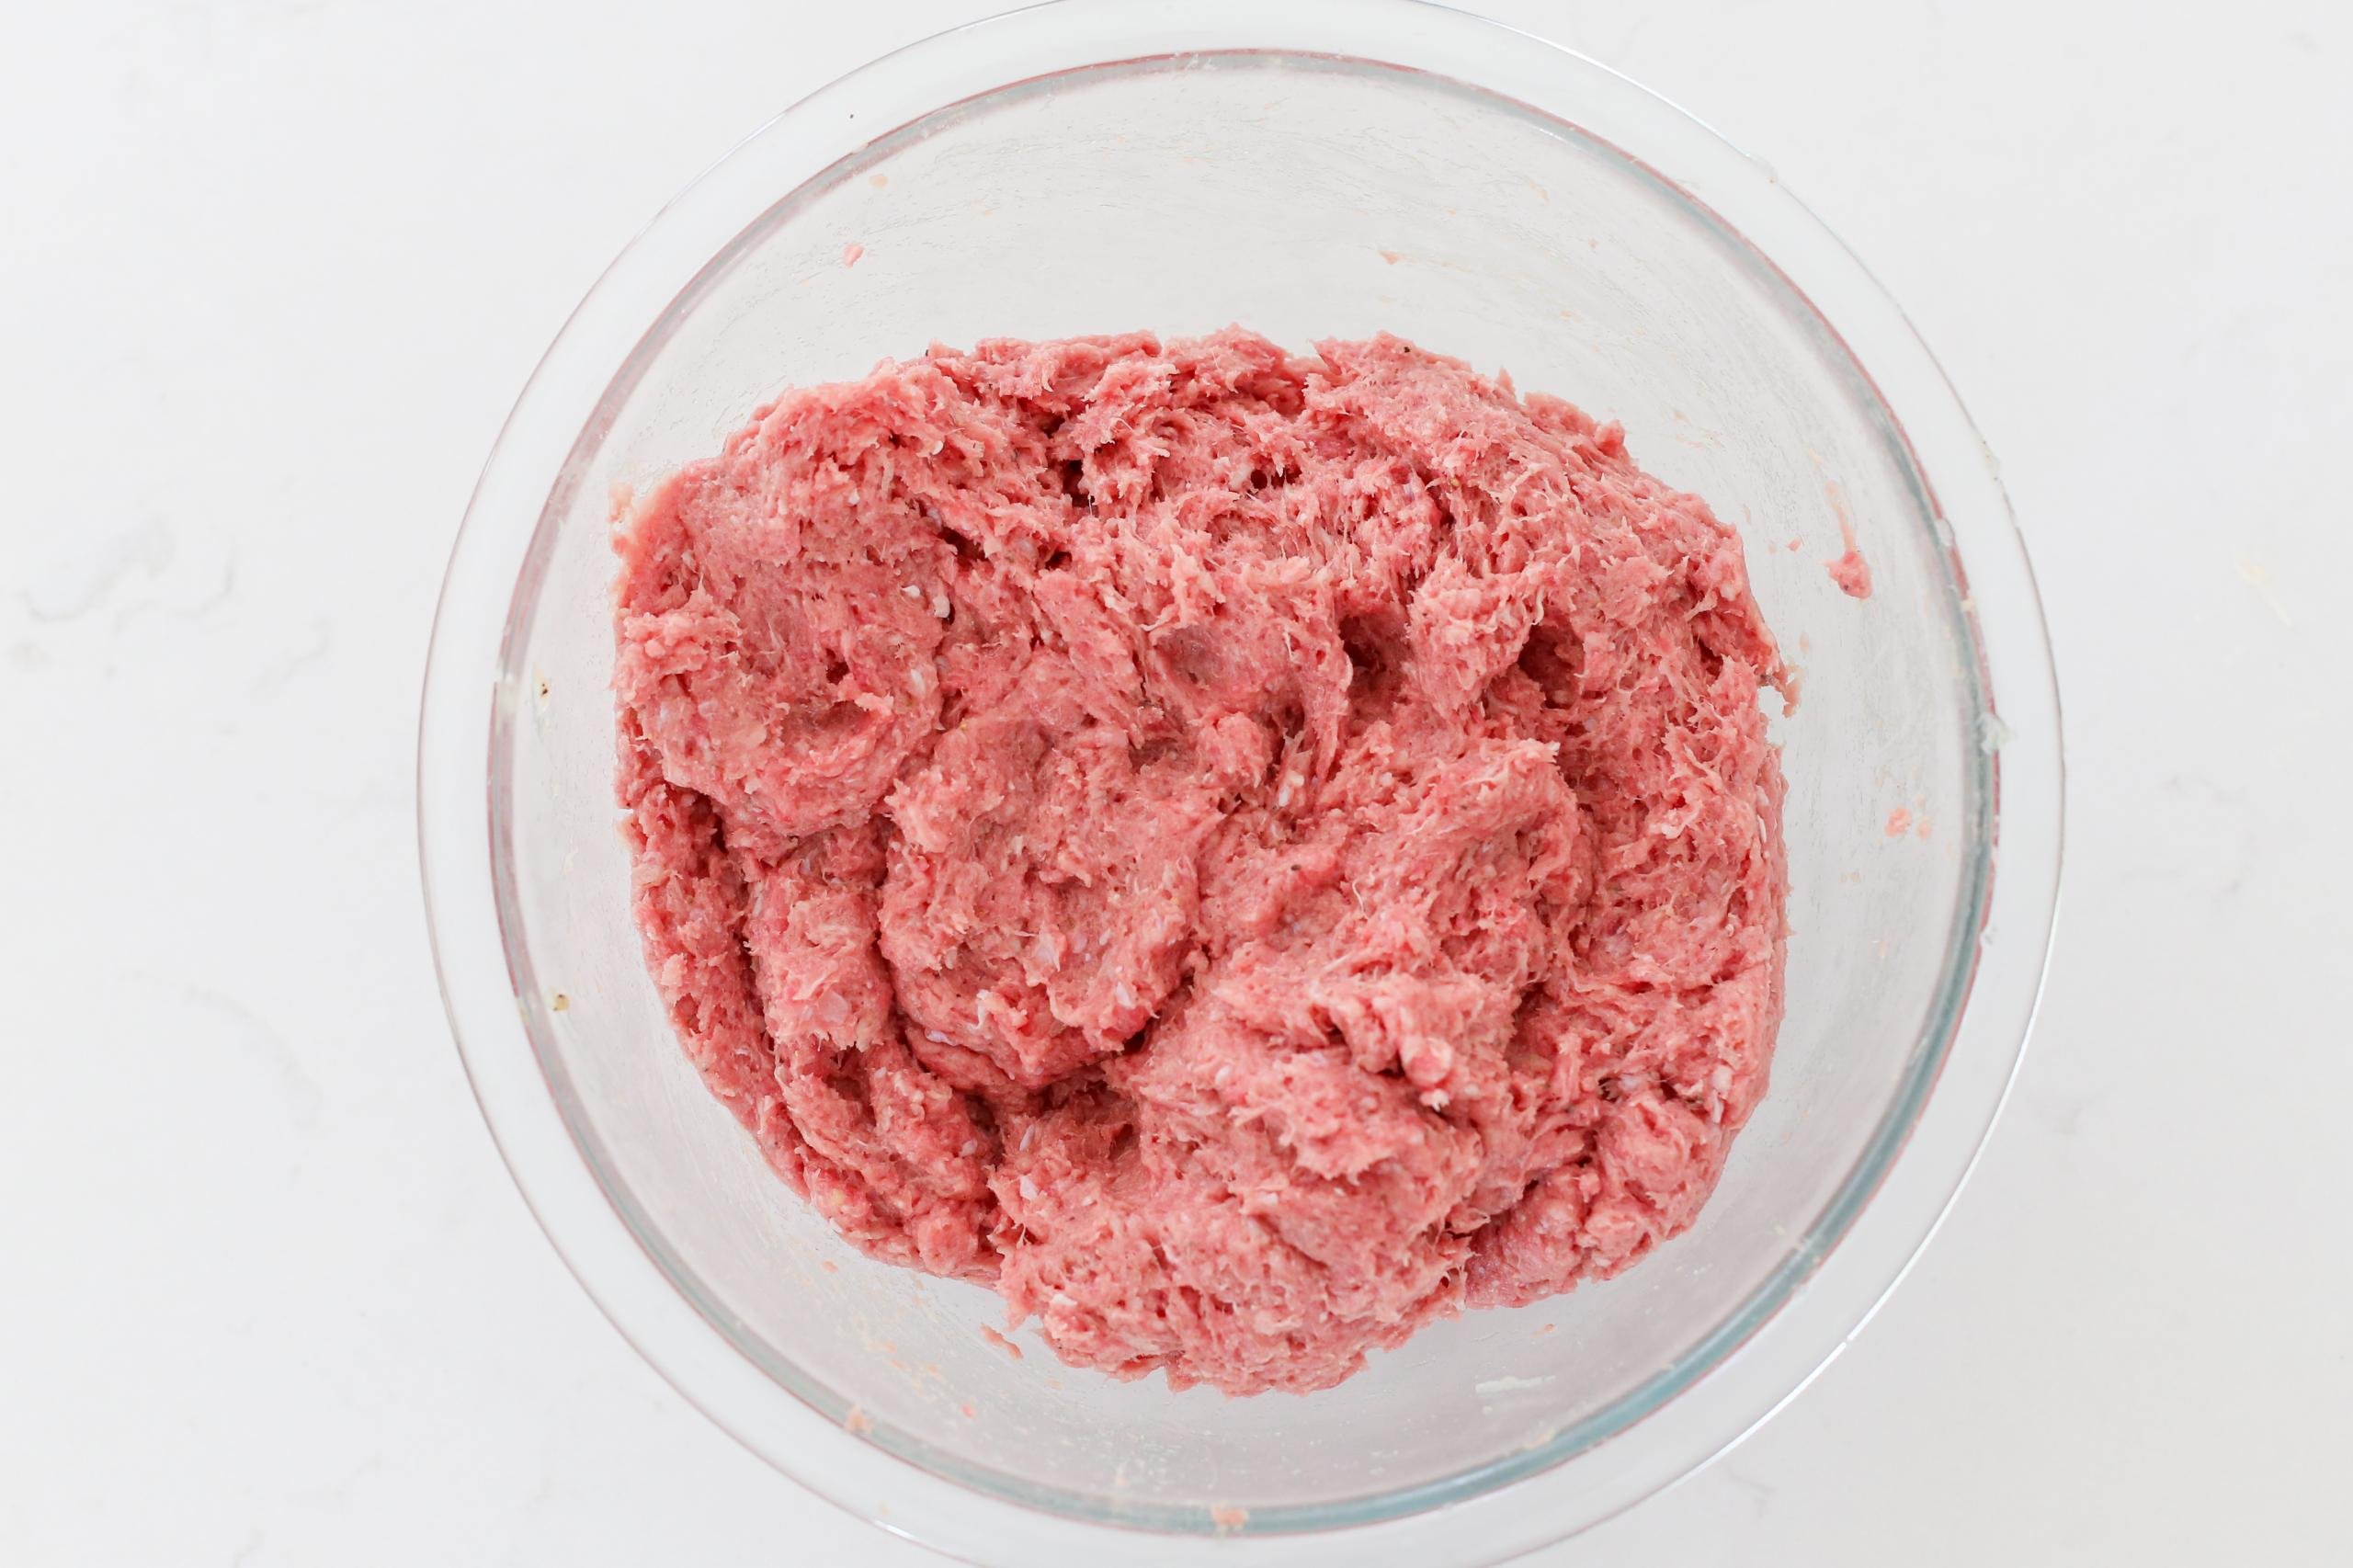
- Make the filling: Combine the ground meat and grated onion, then season it to preference with salt, pepper, or your favorite meat seasonings.
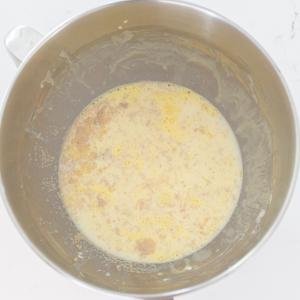
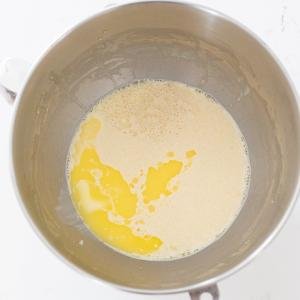
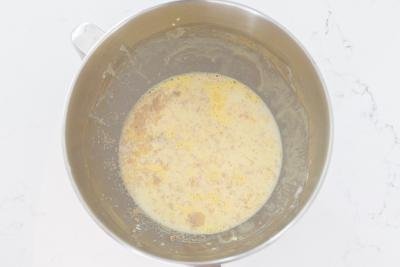
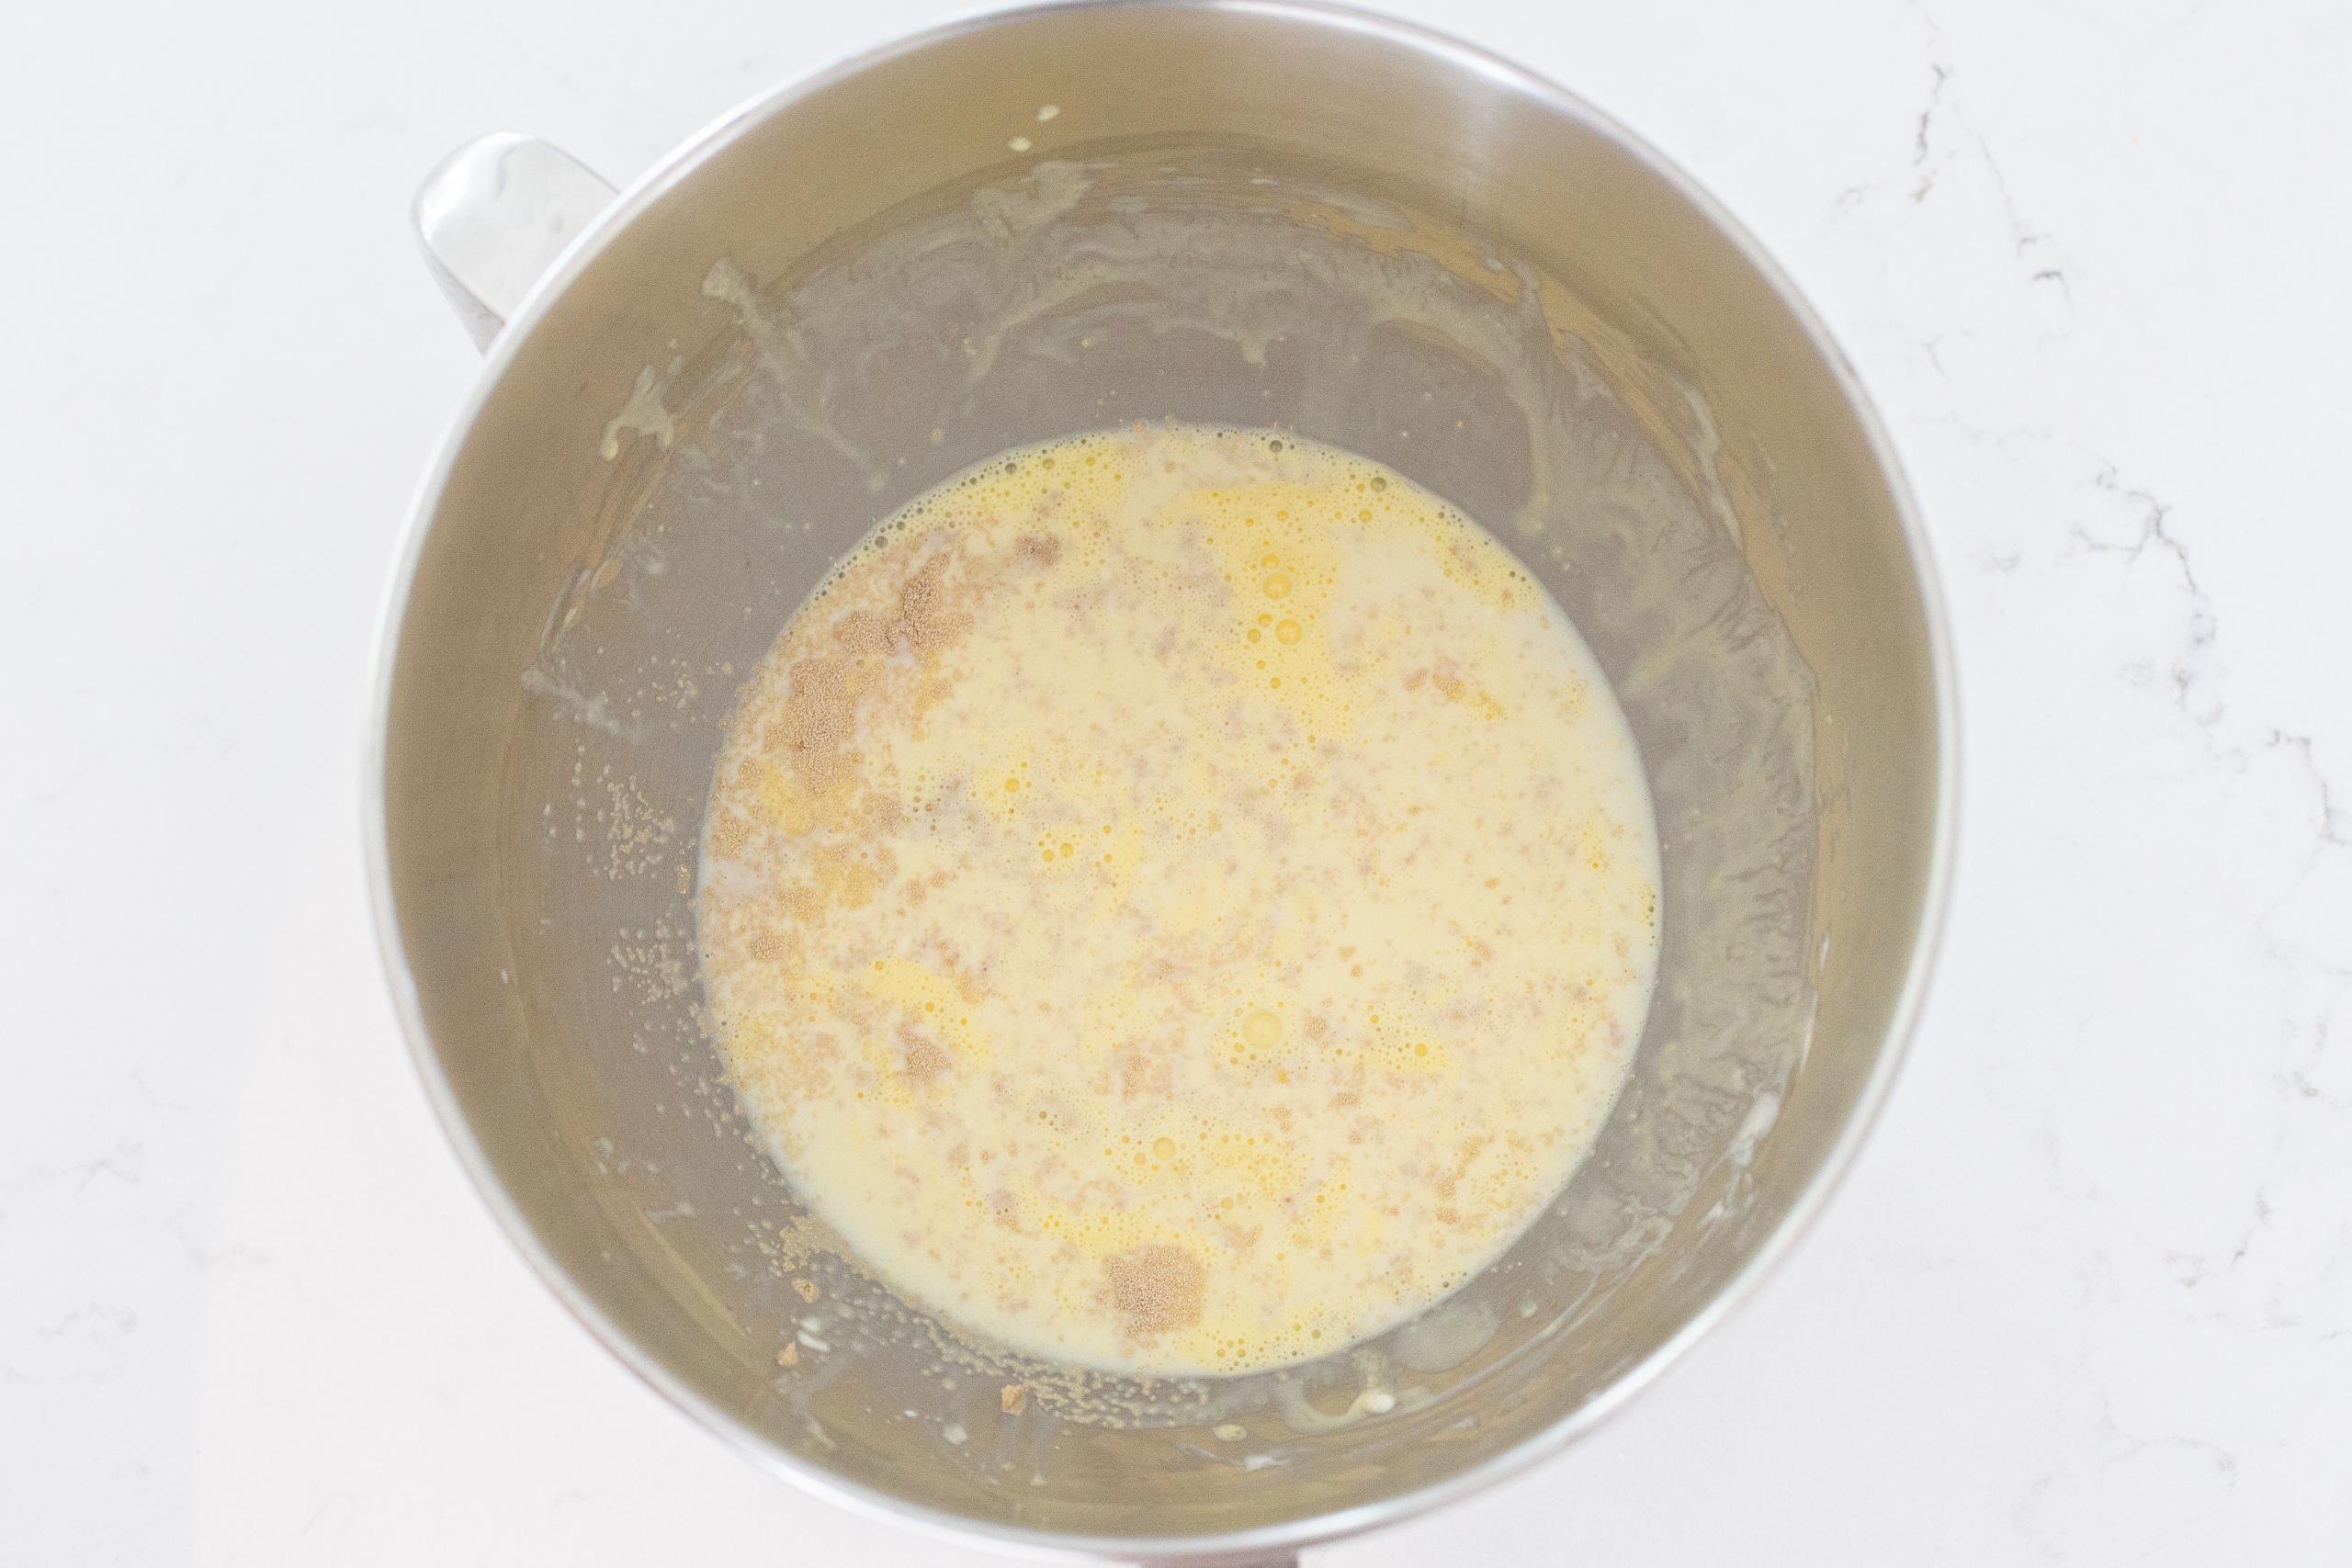
- Start on the dough: In the large bowl of a stand mixer, whisk the eggs, sugar, and sour cream together. Then, add in the water, milk, and dry yeast. Allow this mixture to sit for 30 minutes before adding in the melted butter.
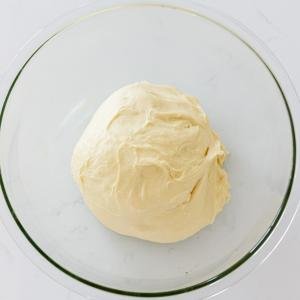
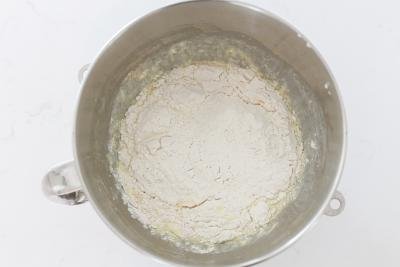
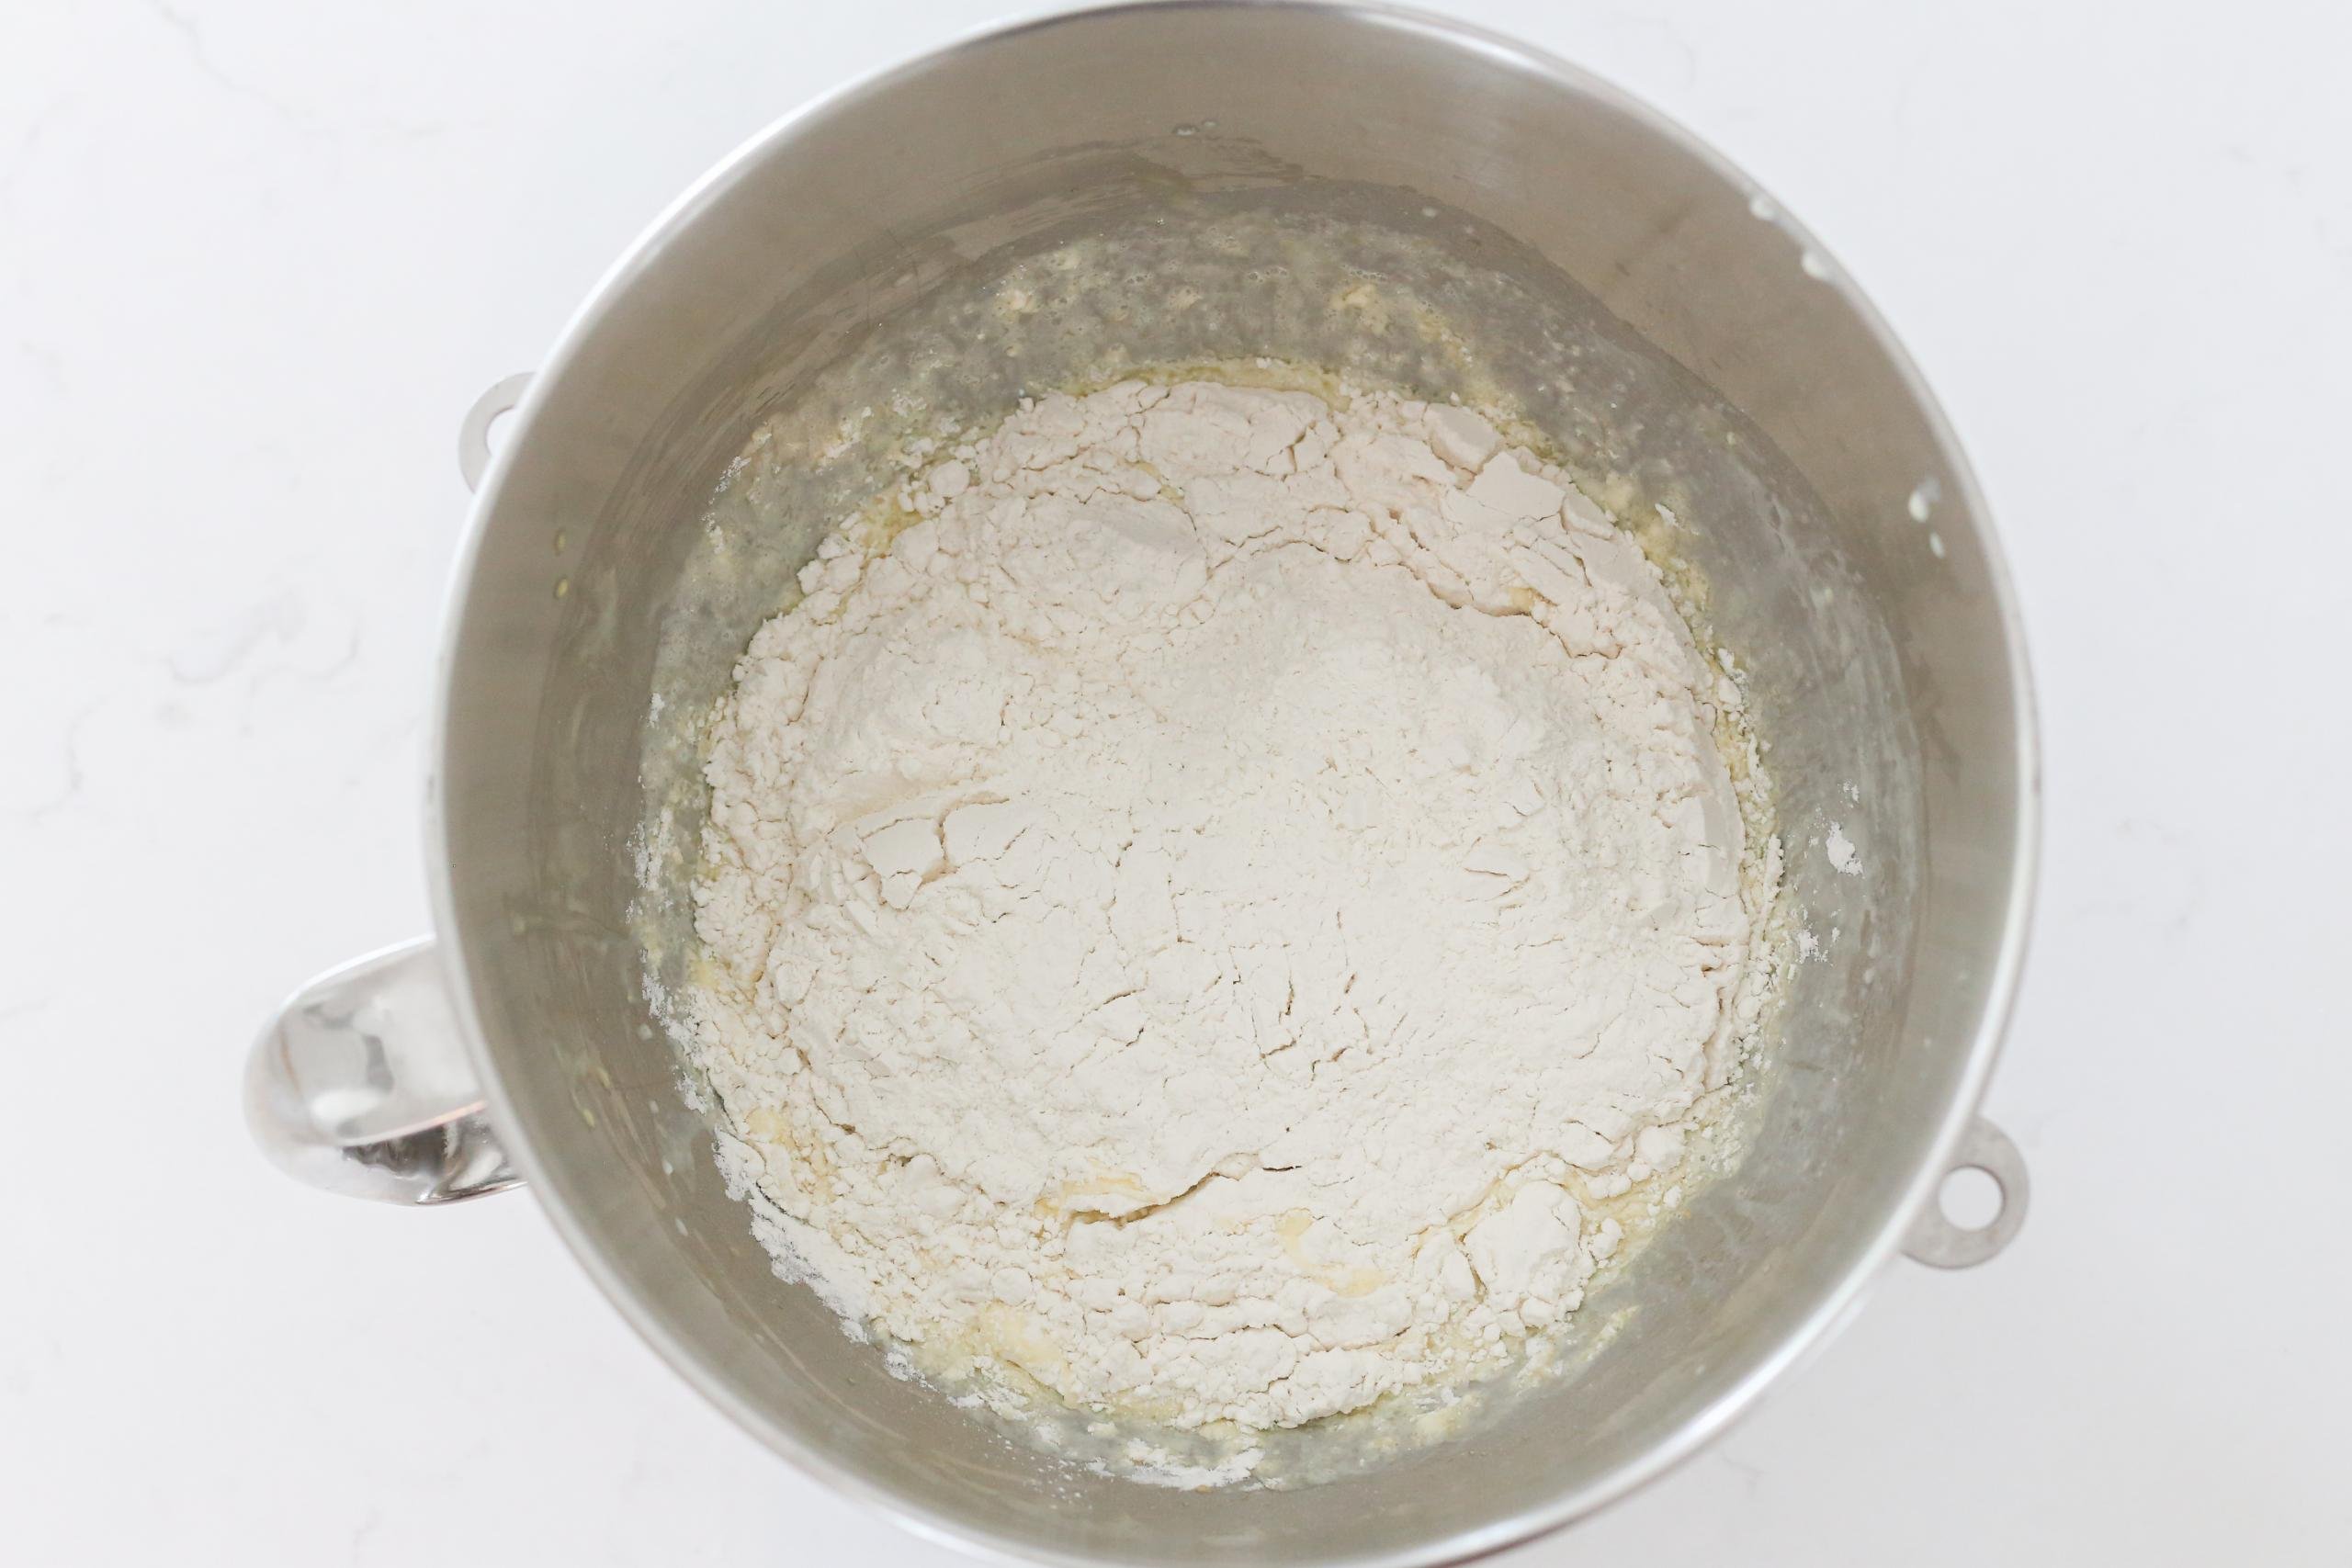
- Mix in the flour: Add the flour into the mixture in thirds. Knead the dough until it is no longer sticky, about 10 minutes.
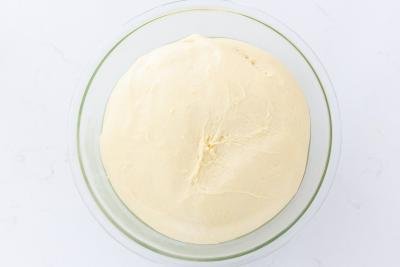
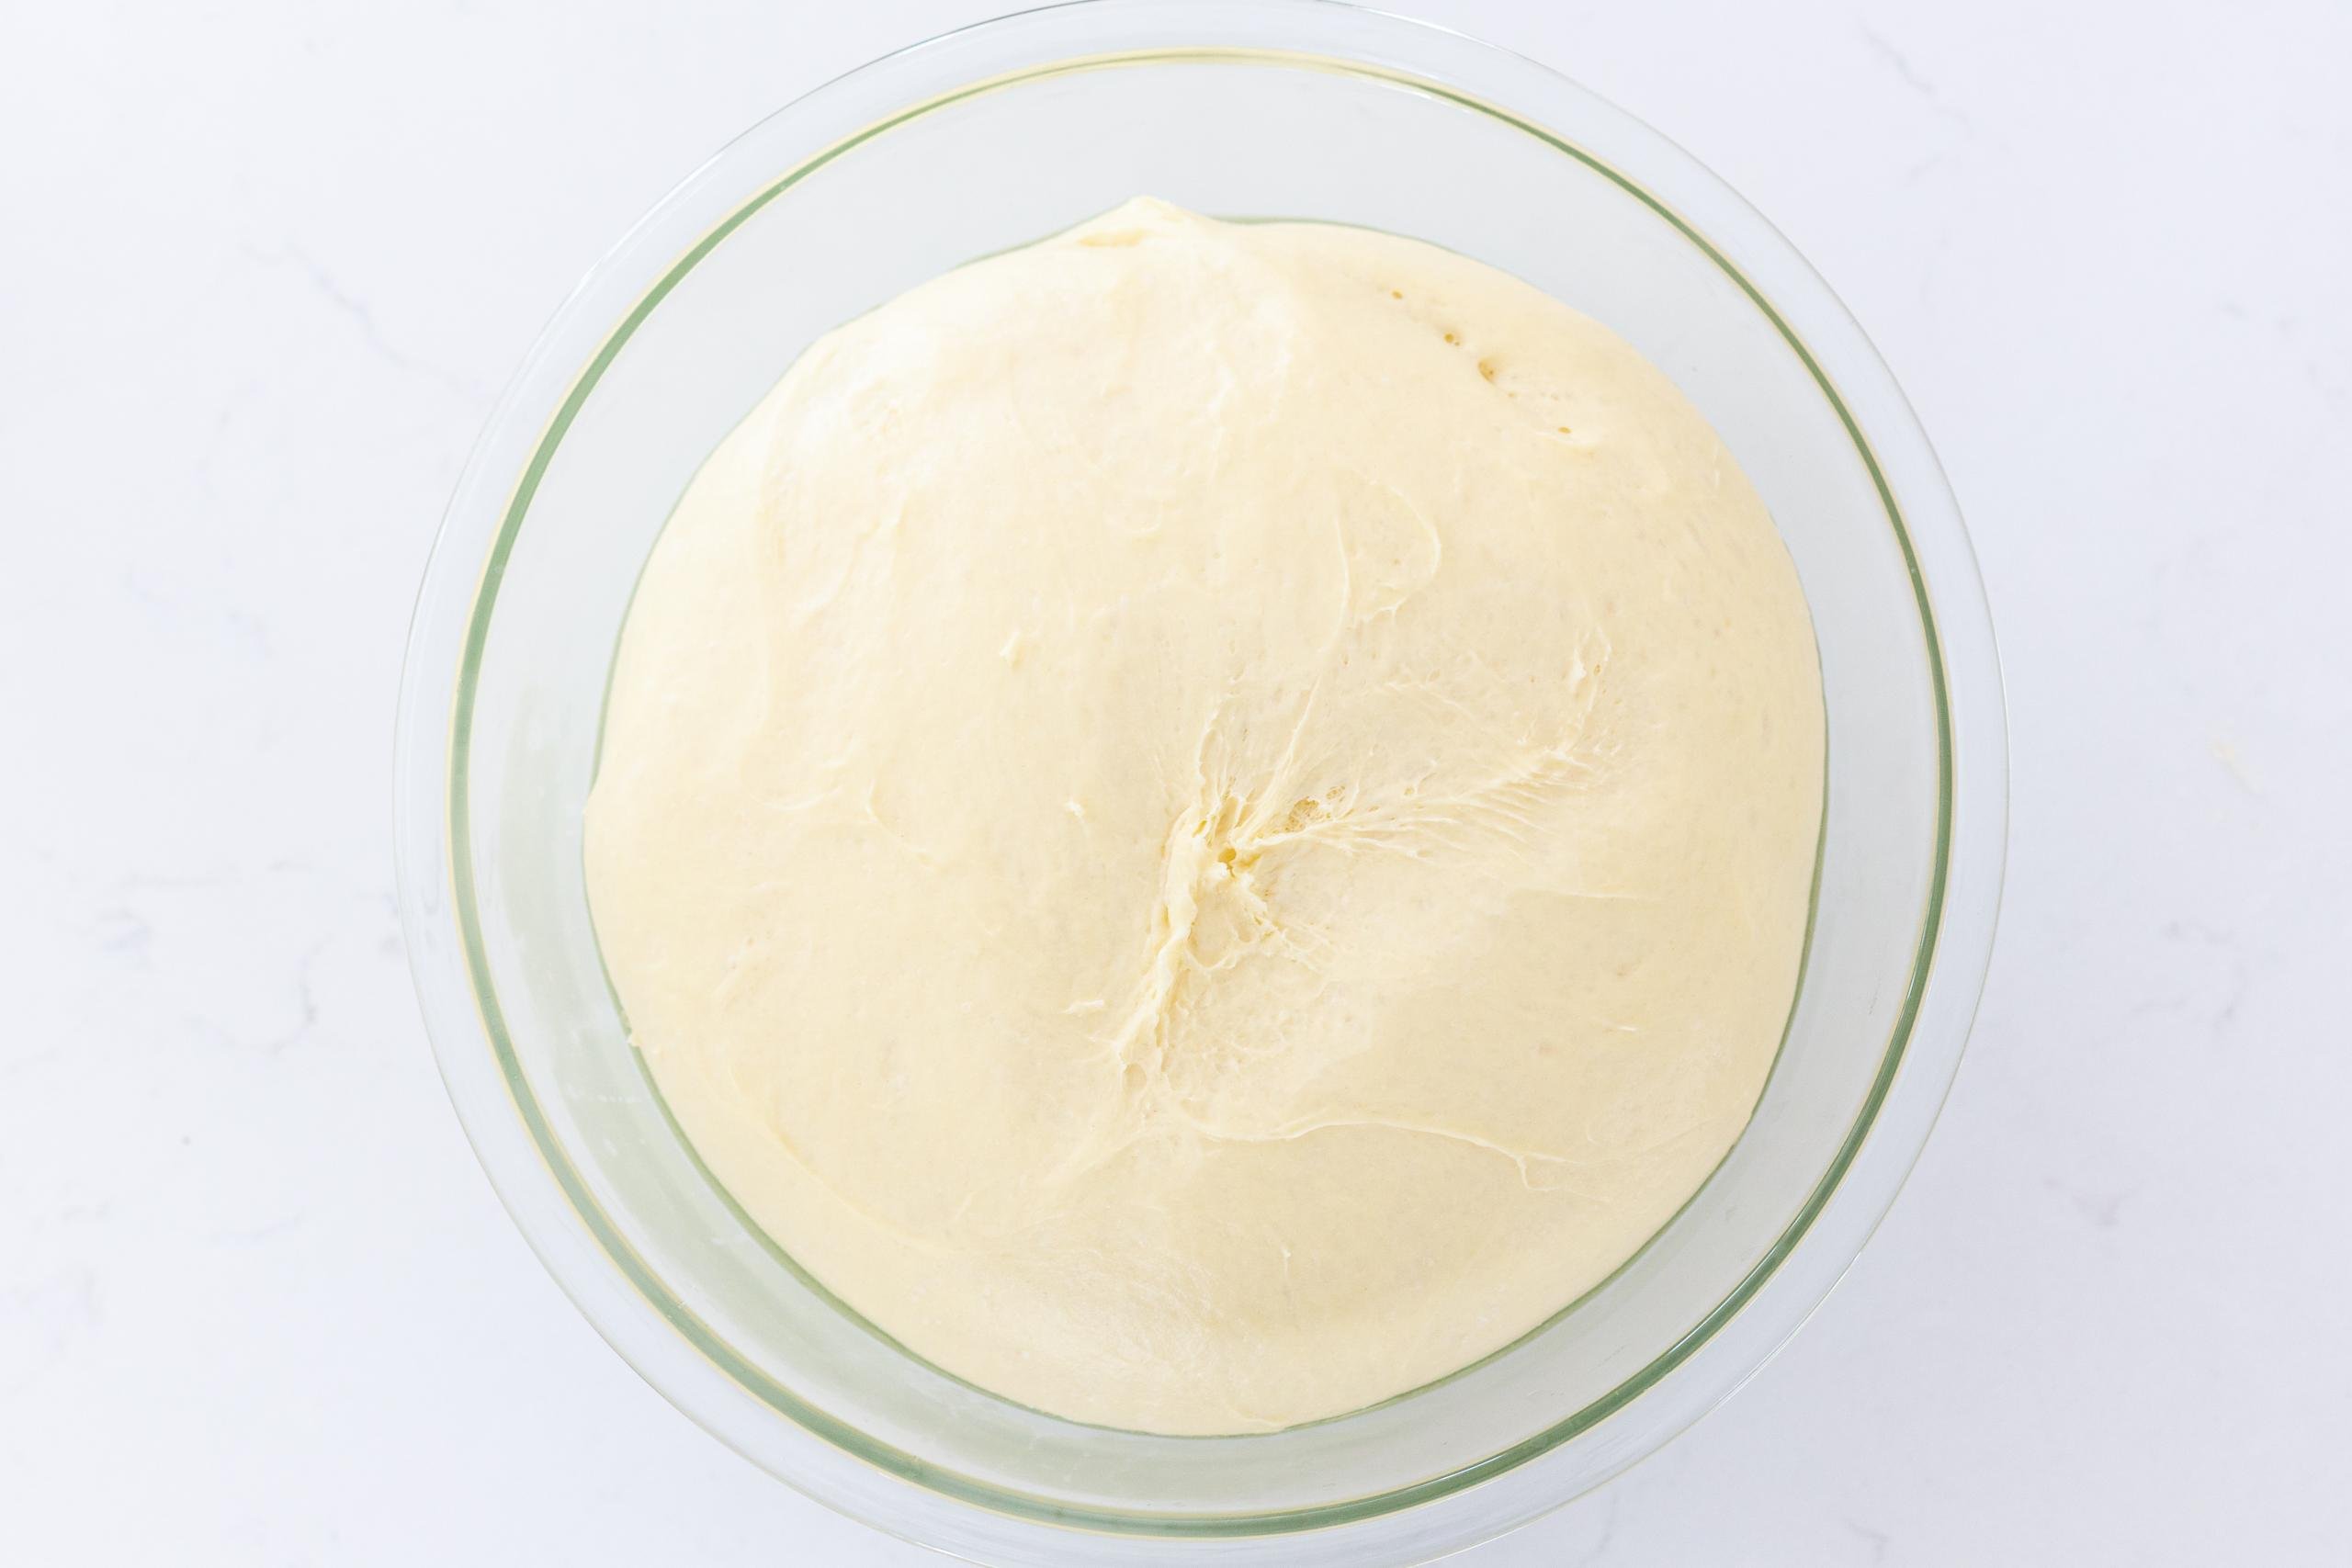
- Rise the dough: Cover the bowl with a towel and allow the yeast dough to proof for about an hour in a warm place.
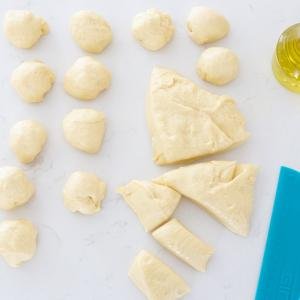
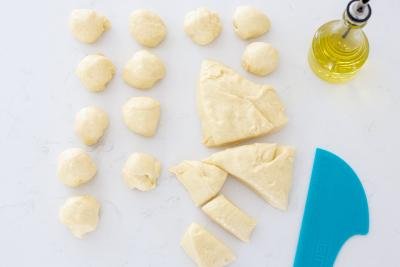
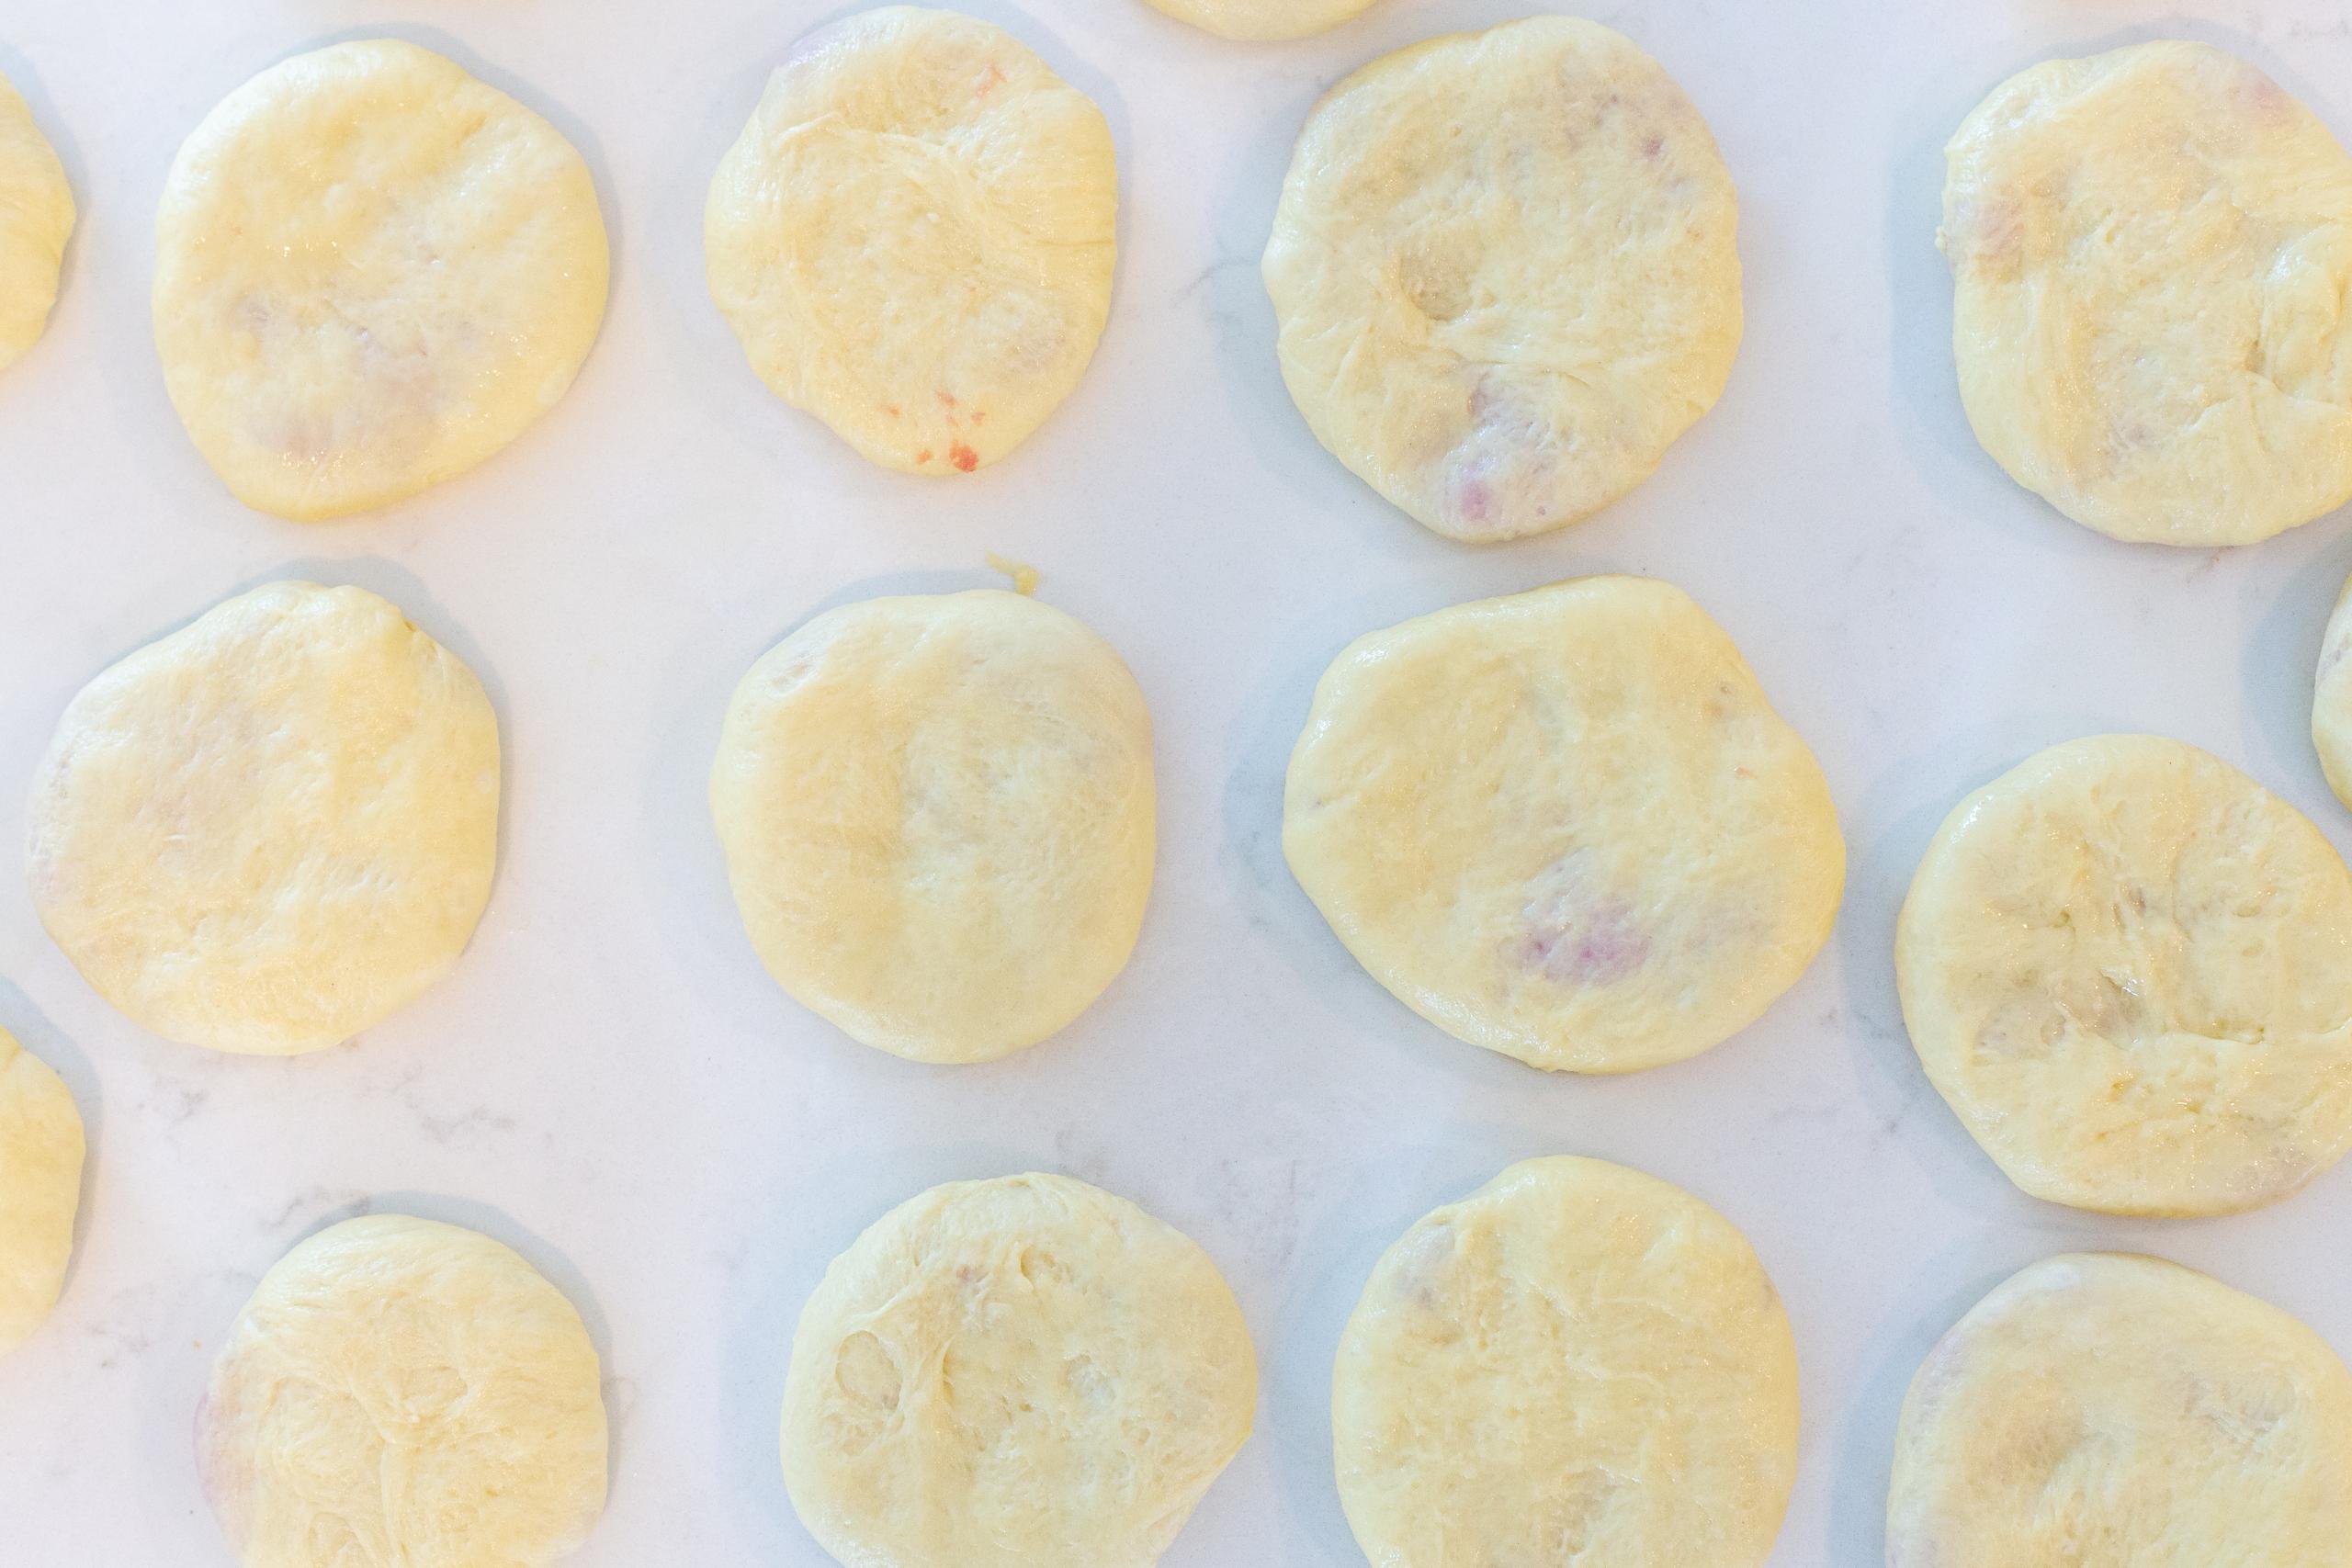
- Divide the dough: Oil your hands to prevent the dough from sticking to them. Divide the proofed dough into small balls equal in size, then flatten them into circles. Lay the dough circles on an oiled surface.
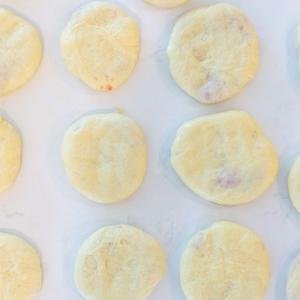
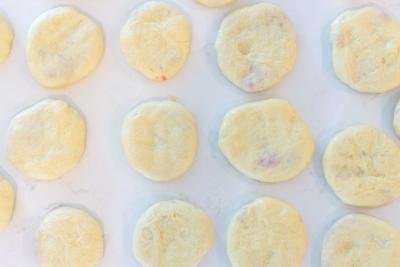
- Fill the circles: Place a dollop of the raw meat filling inside each circle. Fold in the sides and pinch the edges together to seal the dough. Once it is sealed, flatten the dough into round piroshki.
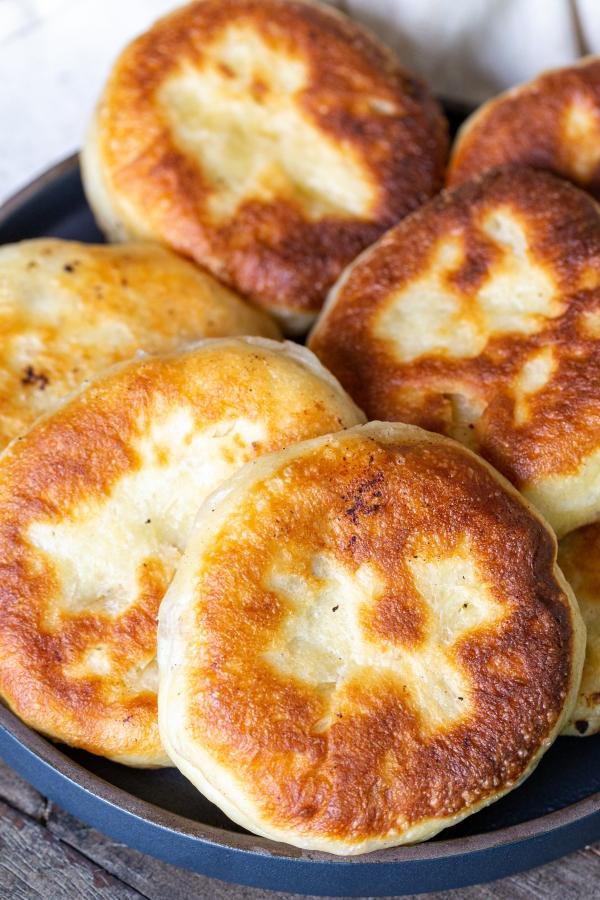
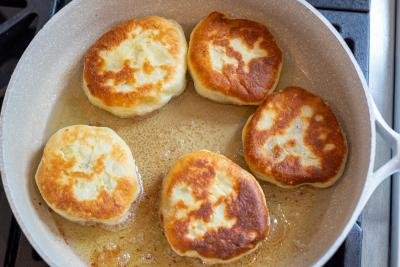
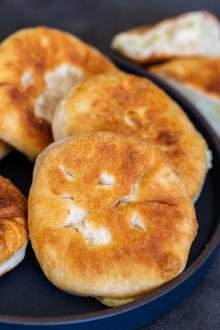
- Fry the piroshki: In a deep frying pan, add in the vegetable oil. Heat to medium heat, then fry each pie until it’s golden brown on each side. Tear one open to check doneness.
- Rest on a paper towel: As the piroshki finish cooking, lay them on a wire rack or a paper towel to absorb any extra oil. Cover with a towel until ready to serve.
Hot tip: For a super easy way to create a warm environment for your rising dough, boil a ramekin of water in the microwave, then add the bowl of dough into the microwave (leave the ramekin with water in there!). Let the dough sit in the steamy microwave until it rises adequately (don’t turn the microwave on!)
Tips for Success
Piroshki are the perfect handheld option for an on-the-go meal. Follow these tips to ensure an easy cooking experience and a delicious result.
- Use a mixer: Make the recipe easier by kneading the dough with a stand mixer instead of your hands. You won’t regret it.
- Change up the meat: Feel free to use whatever ground meat you have on hand. We prefer ground beef, but ground chicken and pork work as well!
- Add to the filling: For more texture and nutrition, add braised cabbage or small pieces of sauteéd mushrooms to the filling mixture. For a herby taste, add a teaspoon of freshly minced dill. If you love cheese, add in a bit of cheddar cheese!
- Oil your hands: Keep your hands oiled when working with the dough. Piroshki dough is notoriously sticky and the stuffing process should be fun, not messy!
- Test the oil with a wooden spoon: To see if the oil is hot enough for frying, place the end of a wooden spoon into the oil. If it sizzles, it is ready for the piroshki. Adding the piroshki too early causes them to soak up too much oil — making them soggy and too greasy.
- Avoid high heat: Do not fry piroshki at high heat! Keep the frying pan at medium heat so the filling cooks at the same rate as the dough.
- Place the piroshki on a paper towel: Place the fried piroshki on top of a paper towel to absorb the extra oil. This also helps prevent your pastries from becoming soggy!
Serving Piroshki
Piroshki are best served warm as a snack, appetizer, or main entrée. They pair well with light sides such as salads, veggies, or a soup. Israeli couscous salad, creamy cucumber salad, and arugula caprese salad are refreshing salads that balance well with the fried piroshki. If you like the flavor of pickled foods, make a bowl of marinated tomatoes or pickled vegetables (giardiniera). Or, take a shortcut to delicious veggie flavor with air fryer asparagus or air fryer broccoli. For soup pairings, try vegetable soup or tomato basil soup.
Storing & Reheating
Piroshki are a great make-ahead meal, so it’s important to store and reheat them properly. Follow these tips for the best tasting leftovers.
- Refrigerator: To keep for 2-3 days, place completely cooled piroshki into an airtight container in the fridge.
- Freezer: To keep for up to two months, place cooled piroshki in an airtight container or freezer safe bag with layers of parchment paper between them. Thaw the frozen piroshki in the fridge overnight.
- Reheating: The best way to reheat piroshki is in the air fryer set to 350°F for a few minutes. They will come out crispy just like when they were fresh. Or, pop them into the oven at 350°F for about five minutes.
FAQ
What’s the difference between pierogi and piroshki?
Pierogi and piroshki are very different — pierogi are meat or cheese filled dumplings, whereas piroshki are meat, cheese, or veggie filled buns that are fried.
What’s the difference between piroshki and chebureki?
Both piroshki and chebureki are filled with meat and fried to get a crispy shell. However, piroshki have an outer bread-like exterior, whereas chebureki have a more fried tortilla-like exterior.
More Piroshki Recipes
- Potato Piroshki Recipe — Filled with a creamy mashed potato filling
- Overnight Piroshky — Meat or cabbage piroshki made with an overnight dough
- Fruit Piroshky — Filled with your favorite jam or jelly!
- Quick Fruit Piroshky — Use this no-yeast recipe for piroshki in under an hour
About Author
Recipe

Ingredients
Piroshky Dough
Filling
- 3 lb ground meat
- 1 large onion grated
- 1 tbsp salt adjust to preference
- 1 tsp ground black pepper adjust to preference
- oil vegetable or canola for frying
Instructions
Piroshky Filling
- Combine the ground meat, onion, and season to your preference (I prefer using salt and pepper).
Piroshky Dough
- In a large bowl, whisk the eggs with sugar and sour cream. Then, add water, milk and yeast. Let it sit for 30 minutes. Add the melted butter.
- Mix in the flour in thirds. Knead the dough until it no longer sticks to your hands, at least 10 minutes.
- Let the dough rise for an hour.
- Using oiled hands, divide the dough into small evenly sized pieces. Form the dough into circles and leave them on an oiled surface.
- Flatten out the dough and place the filling inside. Flatten out the meat across the dough. Fold over the sides and pinch the edges together to seal the dough. Once it's sealed tight, flatten out the dough into round piroshki. Place them side by side on an oiled surface.
- Fill up a deep frying pan with lots of oil and place over medium heat. Fry each piroshok until golden brown on each side. Tear open one piroshok to confirm readiness.
- Lay the piroshki out on paper towel to absorb some of the oil. Keep them covered with a towel until ready to serve.


This is the best dough I’ve ever tried for peroshki!! I did add some salt to the dough, and I have to say this recipe makes a lot of them but I’m not complaining it was absolutely perfect!
That's so great to hear, Natasha! Enjoy all of the piroshky!
This was a wonderful recipe! Mine turned out beautifully and I baked instead of frying them. I placed them on a well buttered pan and then brushed each one with butter. Baked them in a preheated 350F oven for about 40 minutes. Filling was cooked (temperature inside was 165F) and the dough was nicely browned. My entire family loved them. I will definitely be making them again. Thank you!
Thank you for sharing your baking method! I baked some today and they turned out perfect!
Of course, Vera! Enjoy your piroshky!
I'm so glad to hear that the recipe turned out beautifully for you! Baking them with butter sounds like a delicious twist, and I’m sure that added some extra richness. Thank you for sharing your adjustments, and I’m so happy your family loved them!
Moms dish. Thank you so much for the most amazing recipe for the pirozki. I prepared them today, the dough was so soft and workable. I tried to bake some in the oven, but I would say they taste better fried. Thank you for the 1st time Success
Hi Yelena, so glad you got to try this recipe. I have tried baking them, thanks for sharing that feedback. ISn't everything better fried, lol.. Have a great day.
Pirozhki are my least favorite to cook (but favorite to eat) and so I’ve tried this recipe twice. I don’t believe these ratios can possibly be correct, and the mix of metric and US measurements makes me believe this even more. The first batch I made, I finally got the dough to be workable (extremely sticky but workable) with 3 additional cups of flour. The dough was fluffy and nice but tasted very bland. The second time I tried, I just couldn’t get the dough to be workable. It stuck to everything. Perhaps half the amount of warm milk….? Alternatively, are you measuring out 7 cups of packed flour?
Hi Elizabeth- I'm sorry to hear this recipe wasn't working out, I know how frustrating that can be. Since this dough is more hydrated and can be a little sticky, I recommend well oiled hands to make it a bit easier to handle and shape the dough. I apologize about the confusion in mixing both metric and US measurements in this recipe.
If I were to bake meat piroshky, how long and at what temp should I bake it?
Hello Lid, I personally never baked this dough so I can't really make a recommendation. If you do bake them, let me know how they turn out, I would love to hear your feedback 🙂
These sound so good! However I found out I have a gluten sensitivity. Is it possible to make these using a gluten free flour or blend?
Cheri, I have never tried it, I am not sure how it would work. If you do try it, please share feedback.
Hi! Would this filling work with the yeast free dough from your potato piroshki recipe? I'm trying to make something to remind my russian boyfriend of home but am ALWAYS short on time 🙁
Hey Jenn, yes but fry them on lower heat for a longer time. You have to make sure the filling is fully cooked. Enjoy 🙂
Hey Natalia! Great recipe. Could you tell which dough to use for baked piroshki with meat. Would appreciate the recipe for turkey leftovers for stuffing for baked piroshki. Thank you!!!
I would use this recipe but probably reduce the sugar in the dough. https://momsdish.com/recipe/3…
What type of seasoning do you use for the meat? Can’t find that question answered yet. Excited to make some soon.
Hey Diana, I always use good old salt and pepper. If you have a favorite meat seasoning, it would work great in this recipe. Hope you love this recipe.
How long do cook the frozen ones in the air fryer?
Hey Katie, for even heating you would want to thaw the piroshky before reheating them. Air Fryer is great for reheating cold Piroshky. Enjoy
Are using row meat for filling or are you cooking it before? I missed that part.
In this recipe, I am using raw meat. You can precook it if you wish but this has been my preference.
Hi. Just to make sure, you are using only egg yolks? If I want to make half do I use 4 egg yolks? Another question - May I bake mine instead of frying? Thank you, thank you
Hey Mia, the recipe calls for 5 egg yolks so use 2 or 3 if you are making 1/2 portion. I personally never baked this dough so I can't really make a recommendation. If you do bake them, let me know how they turn out.
Thank you for a quick reply and I will definitely let you know if I’ll bake them. Can’t wait. They look so delish
Mia, looking forward to hearing from you!
This looks amazing! Love your recipes! Could you please provide how many pieces of dough there would be for the full recipe and also an approximate size of each dough ball before flattening?
Hey, thank you so much for such a sweet comment. This makes about 40 piroshky.
i make something very similar. I add fried cabbage with onions to the meat. and bake at 350 for about 45 minutes amazing
Hey Cindy, that sounds amazing. We also bake piroshky but typically they are filled with jam.
Wow! Looks really delicious! Can't wait to try it! Thanks for the recipe 🙂
Hey Noemi, thank you! I really hope you love it!
You had me at Piroshky Piroshky in Seattle! Went there several years ago and can remember that delightful experience looking forward to trying your recipe
Yes, I know exactly where that is! I use to work a few blocks from there. 🙂 Enjoy!
How many Tbs of butter exactly? I don’t have a scale to measure grams.
Hi Inna, its 4.67 tbsp. The butter stick typically has grams marking on it. Not sure which brand of butter you use.
I can't wait to try this! Sounds so delicious!
Taylor, thank you. Keep me posted on how you like them. 🙂
Oh, these look SO good!
Katie, thank you!
Thank you so much for the easy to follow recipe with great pictures, these Piroshki's are amazing!
Thank you Billy! Its an honor hearing such a nice compliment from you!
This is so unique and delicious looking!! Can't wait to try this out with the kiddos
Thank you Natasha! My boys love playing with dough. I hope you have just as much fun!
I've never tried these but they look amazing. Can't wait to taste them!
Thank you Krissy! I hope you love them!
They are so good!
Wow! They look so perfect! I think I wi make some this weekend.
Really good! I put about 1/2 cup extra flour for them to absorb less oil and it was perfect! Thanks for the great recipe!
Depending on the flour you may need to use more. Thanks for sharing the tip with others 😉
Hi Natasha. You don't put any salt in the dough ?
Usually I use salted butter and it adds enough flavor. But a pinch of salt would be a good idea.
Hello, I tried to make these today and the meat isn't cooking that well, dough wet inside. I've tried cooking at a lower temp and longer, still the same inside. I used pork meat.
You should be cooking them at low heat in preheated oil. If they are still not cooking through, try making them smaller.
Hallo Natalya! Could I use the air fryer instead of deep frying?
I haven't tried yet. I am worried that they would stick to the basket. Also, the dough doesn't have much fat so it will be impossible to achieve the crispy crust. I may try it next time. 🙂
Parchment paper sprayed with oil would work in the air fryer. A bit of oil on the dough top would help too.
Thanks for such a great tip!
thank you. i did turn the heat even lower. i think i also made them too big. will know next time
Natalya, if I wanted to freeze these pyroshky, when would I do it? When they're done but not cooked yet? Or when they're cooked already? Thank you for your time 🙂
I freeze them very often when they are cooked. Than reheat in a microwave or oven on a low heat. My husband says that they are better reheated 🙂
Hi sweetheart, what type of oil do you personally prefer for frying these?
I like organic canola oil or light olive oil, whichever I have on hand 🙂
Was very good! I've been going to place in Everett, WA called Piroshki and Crepes which inspired me to try making my own. It's not quite like theirs, but these are amazing and were a big hit with my super picky husband. Thanks for sharing!
Hi Heather, oh yeah, we go to that place. Everyone makes theirs a bit different but they all are good in their own way 🙂
so for the potatoe filling, what do you recommend to put in potatoes?
I have tried before, mashed potatoes with sautéed ground meat. It was really good