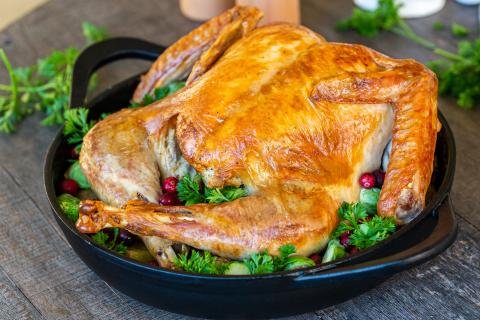
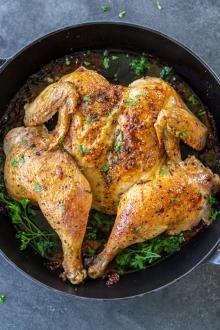
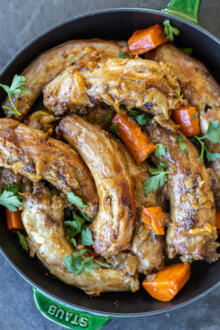
This spatchcock turkey recipe is an absolute game changer. It has all the same flavors of a juicy, roasted turkey, cooked in a fraction of the time. A win-win for all!

I understand the fear of spending hard-earned money and time on making a turkey only for it to turn out dry and plain. I’ve been there, but I’m happy to say, I’m not longer there! I am now confident in my roasting turkey skills, so I fear it no more! If I have lots of time, I make the classic roasted turkey recipe, but if I’m short on time, this spatchcock turkey recipe is my go-to.
This spatchcock turkey recipe speeds up the cooking process by roughly half of traditional roasted turkey! Plus, removing the backbone also makes it easier to serve the bird soon after baking. Oh, by the way, make sure to save that backbone (and any giblets) to make turkey neck soup!
What is spatchcocking? Spatchcocking may seem like a funny word, but all it means is to remove the backbone from a bird in order to lay it flat. This exposes more meat surface area to the heat, which means faster and more even cooking. “Butterflying” is another term that means the same thing!
Spatchcock Turkey Video
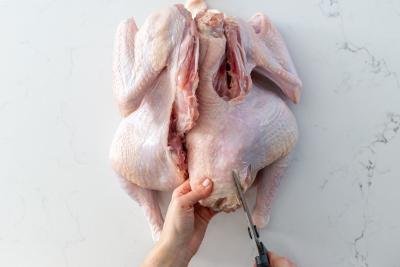
How to Spatchcock a Turkey
Before you bake, you need to break down a turkey spatchcock-style. It might look tough, but it’s actually quite easy.
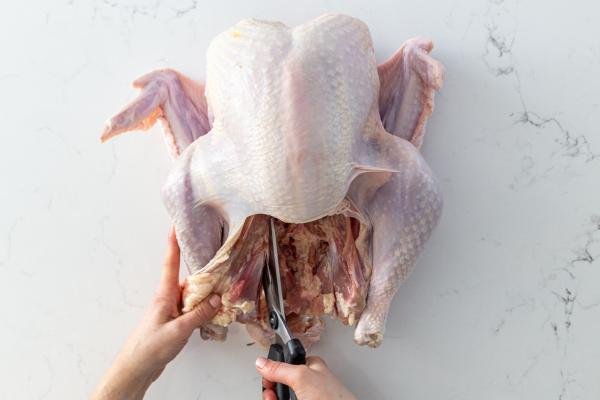
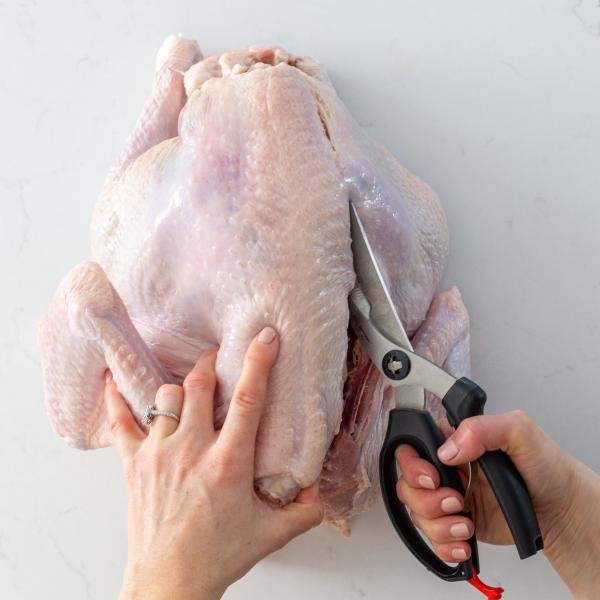
- Face the backbone up: Flip the bird over so the backbone is on top.
- Cut the bones: Using sharp kitchen shears (preferably poultry shears), slice along the sides of the backbone. Set aside the giblets and backbone (don’t throw them away – use them for amazing turkey broth and turkey neck soup later!).
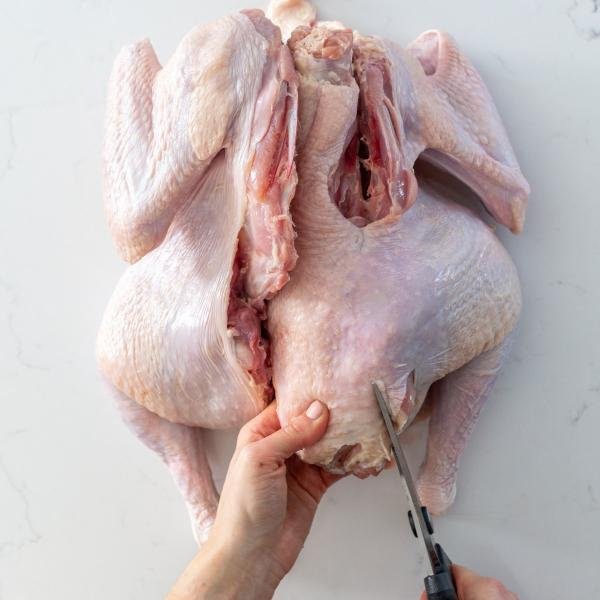
- Open up the bird: Grab hold of the open sides of the turkey and open up the bird as much as you can. Remove any excess pieces of fat or skin and toss them away.
- Flip the turkey over: Flip the turkey breast side up. Using your hands, press down on the breast meat until you hear a crack (that’s the sound of the breast bone breaking).
- Pull out the thighs: Pull the thighs outward and tuck the wings underneath the bird so the turkey lays as flat as possible. Congrats! You just spatchcocked your first turkey.
Useful Roasted Turkey Kitchen Tools
There are a couple kitchen tools that make spatchcocking a turkey super easy. Poultry shears remove the backbone super easy (easier than a knife!), and an instant read meat thermometer makes overcooking nearly impossible. I love how silicone roasting racks are so easy to clean, and this fat separator makes it crazy easy to remove fat and veggie solids from the drippings before making a knockout turkey gravy.
How to Cook a Spatchcock Turkey
Once you get the hang of cutting out the backbone (it might feel a tad awkward at first, but it gets easier!), cooking spatchcocked turkey also becomes second nature.
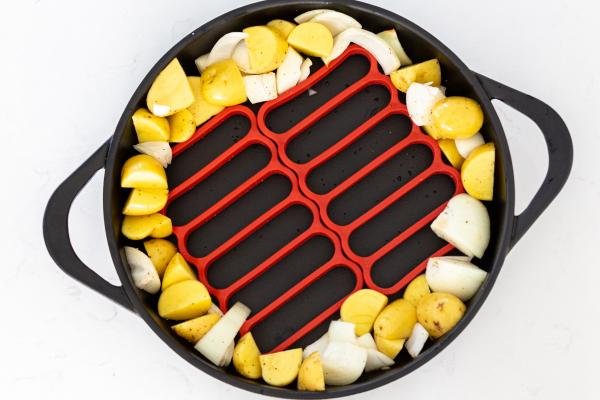
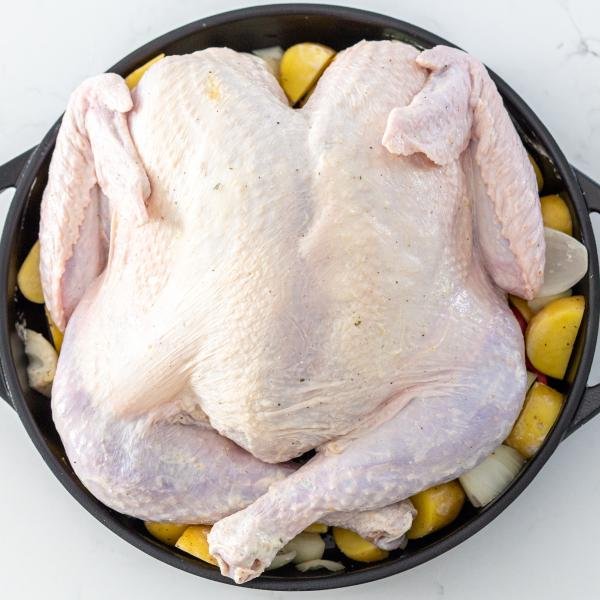
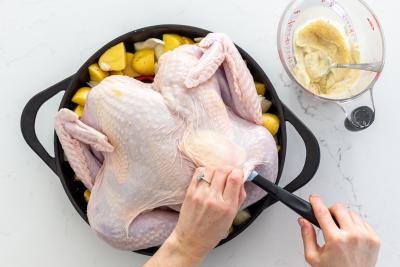
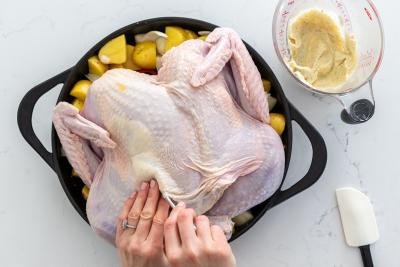
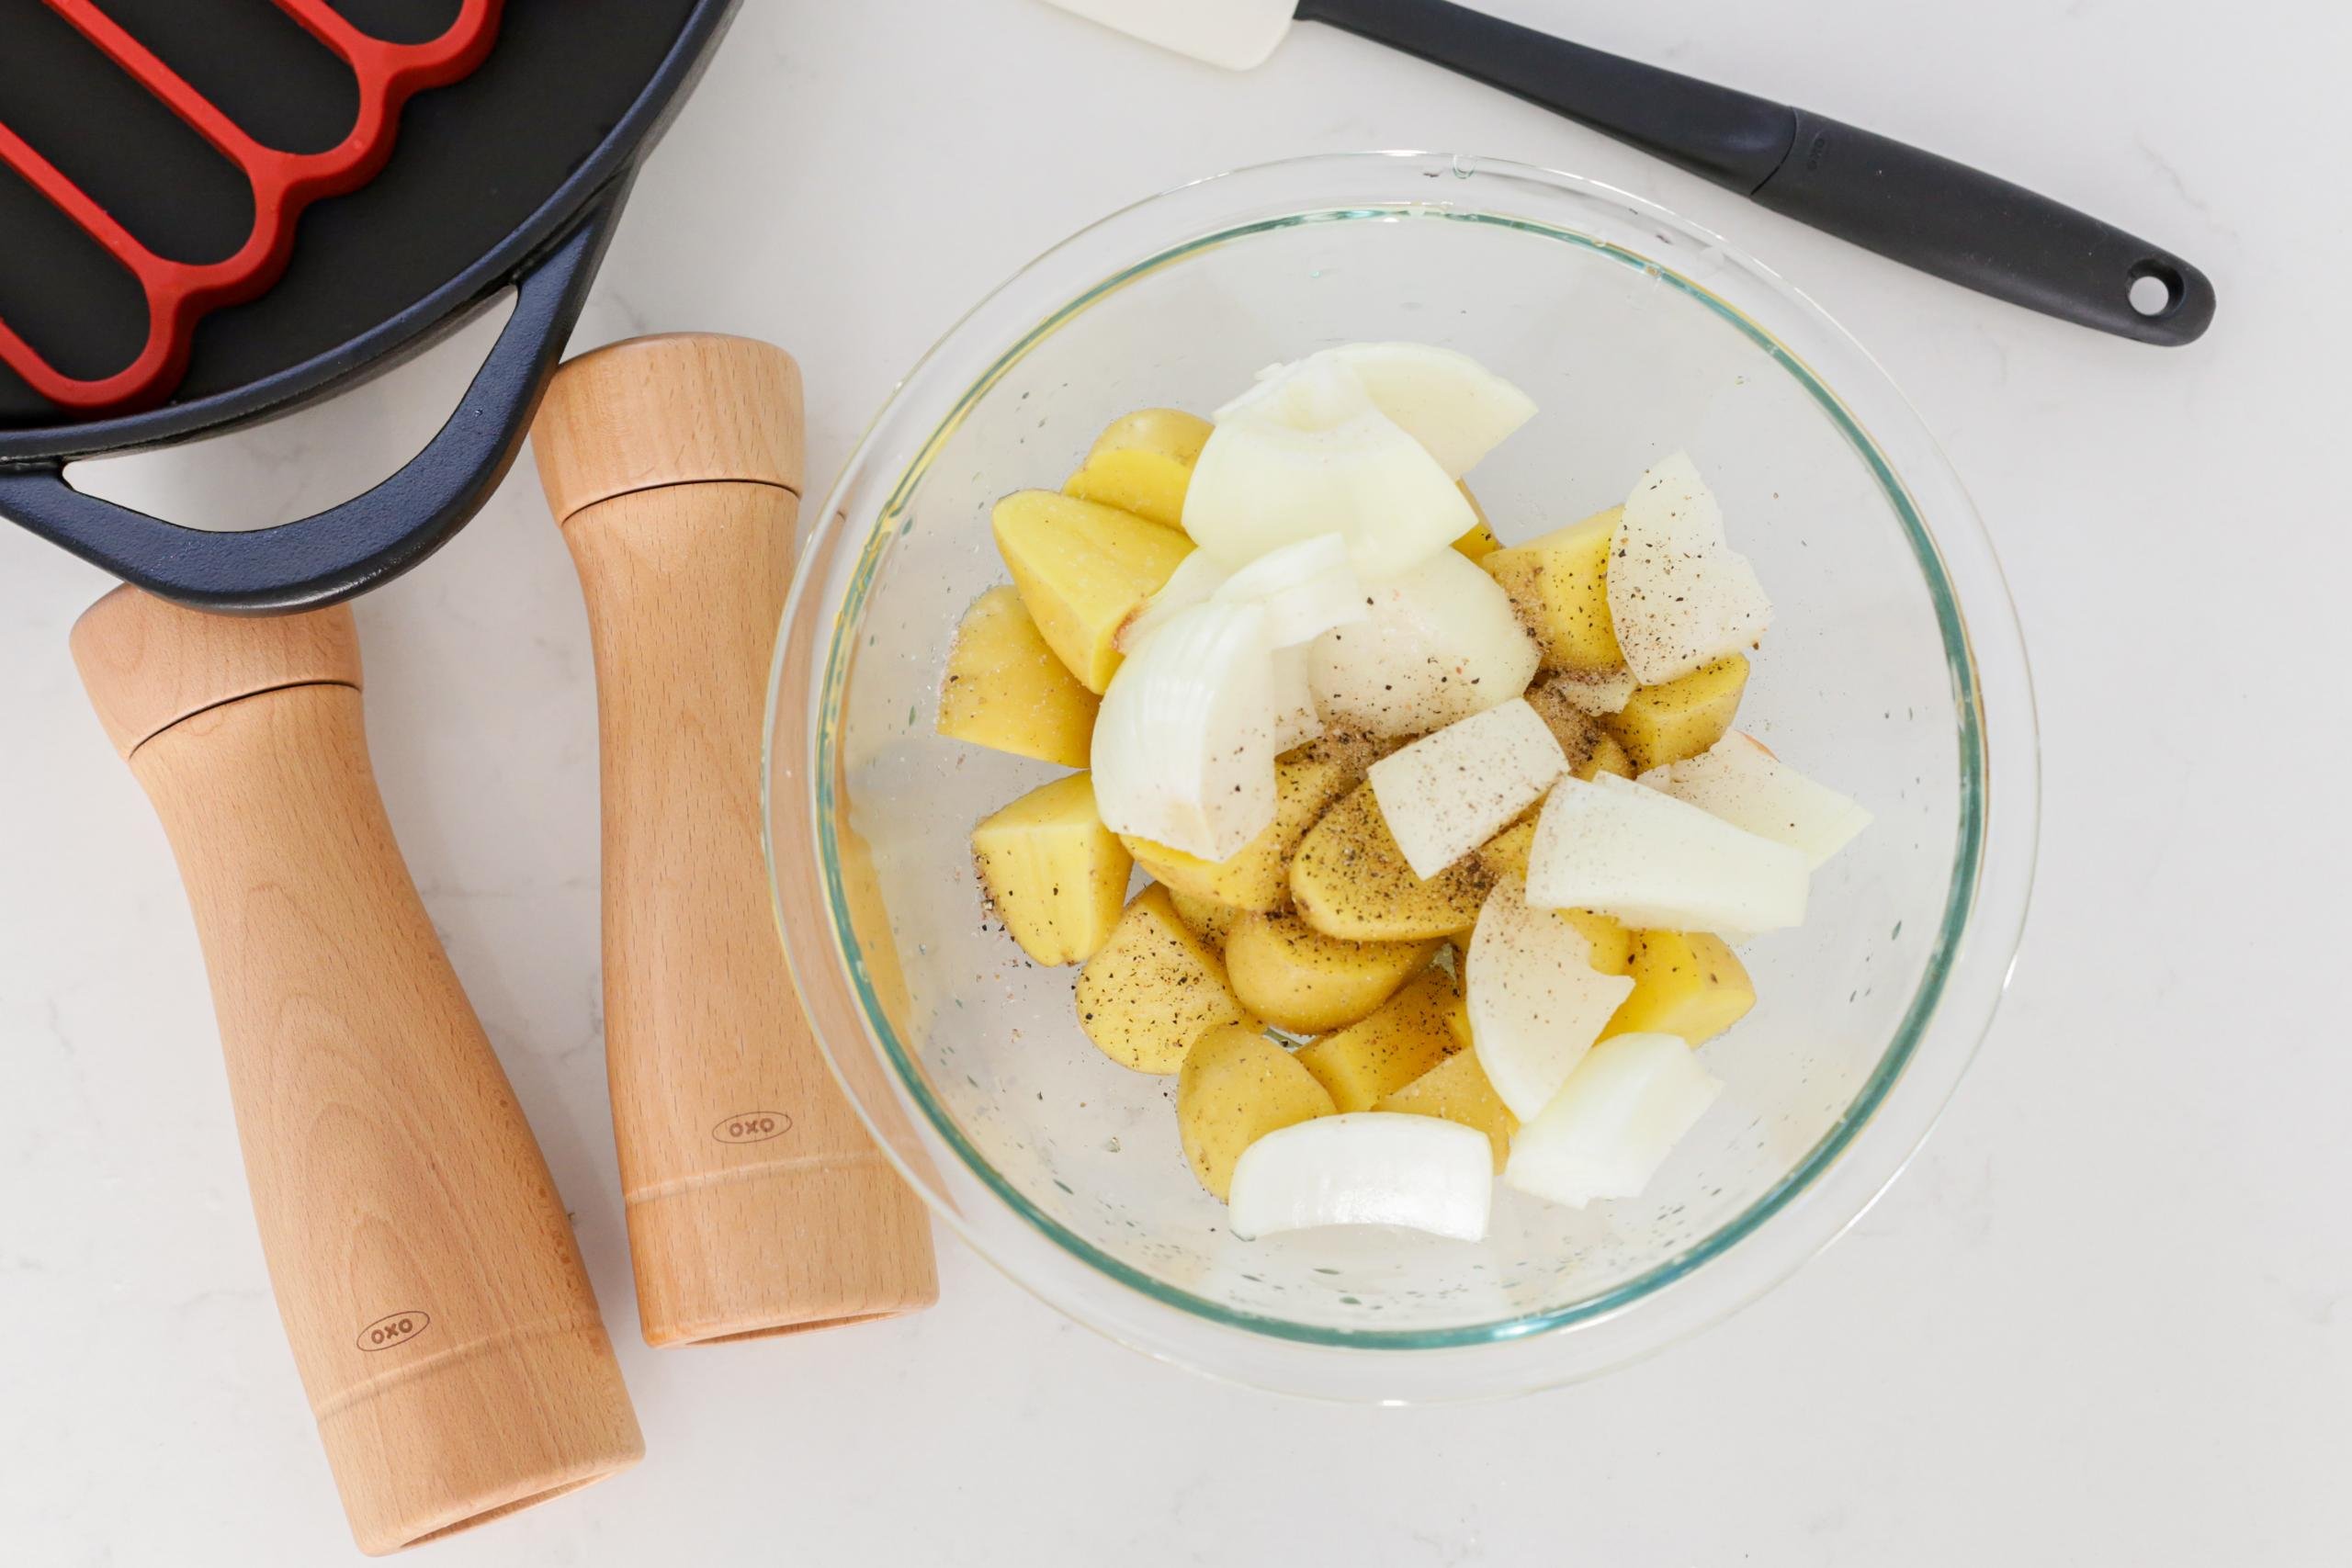
- Prep the veggies: Slice the potatoes and onions into chunks and assemble them on the outer perimeter of the baking dish.
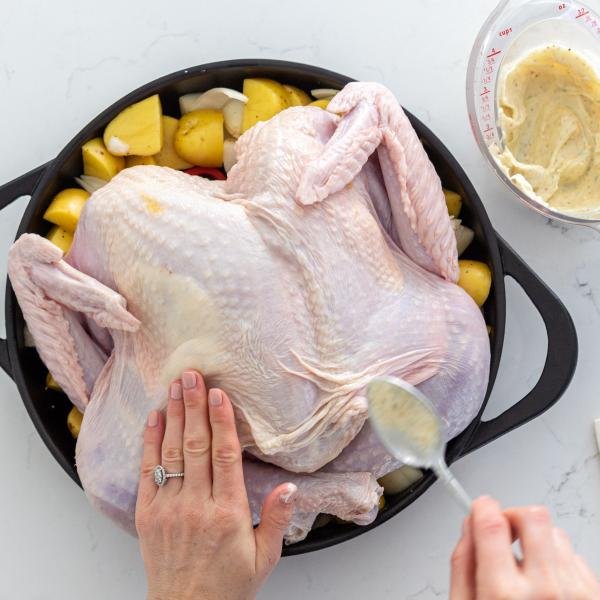
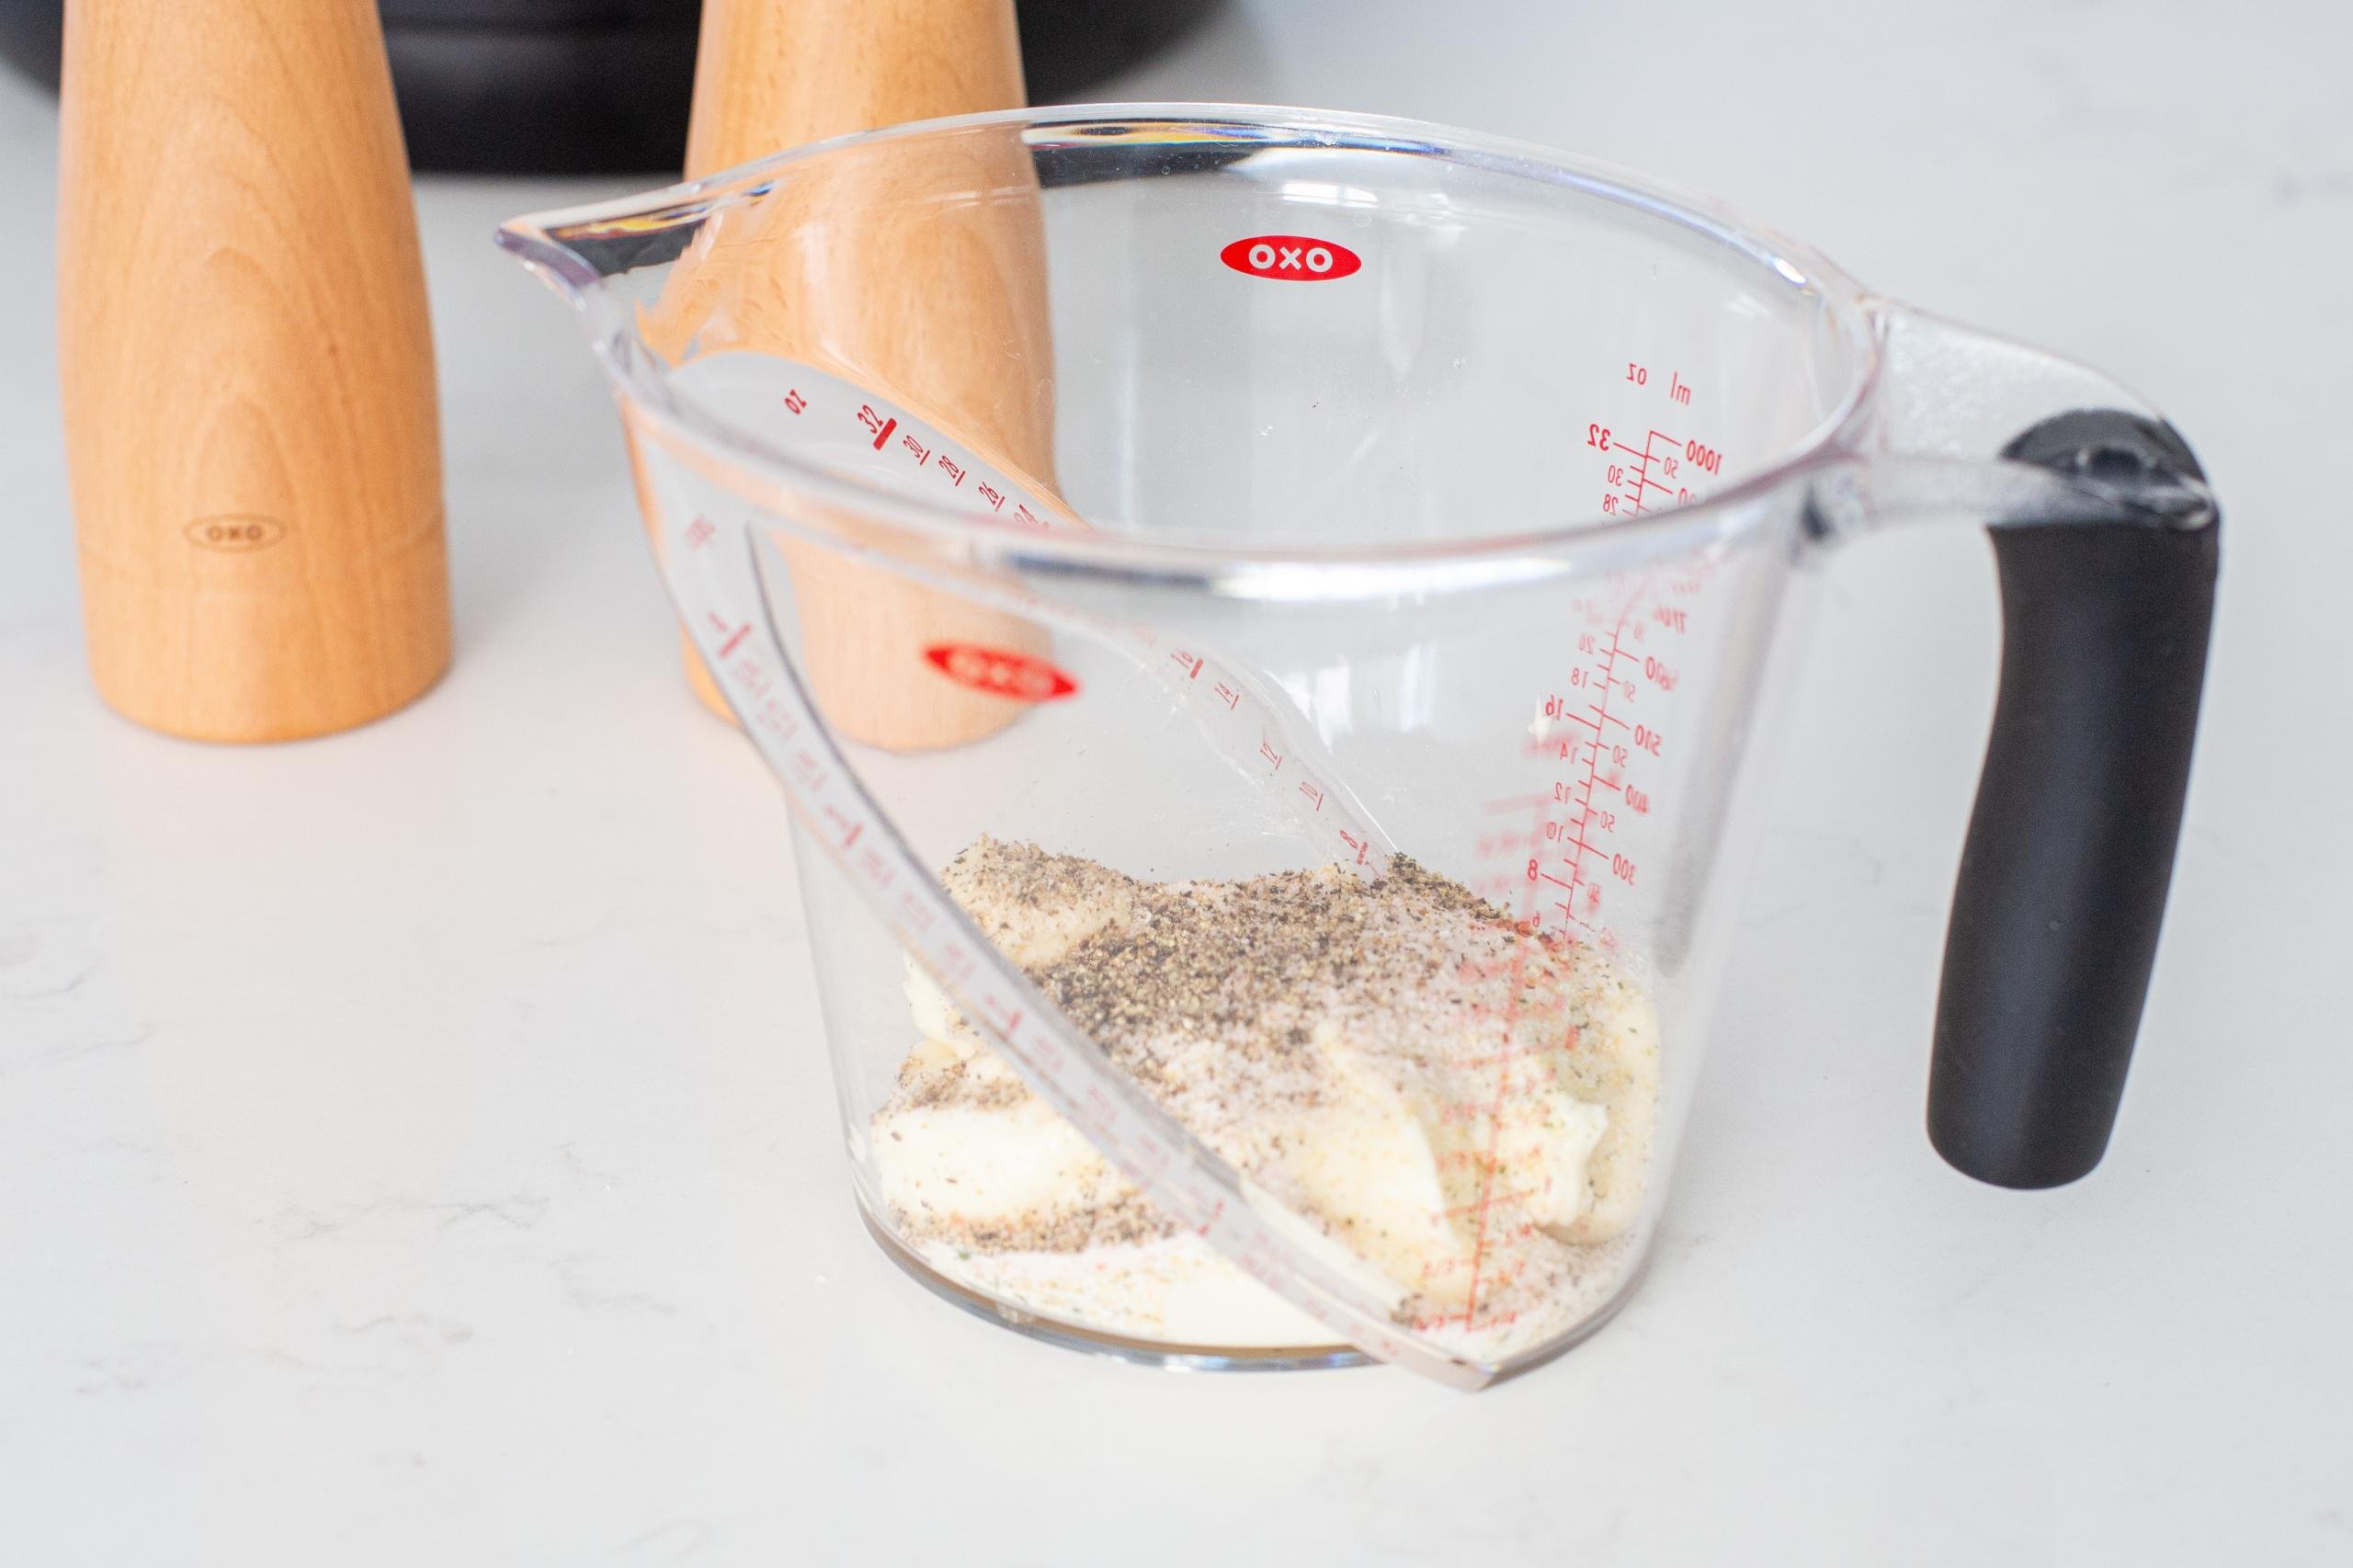
- Make the turkey rub: In a small bowl, combine the mayo, salt, black pepper, and pressed garlic until smooth.
- Spatcock the turkey: Using poultry shears, cut along both sides of the backbone, break the breast bone, flip the bird breast side up, and flatten the turkey.
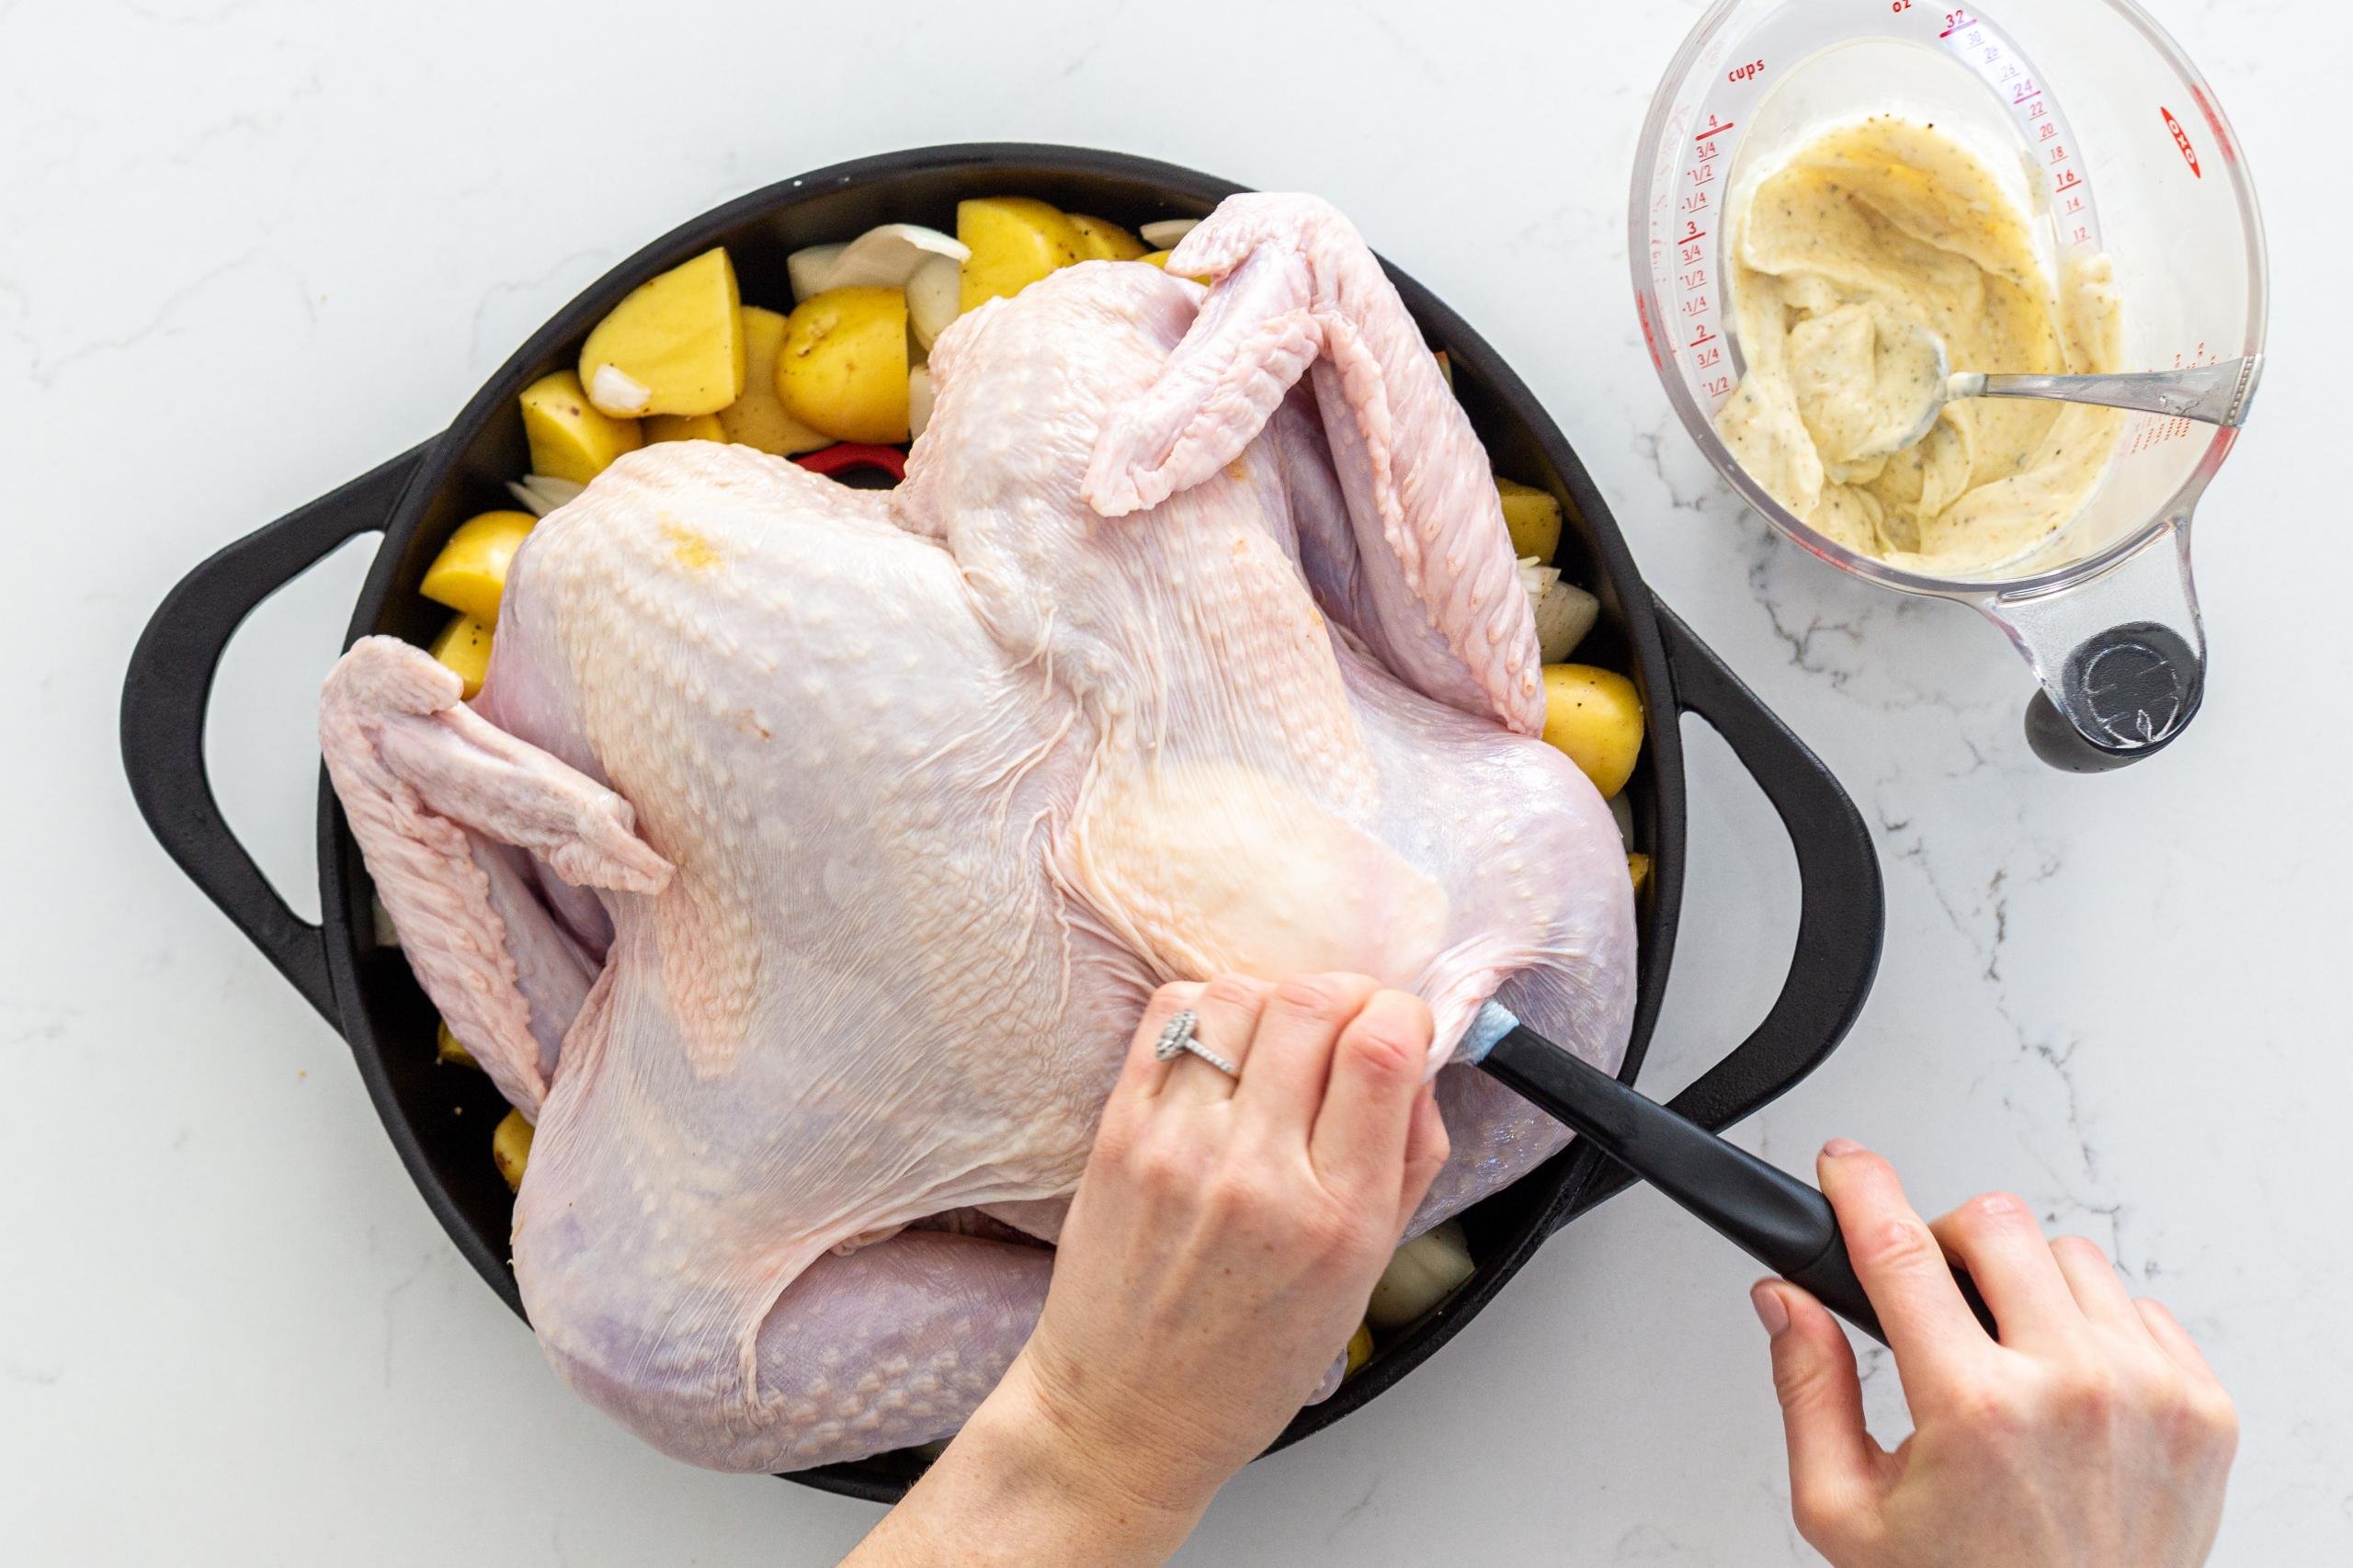
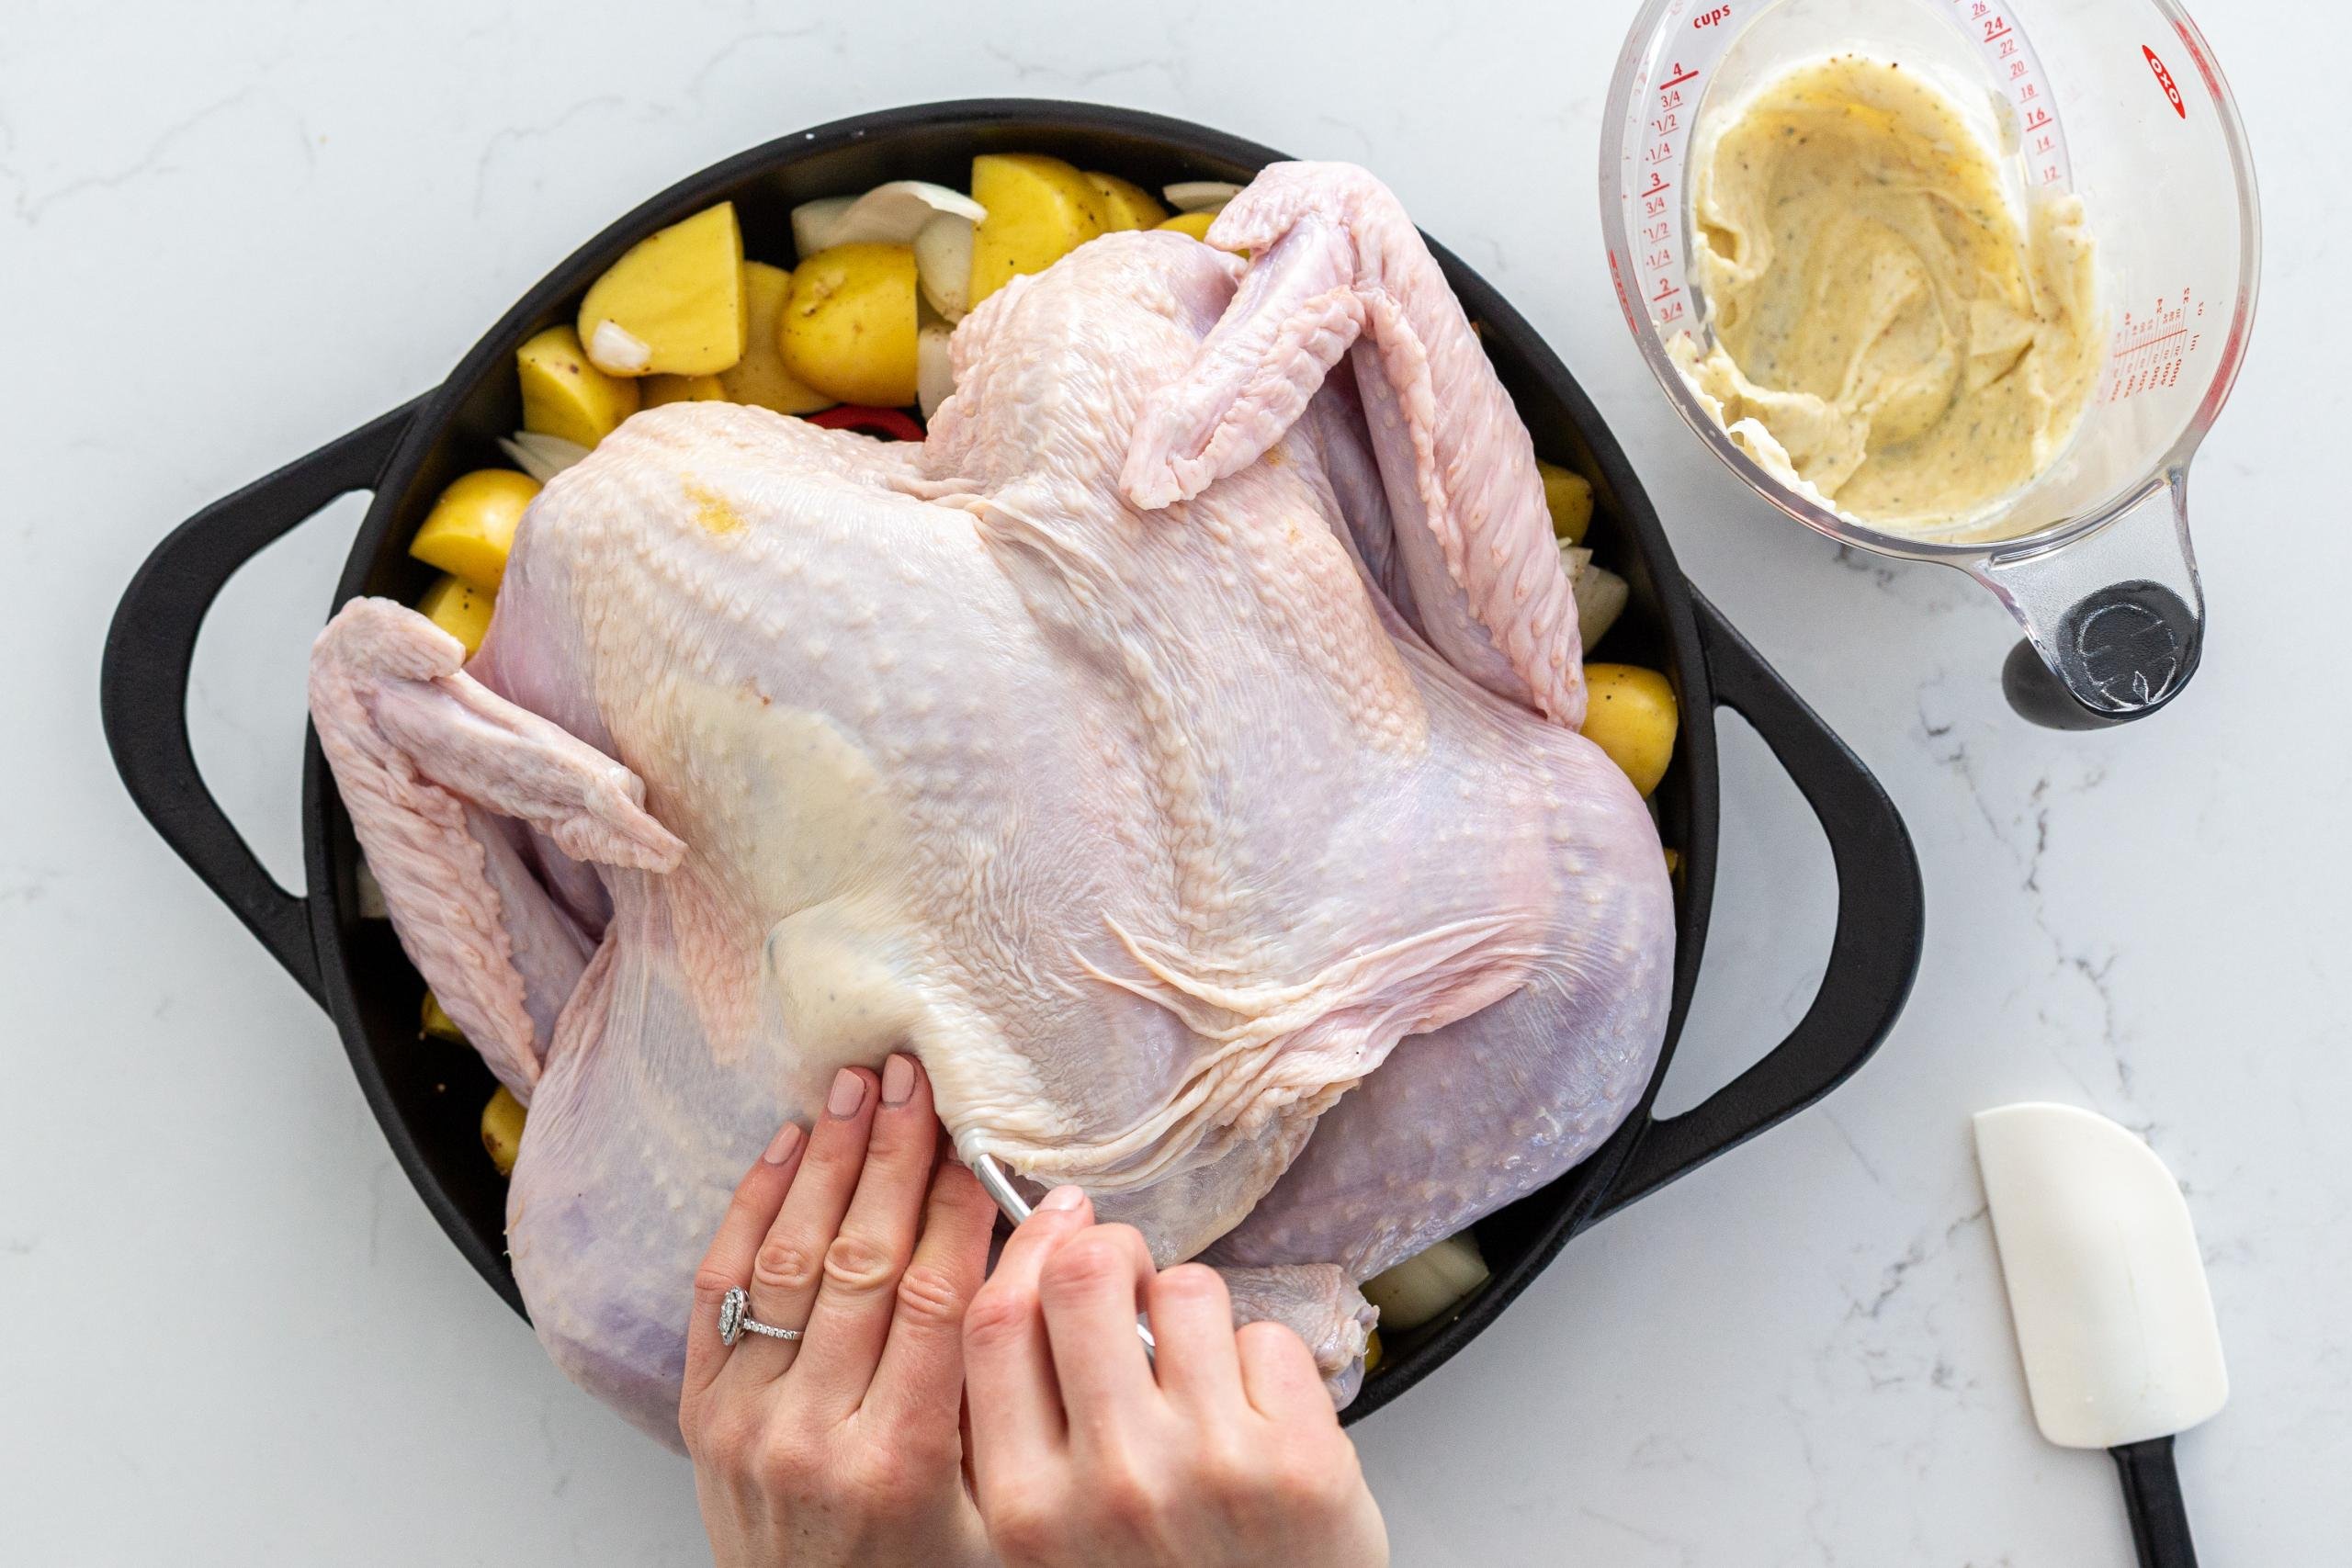
- Rub the seasonings in: Carefully pull the turkey skin away from the flesh and spread a portion of the rub under the skin. Spread the remaining portion on the outside of the bird.
- Roast the spatchcock turkey: Roast the turkey at 400°F for 60 minutes. Then, turn the heat down to 350°F and bake for another two hours. If you don’t like how much the skin is browning and crispy, cover it with foil.
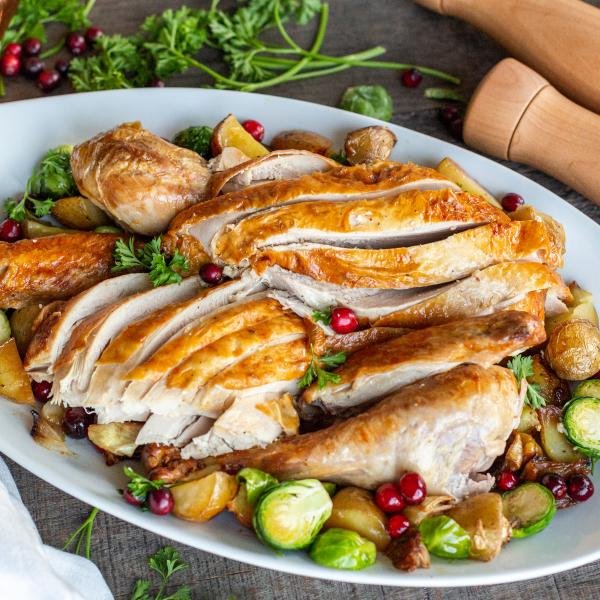
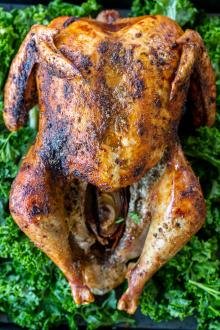
- Let the turkey rest: Tent the turkey with aluminum foil and allow it to rest. Carve and enjoy with your favorite sides (stuffing is one of my favorites!).
Serving tip: For a beautiful presentation, assemble the bird on a serving platter with veggies and sprigs of your favorite herbs (such as thyme, sage, and rosemary). Pick any traditional Thanksgiving sides from this list to serve with it.
Tips for Making The BEST Spatchcock Turkey
Everyone wants juicy meat, right? Of course! In that case, this spatchcock turkey recipe (and these tips) are made with you in mind.
- Pick the right-sized turkey: Plan on each of your guests to eat about ½ pound of meat. Buy a turkey to fit your crowd spot-on!
- Pat the skin dry with paper towels: Before seasoning the turkey, pat it dry of any excess moisture. This also helps get super crispy skin.
- Season under and on top of the skin: To capitalize on flavor, put the rub both on top and under the skin of the turkey. Don’t worry about over-seasoning! As the turkey slowly cooks, the seasoning absorbs into the meat. This is what you want!
- Add veggies to the roasting pan: The vegetables don’t just make for a built-in side dish, but they also add a ton of flavor to the turkey as it bakes. Potatoes, onions, carrots, and celery are all great options.
- Cook until the meat hits 160°F: Turkey is fully cooked once the meat reaches 165°F in the thickest part, but I take out my turkey just a few degrees shy (at 160°F) because it inevitably cooks the remaining few degrees while resting.
- Let the turkey rest before carving: Once you remove the turkey from the oven, let it rest for 30-40 minutes on a large cutting board. This is a must! Resting traps the juices in, and makes it easier to cut the turkey into pieces before serving.
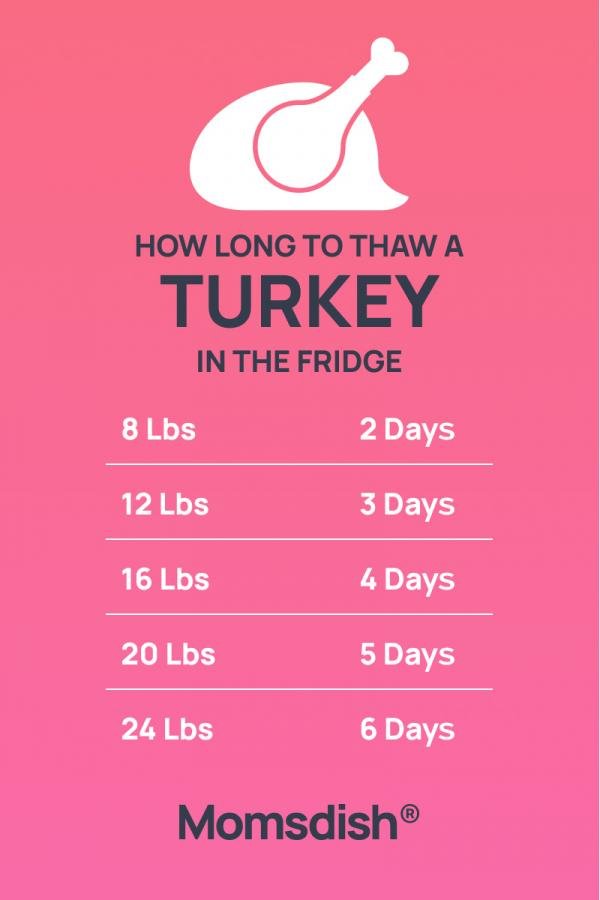
Thawing Guide for Frozen Turkey
If you’re using a frozen turkey, check out the infographic below to ensure that you aren’t dealing with a frozen bird the day-of. Spatchcocking saves time with cooking, but there’s not much that can be done with a frozen turkey!
Storing, Freezing, & Reheating Turkey
Perhaps the best part of making a whole turkey is enjoying the leftovers. Here’s how I store, freeze, and reheat my leftovers for days to come.
- Refrigerator: Store turkey for up to a week in an airtight container in the fridge.
- Freezer: Place the cooled turkey slices in an airtight container or freezer safe bag for up to three months.
- Reheating: The best way to reheat turkey is on low in a skillet with butter. If you have pan drippings or gravy leftover, use them to baste the turkey so it doesn’t dry out.
Leftover tip: Use leftover turkey meat to make tasty turkey focaccia sandwiches, soup, turkey tetrazzini, and salads throughout the week.
More Poultry Recipes
- How to Cut a Whole Chicken – A quick guide on deconstructing a whole chicken
- Chicken Gizzards Gravy – A great way to use chicken giblets
- Spatchcock Chicken – Flattened, roasted whole chicken
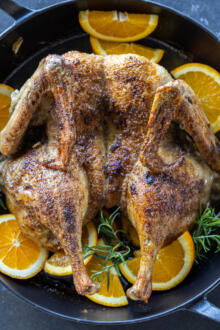
- Spatchcock Duck – Infused with citrusy flavor
Recipe
Ingredients
- 12 lbs turkey
- 2 cups mayonnaise
- 3 tbsp salt divided
- 2 tbsp black pepper divided
- 3 garlic cloves pressed
Roasted Veggies
- 1 lb potatoes
- 2 large onions
Instructions
- Cut the veggies into chunks and season them with 1 tsp salt and 1/2 tsp pepper. Assemble them throughout the baking pan, leaving space in the center to nestle the turkey.

- Whisk the mayonnaise, remaining salt, remaining pepper, and pressed garlic together.

- Using poultry shears, remove the backbone from the turkey (spatchcock the turkey).
- Carefully pull the turkey skin away from the flesh in several different sections across the bird.
- Generously spread the rub underneath the skin.
- Roast the turkey at 400°F for 60 minutes. Then, turn the heat down to 350°F and bake the turkey for another two hours. Remove the turkey from the oven and cover it with foil or a lid. Allow it to rest for 30 minutes before carving into it!


How about 15 lb turkey 🦃 same time roasting ?
Hi Oksana! A 15 lb turkey might take slightly longer to roast, at least an extra 10 minutes for sure. It's still way faster than a non-spatchcocked turkey!
Hi Natalya,
Do you not brine the turkey for this method?
Hey, There's no need to brine. One less step, and the turkey turns out juicy and delicious! I hope you try it and let us know your thoughts.