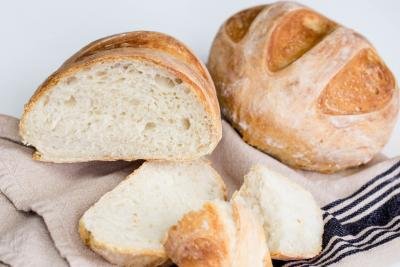
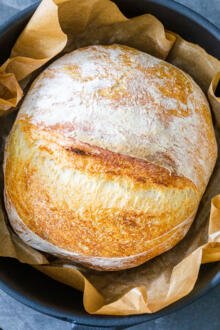
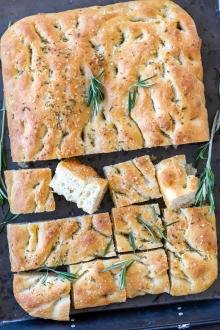
This no-knead bread takes only 15 minutes of your time and does the rest on its own! You’ll have freshly baked homemade bread with no hassle!
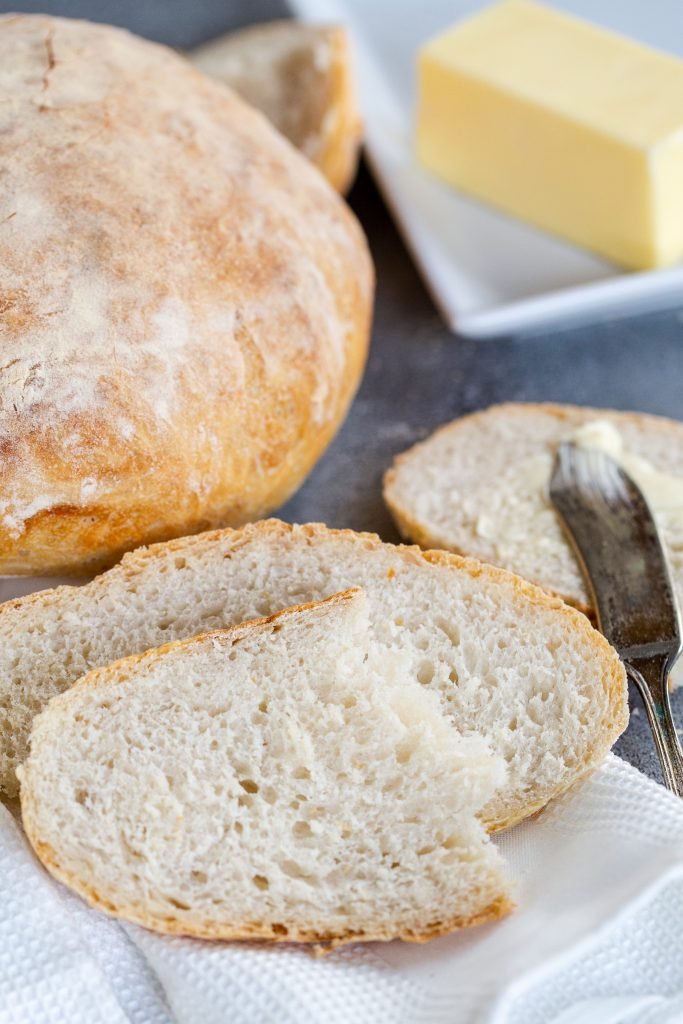
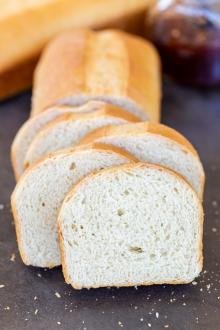
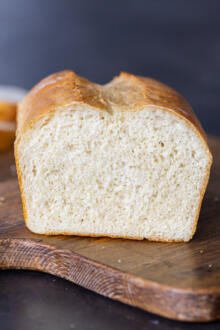
No knead easy bread has proven itself time and time again in our family. I’ve made it over 5,000 times because of how quick, simple, and tasty it is. Over the years, I’ve learned how to perfect the recipe and now I’m sharing all my secrets with you. Instead of putting lots of effort into kneading, the yeast works its magic in the dough during the overnight rising time. Plus, we love how this bread is chewy on the inside, but still has a deliciously crispy crust on the outside.
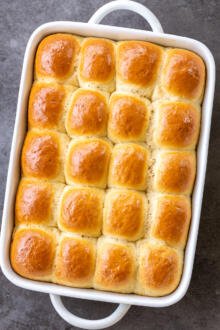
Do you love no-knead recipes?You’ll love these no knead cinnamon rolls. It’s a super simple way to get your sweet fix!
No-Knead Bread Video
How To Make No-Knead Bread
This recipe for no-knead bread is “no-hassle” and “no-worries”. Set aside 15 minutes the night before to start the dough, shape it in the morning, and you’ll have a freshly baked loaf in no time.
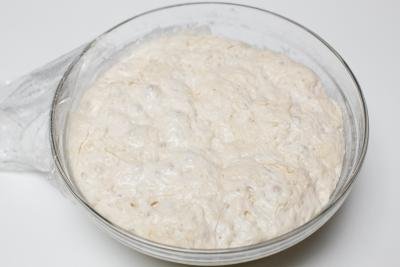
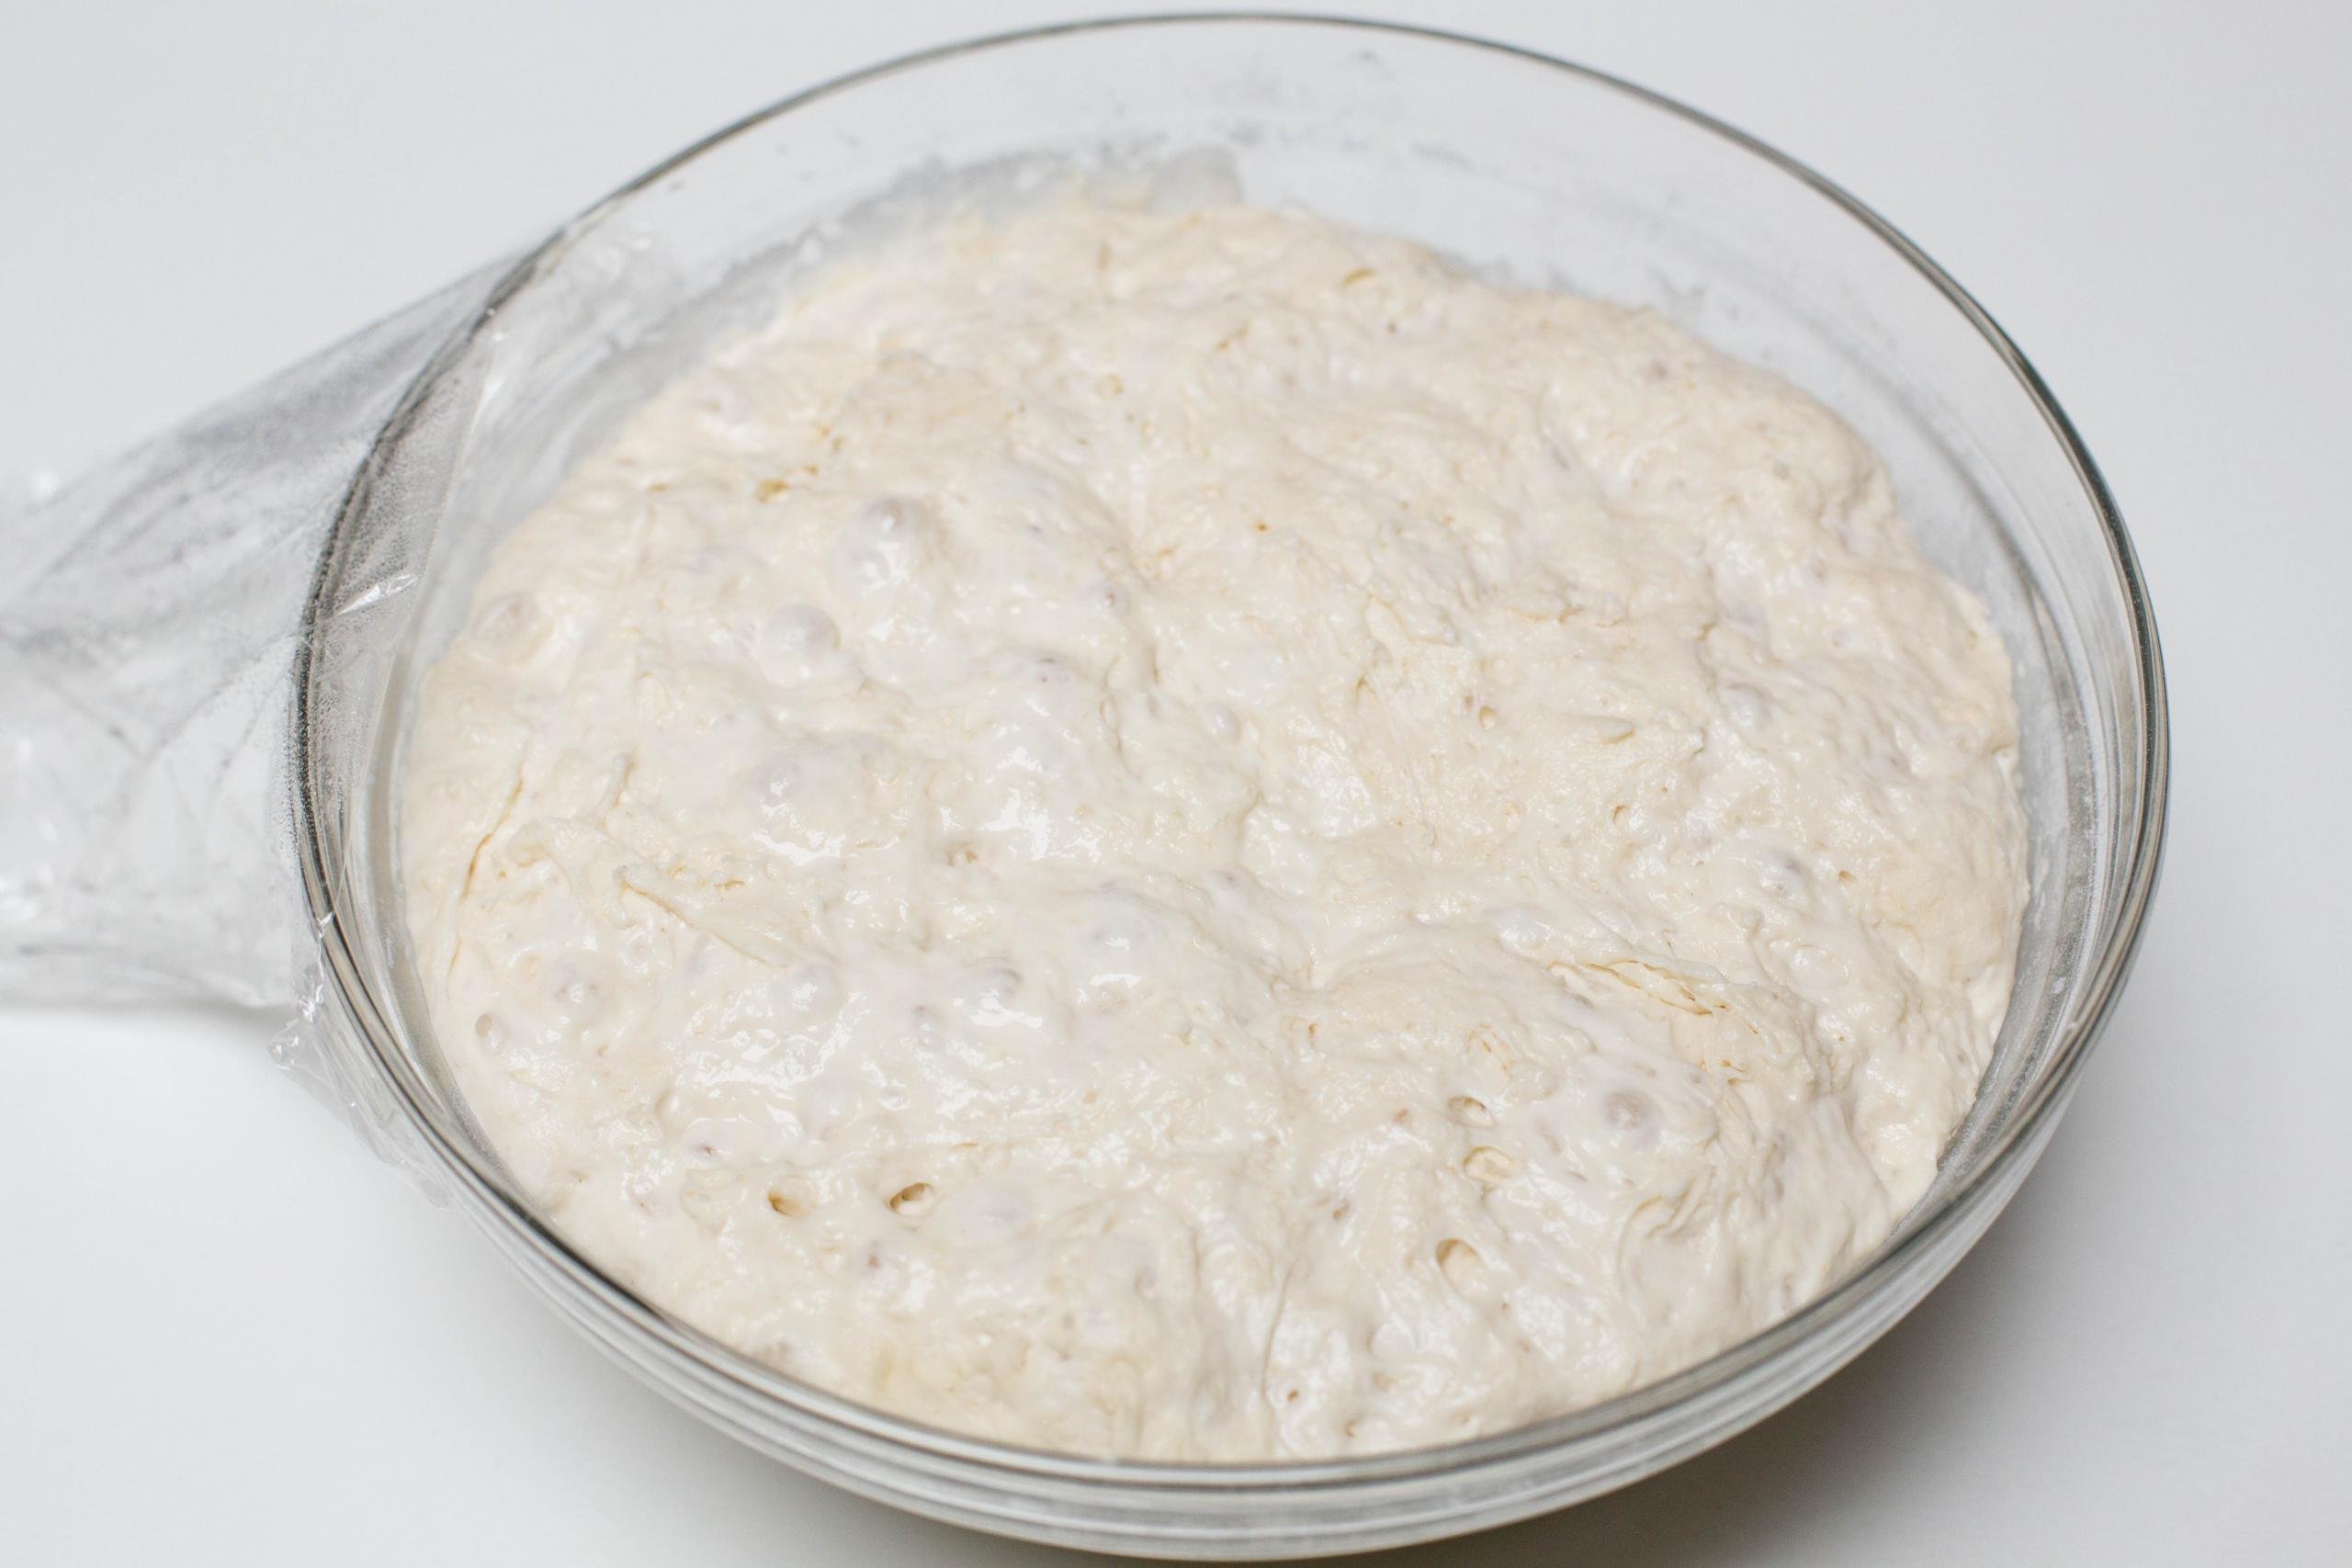
- Mix the dough: To make the bread dough, combine the flour, salt, and yeast in a large bowl. Then, stir in the water. Cover the bowl with plastic wrap and let it rise for 12-24 hours at room temperature. A sticky dough with tons of bubbles will develop when it’s ready.
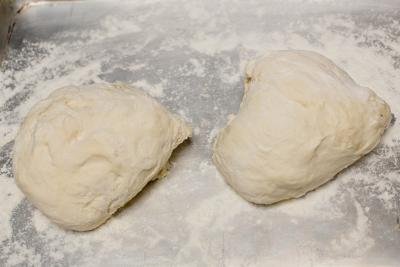
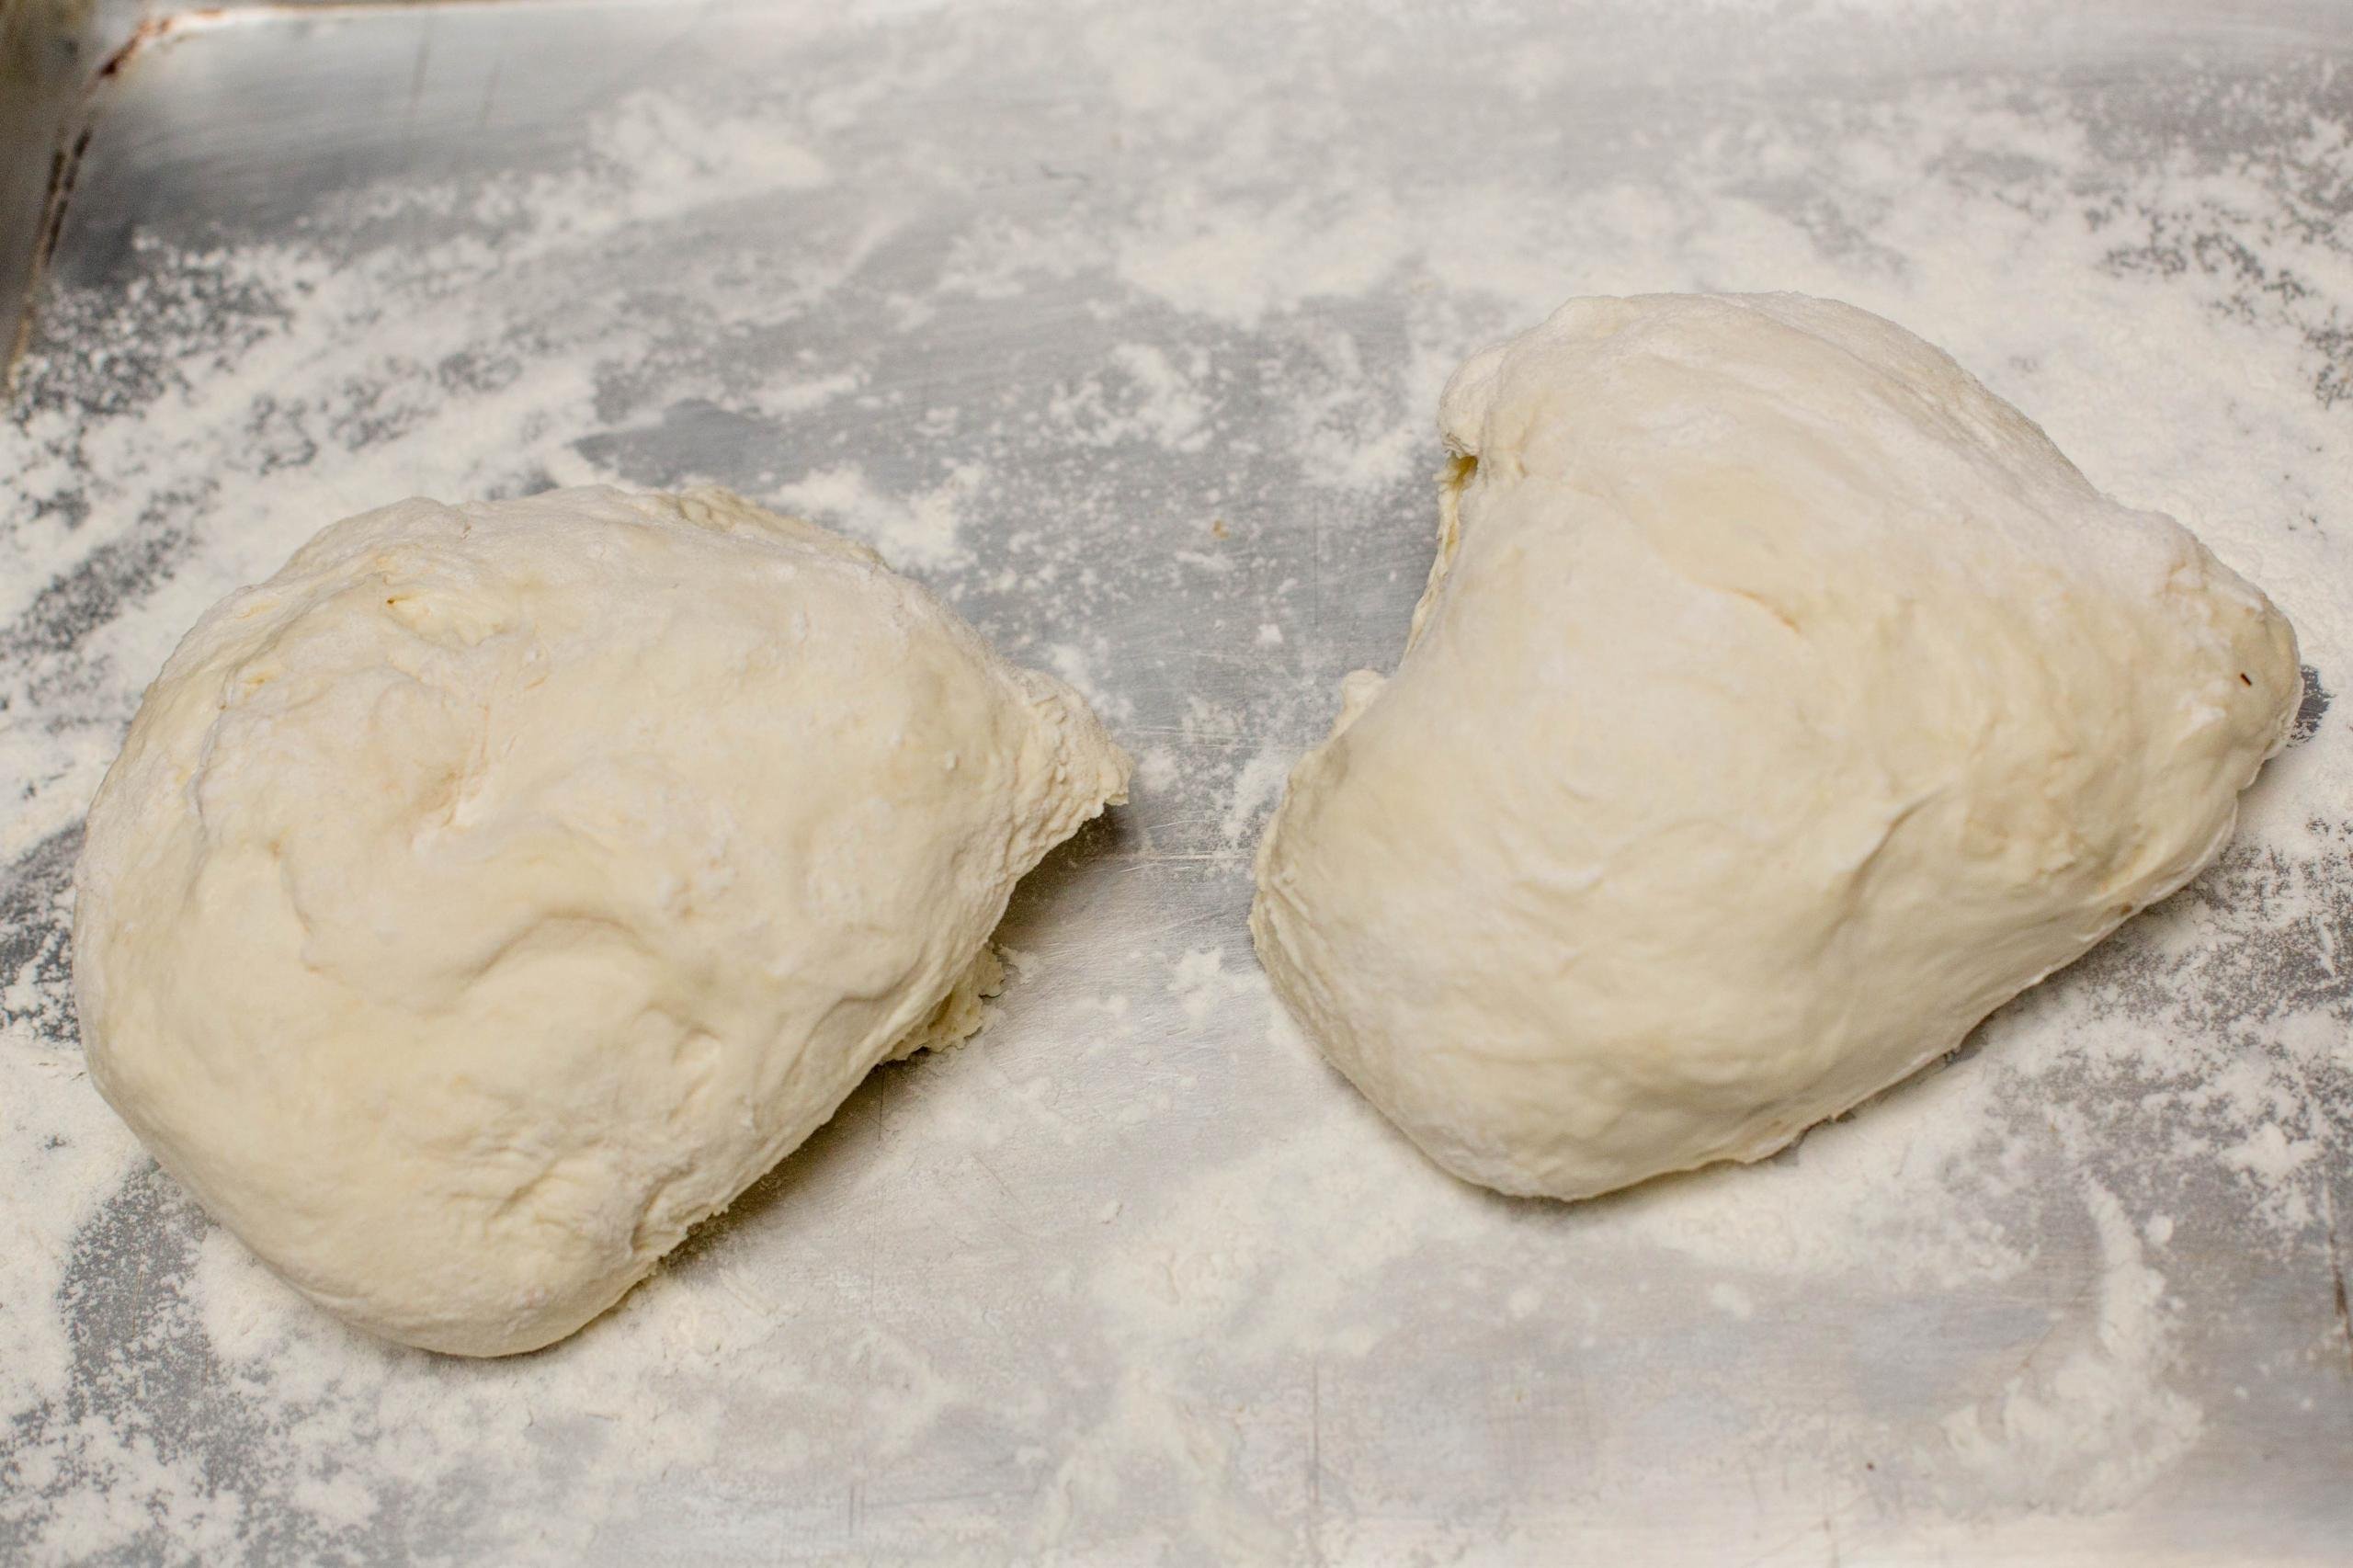
- Shape the dough: Generously flour your hands and a baking sheet. Form the dough into a round shape, then place it on the baking sheet. Add more flour to your hands if the dough sticks too much.
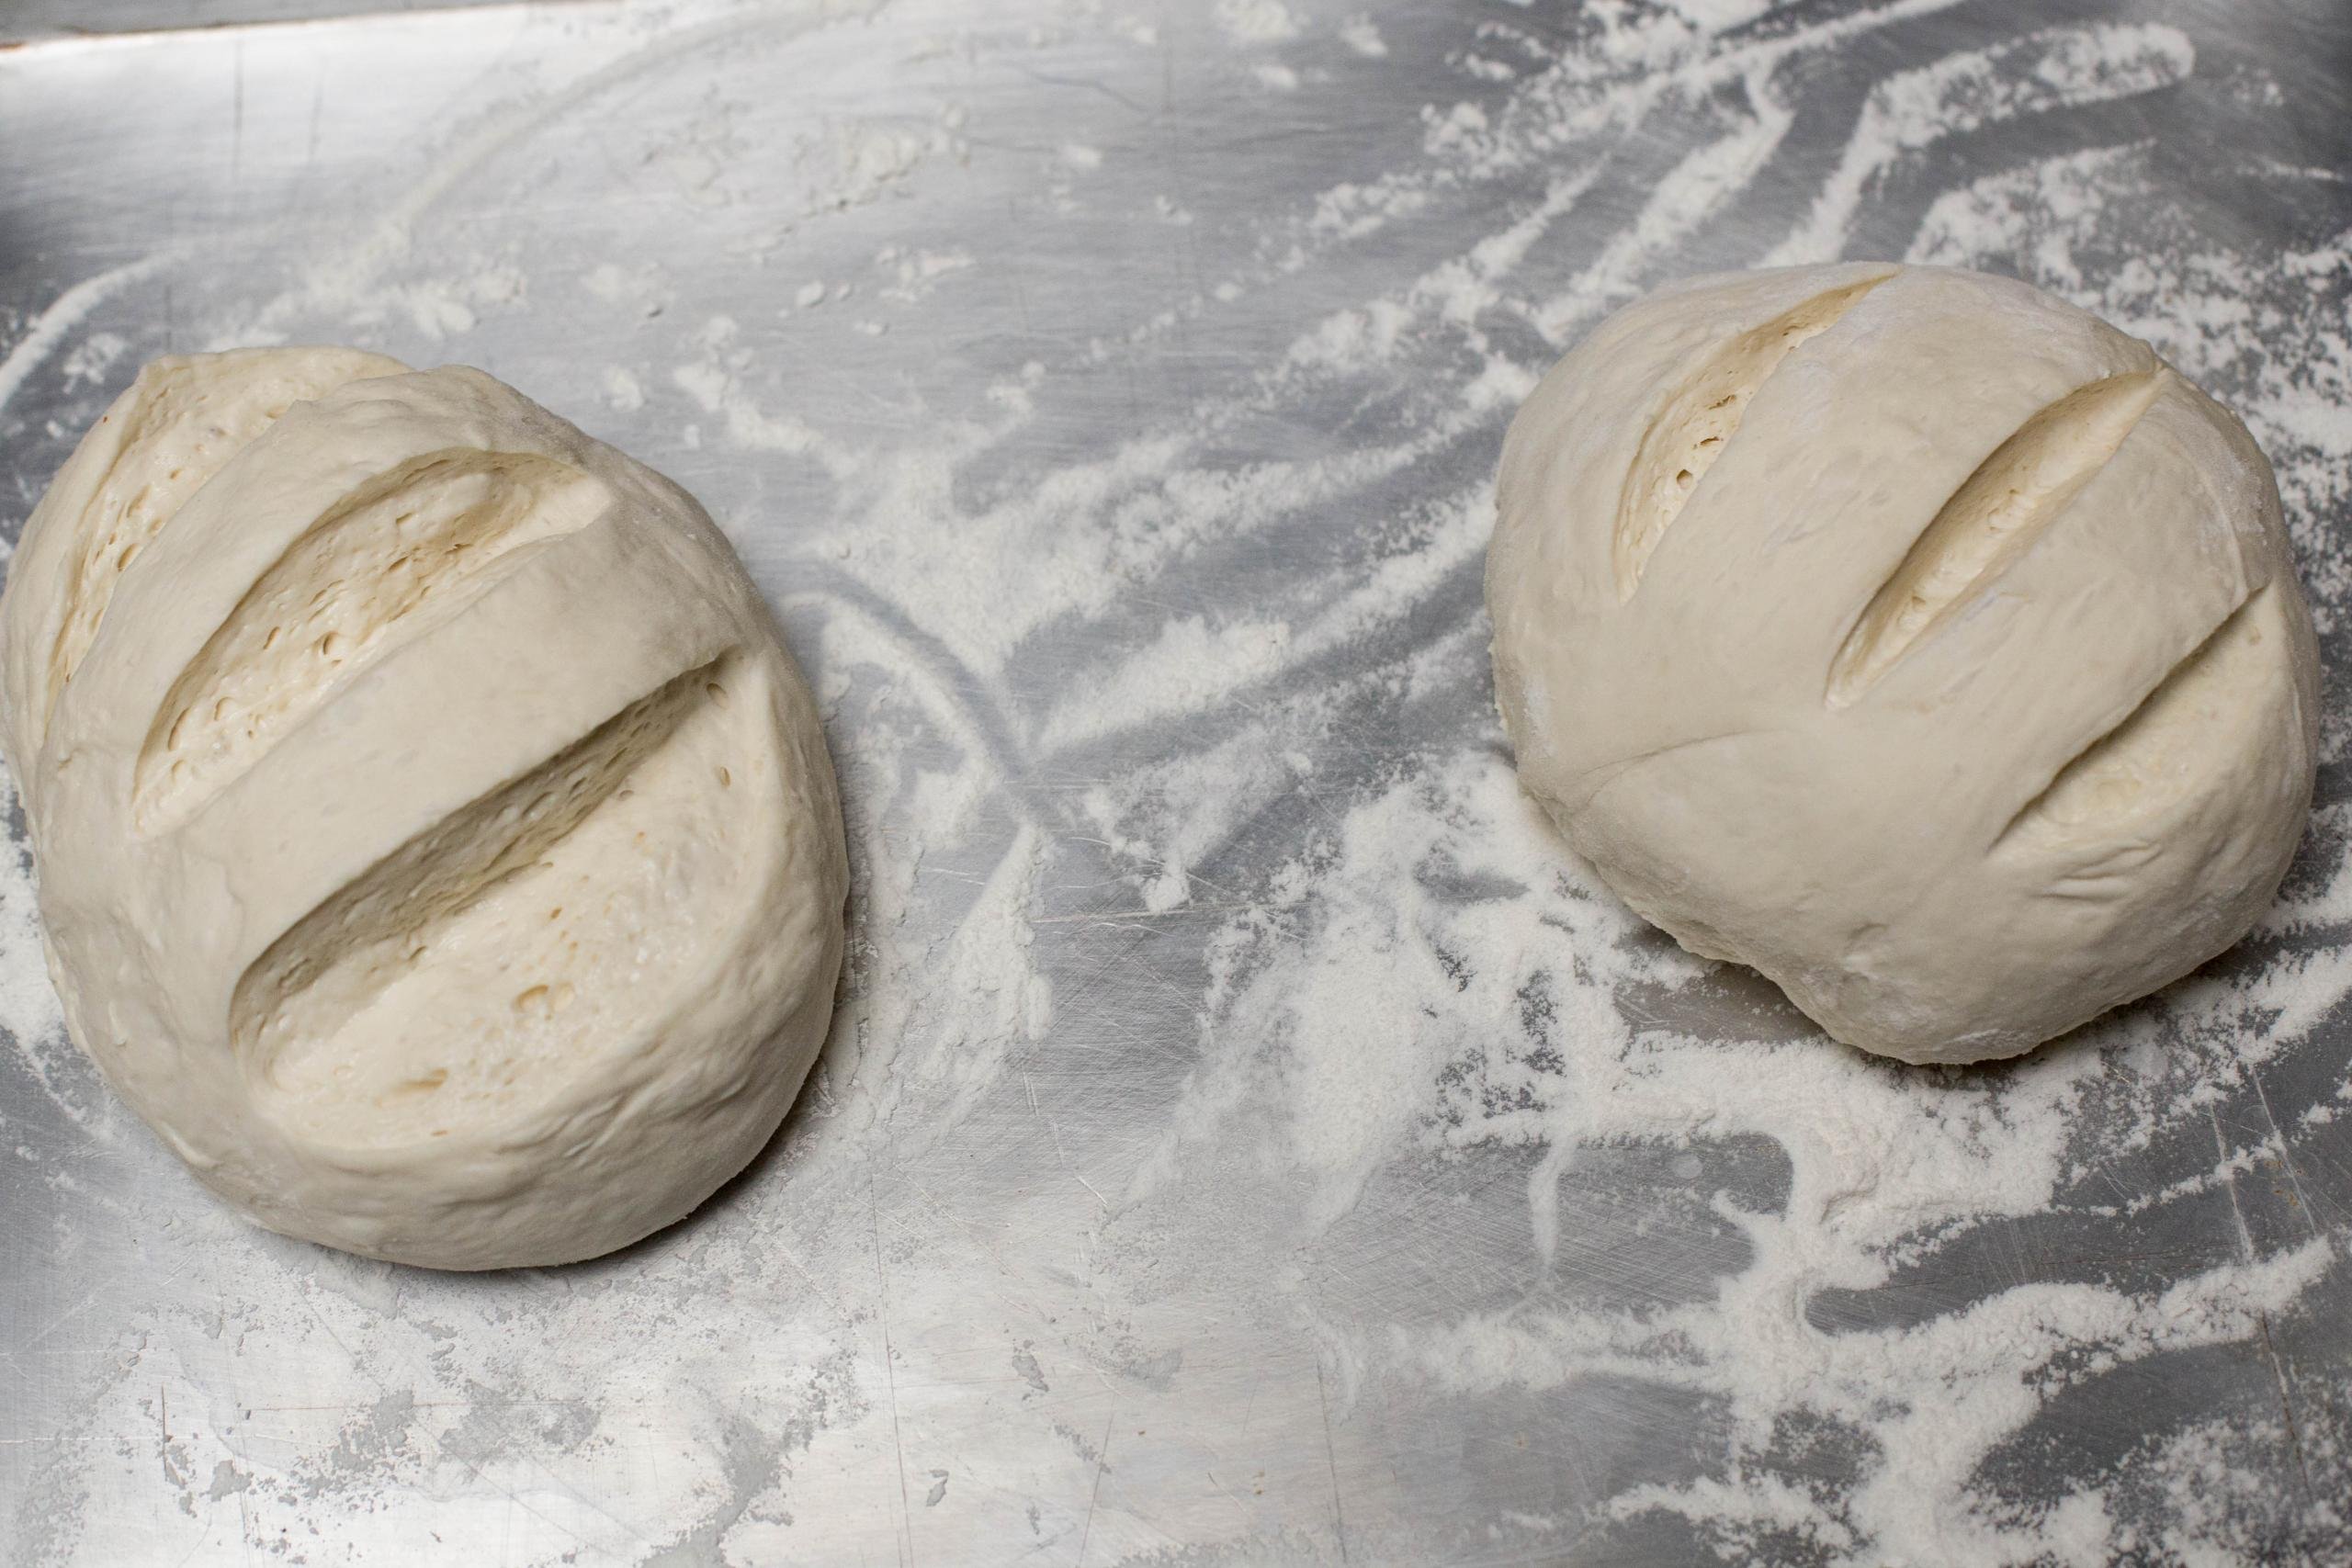
- Allow the dough to rise again: Sprinkle flour on the top of the dough, then cover it with a kitchen towel and set in a warm area. Allow the dough to rise again for about an hour.
- Bake the bread: Preheat the oven to 450°F and fill a deep baking dish with two cups of water. Once the oven is preheated, slide the dish with water onto the bottom rack and place the baking sheet with the bread onto the top rack. After 10 minutes, remove the water, but continue baking the bread for another 30 minutes or until it is golden brown.
No-Knead Bread Tips & Tricks
Are you ready to make your very own “artisan bread”? Check out these tips and tricks to make sure the bread turns out perfect the very first time.
- Use two baking sheets/pans: Instead of using a cast iron pot or a Dutch oven to make a bread loaf, use two baking sheets instead. To mimic the steam that a Dutch oven provides, place a deep baking sheet filled with water on the lower rack for the first 10-15 minutes of baking.
- Allow the dough to rise for 12-24 hours: If possible, allow the dough to rise for at least 12-24 hours. If baked too early, the resulting texture of the bread will not be as fluffy and airy.
- Opt for high-quality flour: We love King Arthur unbleached all purpose flour or Bob’s Red Mill flour for this recipe, but any flour that is higher in protein is a good choice. For a substitute, check out this whole wheat flour.
Troubleshooting Dense & Flat Bread
Several factors may contribute to a flat or dense loaf. To help you avoid the common pitfalls and provide a bit of troubleshooting, here are a few directed tips.
- Be careful with the amount of flour: Adding too much flour results in a dense bread. It’s important to take measurements seriously when baking. Avoid packing the measuring cup with flour — instead, carefully spoon the flour in.
- Ensure the yeast is fresh: No-knead bread relies heavily on fresh active dry yeast (instant yeast may be used as well). If the yeast is old, the bread will be flat and dense. To check if it’s fresh, mix it with a bit of warm water and sugar, then let it sit for 10 minutes. If the yeast rises and foams, it’s fresh. If not — you’ll need to buy fresh active dry yeast.
- Allow the bread to ferment/rise adequately: Ending the fermenting process too early results in a more dense loaf. No-knead bread saves your arms some work, but it does take a good chunk of time to rise — 24 hours is the sweet spot.
- Rise the bread in a warm place: It is essential for the bread to rise in a warm place. Yeast works best in warm (not hot) temperatures. So, here’s a trick — heat the oven to the lowest temperature for a couple of minutes, then turn it off and let the dough rise inside the oven. Leave the light on to keep the temperature at a consistent ~80°F the entire time.
Serving No-Knead Bread
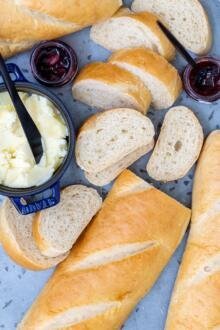
We likely don’t need to give any ideas on how to serve fresh no-knead bread. Use it as a side of salads, soups, creamy entreés, and even with a cup of milk and jam. Check out this list of nine hearty beef soups you can serve this bread with. But — if you happen to have day old bread, we love chopping it up and making croutons to enjoy on a Caesar salad. Or, use the bread to make a grilled cheese sandwich, mushroom and cheese sandwich, or chicken bacon canapés.
Storing Bread
Correctly storing bread is almost as important as baking it the right way. To keep the texture and flavor consistent for days to come, check out these storing guidelines.
- Room temperature: If you plan to use the entire loaf within a day, keep the bread uncovered at room temperature.
- Refrigerator: Store leftover bread in the fridge for up to a week. Keep the bread in a bag or airtight container to keep it from drying out.
- Freezer: Store a cooled loaf for up to three months in the freezer. Tightly wrap the loaf in plastic wrap or aluminum foil, then freeze in a freezer-safe bag. Thaw the loaf at room temperature when you’re ready to enjoy it again.
Other Easy Bread Recipes to try:
- Cottage Cheese Bread — A high-protein, spongy bread
- Classic White Miche Bread — A copycat of Panera’s country white bread
- Sourdough Bread — Includes the whole run-down of sourdough baking
- Flax Wheat Bread — A high-fiber bread option
Recipe

Ingredients
- 3 cups all purpose flour
- 1 tsp salt
- 1 tsp active dry yeast
- 1 1/2 cups water lukewarm (110 °F)
Instructions
- The night before baking the bread, combine the flour, salt, and dry yeast. Then, add the water and mix until the dough comes together. Cover with plastic wrap and let it sit for 12-24 hours at room temperature.
- When the dough is wet and bubbly, you are ready for the next step. Generously flour your hands and a baking sheet. Remove the dough (if it sticks, flour your hands more) and form it into a round shape.
- Place the dough on the baking sheet and sprinkle a generous amount of flour on top. Cover with a towel and let the dough rise in a warm place for about an hour.

- Preheat the oven to 450°F, and make sure there are two racks in the oven. Pour two cups of water into a deep dish or rimmed baking sheet and place it on the lower rack. Place the baking sheet with dough on the upper rack. Remove the water from the oven after 10 minutes.
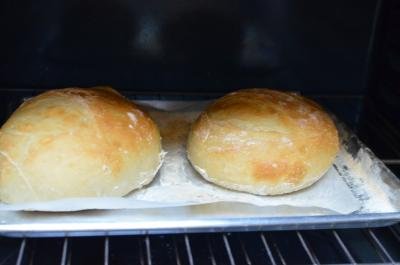
- Continue baking the bread for another 30 minutes or until it is golden brown and crispy on top!


My first time making bread! It was a success! Very easy to follow. Thank you!
That's awesome! Thanks for sharing, and I hope going forward you make homemade bread more often. 🙂
Amazing bread!!
Thank you Lana!
My family loves this bread ! We can’t stop making it ! 😊
I'm so glad to hear that your family loves this bread as much as mine does! There's something so special about a homemade loaf that brings everyone together.
I have tried this its so do difficult to handle, just a massive blob total waste of products. Not at all easy bread. I am experienced at bread making the normal way just thought I would give this a try.
Never again
Hey Carol, Sorry to hear this didn't work out for you. Can you give me more details about what wasn't working so I can help troubleshoot?
Hey Natasha, I used to make this bread recipe few years back. Loved it!
I looked up your recipe again but realized it used to be less yeast before?
Is there a reason you upped the amount. I love bread with not such a prominent yeast taste
Hi Ellenah, how much yeast do you have from before? I looked back at our records and we always had 1tsp. I want to find where the difference is coming from. Please let me know. Thank you!
I believe it was 1/4 tsp before. Its been five years so maybe my brain is just messing with me Lol
But I made a batch last night using 1 tsp like this recipe states and it turned out Delicious! No yeasty aftertaste.
So thank you I’ll just stick with this recipe 🙂
Thanks for getting back to me! I'm happy to hear it turned out delicious. Enjoy!
Bread was delicious and easy to make. We baked it for 24 minutes in total (10 minutes with water 14 without) because we wanted a softer texture and it was really good!
Hi Andres, I am thrilled to hear that this recipe was a success! Thank you for taking the time to leave feedback! Enjoy!
Love how this bread turned out however I like bread that is a little sweet. Can I add a little sugar with the same results?
Hi Loretta, I think you can but I wouldn't add too much sugar because it can change the outcome. If you do try it with sugar, please come back to share your feedback!
I have tried this recipe but it spreads out after making it into a ball before baking. What am I doing wrong? My friend said put the yeast in the water and let it set before mixing the dough. What am I doing wrong. It tastes good but it's Kinda flat because it spreads out more than rising help
Hi Eric- I'm sorry it came out flat & dense. There are several things that can affect the bread or cause this. The type of flour used and the amount of flour can make a big difference- I make some suggestions on brands I like to use above, they have a higher protein count. Did your dough look similar to my dough in the video above? It should be sticky but a well floured surface should help with shaping it. After shaping, it is normal for the dough to flatten a little bit, but it shouldn't go completely flat. Make sure you are proofing the dough in a warm place for that final 30-60 minutes before baking. I hope these tips help you for next time!
Love simple recipes! Cooking doesn’t need to be massively complicated. Thank you
Hi Jane- I fully agree with that statement! I hope you loved the bread!
Natalya, I tried making this bread. I left it 24 hrs., it rose and was nice and bubbly, but when in took it out of the bowl it was sooooo sticky. I had to probably another cup of flour. I have it resting now for the hour. Not sure what will happen.
Hey Marilyn, is it similar to the dough in the video. This will be a very wet sticky dough and thats totally fine. You can four the working surface and your hands, it should be no problem. Hope it came out amazing at the end for you.
Hi Natalya,
I live in India and the temperatures here are on the warmer side. Do I still need to keep the dough for 12-24 hours?
Madhulika
Hi Madhulika- your dough will probably rise a faster although I don't know how much faster since I haven't tested this recipe in a very warm/humid climate.
Hi, how long total bake time? 40 minutes?
Yes, approximately, but keep an eye on it!
do you use all purpose flour or bread flour
I use Bob's Redmill All-Purpose Flour.
Should water start steaming before putting the bread in the oven?
Hey Jewly, no, it doesn't need to be steaming. You can even use cold water and it will heat up as bread bakes.
No sugar in this recipe? Right? Sorry it seems I asked already but I can't find where I have asked about this. I am just wondering how the yeast will work without sugar?
But according to the recipe it works great!
Hey Olga, yes, the recipe has no sugar. See the video, I explain the process of the dough. I think it will make it easier.
This bread recipe is absolutely amazing! Tried it a few times now and each time it turns out just perfect.
Just made today a loaf of bread using 2 cups of whole wheat and 1 cup of all purpose flour, and Oh Gosh, this is the best bread I've ever eaten! Thank you Natalia for this recipe 😍
Hey Natalia, thank you for sharing this with me. I am so happy you love it. We actually made some with wheat flour this weekend as well. Thank you for sharing your feedback, it really means a lot to us!
Really easy to make and very delicious bread. Love it
Hey Nataliya, I am so glad you loved it. Thank you for sharing!
Hi Natasha, my dough was standing for 24 hours and it didn't really rise. It turned bubbly but did not rise. When I took it out on the baking sheet it just went flat. Recipe calls for 1 tsp of dry yeast but someone in the comments mentioned 1/4 teaspoon? Also I used regular store bought flour, not the Canadian. I really want to give it another try. Let me know if you have any tips.
Also, love your recipes! Lots of them are on my list to try:)
Hey Dina, there could be a few factors. Either yeast is not fresh. Check the expiration date and make sure you store it in a fridge (packaging would have instructions). Another factor is the brand of flour. I would recommend using Bob's Red Mill or Canadian brand of flour. Let me know how it goes the second time around.
King Arthur flour is very good
Hi Ruth- yes that is another brand I recommend. 🙂
How many loaves does this recipe make? Do I need to double it for 2 large loaves?
Hey Kate, yes, double up the recipe for two loaves. Just make sure that your dish is large enough so the dough doesn't run out of the dish. Enjoy!
Wish I would have known to double the recipe for two loaves. I thought this would make 2 loaves that shown in the picture.
Hi Irena - It does make two small loaves. We simply split the dough in half. If you'd like larger baguette, feel free to double up the recipe or split it into fourths. Hope this helps!
Can you make this recipe in a loaf pan?
Thx!
Hey Trish, yes, one of my readers said it work great in a loaf pan. But line it so to doesn’t sick to the sides.
Hello Natasha,
Can I use instant dry yeast instead of active dry yeast? I couldnt find active
Hey Tanya, yes you can use instant dry yeast. Enjoy!
Can we bake bread using baking powder.. No yeast in stock😔
you can use baking soda and buttermilk to make Irish Soda Bread
Great tip!
Hey Deepa, sadly I don't have a recipe for bread without yeast. This specific recipe wouldn't work with baking powder.
Thanks for this recipe came out very good will make again
Hey Deborah, I am so happy you enjoyed it. We love this bread recipe, its on repeat in our home as well. 🙂
Hi there! I love this recipe, I’ve been using it for a few years. and now I’d like to try it with an iron pot. Where can I find the instructions for baking for that version? Thank you!
Hi there ,,I am using a no lid cast-iron pan two small handles from lodge available on Amazon no long handle to get in the way I leave it in oven when pre heating to 450 Fh , just put my dough in when dough is ready to bake never fails you can also use a spray bottle water just spray sides of oven ..!!
Hey Joseph, that may need this some testing. I haven't tried this method so I can't give you an exact recommendation. I do think it may work. If you try this, please let me know.
hi there it works great my oven is a small portable in my motor home the iron skillet makes a great crust also using Caputo 00 flour have tried a small amp of water in aluminum foil that worked out fine thank you oh make sure that cast iron pan preheats in oven bread rises fast when it hits that pan temp. 450f
Hey Joseph, it sounds like you have it nailed! Thank you for sharing your feedback.
I havent tested Cast Iron option for years and I can't really make a good recommendation for you.
I haven’t tried your recipe with cast iron pot/Dutch oven yet but have used Dutch oven many times to make sourdough bread. Here is what I normally do: preheat oven at 500 degrees with empty Dutch oven in it and once it’s heated, I put my loaf of bread inside Dutch oven and put a lid on it. Bake at 450 degree for 20 min with lid on and then another 20 min without lid. I will try your bread using this method and will let you know how it turned out.
Hey Mila, thank you for sharing your version. I have been thinking to make it in a Dutch Oven because I do have one but didnt want to mess it up!
Thank you so much for wonderful recipes! What I love about your website most of all is that you post not only great recipes and descriptions but also stunning photos of food! Have a nice day!
Thank you Rose! That means a lot!
Hi, I plan on making this tonight. What kind of yeast did you use? I bought instant yeast, will this work?
Hey, instant yeast would work great for this recipe.
I used Fleischmann’s rapid rise instant yeast and worried it won’t come out right. Those were the only packets in my store. Any advice? Thanks
This will work well.
It worked perfect! The bread was amazing. Fantastic recipe and definitely a keeper!
Hey Kristal, thank you for sharing! This bread has been a staple in our home for many years now 🙂
Is there any possibility I could add sourdough starter to this for taste? If so how much?
I havent worked with starter, but I am sure you can add it to the mix. Dough should be a bit on a stiff side when you combine all ingredients together. Overnight it will get all bubbly.
i made this with wholemeal bread flour and i added a tablespoon of brown sugar as recommended by one poster, came out perfectly!
Amazing tips, thank you so much for sharing this with us.
I just tried to make a no-knead bread recipe similar to yours, using Organic Canadian All-purpose flour. I found the flour-to-water ratio (3 c flour to 1 1/2 c water) was much drier than expected. Is you recipe based on Canadian or American flour?
I go to Canada to buy flour, sounds odd but we do because of quality. It is very dry when you mix it up. Overnight the dough changes in texture.
Natalya:
I have made many breads, and always find that recipes in US cookbooks are too dry. I either cut down on the flour or ass more liquid. This time I didn't, but while the dough was much dryer so it could be kneaded, it was delicious and disappeared quickly. we did 1/3 whole wheat and 2/3 white All Purpose. Next time I will up the water and see how it works.
Sometimes wholewheat flour could absorb water much quicker, that would make sense. I am glad it was still delicious.
I mixed half white flour and half rye and added some caraway seeds. Came out great. This recipe is easier than the original one using a cast iron pot which is a big hassle. Sugar is not needed because it's a slow rise method, however a teaspoon or two of sugar wouldn't hurt the flavour. The dough is very sticky, so use an oiled wooden spoon to get it out of the bowl, I made the mistake of using my hands!!
When its very sticky I cover my hands with flour. It works wonderful as well. I do agree with you that with out iron pot the process is much easier.