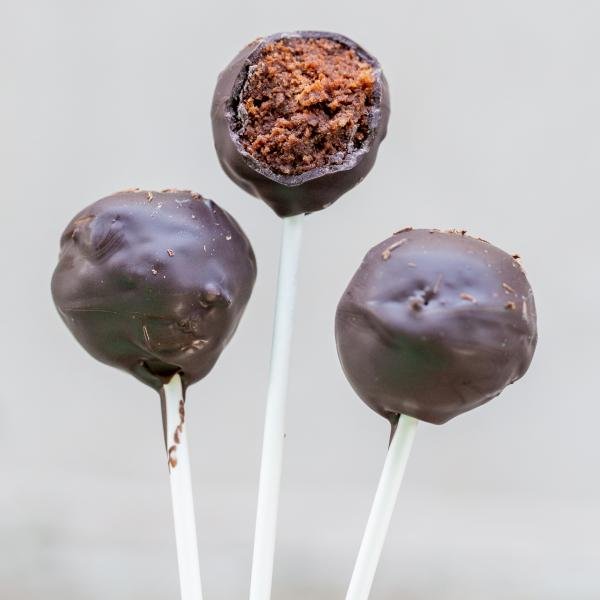
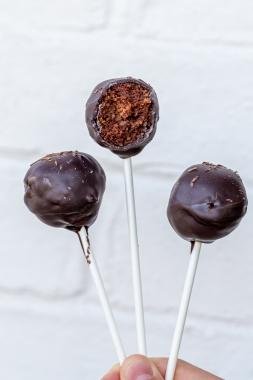
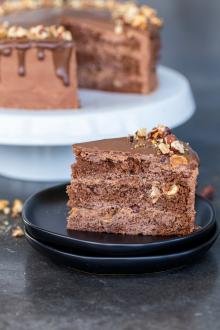
These tasty chocolate cake pops only require chocolate sponge cake, heavy whipping cream, sugar & chocolate melts. A foolproof guide to cake pop glory!

Do you love a chocolate on chocolate dessert? If so, these scrumptious cake pops are right up your alley. Consider this post both a recipe and a how-to guide that will teach you all you need to know about making perfect chocolate cake pops. All you have to do is decide how many you are willing to share!
Note: You’ll need to bake a chocolate sponge cake in the oven for this recipe. You can also use boxed cake mix!
Everything You Need to Make Cake Pops
To make the cake pop process streamlined, you’ll want to invest in a couple of tools and candy melts. Here’s all you need:
- Cookie Scoop – Using a cookie scoop makes portioning out the cake pop batter a breeze. You can also use a tablespoon in a pinch.
- Chocolate Candy Melts – Chocolate melts are what give cake pops that smooth outer sheen. Use them over traditional chocolate chips!
- Cake Pop Sticks – Snag cake pop sticks over lollipop sticks – they are a little shorter than and a bit thicker to support the cake balls.
- Cake Pop Stand – Keeping the cake pops upright in a stand is key to making sure they don’t get damaged. You have a couple different routes you can take – you can purchase a plastic stand, use floral foam, or drill holes into a thick piece of wood.

How to Prepare the Best Chocolate Cake Pops
Preparing these chocolate cake pops requires that you bake a sponge cake and make homemade whipped cream. Other than that, it’s all about the assembly!
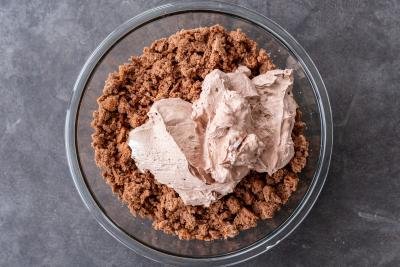
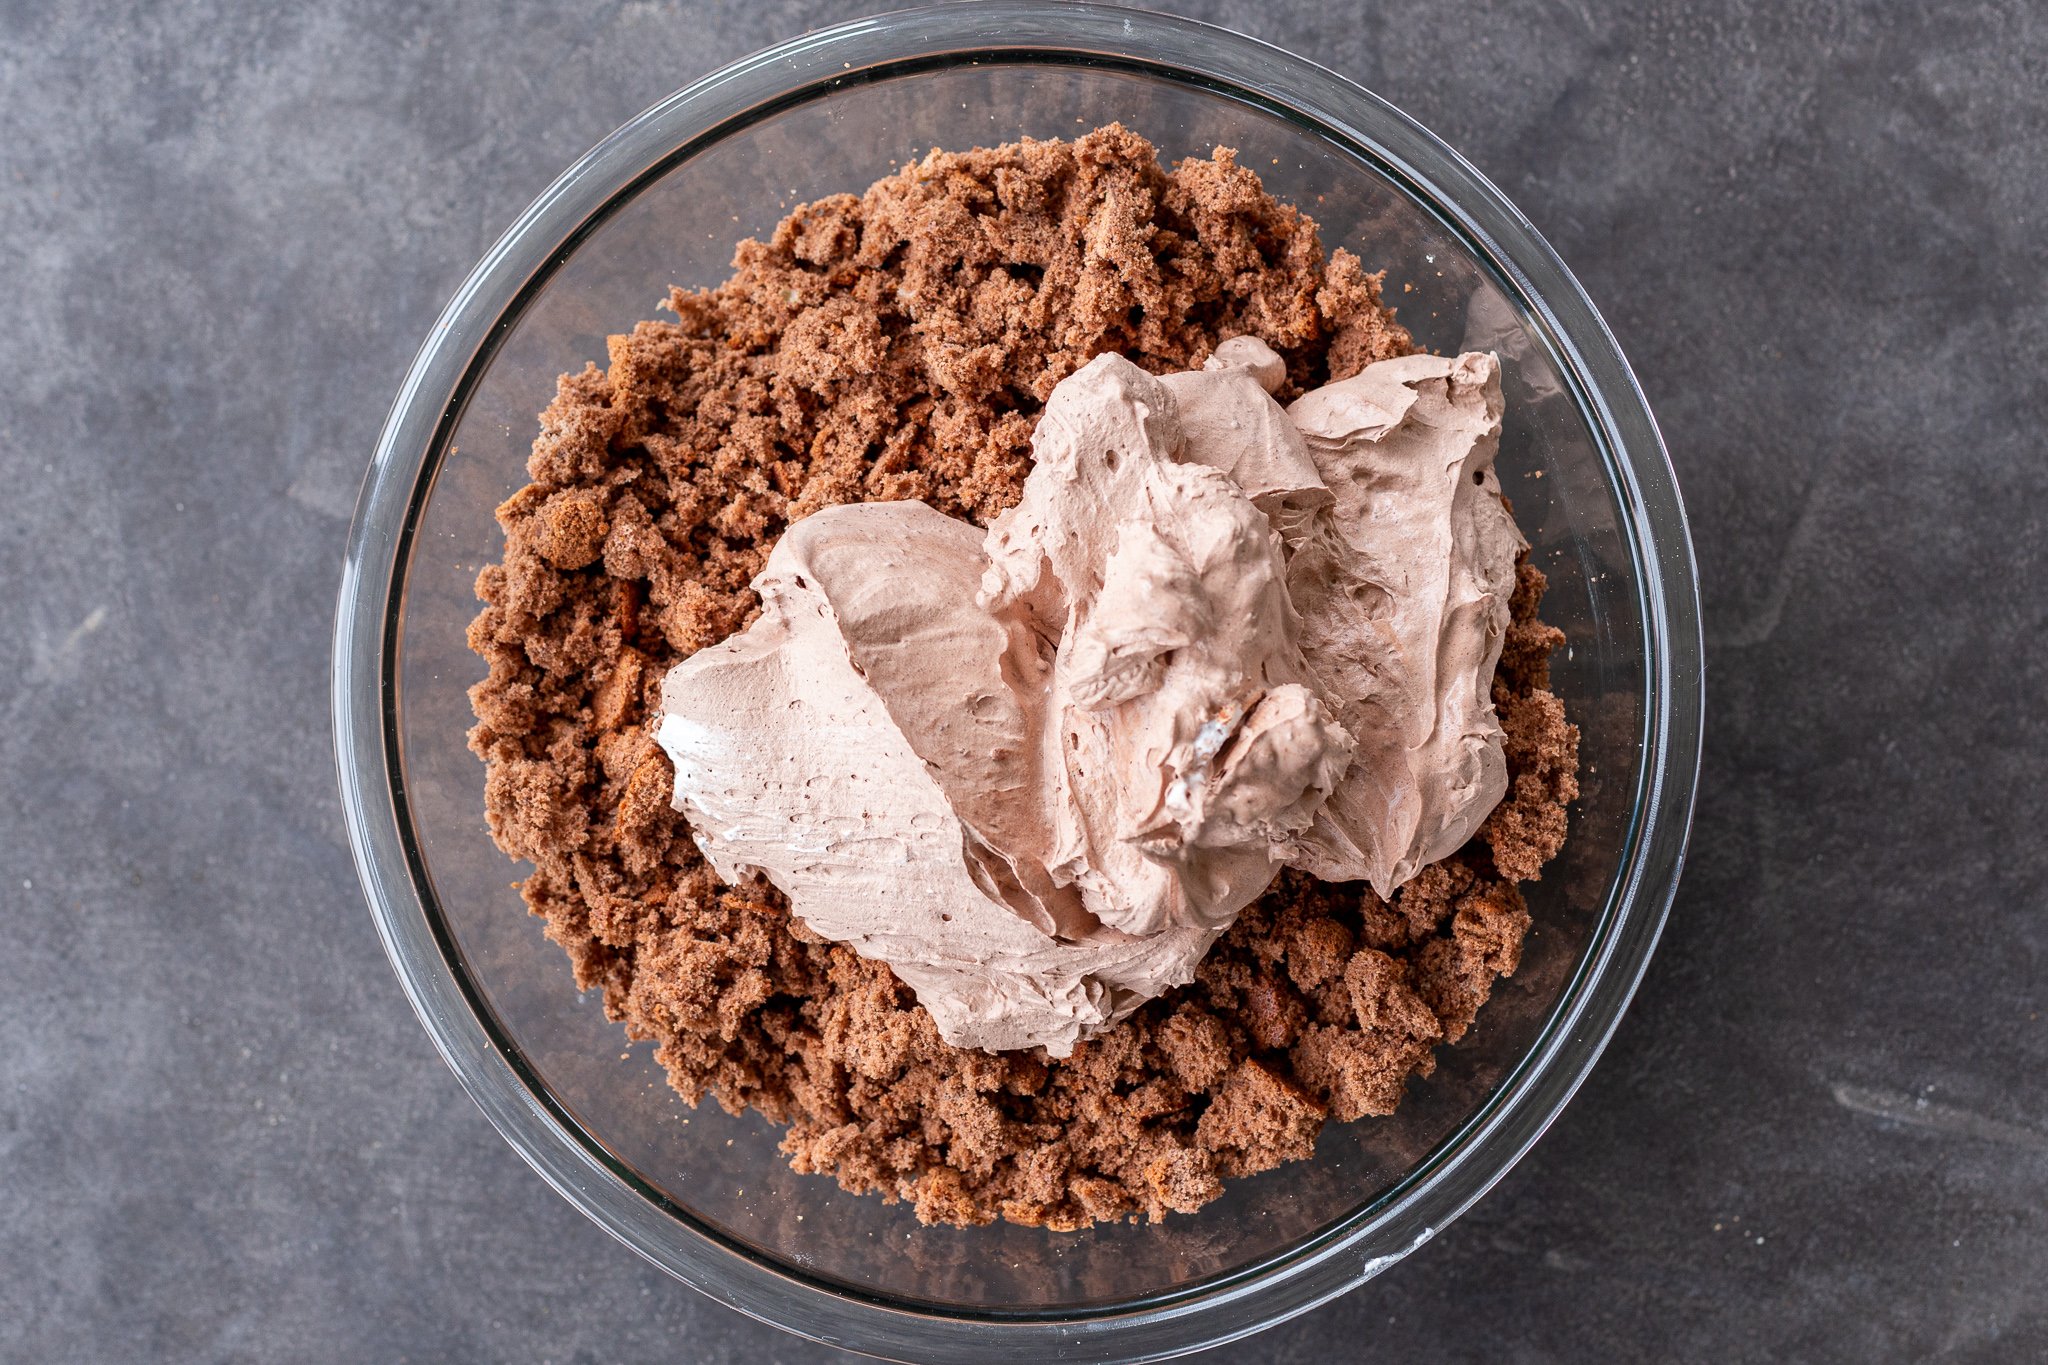
- Crumble the Cake: First, break the sponge cake up into cake crumbs in a large bowl.
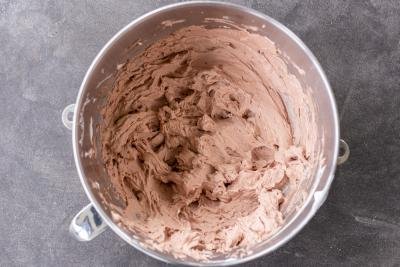
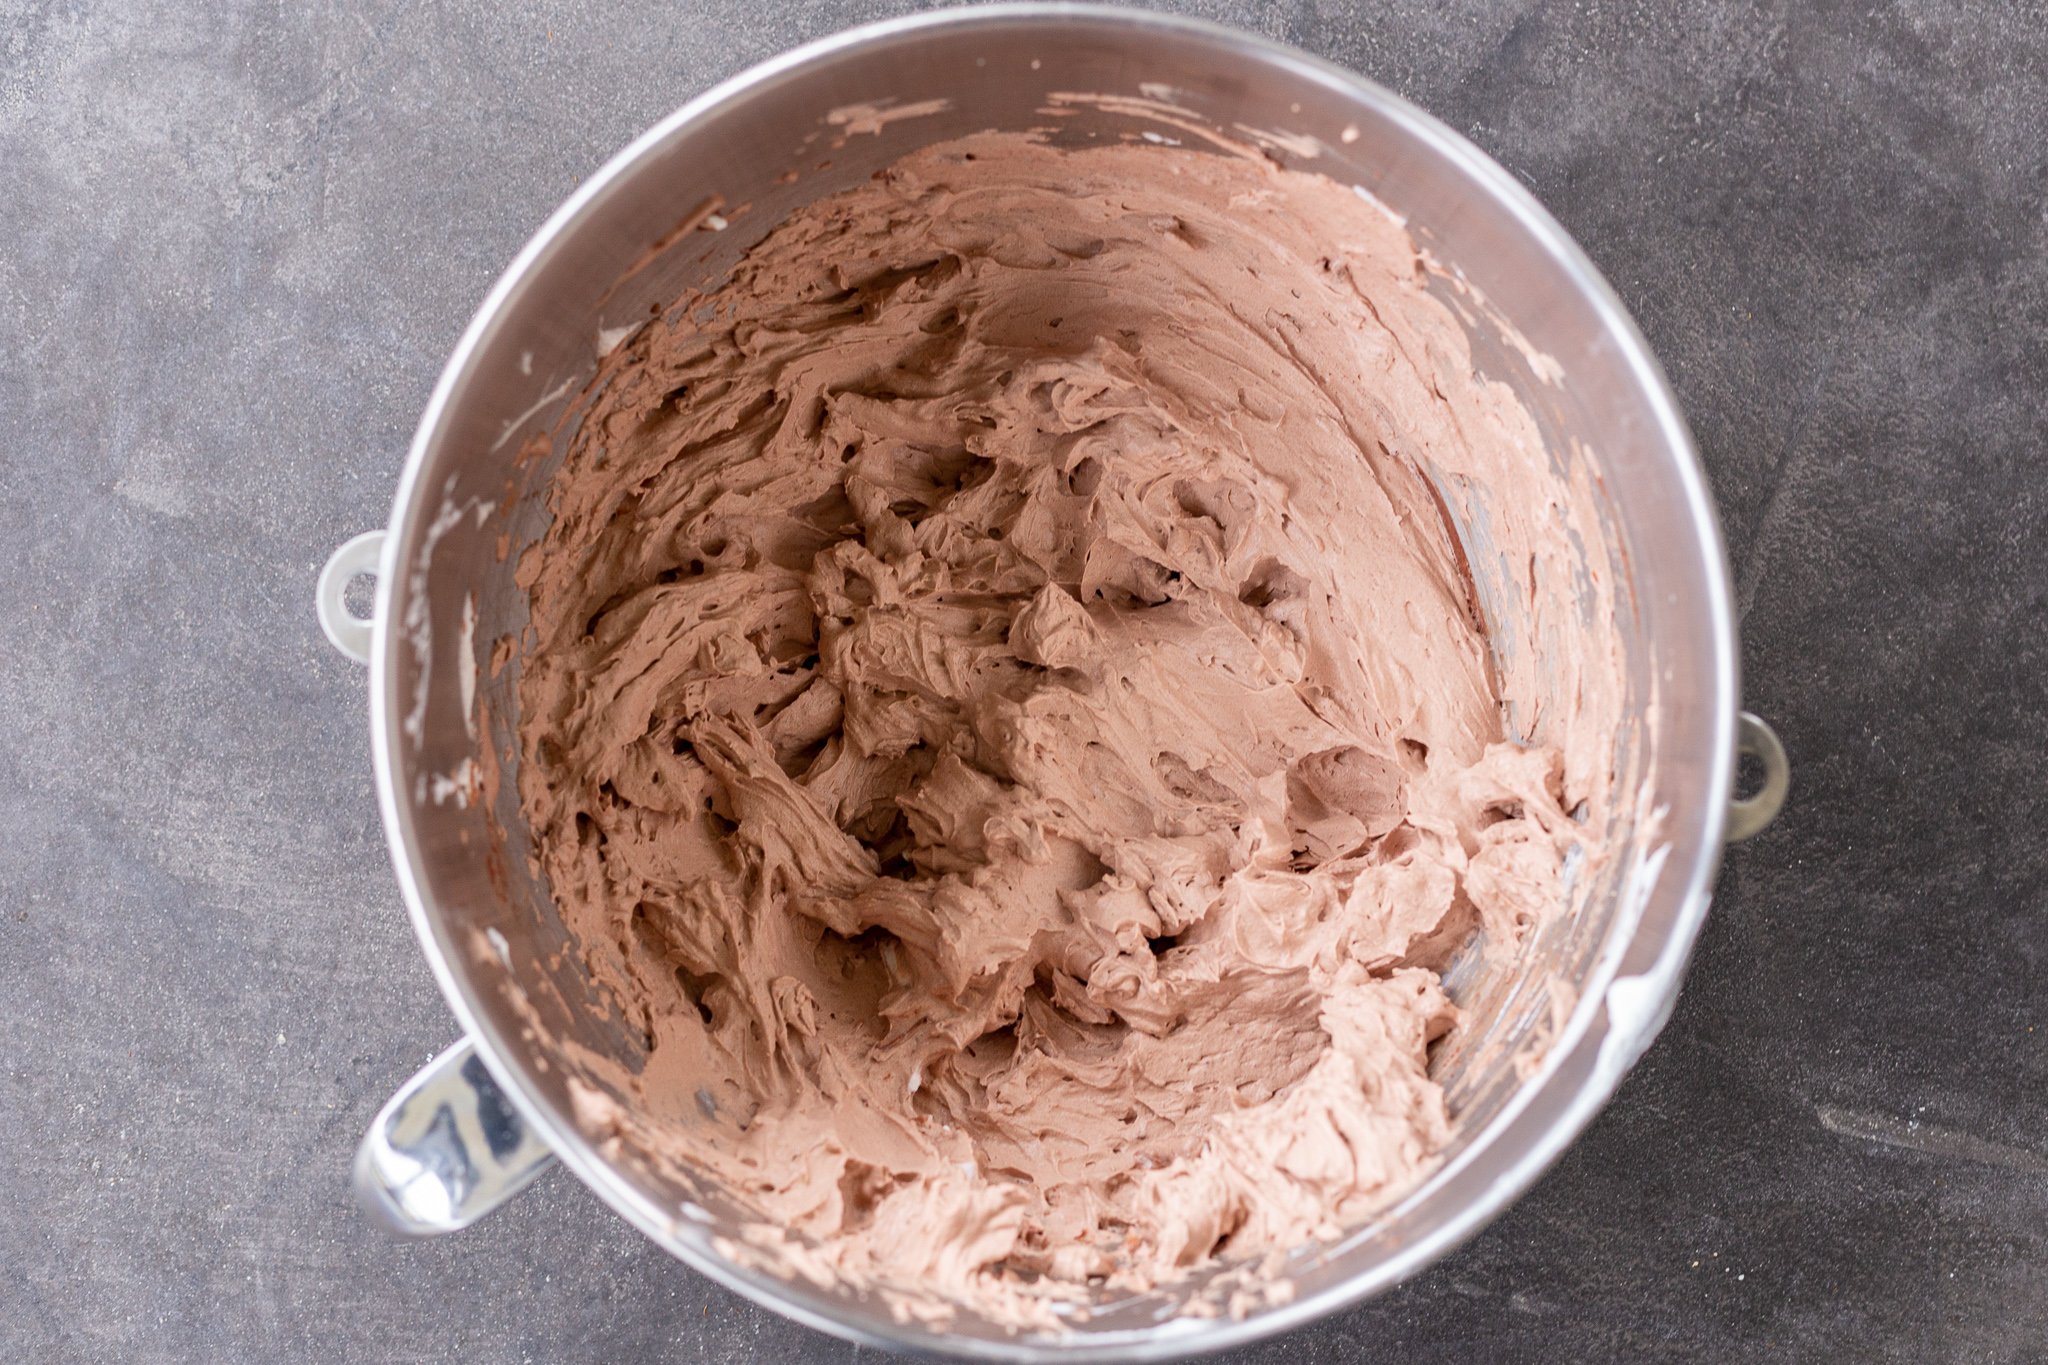
- Make the Whipped Cream: Next, beat the cold whipping cream, cacao and sugar in a stand mixer until you get stiff peaks. If you’re a chocolate fanatic, feel free to beat it with some cocoa powder to make chocolate frosting.
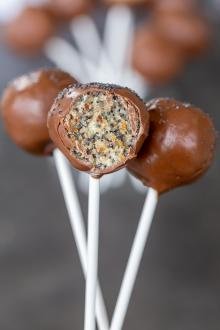
- Make the Cake Pop Batter: Stir the whipped cream and cake crumbs together until perfectly smooth.
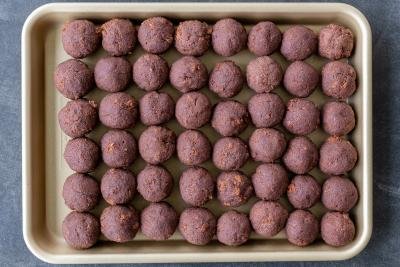
- Portion the Cake Balls: Next, use a cookie scoop or tablespoon to portion out the cake mixture into bite-sized balls. Roll each in the palm of your hand to make a perfect circle and place them on a baking sheet lined with parchment paper as you go.
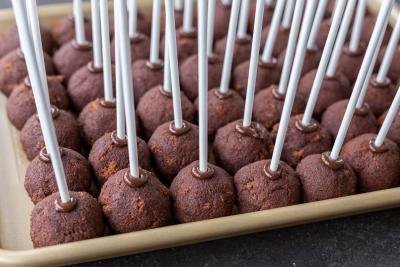
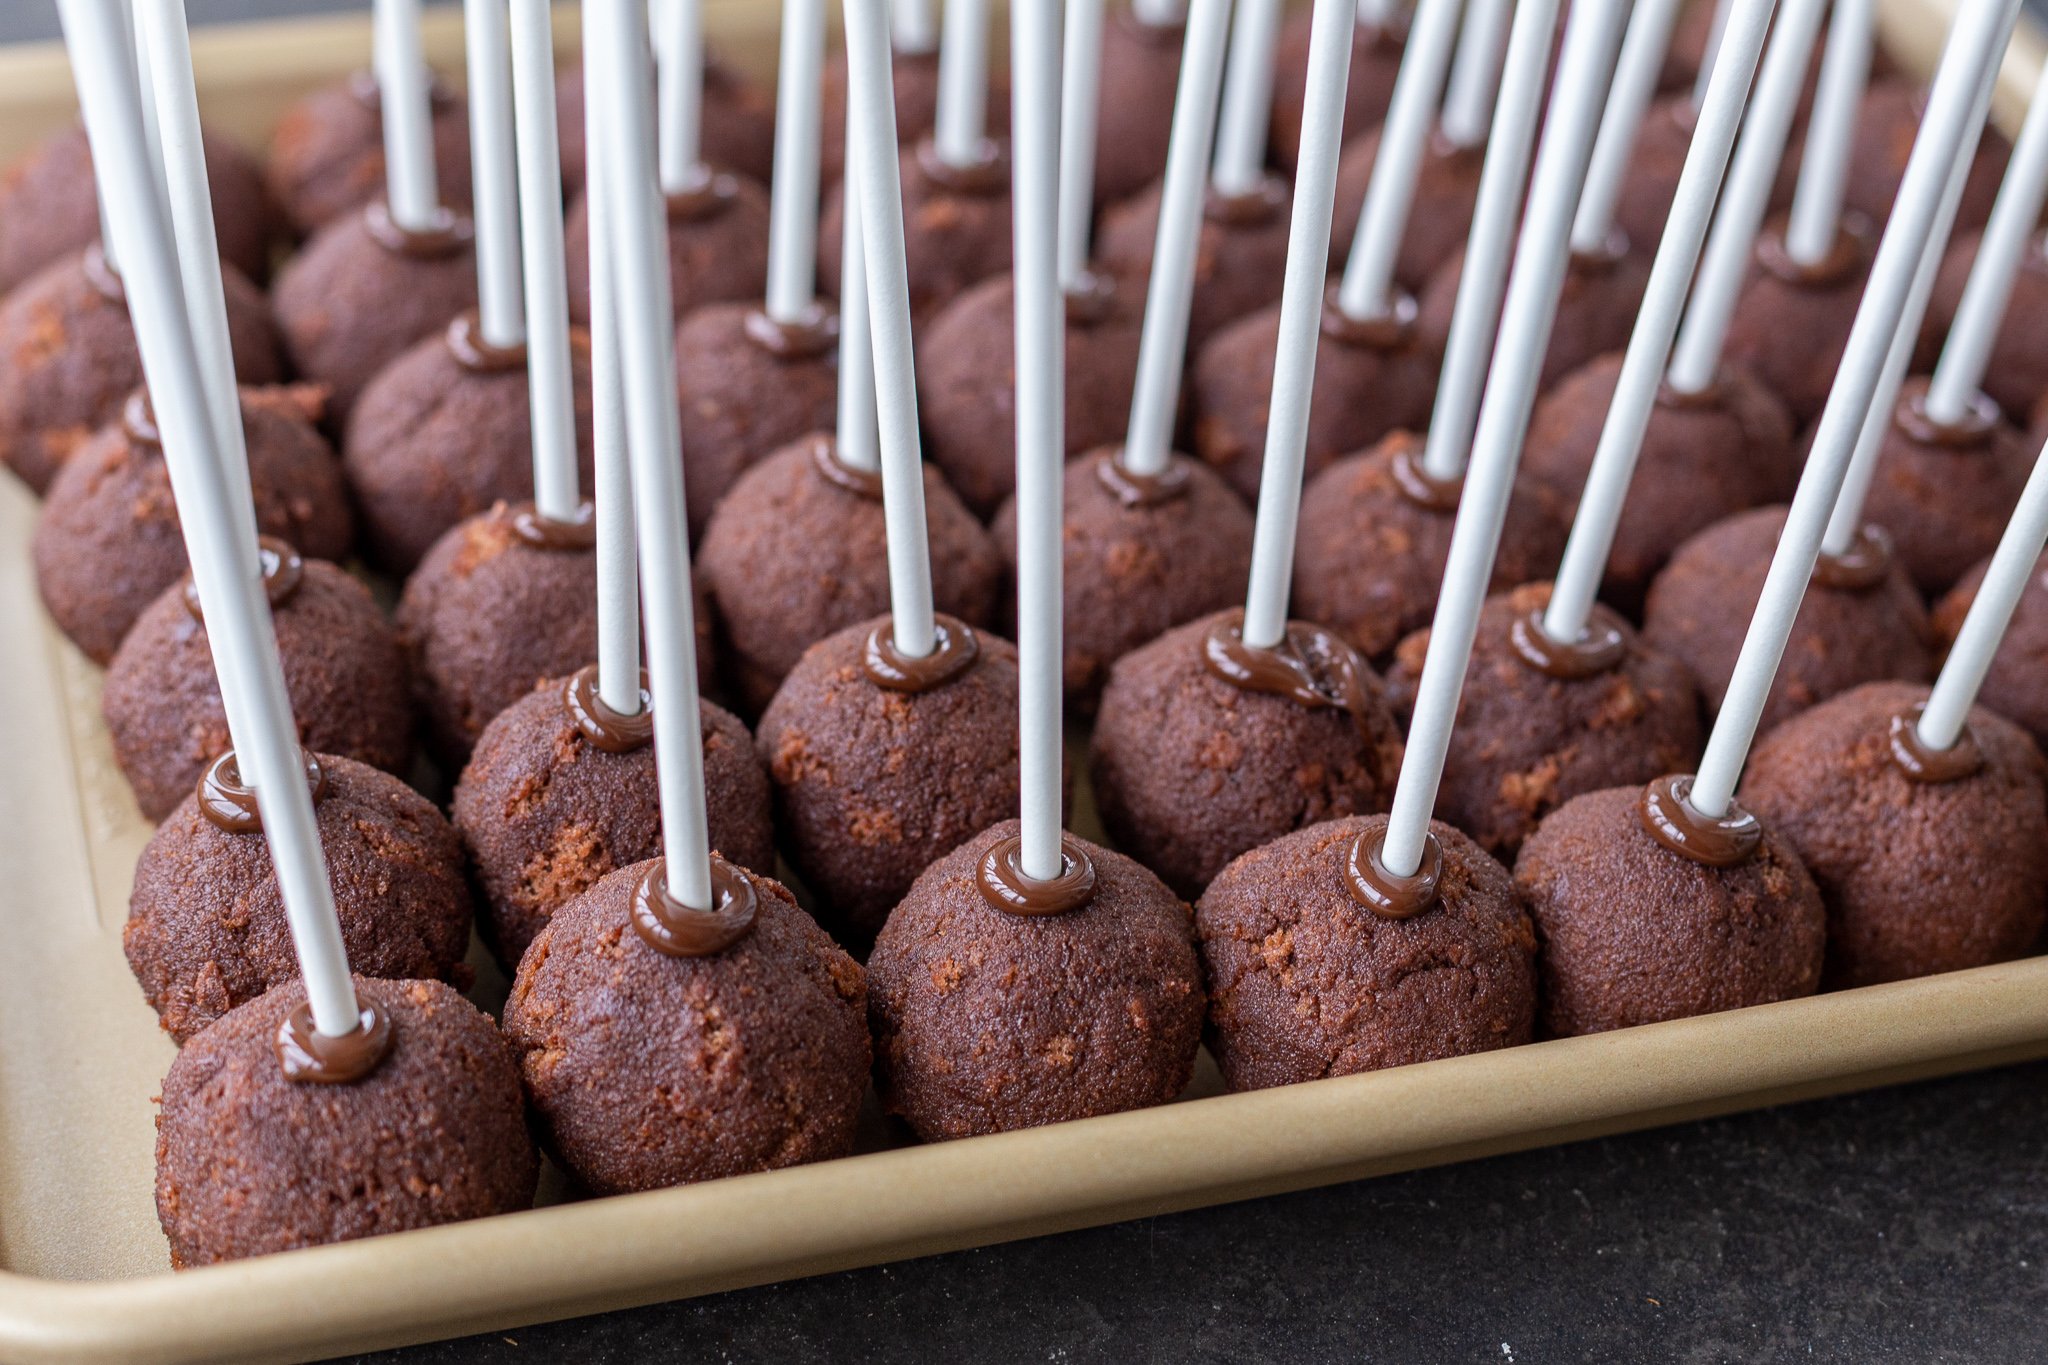
- Pop the Sticks In: Melt a small portion of the chocolate melts in a bowl. Dip the end of a cake pop stick into the chocolate and stick it into the cake ball immediately. Set the cake pops aside at room temperature until the chocolate hardens.
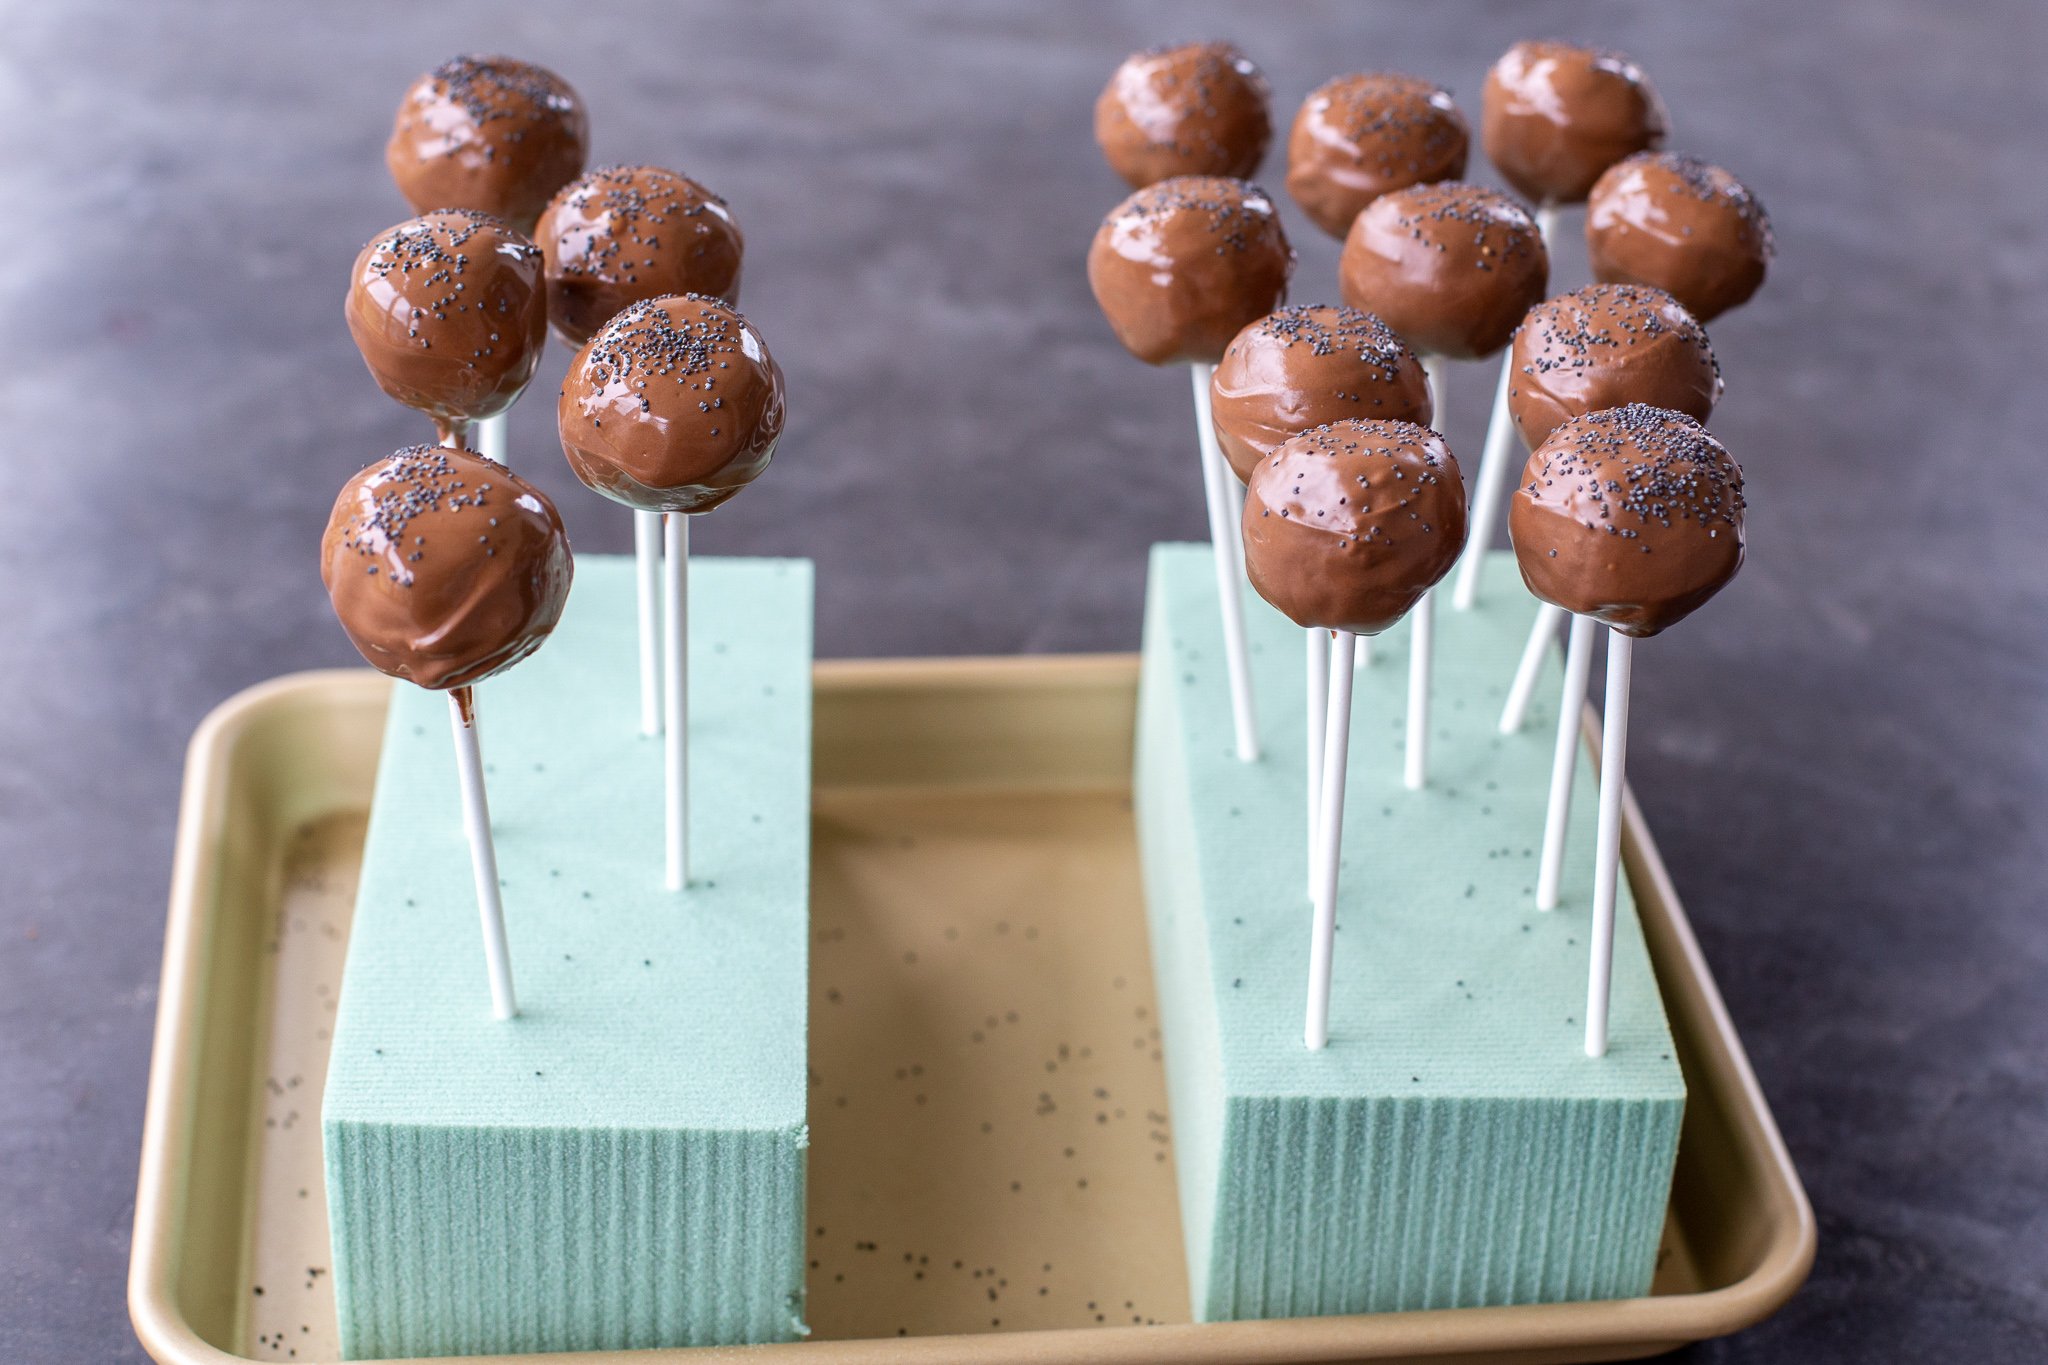
- Coat the Cake Pops: Next, melt the rest of the chocolate melts in a bowl. Dip each cake pop into the melted chocolate and transfer them to a cake pop stand as you go.
- Refrigerate the Cake Pops: Refrigerate the cake pops until you’re ready to serve them. Happy snacking!
Hot Tip: Be extra careful not to over beat the heavy whipping cream. If you go past stiff peaks, it will start to turn into butter!


5 Tips for the Bakery-Worthy Cake Pops
Consider these your 5 commandments to cake pop-making. Follow these pointers and you’ll be golden.
- Make sure the cake balls don’t have any cracks. When you roll the cake balls, make sure they are as near to perfect circles as possible. Any cracks and they will fall apart!
- Opt for extra cold whipping cream. For fluffy whipped cream, make sure to use extra cold heavy whipping cream. To ensure it’s cold enough, pop it in the freezer for 10-15 minutes beforehand.
- “Glue” the stick into the cake ball. Reserve some of the chocolate melts to use as a “glue” between the cake pop and cake pop stick. This will ensure the cake balls don’t slide right off!
- Use a circular motion to coat the cake pops. When you’re doing the final dip in the chocolate melts, use a circular motion to smoothly coat all the sides. To remove any excess chocolate, simply hold the cake pop upside down to let it drip off.
- Don’t use too much whipped cream. Although tempting, don’t overdo it with the frosting. If you use too much, the cake balls will be too flimsy and fall apart!
Decorating Tip: If you want to decorate the cake pops in sprinkles, make sure to do so immediately after you coat them in chocolate to help them stick.
How to Store Cake Pops
Whether you are prepping your cake pops a couple days in advance or freezing some leftovers for later, here’s all you need to know:
- Refrigerator: To keep your pops fresh for up to 10 days, store them in the fridge covered tightly with plastic wrap. This will keep them from absorbing any smells lingering around in your fridge.
- Freezer: To freeze your pops for up to 3 months, place the entire stand in the freezer for 1-2 hours. Once the individual pops are completely frozen, transfer them to a freezer-safe bag or airtight container. To thaw, place them in the fridge overnight.
Making cake pops for a gift? These mini bags with twist ties make for a great presentation.
FAQ
What chocolate melts are best for cake pops?
Wilton Candy Melts are the most readily available brand of chocolate melts, but feel free to use any kind you’d like to make cake pops. Any brand should give you that sheen and smooth coating that you’re looking for!
Can you use chocolate chips instead of candy melts for cake pops?
It’s not a good idea to use traditional chocolate chips for cake pops. Unlike candy melts, they lack the amount of vegetable oil it takes to get a smooth, candy coating.
Why did the chocolate on my cake pops crack?
The chocolate on your cake pops likely cracked if you didn’t allow them to set in the refrigerator. It’s important that they are chilled so that the chocolate doesn’t melt and break at room temperature.
How far in advance can you make chocolate covered cake pops?
You can prepare you chocolate covered cake pops up to three days in advance. It’s actually best to prep them ahead of time so you give them ample time to set and become sturdy.
What’s the best way to melt candy melts for cake pops?
The best way to melt candy is on a steam bath or double-broiler. This will keep the melts liquified as you work, making the dipping process a breeze. Alternatively, you can keep nuking them in the microwave every so often.
More Cake Pops to Try
- Christmas Cake Pops – Chocolate cake pops with mint & cream cheese frosting
- Poppy Seed & Raisin Cake Pops – Slavic-style cake pops
- Russian Chocolate Cake Balls – Sponge cake & condensed milk cake
- No-Bake Cheesecake Bites – Cream cheese, chocolate & graham cracker bites
Recipe
Ingredients
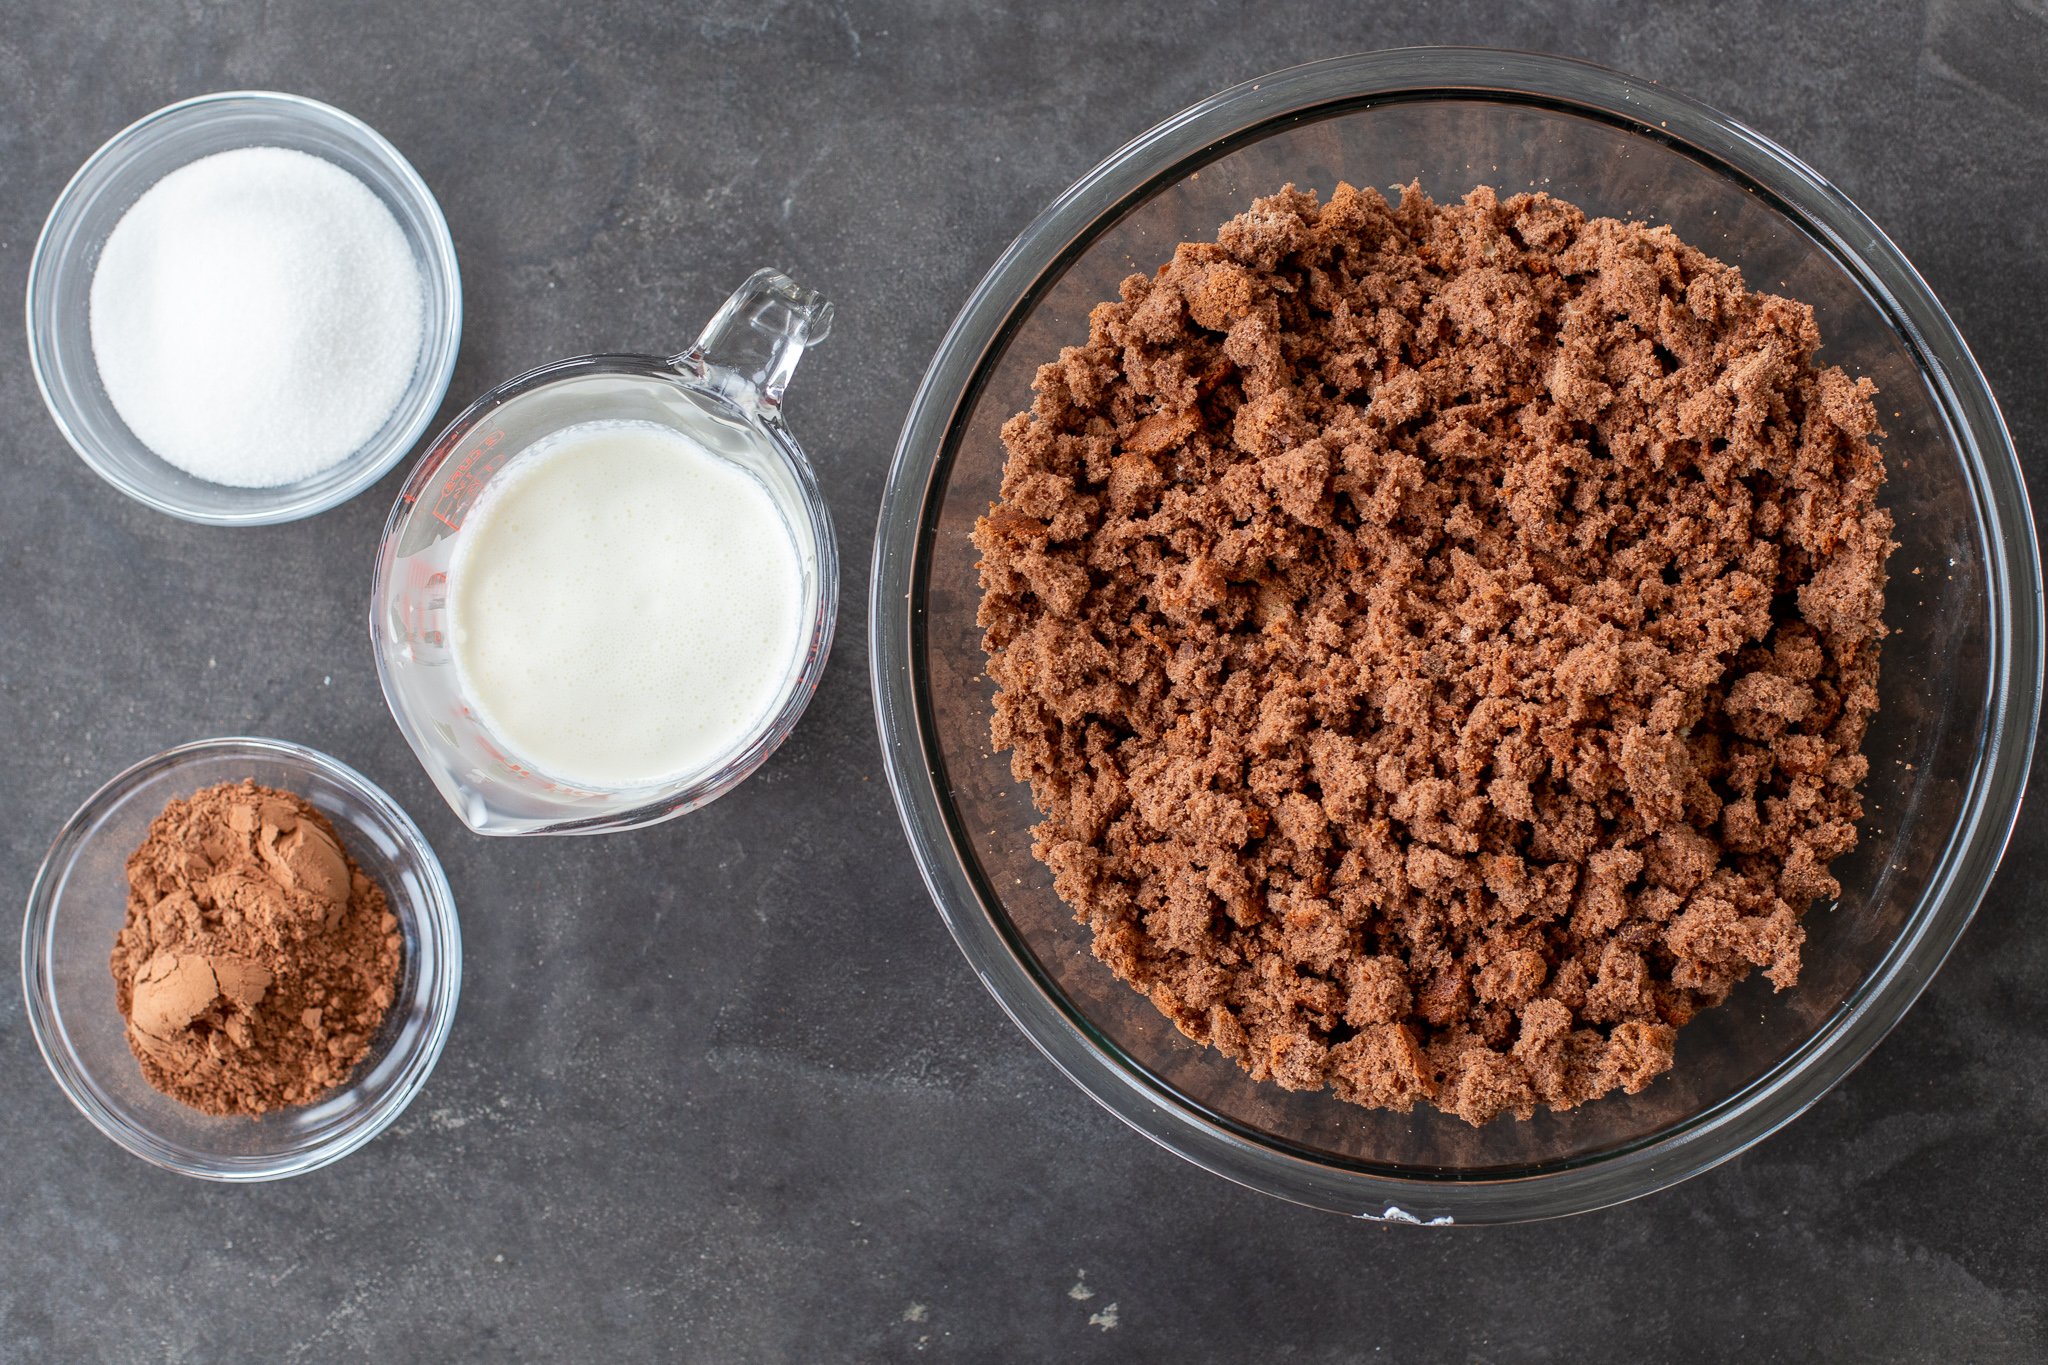
- 1 chocolate sponge cake
- 1 cup heavy whipping cream very cold
- 1/4 cup cacao
- 1/2 cup sugar
- 24 oz chocolate melts
Instructions
- In a large bowl, break the chocolate sponge cake into small crumbles.

- Using a hand or stand mixer, beat the cold heavy whipping cream, cacao and sugar together until you see stiff peaks.
- Combine the whipped cream with the crumbled cake mixture. Work it together until perfectly smooth.
- Using a cookie scoop, portion out a small amount of the batter and roll it into a ball in your hands. As you go, place the cake balls on a baking sheet lined with parchment paper.
- In a small dish, melt about 1/4 cup of chocolate melts. Dip the end of a cake pop stick into the chocolate and immediately stick it into a cake ball. Repeat with all the remaining cake balls. Set the cake balls aside until the chocolate hardens.
- In a shallow bowl, melt the remaining chocolate melts according to the package instructions. Dip each one of the cake pops into the melted chocolate in a swirling motion. As you go, transfer each cake pop to a stand to dry. Refrigerate the cake pops until you're ready to serve them. Enjoy!


Best cake pops ever! Super easy recipe and they turn out amazing! Thank you for the detailed instructions on how to store already made cake pops that helps so much! Blessing to you and your family!
I'm happy to hear you appreciate all the details in the blog post! Thank you for the feedback Inna. 🙂
Mine kept popping off the stick when I went to “swirl” in the chocolate. Help!!!
Hi Cait, I am sorry that kept happening to you. Did you put the chocolate on the stick before putting the stick into the cake pop and letting it harden before covering with chocolate? If you skip that step, the cake pop will fall off the stick.
This was my first time making cake pops and they were so so delicious! Perfect for chocolate lovers and also pretty easy to make. Will definitely make again!
This is a classic recipe to have ready and on hand. Everyone loves chocolate cake!
Thank you Katie, I totally agree!
My kiddos loved every single bite of these!
Allyson, I'm not surprised. Cake pops are often a total hit with the kiddos!