This homemade puff pastry recipe requires only four ingredients and quick hands. It’s the best dough to have on hand for last minute desserts and easy baking!
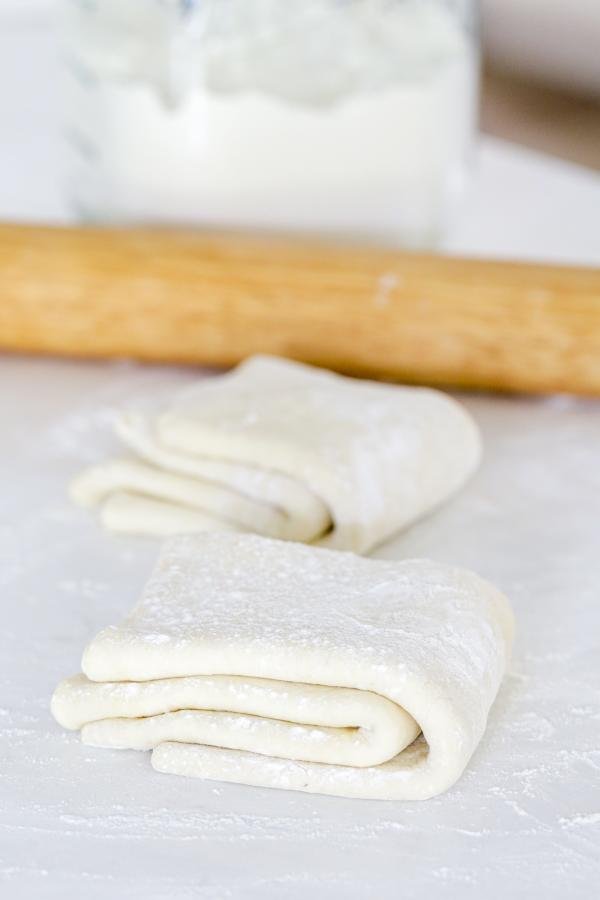
If you’ve landed here, you must be interested in making your own puff pastry. Let me tell you… this puff pastry dough recipe changed my life years ago when I figured it all out. Butter is the main ingredient to make this puff pastry dough what it should be – so it’s important to learn how to work with it.
In general, this is an easy puff pastry dough recipe, but fair warning – you cannot move at a turtle’s pace with it or you’ll end up with a pile of melted butter and sticky dough. So yes… it’s easy. Yes… the flavor is next-level. But, you do need to stay locked in. Your baking game is about to change, and I can’t wait to hear about it in a review!
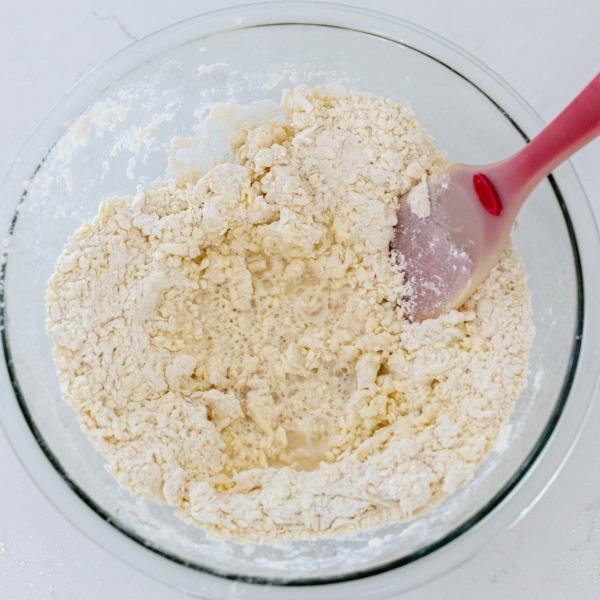
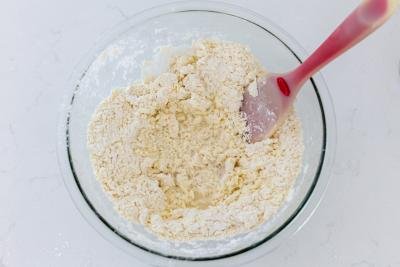
Watch the video tutorial first: Making puff pastry for the first time can feel a little intimidating. Watch the video tutorial below so you can easily see how “shaggy” and messy the dough is supposed to look before it comes together. It’ll give you the confidence to keep going without overworking it!
Easiest Puff Pastry Video Tutorial
How to Make Puff Pastry Dough
The goal is always delicious, flakey layers, right? Make sure to follow these recipe instructions closely, especially when working with the cold dairy! If written directions aren’t your thing, please go watch the video – it’s so helpful!
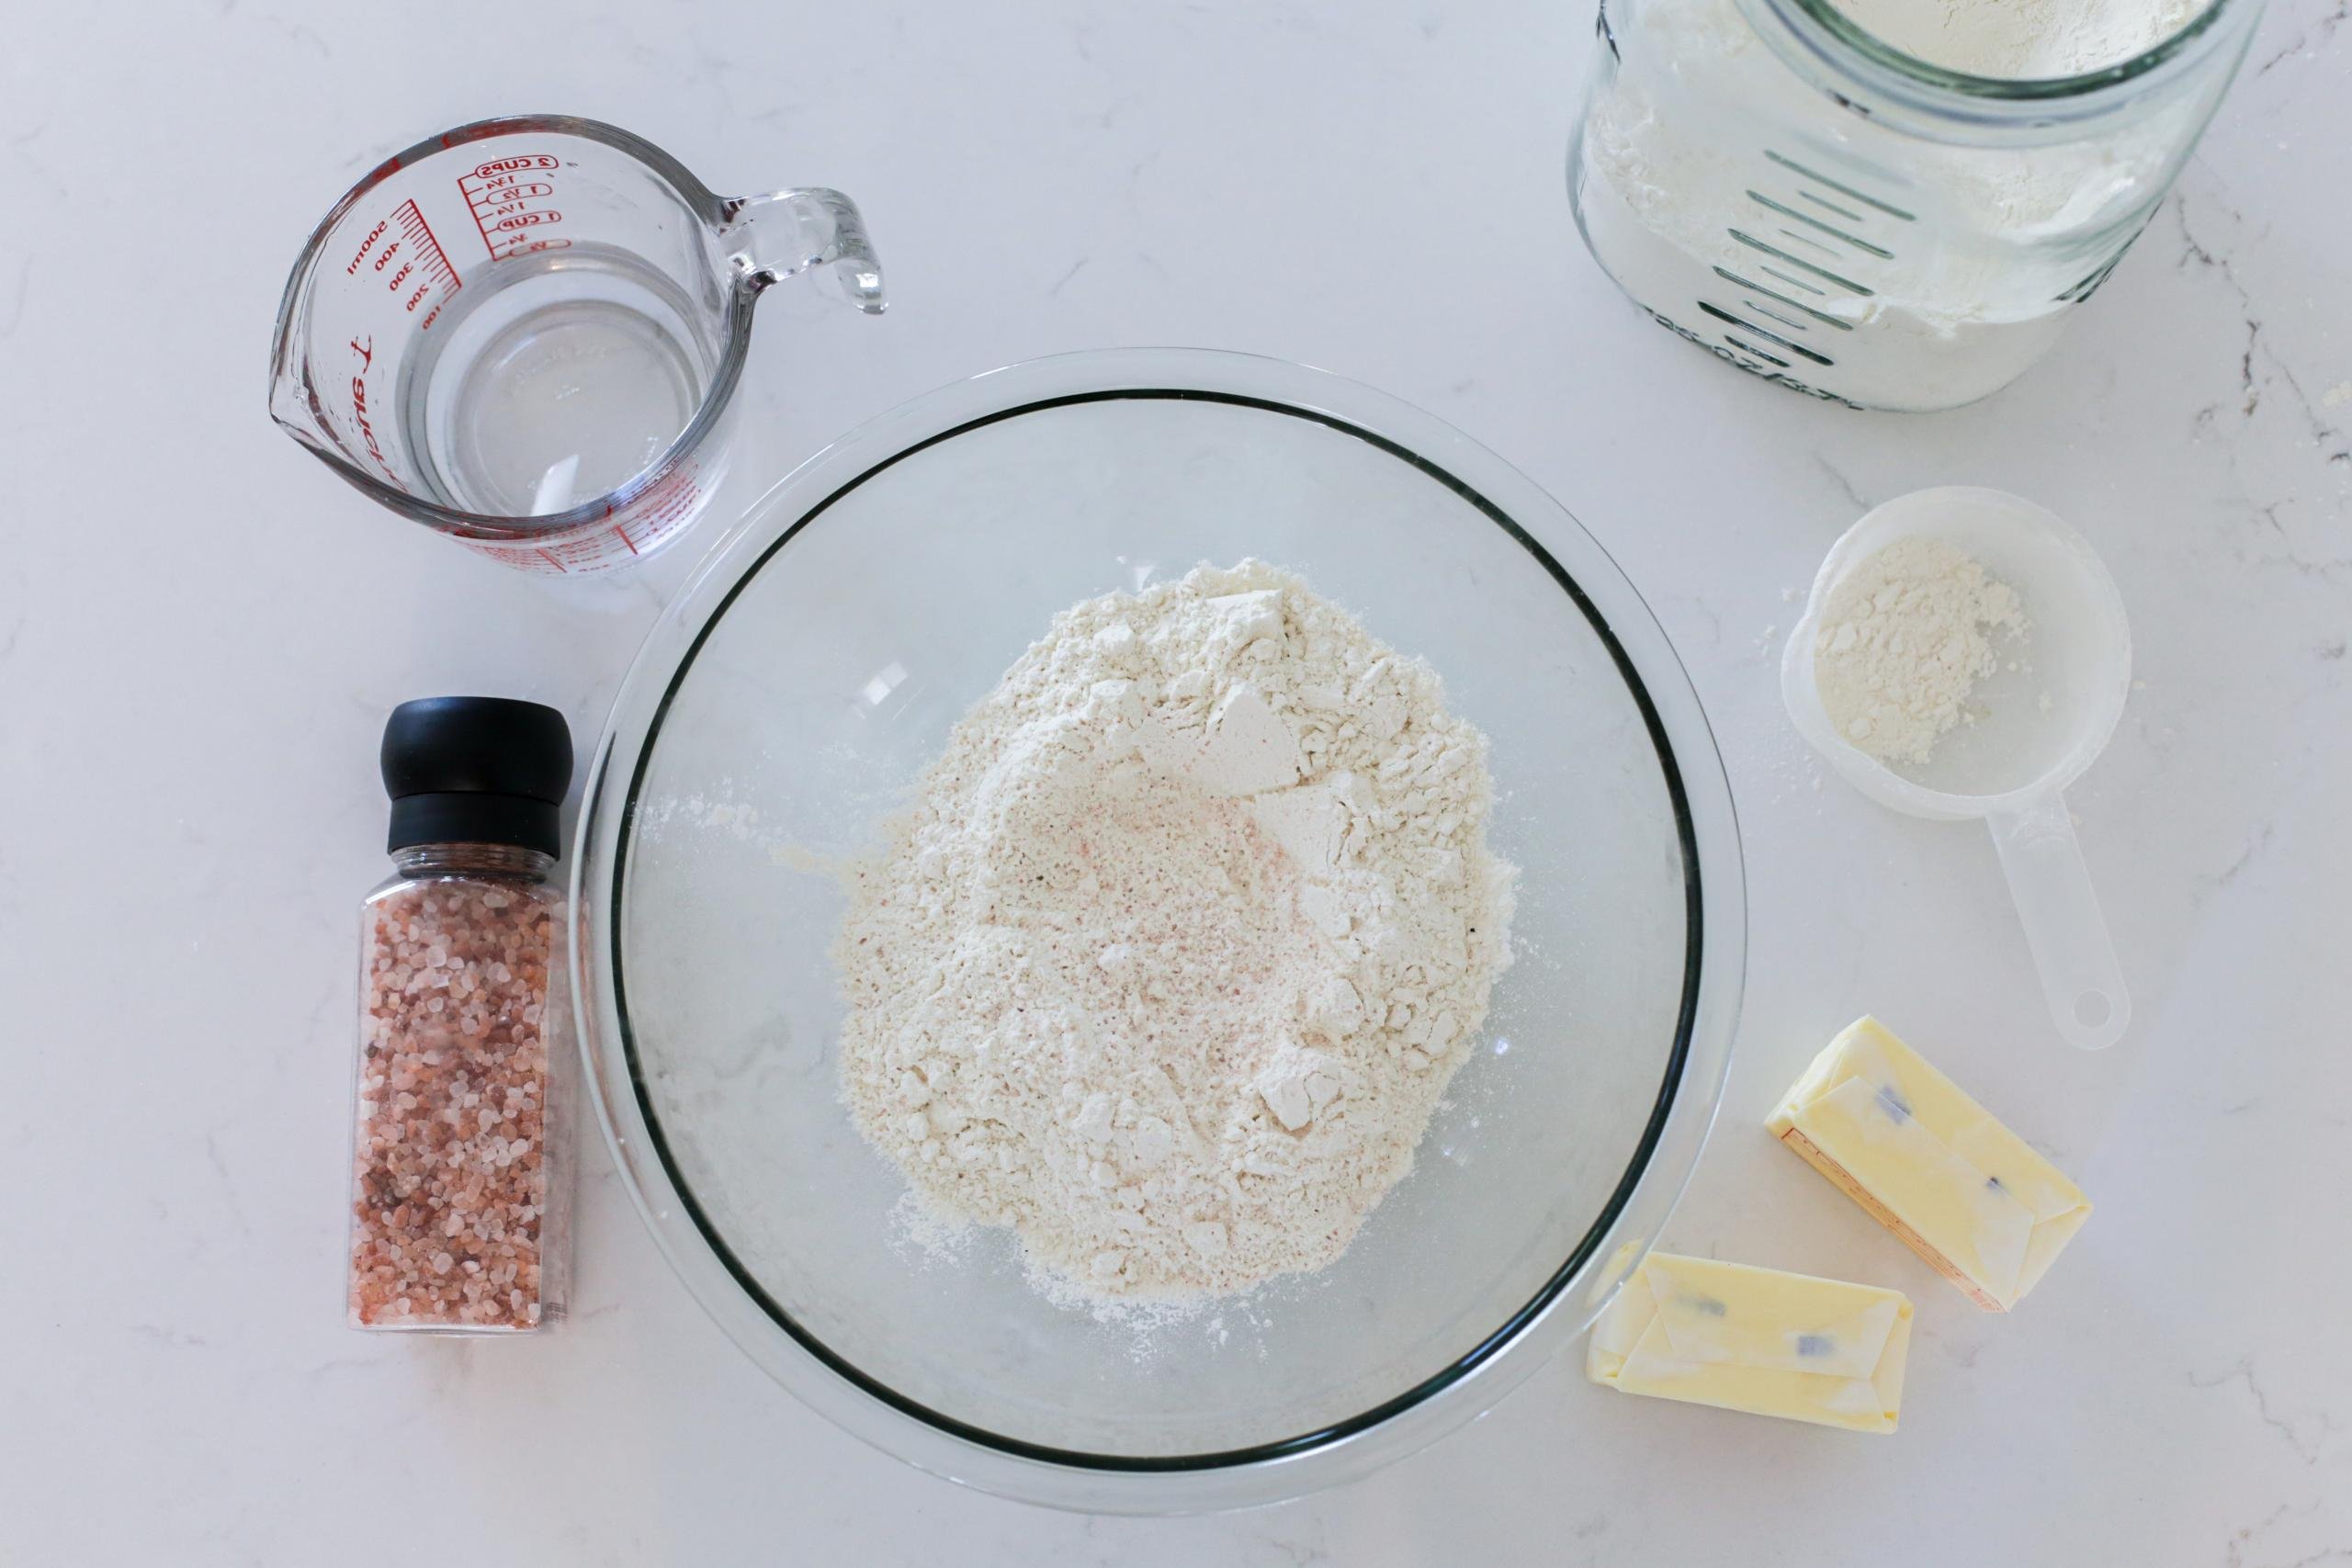
- Sift the dry ingredients: Sift the all-purpose flour and salt into a large bowl and place it into the refrigerator for about 15 minutes (bowl included!).
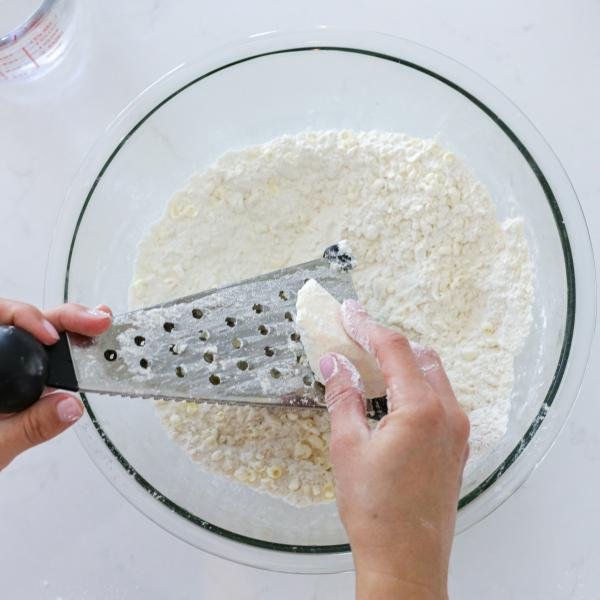
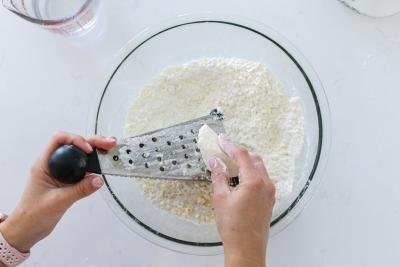
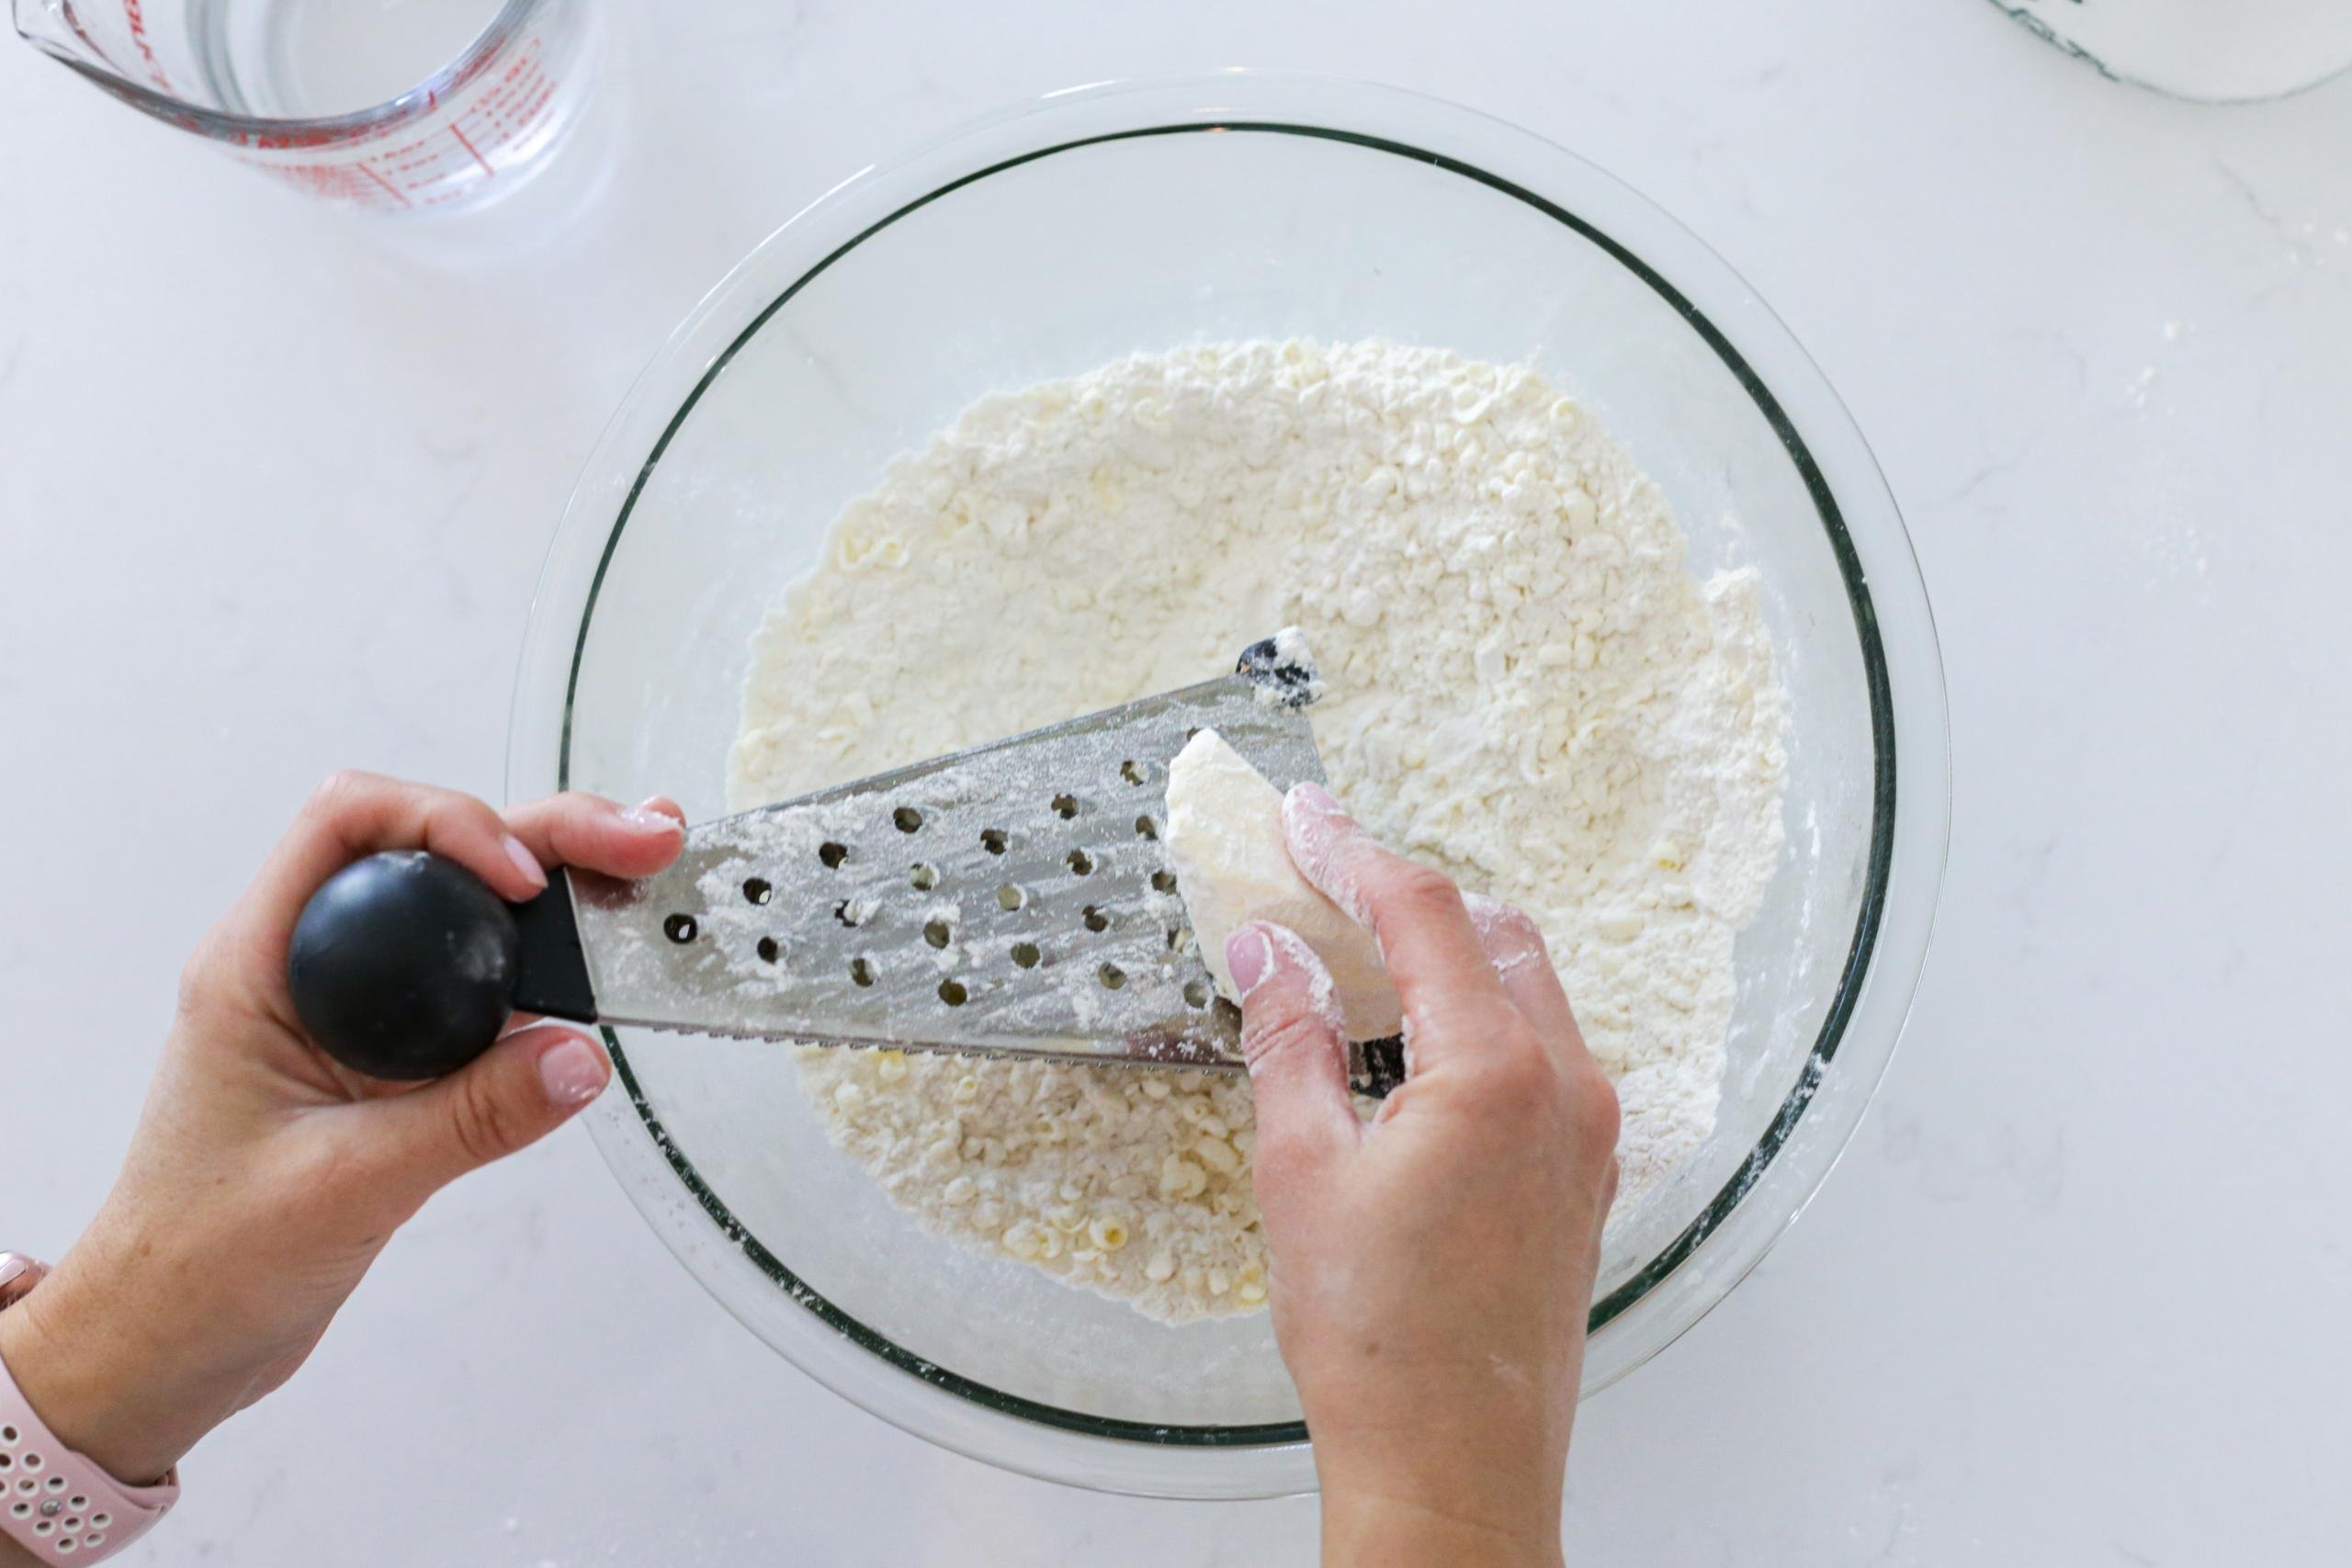
- Grate the butter: Next, grate the frozen unsalted butter into the flour, stirring the butter pieces with the flour as you go.
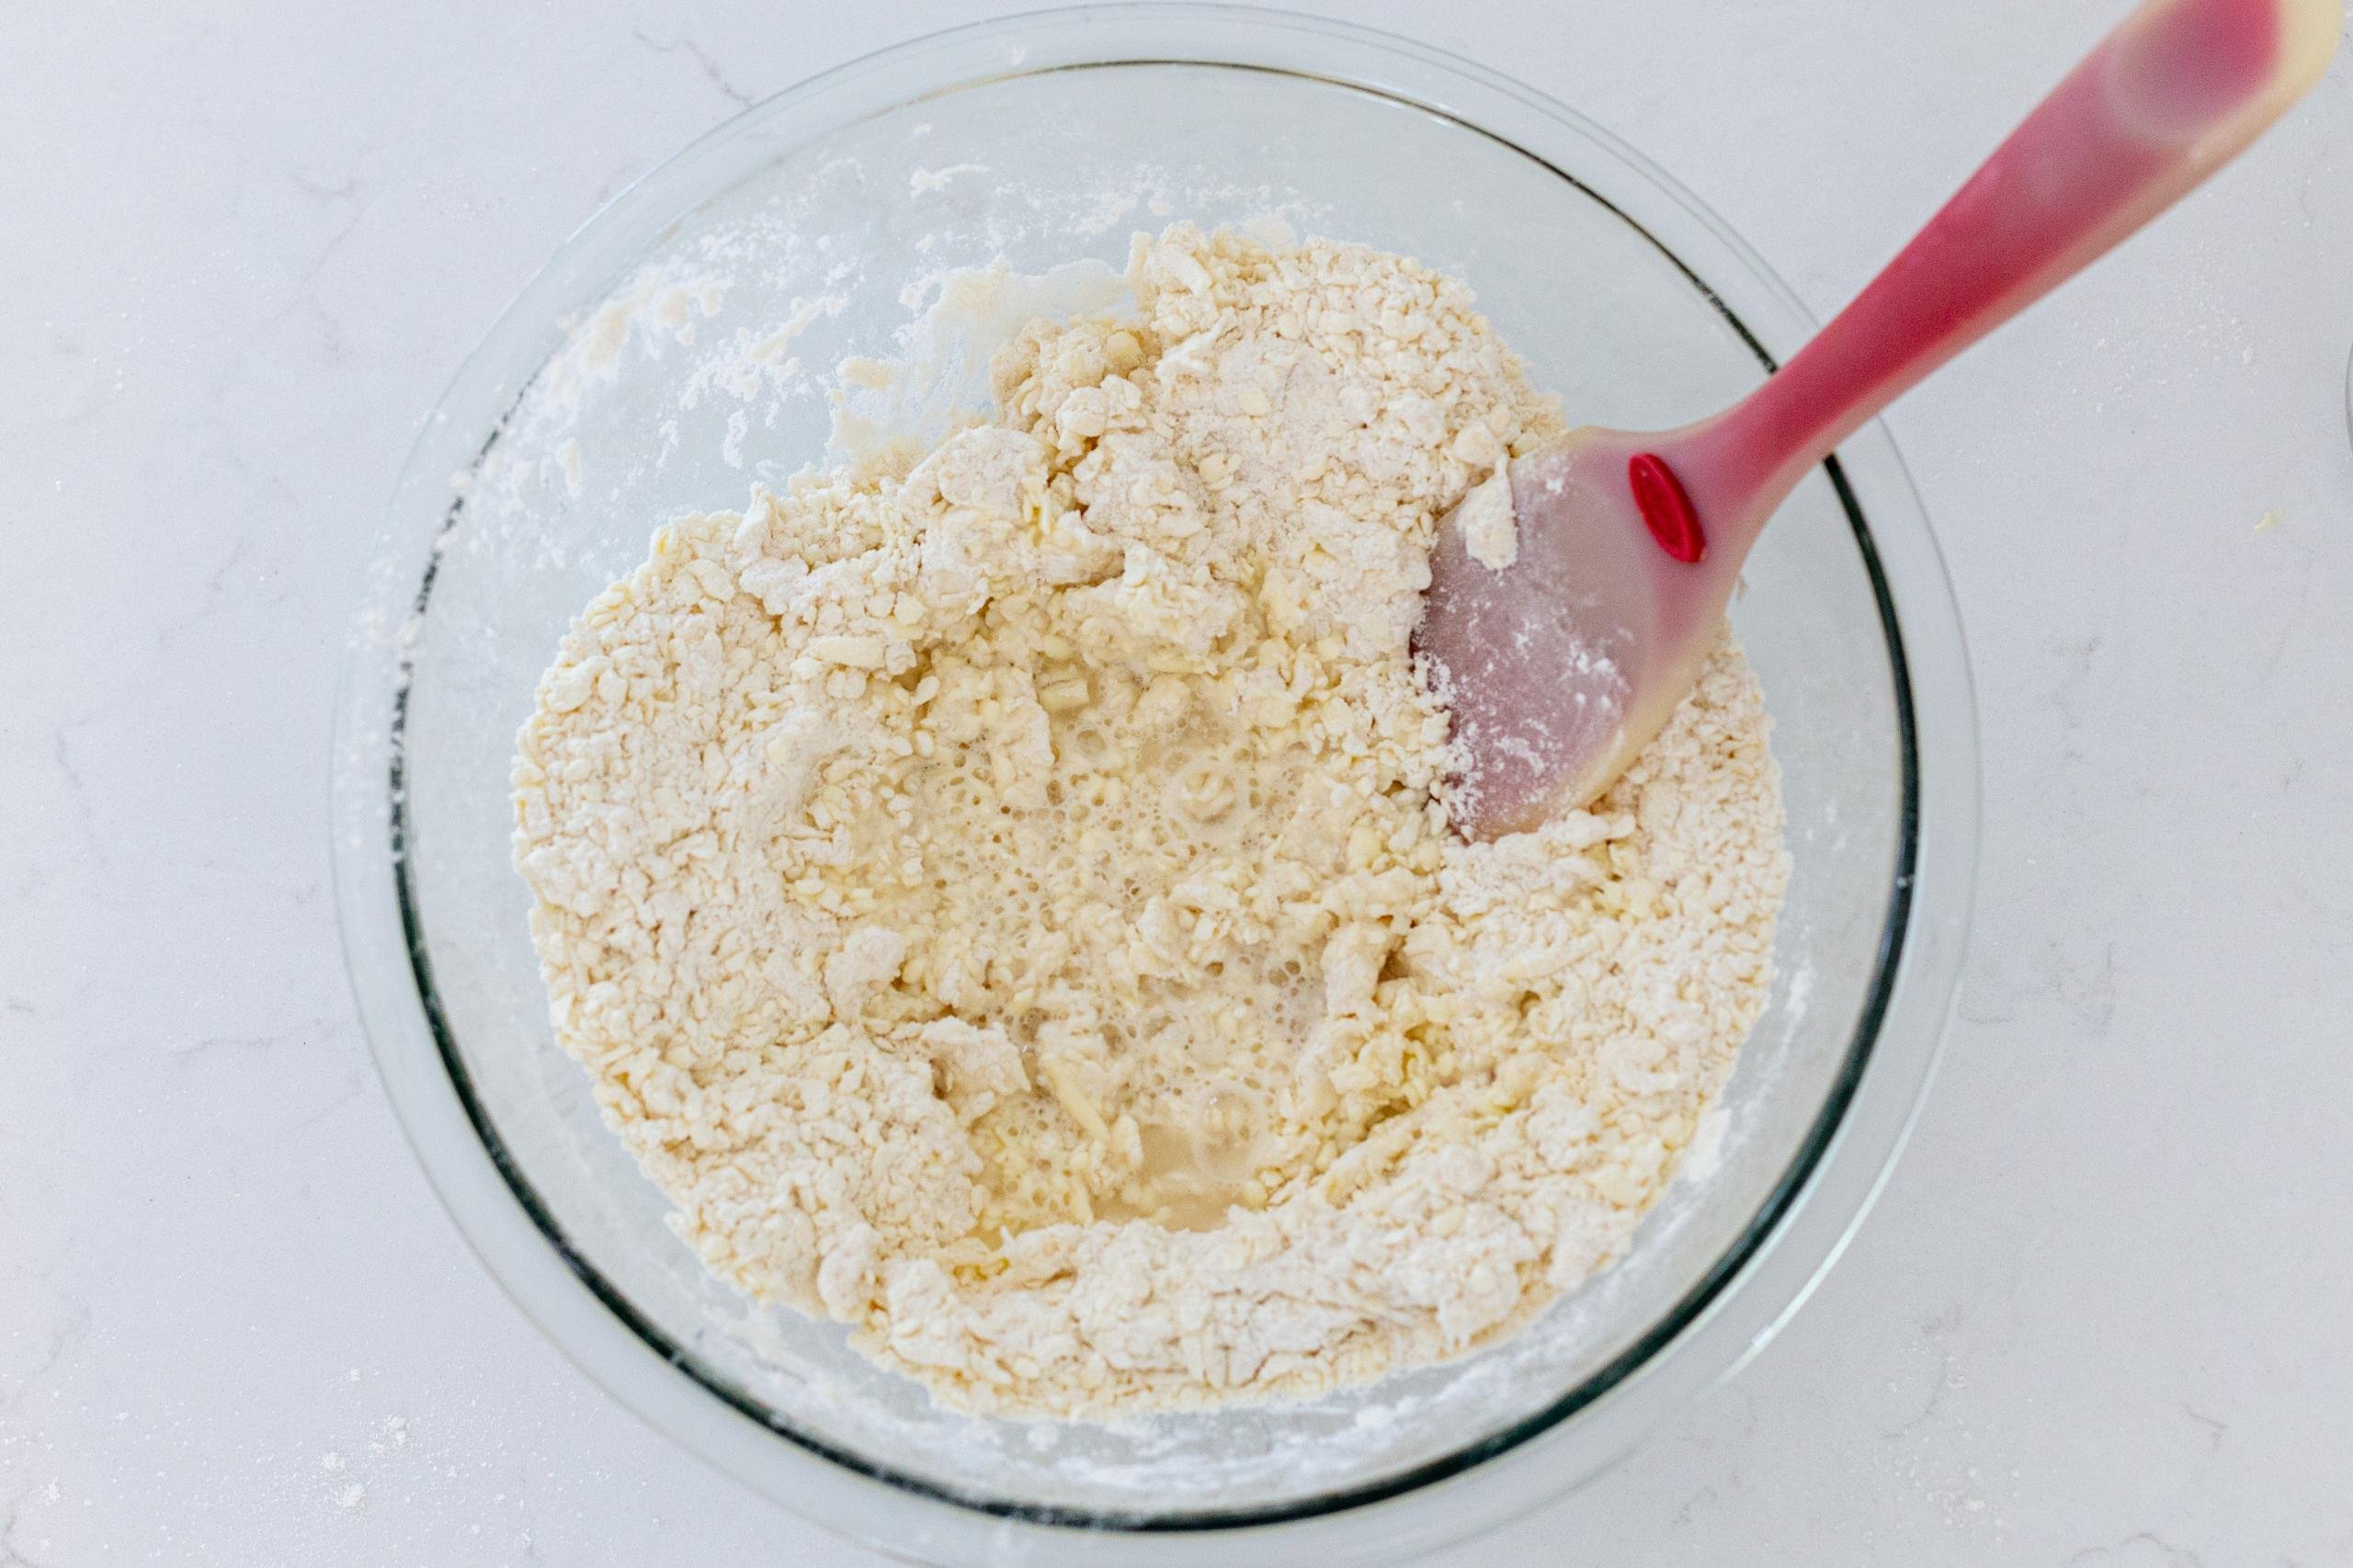
- Add in the liquid: Make a well in the center of the bowl and pour in the ice cold water, mixing until the dough is firm but still a little shaggy.
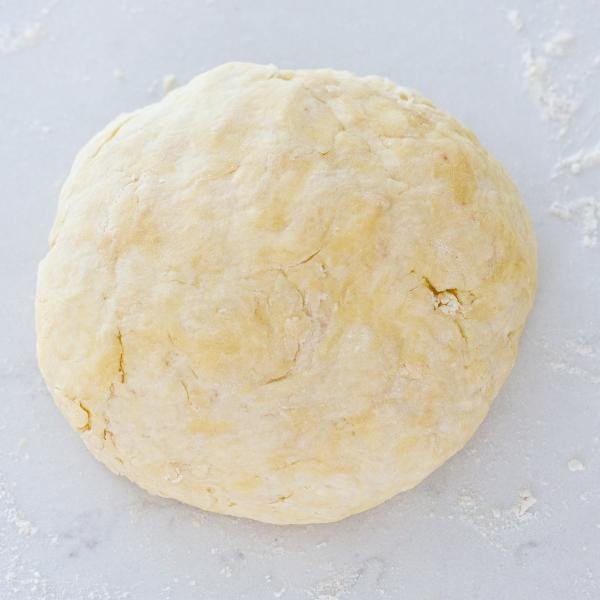
- Chill the dough: Wrap the dough tightly with plastic wrap and pop it in the refrigerator for 30 minutes.
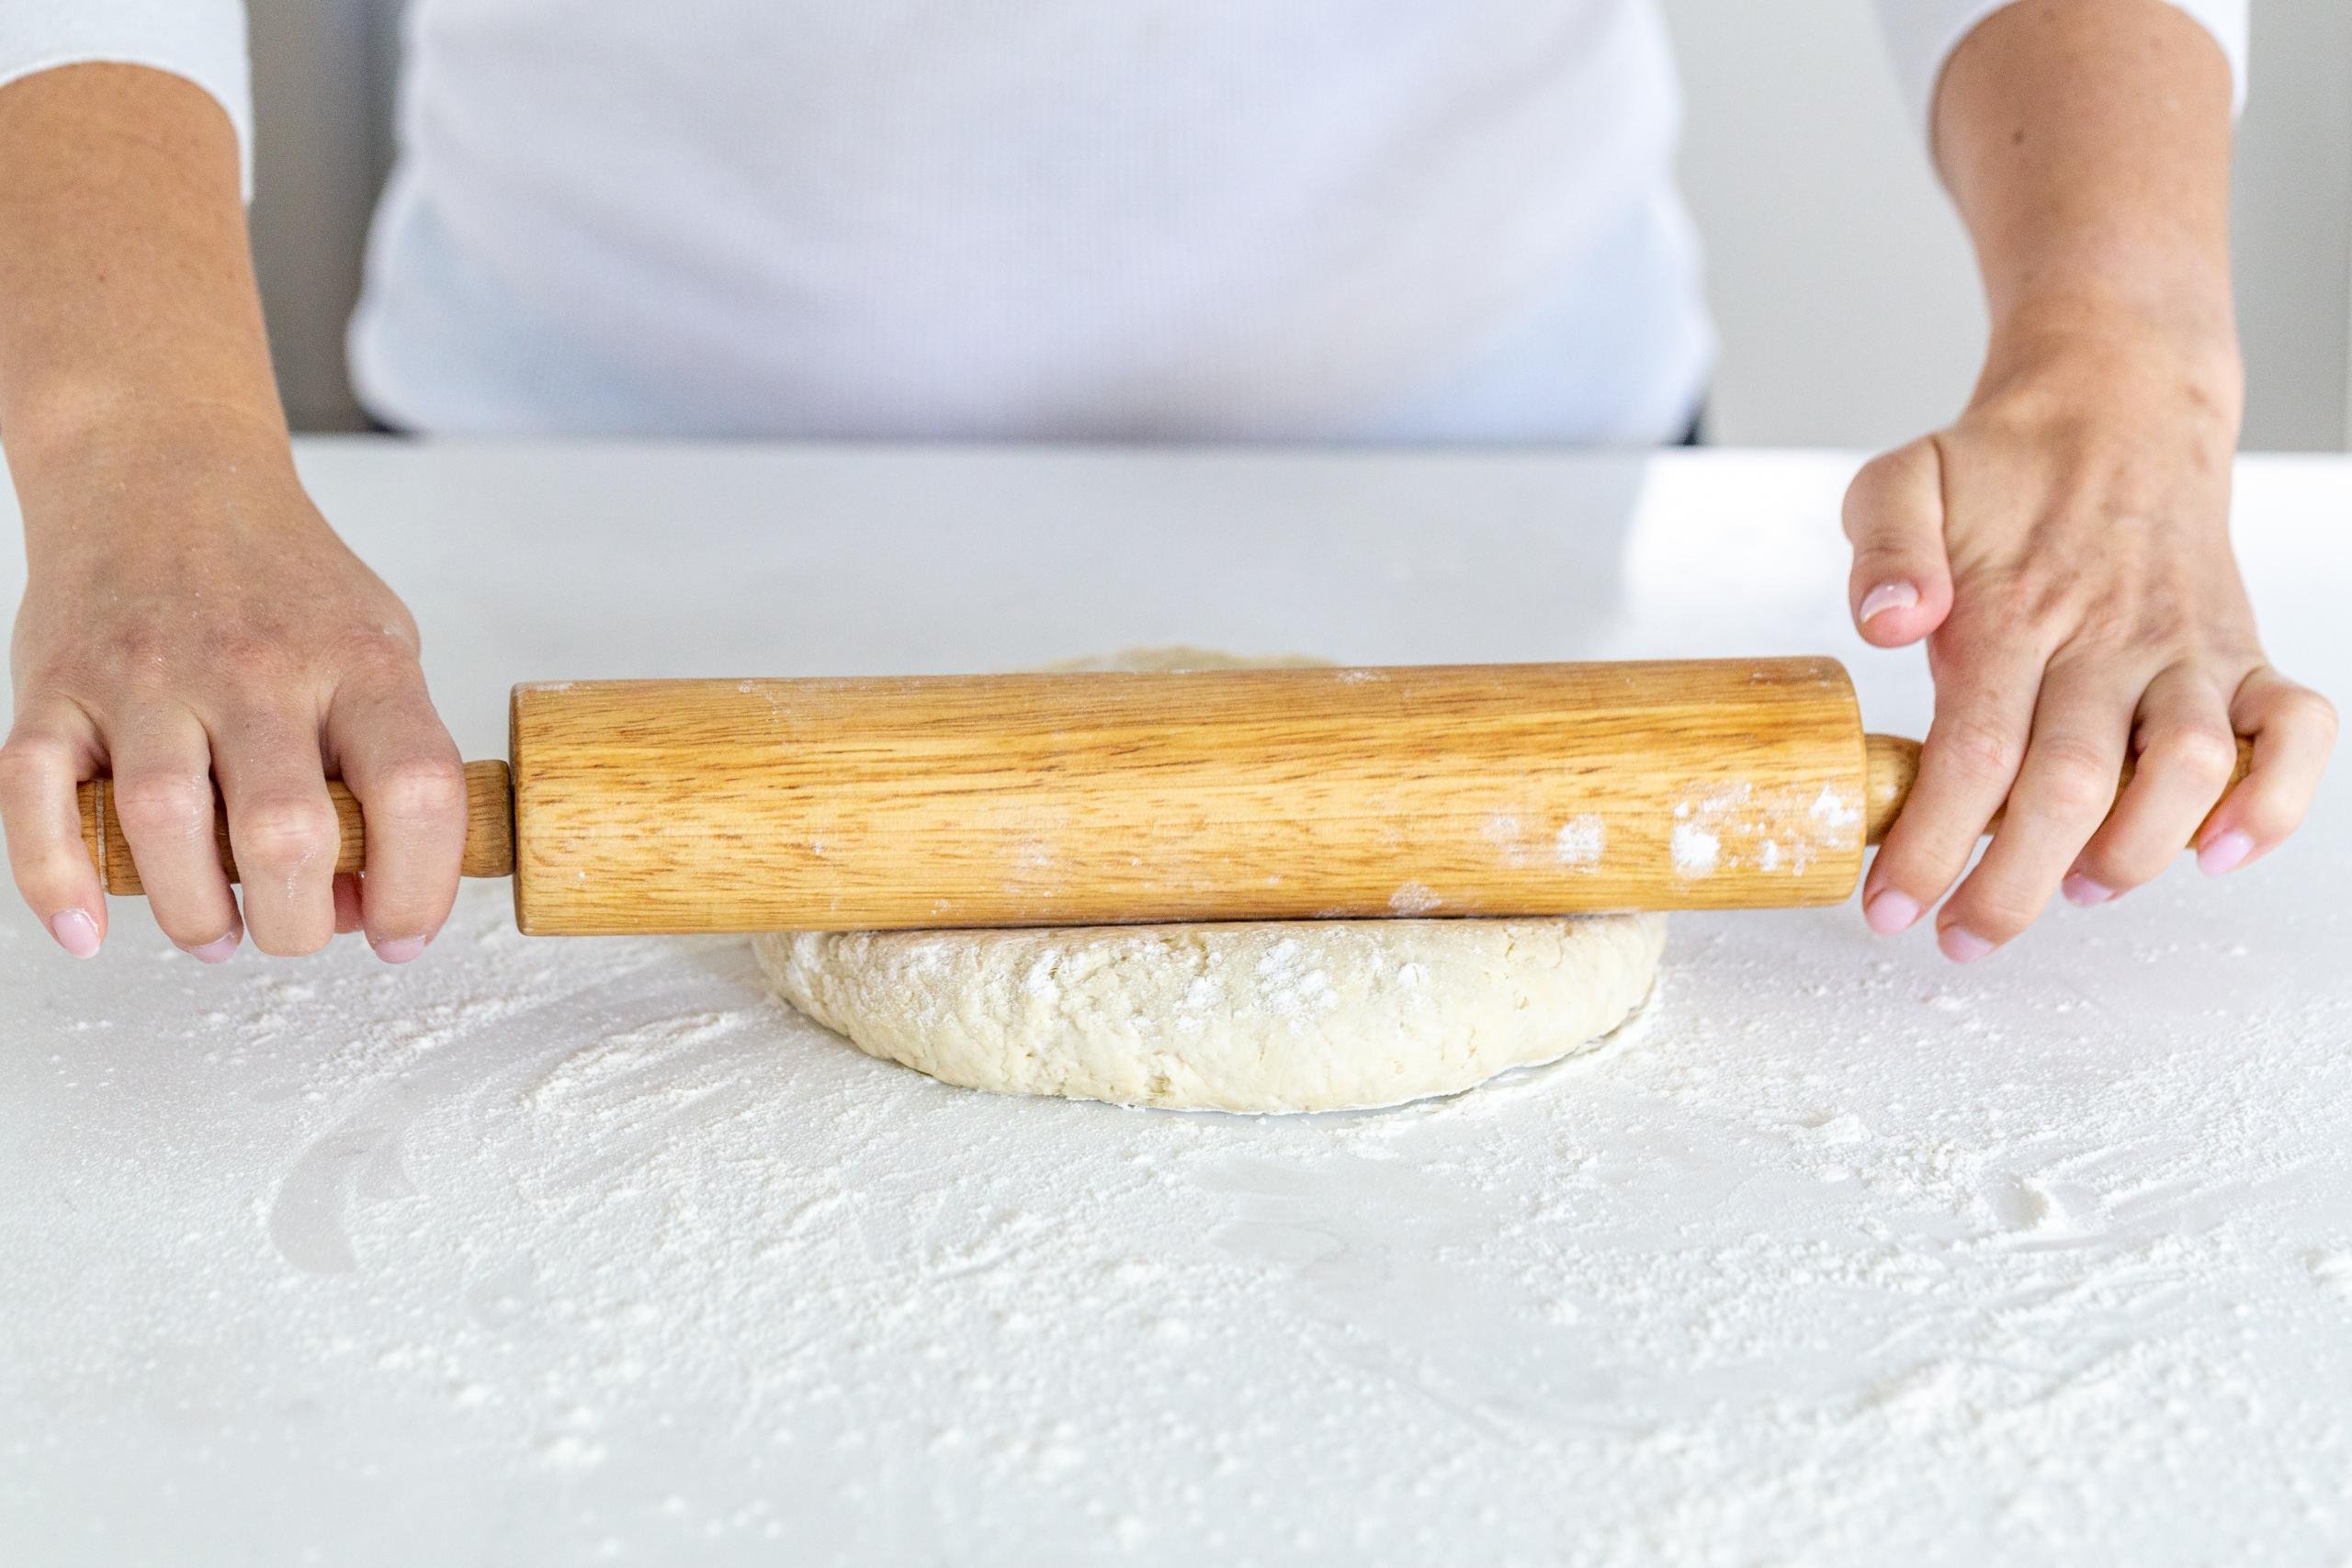
- Roll the dough out: Using a rolling pin, roll the dough out onto a lightly floured surface and form it into a smooth large rectangle about 1/4 inch thick.
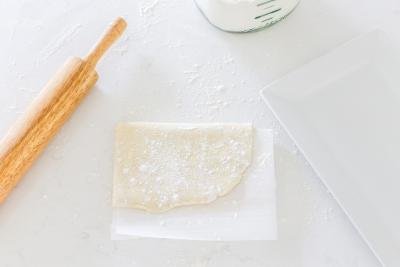
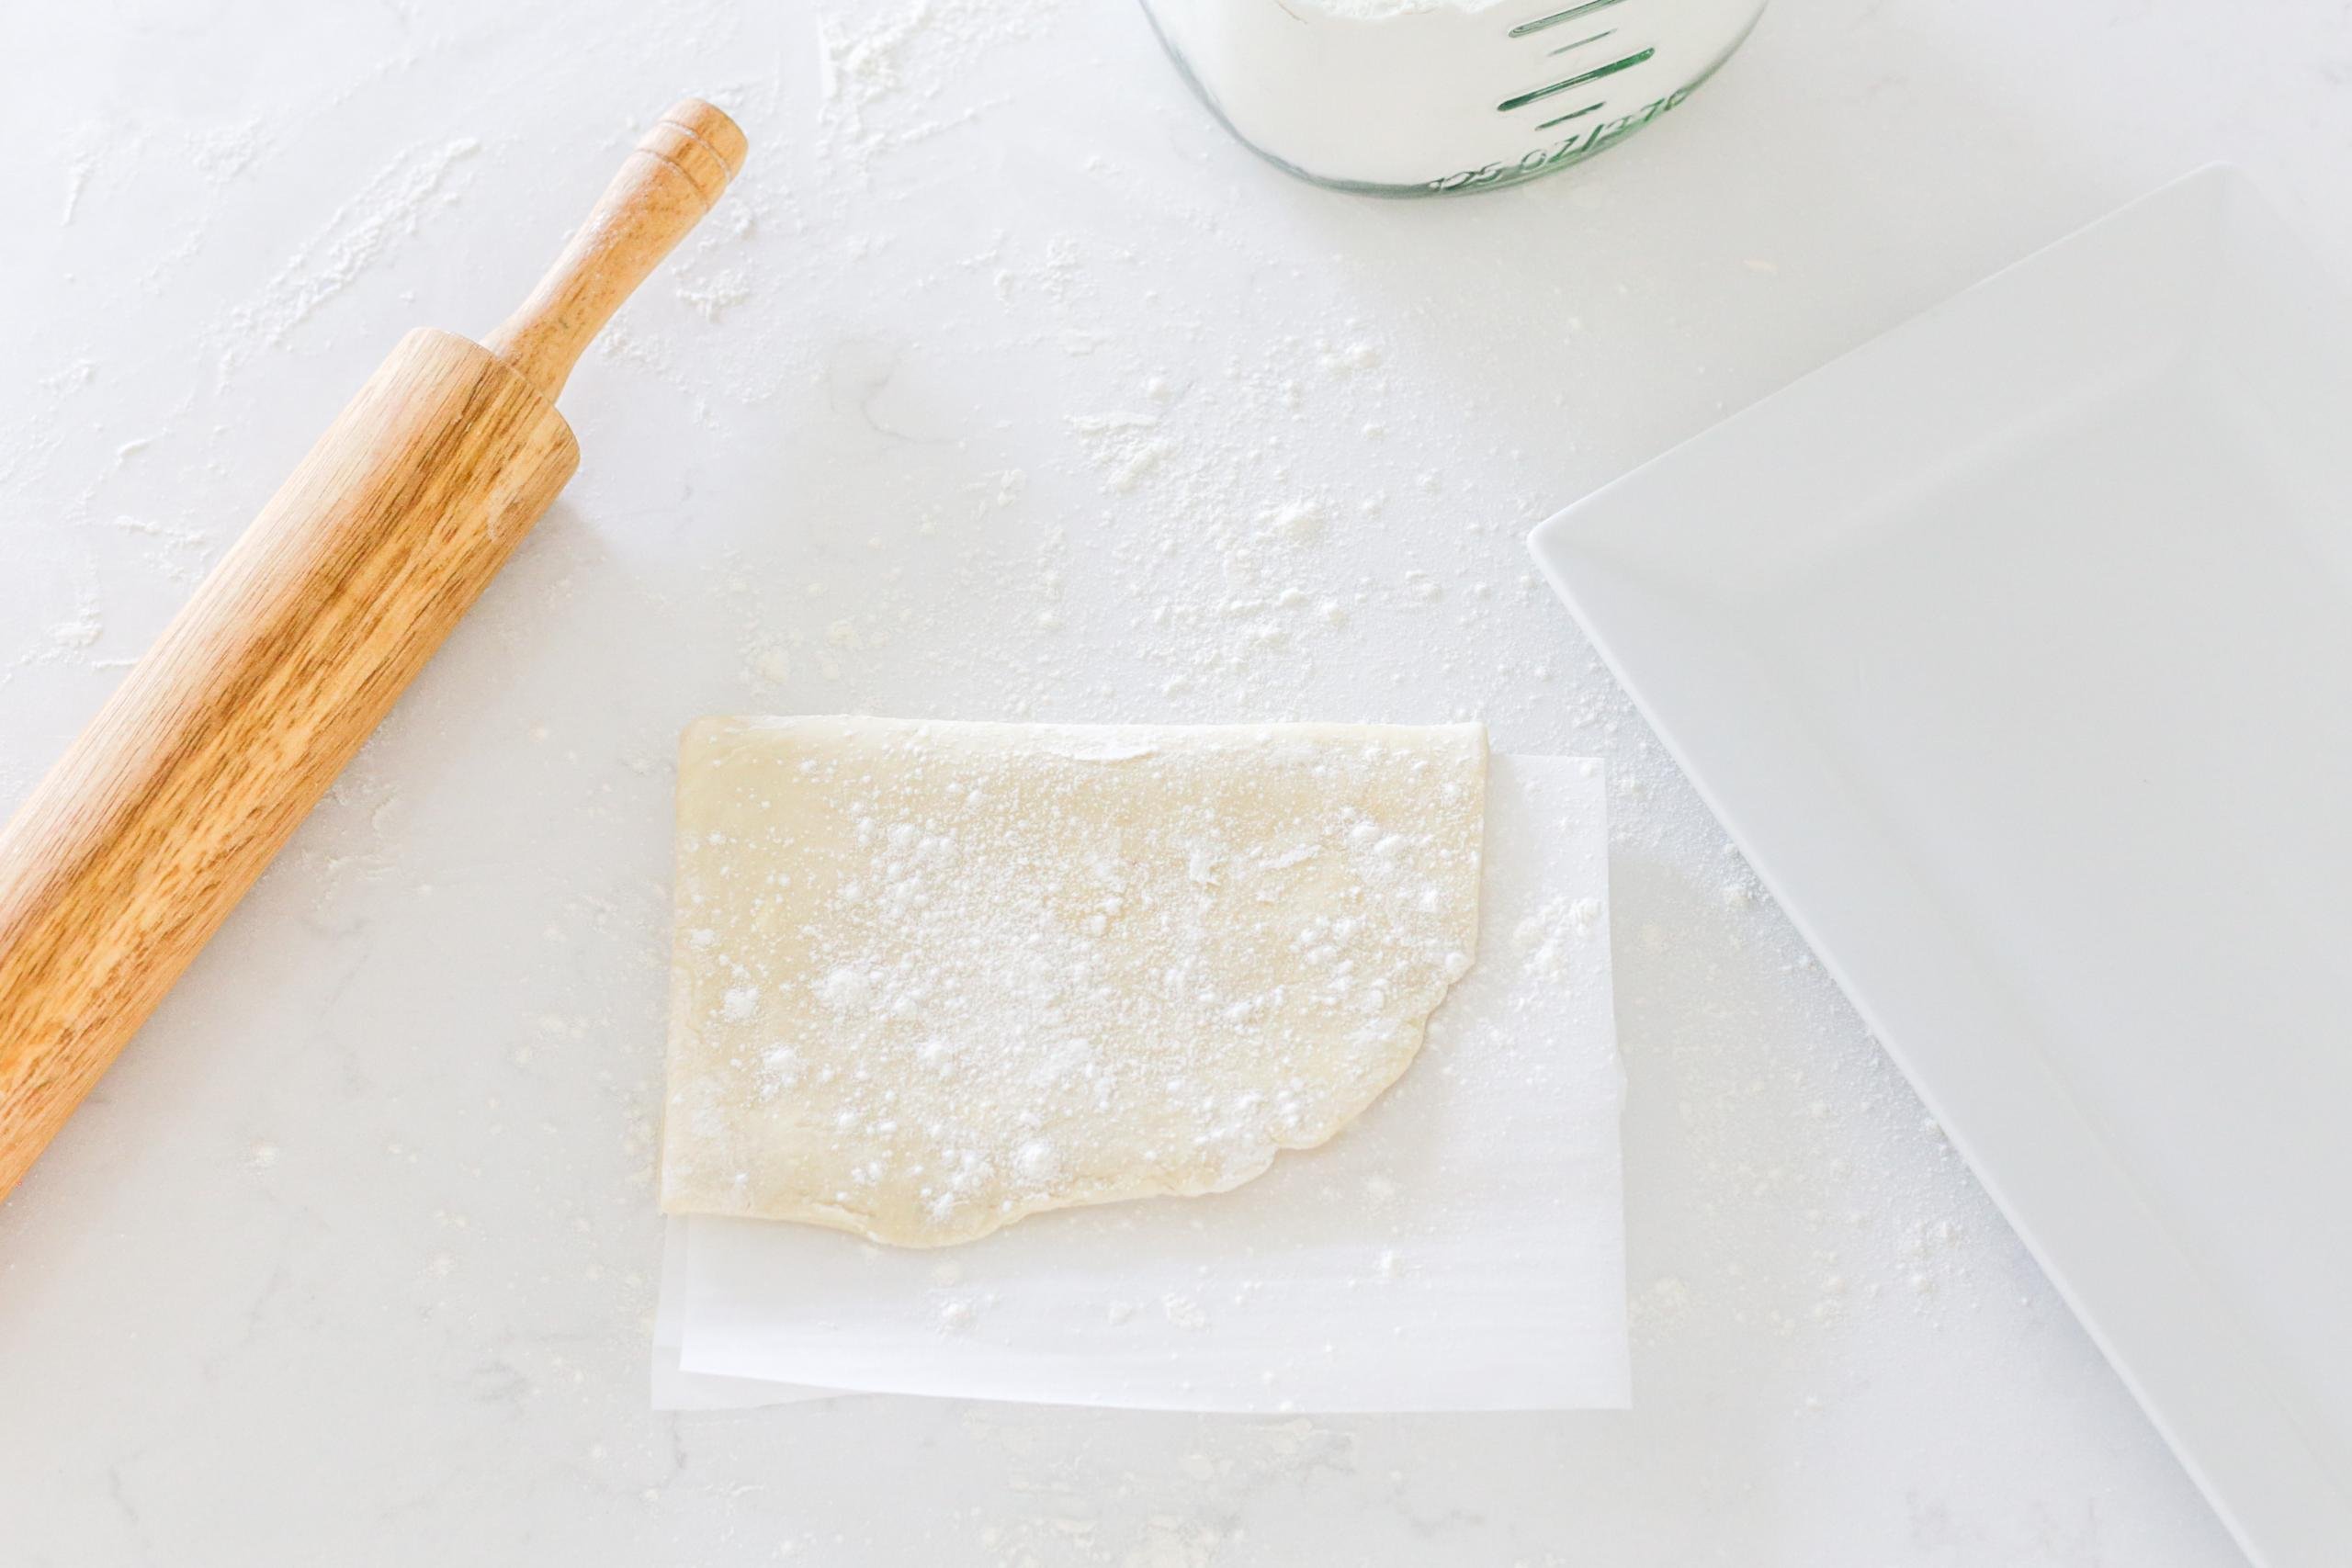
- Fold & roll the dough: Fold the top third of the dough down to the center, then the bottom third up and on top. Roll the dough out again to three times the length and into a rectangular shape. Place the parchment paper on top of the dough. Fold down the top third and then the bottom third over it. The parchment keeps the dough from sticking to each other.
- Chill the laminated dough: Wrap the dough with plastic wrap and let it chill in the refrigerator for an hour. Bake away, friend!
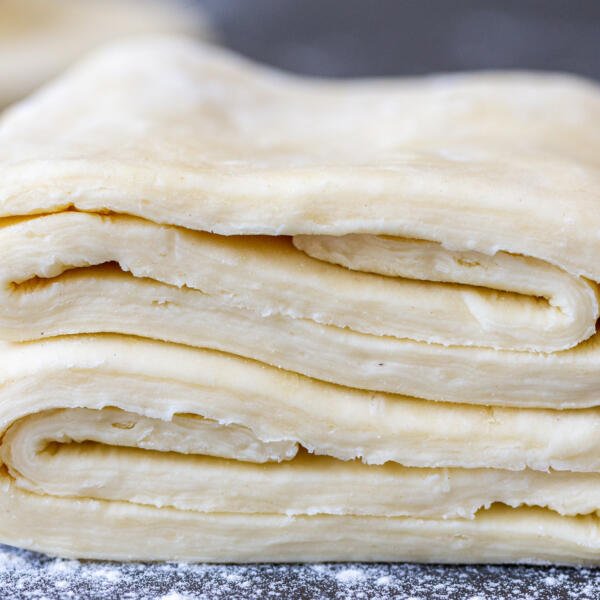
Tips to Nail Puff Pastry Dough
Making puff pastry for the first time may feel a little intimidating. Don’t fret! These useful tips will ensure you get the flakiest pastry possible!
- Sift the flour: Make sure to sift the flour prior to using it so your dough doesn’t get clumps of flour in it.
- Opt for a good quality butter: A good butter really makes this puff pastry great. I love European style butters like Plugra or Kerrygold.
- Use frozen butter & ice cold water: The two most important rules to follow when making this dough are to work with FROZEN cold butter and ICE COLD water (and even cold utensils if possible). You need the ingredients to stay as cold as possible so the butter doesn’t melt.
- Continuously mix the frozen butter in: As you grate the frozen butter, continuously mix it with the flour to prevent the bits of butter from sticking together. If the clumps of butter are too big, you’ll get too much concentrated in one area and the pastry will be less flakey.
- Avoid over-handling the dough: Try to minimize how much you shape the dough to prevent over mixing (and risk the dough warming up too much and melting the butter). The more you fuss around with it unnecessarily, the flatter the pastry will be.
- Thaw frozen dough in the refrigerator: Be sure to pop your frozen dough into the fridge for at least 30 minutes before using it (an hour or more is best). Do not unfold it until it has completely thawed. This causes cracks and breaks.
- Work on a well-floured surface: When you are ready to bake with your puff pastry, flour the surface you are working on so the dough doesn’t stick.
- Avoid overly wet fillings: If you find that your pastry is crisping up beautifully on the outside but staying raw or gummy in the center, the filling might be the culprit. Ingredients that release a lot of moisture (like certain vegetables or wet fruit) can steam the inside of the dough. Control your moisture for the flakiest possible layers!
The biggest tip of all – work as quick as possible: I cannot stress this enough — work quickly so the butter stays cold. Mix everything together without overworking it, and move fast when rolling out the dough. Once the butter melts, you lose those beautiful flaky texture and end up with sticky, messy dough instead.
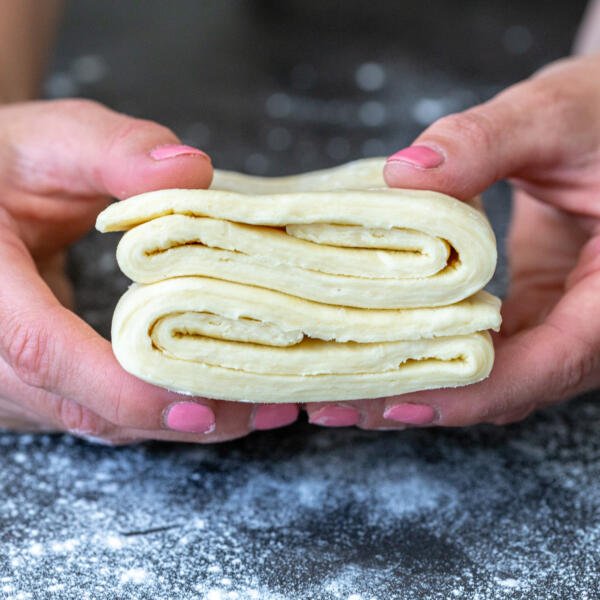
Recipes Using Puff Pastry
You can easily improvise and use this puff pastry to make your own creation (and it’ll turn out great!). For inspiration, here are a handful of my favorite ways to use it. Make sure to keep the dough cold until right before you bake it. Cold puff pastry takes longer to melt in the oven, allowing the dough to rise beautifully and form light, pretty layers.
- Puff Pastry Cheese Turnovers – Sweet cheese stuffed pastries
- Quick Apple Turnovers – 5-ingredient apple turnovers
- Angel Wing Cookies – A classic Polish cookie
- Poppy Seed Rolls – Spiral pastries with a sweet poppyseed filling
- Sweet Cheese Bourekas – Filled with a sweet farmers cheese filling
- Ham & Cheese Puff Pastries – A savory start to your day with these delicious ham & cheese pastries
Hot tip: Make sure to always roll your dough to exactly 1/4-inch thick so it puffs perfectly without staying raw inside. The actual length and width are entirely up to you— just cut it into whatever shape your final recipe needs!
Storing Homemade Puff Pastry
When you make this pastry dough recipe, make sure to make a double batch. It’ll save you time and effort in the future! Here’s how I store my batches.
- Fridge: Store the dough wrapped tightly in plastic wrap for up to two days. Make sure to use the dough within that timeframe or the pastry risks falling flat in the oven.
- Freezer: Store the puff pastry folded with parchment paper and wrapped tightly in plastic wrap in the freezer for up to two months. Thaw in the fridge overnight.
More Homemade Doughs
- Overnight Pizza Dough – Day-ahead pizza dough
- Yeast Pastry Dough – Universal yeast dough
- Pizza Dough – Quick pizza dough with a two hour rise
Recipe
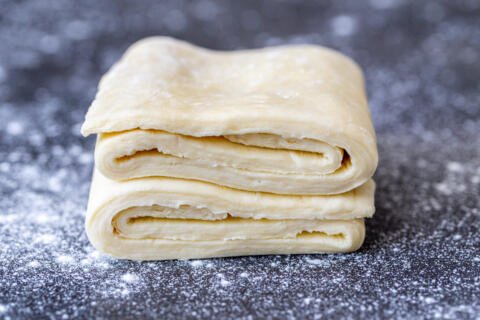
Ingredients
- 2 cups all-purpose flour
- 1 tsp salt
- 250 g unsalted butter frozen
- 2/3 cup water ice cold
Instructions
- Prepare all the ingredients for the puff pastry dough. It's important to work fast!
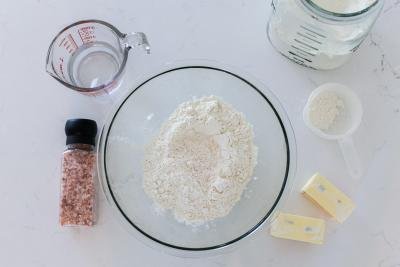
- Using a fine mesh sieve or flour sifter, sift the flour and salt into a large bowl and place it into the refrigerator for about 15 minutes. After, grate the frozen butter into the flour, frequently mixing it to prevent the butter from clumping together.
- Make a well in the center of the bowl and pour in the ice cold water. Mix it until you have a firm, rough dough.
- Wrap the dough tightly with plastic wrap and leave in the refrigerator for 30 minutes.
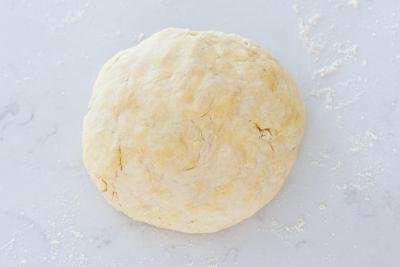
- Roll the dough out onto a lightly floured work surface, kneading it gently to form into a smooth rectangle. Keep the edges straight and even and don’t overwork the butter streaks – the dough should have a marbled effect.
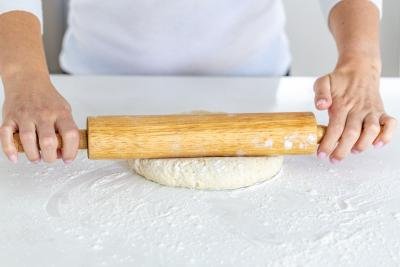
- Fold the top third down to the center, then the bottom third up and on top of it. Do the same with the sides. Roll the dough out again to three times the length and into a rectangular shape. The pastry dough should be about 1/4 inch thick. Place the parchment paper on top of the dough, folding it over the top and bottom of the dough. Wrap the dough with plastic wrap and let it chill in the fridge for at least an hour. Use right away or freeze for later!






I love this recipe thank you for sharing it. It turned out beautifully golden and flaky. I made cherry pie turnovers.
Cherry turnovers are so delicious! Thanks for giving my puff pastry dough a try, Tracy!
Thank you, thank you thank you for your recipes!
No, thank you Debra, for trying so many of them! 🙂 Enjoy!
This is my go to puff pastry recipe. I’ve read some of the comments so I will throw out this… WATCH THE VIDEO! do only what she says to do! Don’t let the butter get warm! What I do is grate 1/2 a stick of butter and throw everything back into the freezer for 10 min! Yes the bowl the butter the wooden spoon! I have no issues when I do that. But I think watching the video helps because at first it’s odd to wrap the dough when it’s falling apart so I feel for me the video helped me be confident in following the instructions
Thanks, Jewlie! I'm glad the video has helped you so much, that's exactly why I made it! Thanks for suggesting it to everyone else 🙂
Jewlie, thank you for sharing your suggestions! I try to give as much information and tips as possible in the videos so thank you for taking the time to watch it!
I will agree with some of the other reviews I found this dough extremely difficult to work with. Butter was frozen I chilled it in the refrigerator longer than the recipe called for and it was an absolute sticky mess when I tried to roll it out I had to continuously add flour to it. The parchment paper even stuck to it after it chilled so just taking it out of the refrigerator after I finally got it in there for the final chill so that I could bake with it it was a complete mess trying to peel it away from the parchment paper I may if I try it again try chilling it overnight. But my first attempt was a disappointment and I'm a fairly experienced baker.
Hi Becky, you have to work extremely quickly with the dough. Sometimes the room, counter, or work surface can be warm, and once the butter hits anything warm, it melts pretty fast. I usually work in small parts because of that. I think the video attached to the recipe might also be helpful too. Let me know if you have any other questions.
I am looking forward to making this recipie!
Let me know how it works out for you, Jon!
Easy, quick recipe for flaky puff pastry perfect for any occasion.
Agree!!!
Just made it turned out perfectly love this recipe thank you so flakey yummy 😋
I'm thrilled it turned out perfect! Thanks for sharing your love for this puff pastry dough!
Thank you for sharing recipe
This quick puff pastry recipe is a game-changer—simple ingredients, easy steps, and perfect flaky layers
So glad you think so! 😊 Quick puff pastry is a total lifesaver—easy to make and so buttery and flaky.
Natalya
I love your recipe. The flaky, buttery flavor of the dough (yum!) 😋
I do have a little tweaking to do when it comes to the baking. I did experience a little bit of a gumminess, but overall recipe is awesome.
Thank you so much! I’m so glad you loved the flaky, buttery flavor of the dough! 😋 The gumminess can sometimes happen depending on oven temperature or the thickness of the pastry, but I’m sure with a little tweaking, it’ll be perfect next time. Appreciate your feedback, and I’m so happy the recipe still turned out awesome overall!
Passed on the recipe to my cousin. Turned out great!
Love this, also love that you had you cousin cook 🙂 Smart move!
This recipe was bad. After being in the over for 35 minutes, the pastry was still extremely raw. Did all instructions to a degree, even rolled the dough a little thinner. Still came out raw. I had to put tinfoil over the tops so they wouldn't burn, put them in for an extra 10 minutes, came out with the bottoms nearly black and still raw in the center. I do not recommend.
I’m sorry to hear the recipe didn’t work out for you. Thank you for sharing your experience, though. Issues like uneven cooking often come down to oven temperature or the baking surface. It’s important to ensure the oven is fully preheated to a high heat (around 400–425°F), and using a middle rack can help with even baking. If you'd like to share more details, maybe I can better help troubleshoot!
If I need a total of 8 sheets of puff pastry would I just make the recipe 4 times? And do you recommend doing it 4 times instead of just quadrupling the recipe and do it all at once?
Yes, if you need a total of 8 sheets of puff pastry, quadruple the recipe. It’s generally better to do it in batches (making the recipe 4 times) rather than all at once, especially if you're working with a dough that needs to be folded and chilled multiple times. Doing it in smaller batches gives the dough time to rest between folds, which helps with flakiness and puff. If you make it all at once, it might be harder to manage the process efficiently and consistently.
How many days can I let this puff pastry sit in the fridge? I plan on using it for Thanksgiving but wanted to make ahead of time
Hi, youa re totally fine to keep it in a fridge for up to 5 days. I love making in advance. Its extra flaky when you use it cold. Enjoy
Ok thank you for your recommendation. I'll let you how it goes
Hi, I used 2 cups flour and 250g frozen butter and have been waiting hours now and the dough is soft and not hardened in the fridge.. not sure why?
Hey Stephanie, How soft is the puff pastry, like falling apart? Or, is it holding up it's rectangular shape? Placing it in the freezer can help firm it up!
Hey, thank you for this recipe.
Actually it's my first time wanna make pastry dough. And I don't live with US unit system and wondering how much is 2 cups of flour? In the metric conversion it's says 250gr. But I read one comment that says we need to double it to 500gr.
Please make it clear.
Thank you
Hey Jemmy, Two cups flour is around 240-250 grams. 2 cups of liquid converted to grams is closer to 500, so I can see how someone mistaken that conversion. I hope that helps, and happy baking!
This was my first time making puff pastry. I loved the simplicity of this recipe! The only negative experience I had was while my pastries were baking. The butter was running out of them everywhere and onto the baking pan. So. Much. Butter. I had to place my pastries on a paper towel to try and soak up some of the butter. Other than that, they were yummy!
Hey Micah, I'm so happy to hear you enjoyed this simple recipe! Sounds like a buttery mess though lol. Some things to prevent melted butter when baking is using frozen butter, ice cold water, refrigerating the dough after making it and then again after rolling it out. Let me know if this helps, or if I can help troubleshoot in any other way!
great loved it
Thanks for sharing Andrew! So glad it was a hit!
Question I see two half sticks of butter in your pics but two full sticks is 225g not even 250 can you help
Hi Brittany, its actually two full sticks of butter in the photo but I used a bit more. We use 250 grams of butter in this recipe. Hope that helps.
1st try was horrible 😫 I live in Louisiana(humidity is 100%middle of winter, can u guess what it is in summer lol) I even placed the bowl in the freezer for 20min b4 I started. After the sun set last night & my a/c finally kicked off I decided to give it 1 more try b4 I gave a rating. I did everything the same as I did b4 only 2 different things were I made it in the evening & when everything was done I set it in fridge overnight b4 I used it. This am I allowed to get to room temp & made mini pies. After tasting this I will never buy store bought again. I truly don't care how time sensitive it is I will just do it overnight again. Next time I'll try a Nutella twist that my grandkids go crazy for!
Thank You so much ❣️ btw, your video made it much easier to understand the process & steps.
I'm so glad you didn't give up and gave this recipe another try! Working with humidity can make such a big difference, so I'm glad you figured out what timing works best. Thanks for sharing your experience Nicki!
1st time making this and it went well. One thing I did notice for the UK Metric version, 2 cups are showing 250g and it should be 500g for 2 cups. Was fun making this! Made chicken pot pie.
Hey Leah! So happy you enjoyed making this puff pastry dough. Chicken pot pie sounds so good right now!
Just watched your puff pastry video! I’m going to try it this afternoon. I’ll let you know how it goes!!! ♥️
Hi Pam, yes! Please let me know how it goes. I want to hear all about it. 🙂
Trying with vegan butter and gf flour hoping it works out!!!
Hi Mari, can you report back with feedback? I think it would be useful for others with similar diet. Would love to know what brands you used. Thank you!
We're no newbies in the field of doughs and baking, but we've just spent the past hours to make this puff pastry dough and it's not even worth one star. It's a sole catastrophy. Quick recipe? No! Faster than buying dough? Definitely NO! Just a big disappointment after seeing all those good reviews. The measurements were accurate and we've followed the instructions precisely, also working in a cool environment, but still ended up with a sticky mess. Had to leave it in the fridge for more than an hour, because it still sticked to the plastic wrap so badly. Later for rolling and folding it needed so much more extra flour for the table, rolling pin and the dough itself, yet alone the hussle to somehow roll it out and get it into shape. Afterwards it was way too soft and warm again to fold proper pies with it, but we just didn't want to wait another hour or two for it to be ready, so we went with it as it was. Thus the result looks kinda ugly of course. Nothing to be proud of, that was fun making or could be gifted to anyone. Just sad and frustrating. It's definitely the first and only time that we've tried to make puff pastry dough ourselves! It's a massive waste of time, efforts and ingredients! Just go to a supermarket and buy the ready-to-use dough.
Same. Are you from UK? Then you need to add more flour, as USA cup is twice bigger then UK cup. I was fighting with the dough on my kitchen as well until decided to check if there any difference in the cups.
Hi Ray, it sounds like the butter was not cold. When using frozen butter, it wouldn't be sticky because butter stays in chunks. I would highly recommend watching the video we have with this recipe, it helps to see the process. I am sorry the first time it wasn't as planned but you will love it when you nail down the process. Being able to control ingredients is so great. Hope this helps!
This is a great recipe!! My pastry turned out perfectly! Thank you! Merry Christmas ♥️
Ashley, I'm so glad to hear that! A very Merry Christmas to you as well.
Hi I was wondering instead of using unsalted butter, could I use sweet cream butter salted?
Hi dear, the butter will give you a salty flavor so I am not sure if you want pastry dough to be salty. If you use it for savory desserts, it would work. It's up to you, hope you love the recipe.
I made this last night and used it to make mince meat hand pies. It came out DIVINE!!!! So flakey and flavorful. My husband and I both loved it!!! I will definitely be making this again. So much better in quality and taste than store-bought (which typically contains unhealthy oils). Thank you so much!!!
Nirel, I love love reading this feedback! So happy that you found this recipe epic 🙂 it made my day. Also, love that you made a savory dish with them, usually go for the sweets.
How does this compare to the amount of pastry you get in a box of Pepperidge Farm puff pastry in the refrigerator section? 1 box or 2 box worth? Thank you!
Hey Jenny, It's equivalent to about one box. Enjoy!
Why are the calories 2702 per serving? Store bought is 158
Hey Amber, The calories listed are for the whole puff pastry as one unit. Store bought brands probably have the calories listed for a smaller serving size not the whole puff pastry.
Hi super easy recipe so I’m excited to try it! How long can I leave it in the fridge?
Hey Sam, I hope you do try it soon! I recommend storing it tightly wrapped in the fridge no more than three days. Otherwise, freeze it if you need to use it later. Enjoy!
Incredible! I love making this and look forward to experimenting even more with fillings! My only issue was I couldn't quite figure out the baking... maybe it was the asparagus that I paired them with, but the centres stayed doughy and undercooked while the bottoms and edges crisped and puffed beautifully. Any advice?
Hi Meg, Did you cook the puff pastry with asparagus in it? If so, perhaps the moisture from the asparagus caused the undercooked dough.
Hi I dont understand the parchment paper part. Do you cover the entire rectangle top and bottom and then fold the dough again..for the plastic wrap? Thanks Marilyn
Hi Marilyn, Cover just one side and fold it into thirds. The parchment paper will help prevent the dough from sticking together. Then, you can cover it all with plastic wrap. I hope this helps!
Can you use chickpea flour to make puff pastry dough? I need it to be gluten free and anti-inflammatory.
Hi Adrian, I personally have not tried experimenting with chickpea flour. If you try it - let us know how it works out!