These delectable crepes aka Nalysnyky are filled with sweet cheese, topped with condensed milk, then baked. It’ll be no surprise when everyone raves about them!

This recipe for nalysnyky (aka nalesniki) has been a fan-favorite for years. It’s so nostalgic for many of us who grew up in the Slavic culture, as we enjoyed them at home, weddings, and other special gatherings. My mom made these regularly for us kids — she always stuffed them with farmer’s cheese, but I use cream cheese and cottage cheese because these ingredients are usually much more accessible where I live.
So what makes these nalysnyky so popular? The crepes themselves are no-fuss and turn out consistently perfect. The sweet cheese filling tastes like a mix of cheesecake and vanilla custard, elevating these crepes from plain to luxurious. Lastly, baking the nalysnyky gives them wonderful caramelized edges that will have your mouth watering before the first bite!
Looking for plain crepes? Skip the cream cheese filling and check out this perfect crepe recipe!
Nalysnyky Video
How To Make Nalysnyky
This nalysnyky recipe takes about 15 minutes of prep and only one hour total to make — resulting in an insanely delicious dessert. You’ll wonder why you haven’t been making these forever!
- Prepare the crepe batter: In a large bowl, whisk together the eggs, sugar, and flour until smooth. Continue stirring while adding the milk and oil.
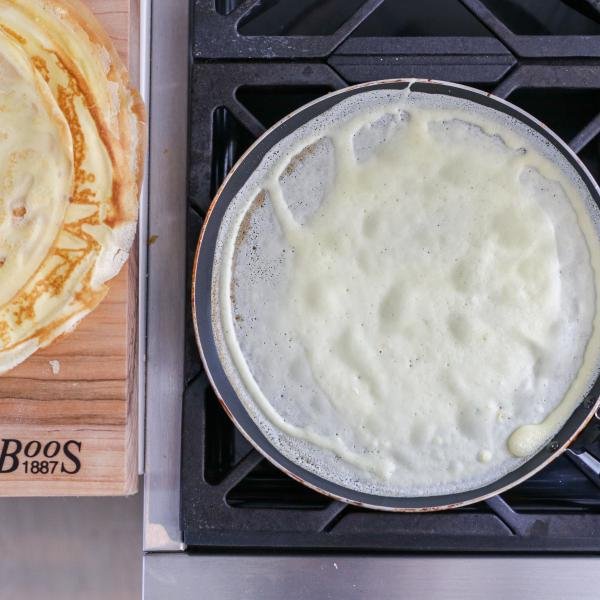
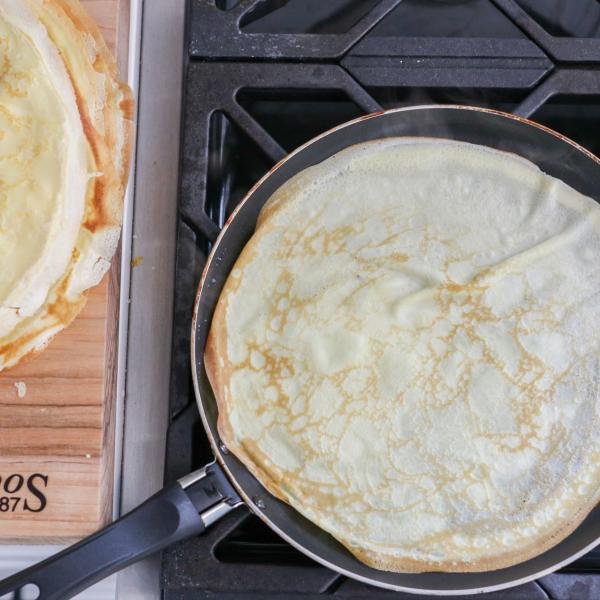
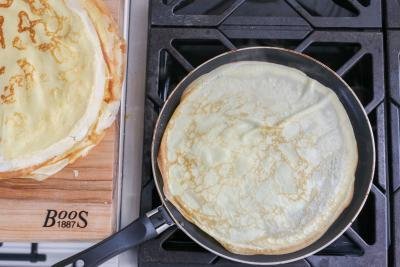
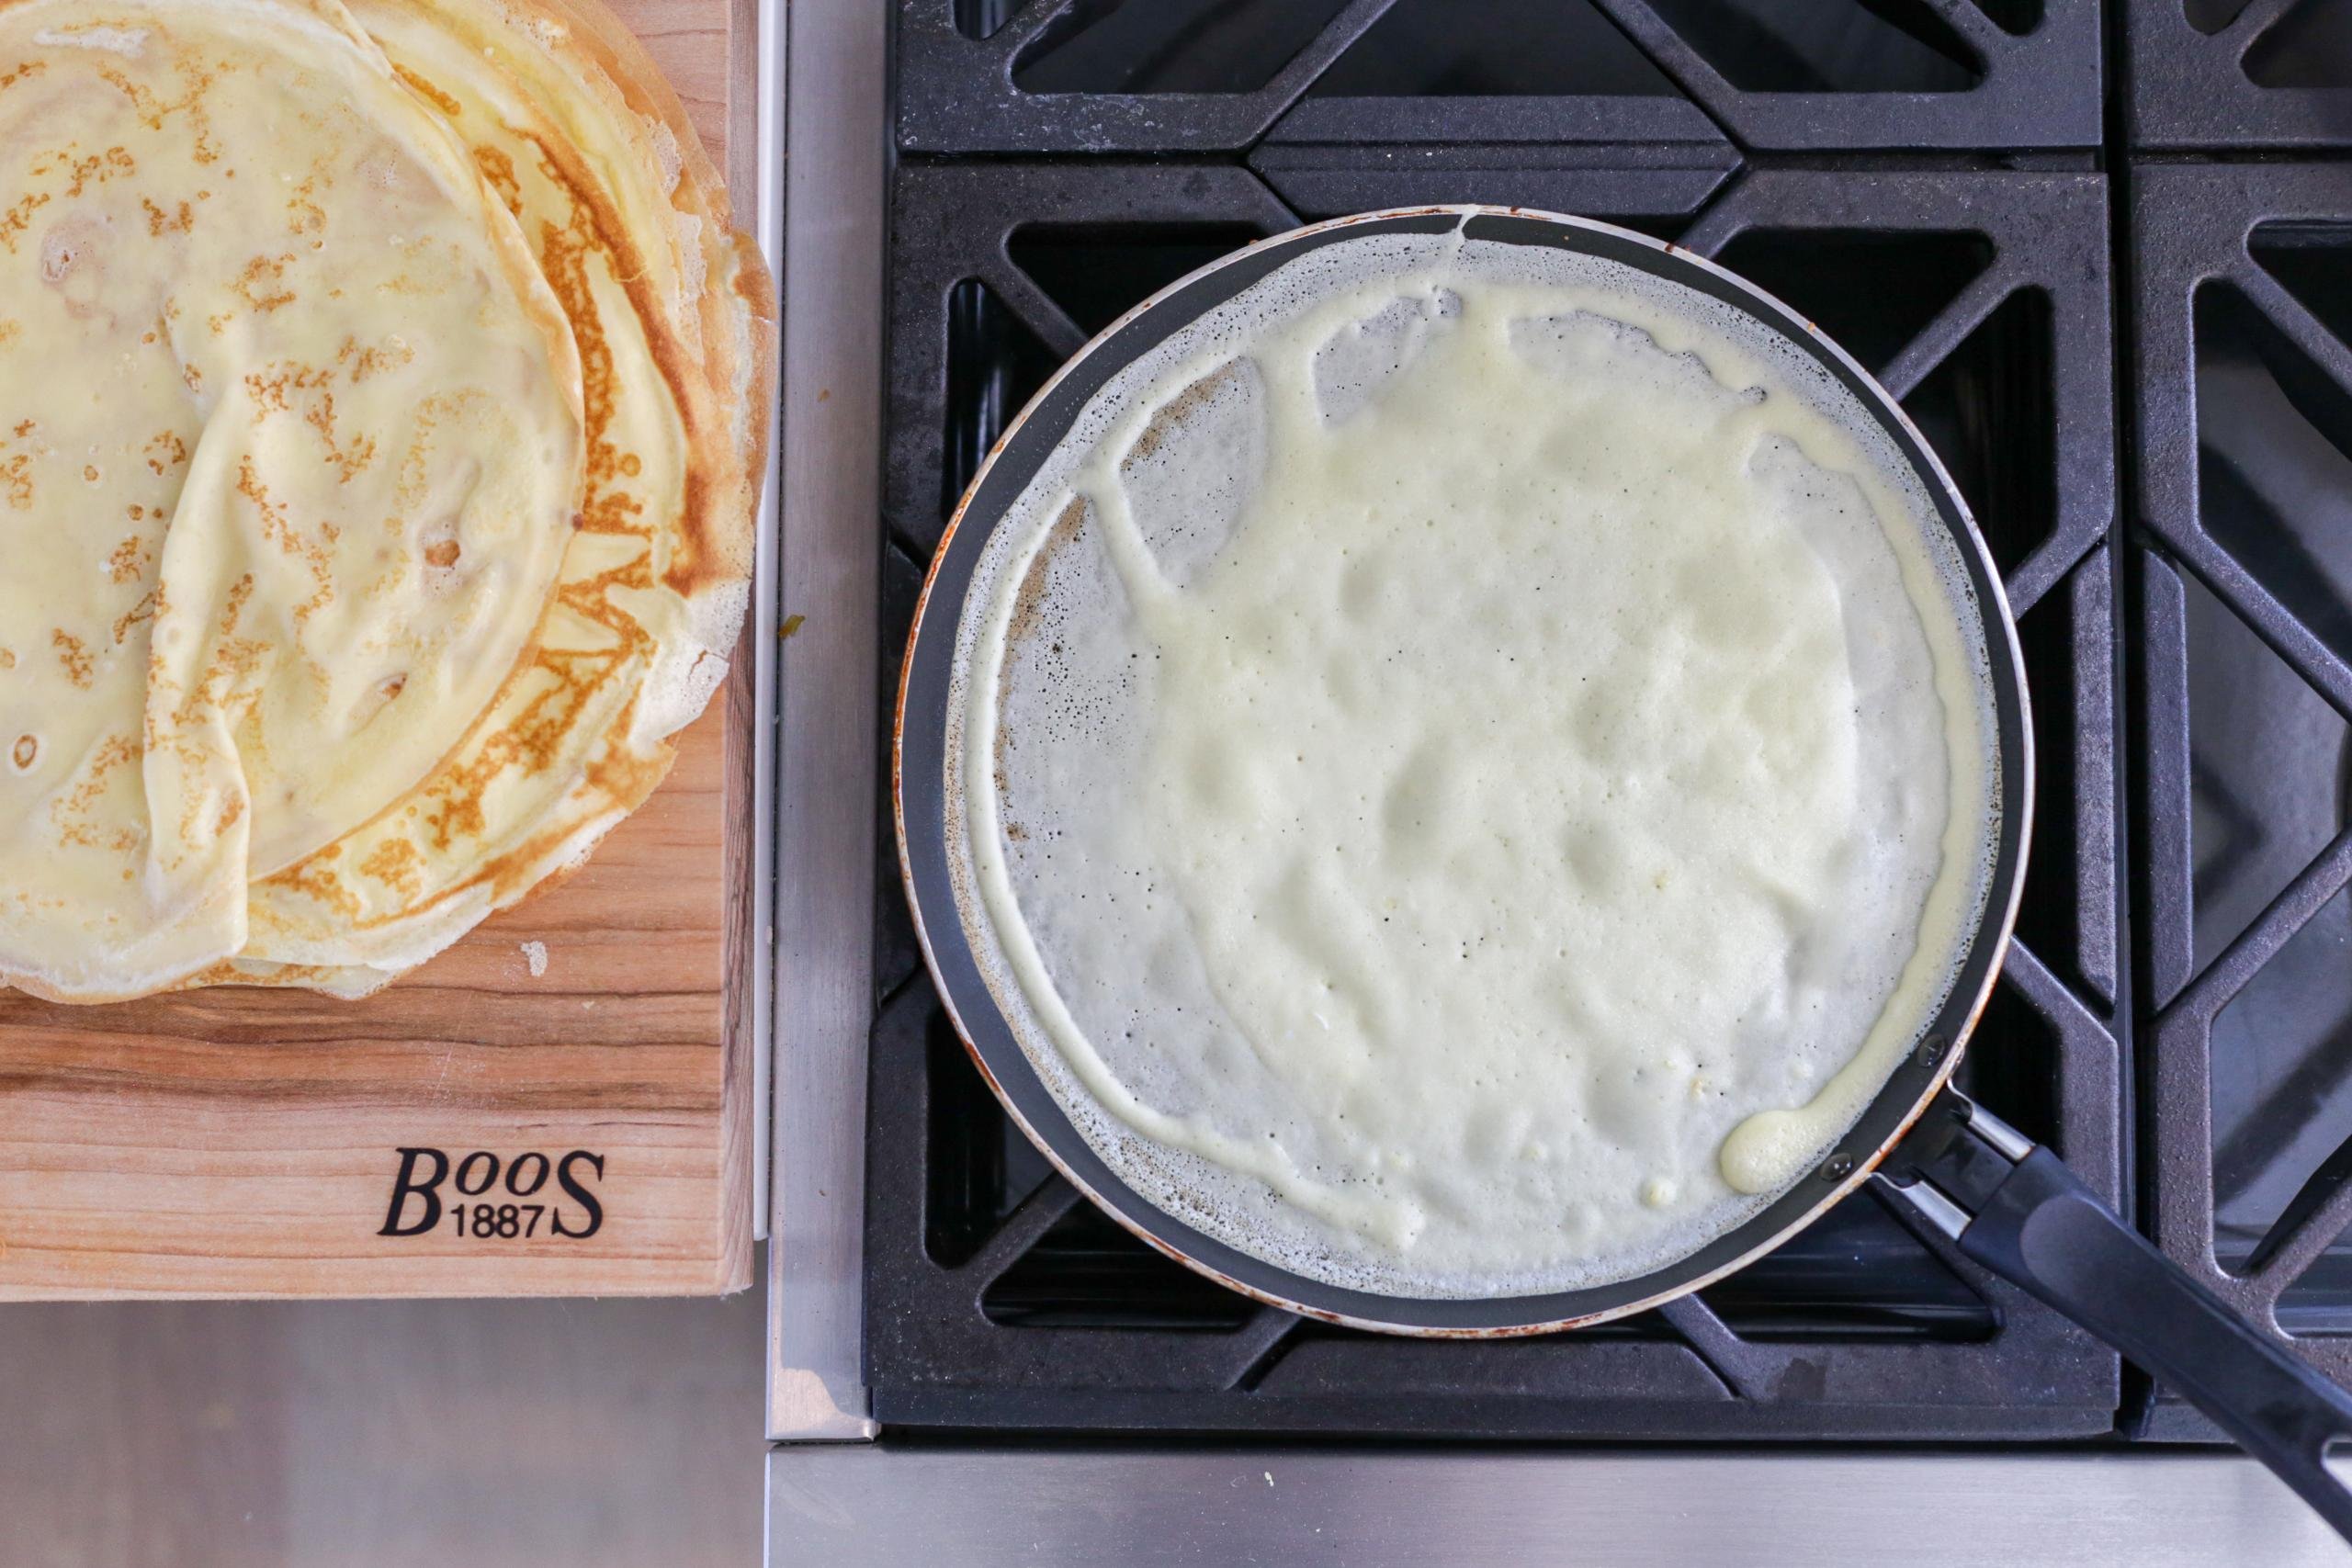
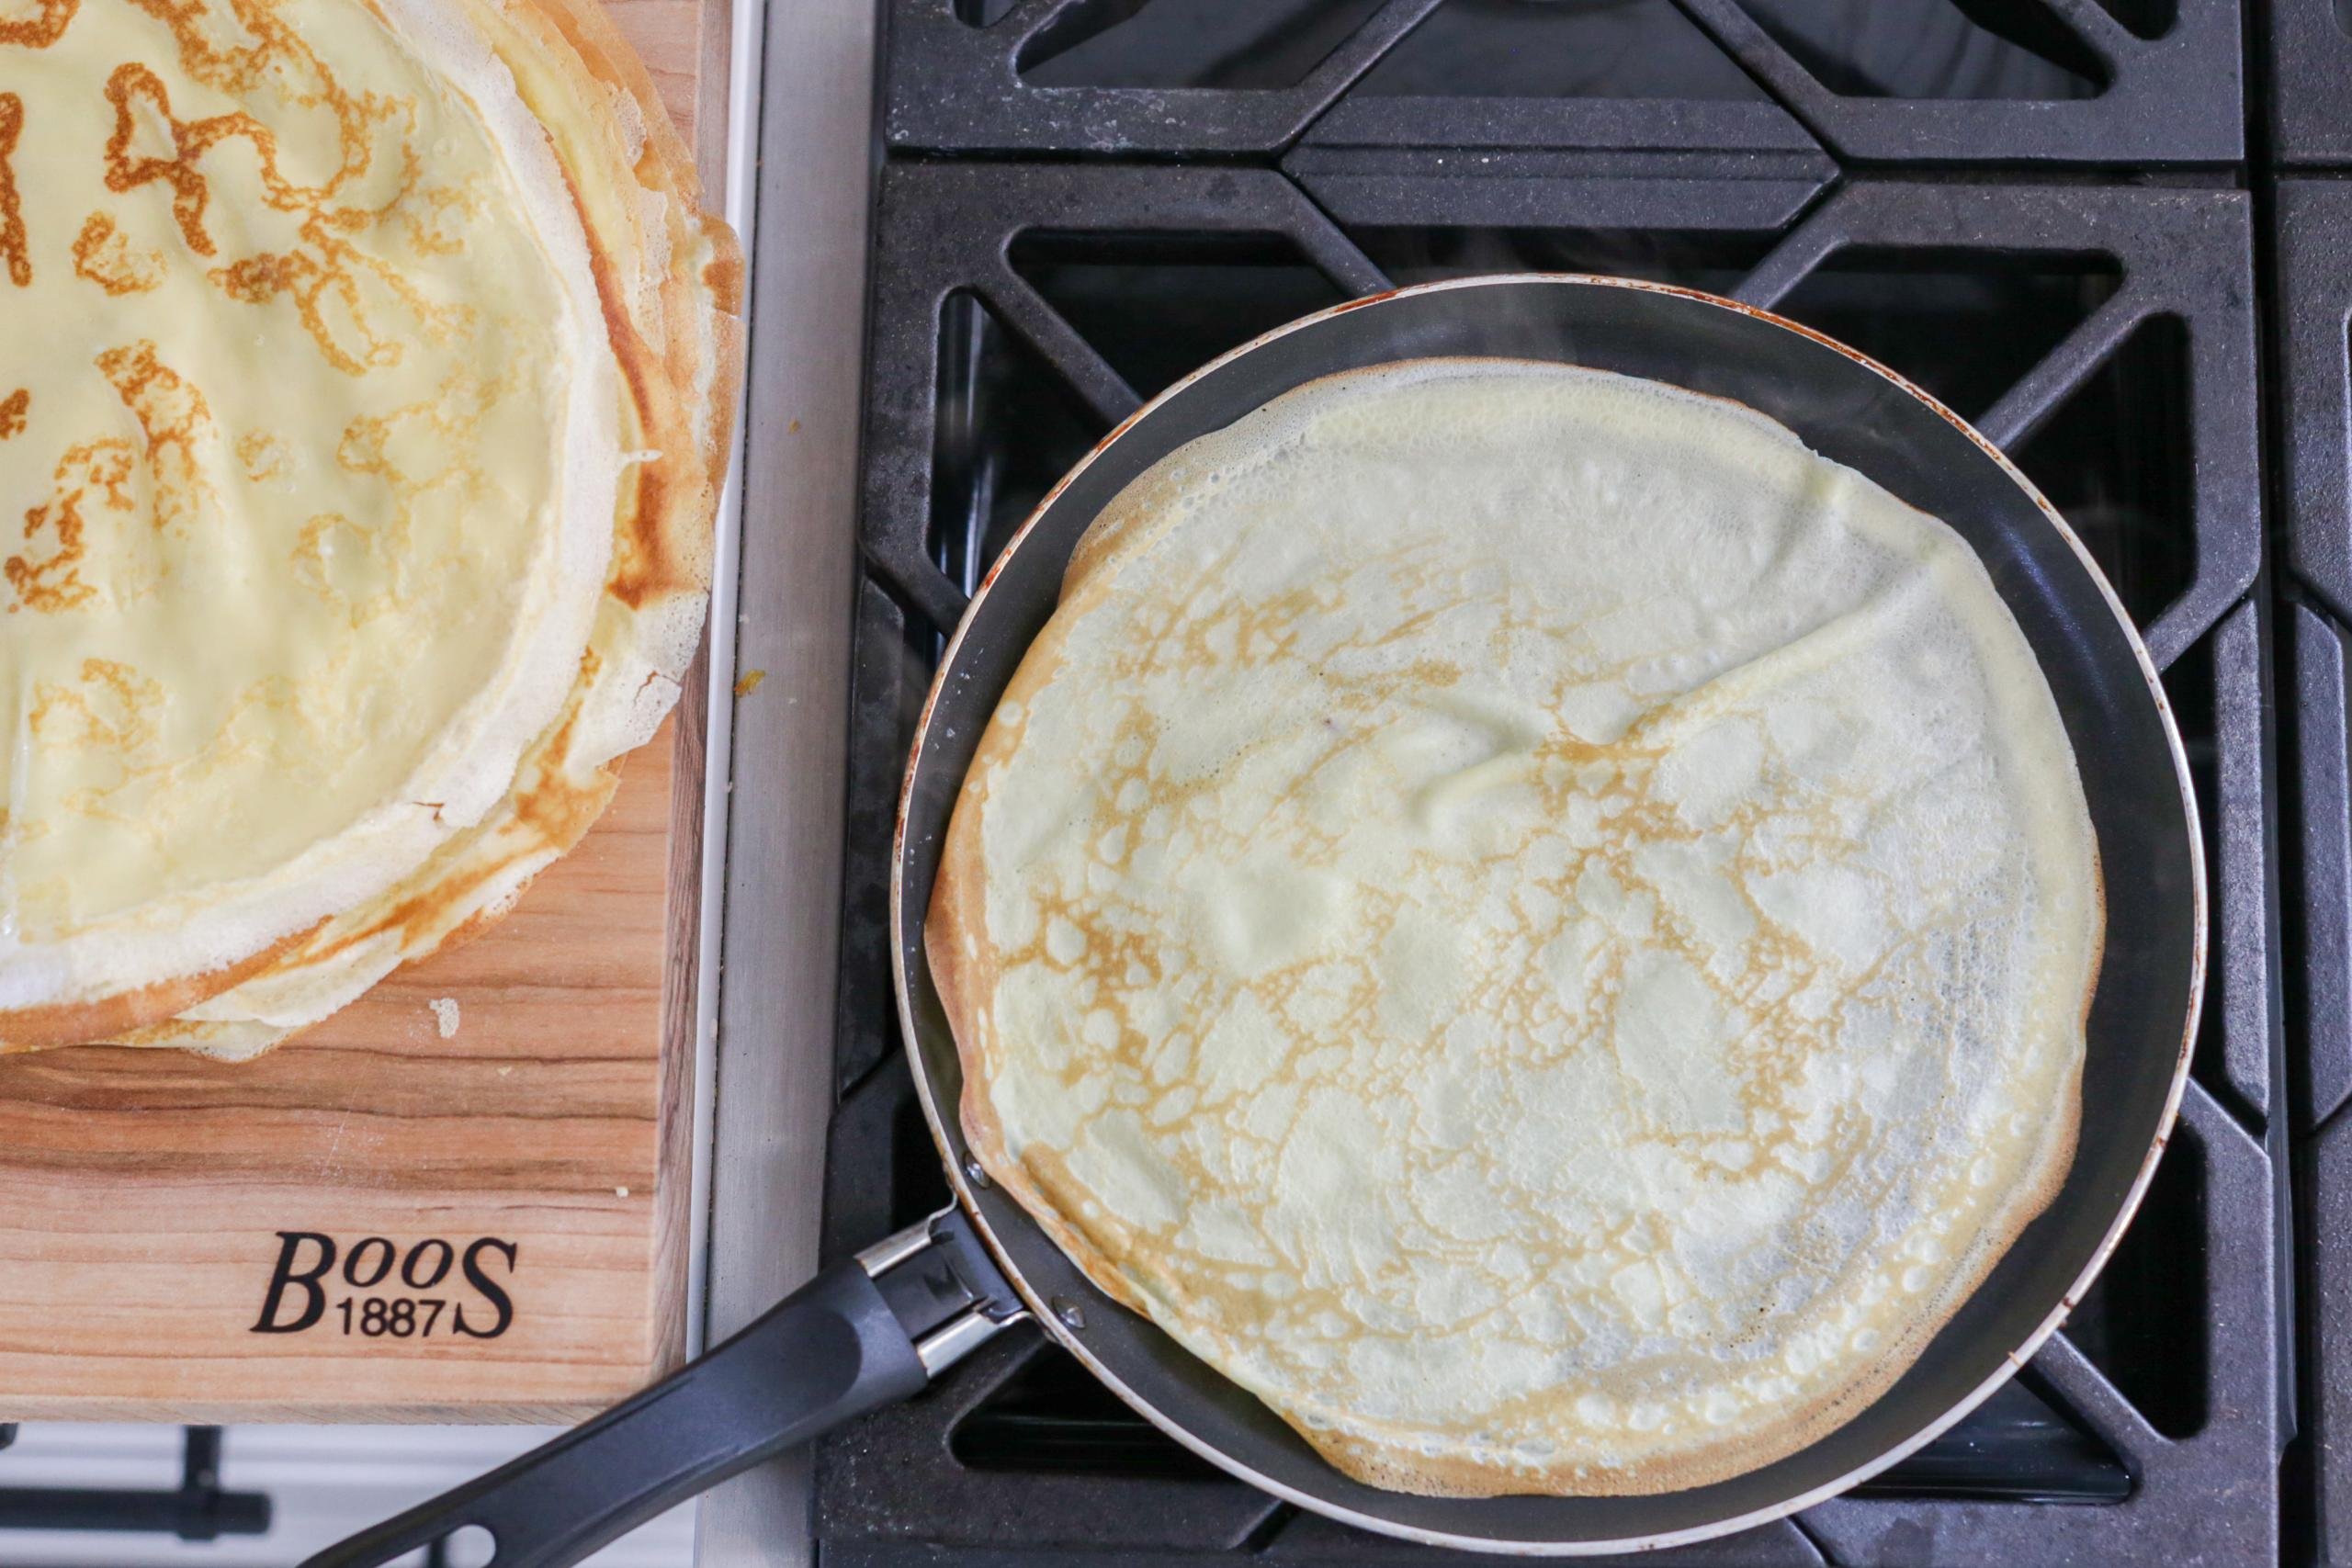
- Fry the crepes: Pour 1/4 cup of the crepe batter into a non-stick skillet. Tilt the pan until the batter covers the entire bottom of the pan. Once the crepe is almost fully cooked, flip it and cook for another few seconds. Repeat with the rest of the batter.
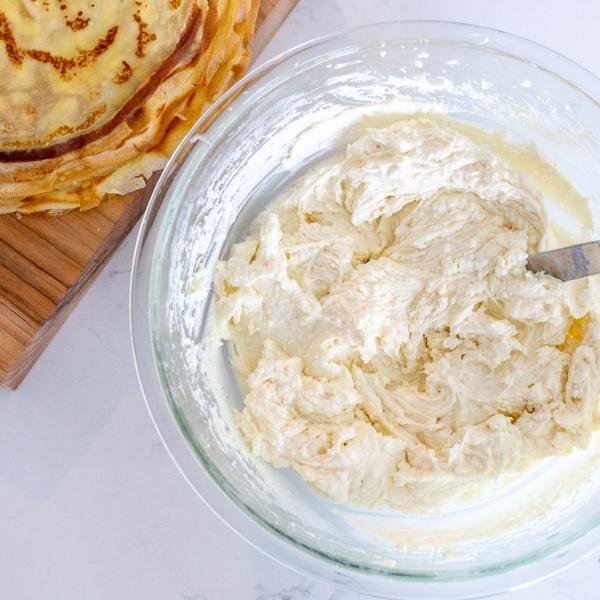
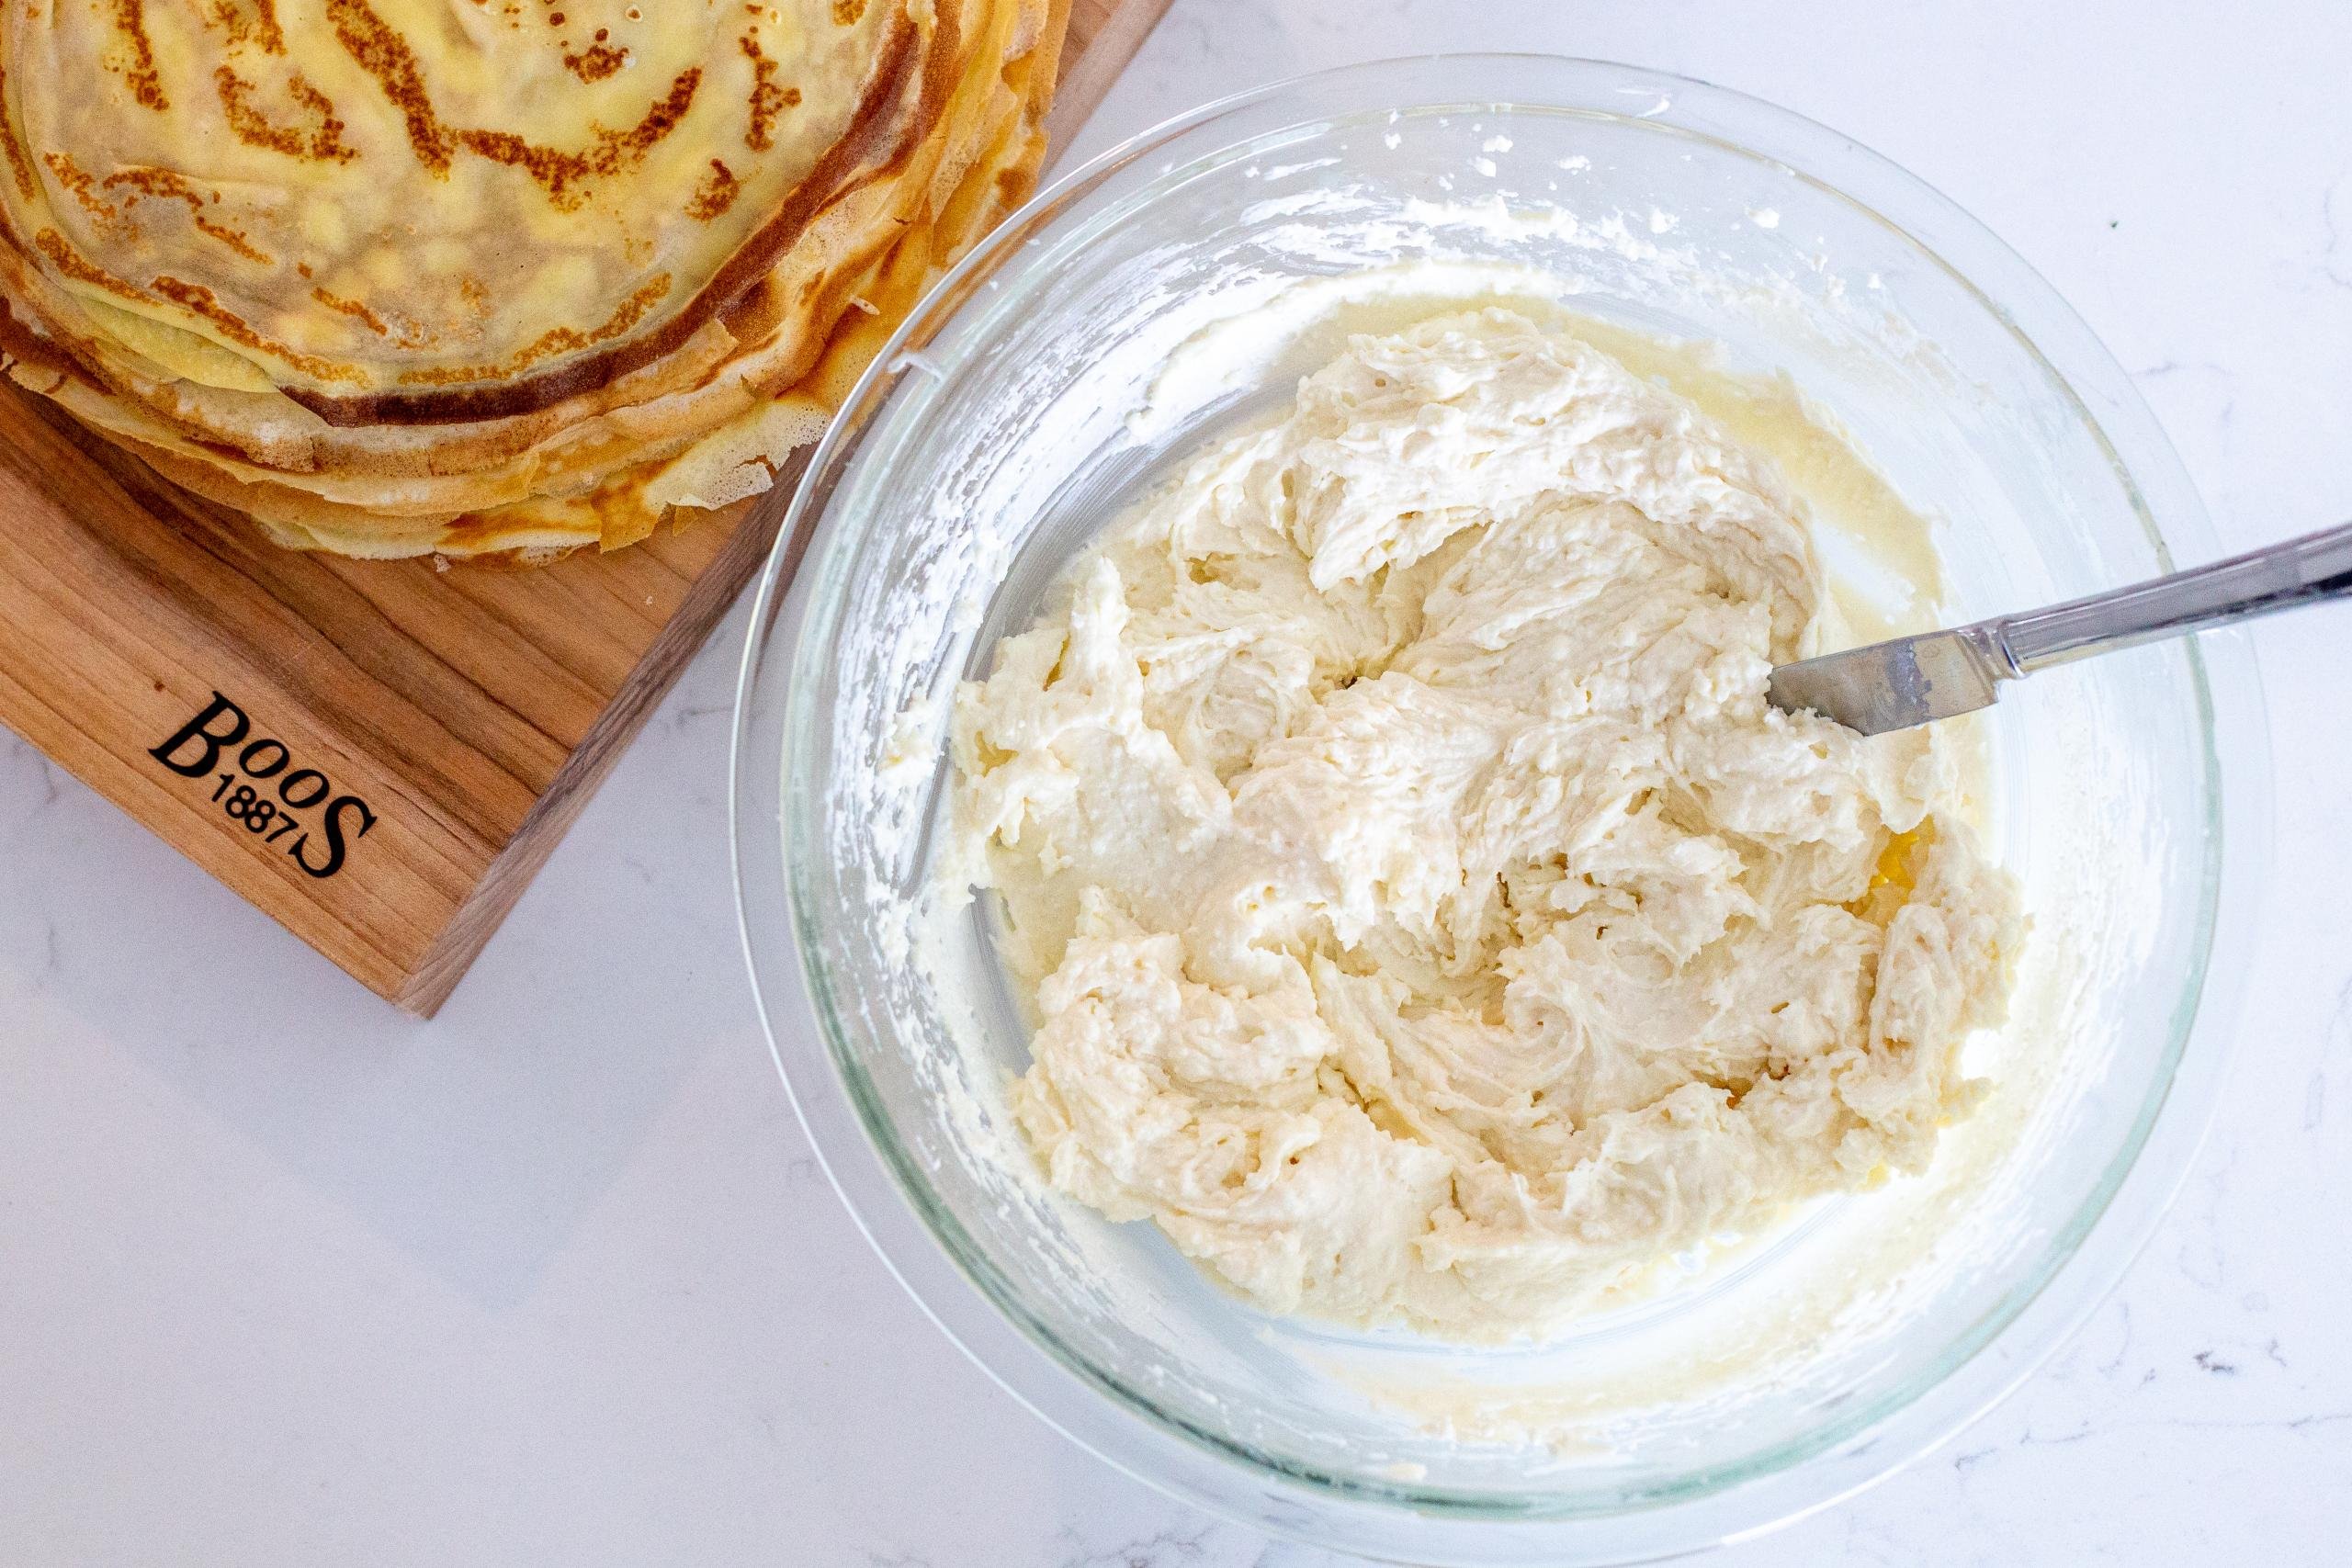
- Make the filling: Combine the cream cheese, cottage cheese, and sweetened condensed milk with an electric hand mixer.
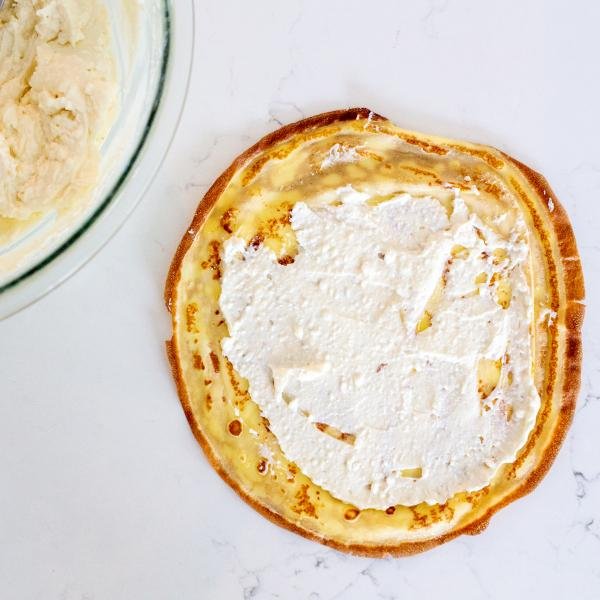
- Fill the crepes: Spread the cream cheese mixture on one side of the cooked crepe, then roll the crepe up. Repeat.
- Bake the crepes: Place all the crepes in a baking dish. Pour the sweetened condensed milk on top, then bake the crepes at 350°F for at least 30 minutes. Serve them hot!
Hot tip: To prepare nalysnyky ahead of time, make the batter and filling, then store them separately in the fridge for up to 24 hours. When you’re ready to fry them up, give the batter a quick mix and proceed with the rest of the instructions.
Tips for the BEST Nalysnyky
Do you want to make crepes that deserve a place in an authentic French bakery? Follow these tips to perfect your technique and achieve an absolutely divine result.
- Adjust the baking time. For more caramelized edges and better flavor, bake the crepes for a smidge longer than 30 minutes. Keep a close eye on them so they don’t burn!
- Preheat the frying pan. Preheating sets you up for success and more consistent results. Place the pan over medium to medium-high heat and wait until it’s sizzling hot before adding the batter.
- Butter the pan. Not only does this make flipping the crepes easier, I love the flavor that butter adds.
- Use a blender. To make the process easier, use a blender or hand mixer to mix the ingredients. If the batter becomes slightly foamy, gently tap the bowl on the table a few times and wait until the bubbles dissipate.
- Add toppings (optional). Make these crepes even more indulgent with Nutella or another chocolate sauce, fresh berries or banana slices, ice cream, whipped cream, and/or powdered sugar.

Storage & Reheating
These nalysnyky are going to be eaten up faster than you think — but because it’s so easy to make a large batch, you’ll want to stash some away for later. Use this guide to store and reheat your yummy crepes properly.
- Storage: To store for up to one week, place the cooled crepes in an airtight container in the fridge.
- Reheating: For the quickest reheating option, pop the crepes in the microwave. For a crispier crust, use a skillet. And for a replay of the original taste, reheat the crepes in the oven at 350°F.
Hot tip: I personally don’t like freezing nalysnyky because the texture changes. However, if you want long-term storage, layer the cooled crepes in an airtight container with wax paper and freeze them for up to two months.
More Breakfast Options
- Starbucks Morning Bun Recipe — Honey and sugar “cinnamon roll” copycat
- Easy Bacon Egg Bites — Bite-sized packages of baked egg and bacon
- Cheese Danishes — Flaky pastry with a cream cheese center
- Chicken Crepe Pockets — A savory spin on filled crepes
Recipe

Ingredients
Crepes
- 6 eggs
- 3 tbsp sugar
- 3/4 cup flour
- 2 cups milk
- 1/2 cup vegetable oil
Sweet Cheese Filling
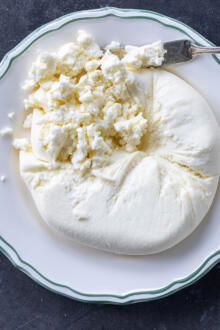
- 16 oz cream cheese
- 6 oz cottage cheese (or farmers cheese)
- 7 oz condensed milk
Topping
- 1/4 cup condensed milk
- 1/4 cup dark chocolate shaved
Instructions
Crepes
- Whisk together the eggs, sugar, and flour in a large bowl until smooth.

- Add the milk while continuing to whisk, followed by the oil.

- Preheat the pan on medium-high heat and spray it with oil. Lift up the frying pan with one hand and with another, pour in 1/4 cup of the crepe batter. Shift the pan from side to side to cover the bottom with the batter. The crepe should be thin, but not see-through.

- Once the edges of the crepe are set, lift it carefully and flip it. Cook for another few seconds, or until golden brown spots develop, then remove it from the skillet and continue cooking the rest of the crepes.


Filling & Topping
- To make the filling, combine the cream cheese, cottage cheese, and condensed milk with a mixer.

- Spread an even layer of the filling onto one side of a crepe, then roll it up. Repeat with the rest of the crepes.

- Layer all the filled crepes in a ceramic baking pan. Drizzle 1/4 cup of sweetened condensed milk on top. Bake the crepes at 350°F for at least 30 minutes.
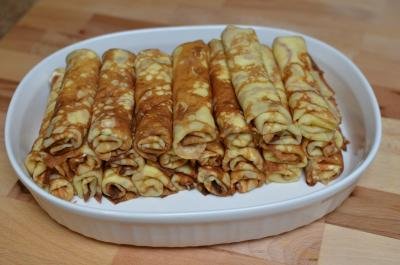
- Serve the crepes hot with all your favorite toppings, like chocolate shavings!


This recipe was an epic fail. I’ve made crepes before with tried and true recipes that worked previously, so I’m not new to crepes. I was supposed to bring a Ukrainian dish to an event I was attending and decided on this recipe. I followed it to the T and nothing that I tried worked. The crepes kept ripping. I thought maybe I’m not using enough batter, that didn’t solve the problem. I tried adding more flour and that didn’t help. I changed skillets, I adjusted temperature and nothing worked. The frustrating part was I double the recipe and just threw everything into the trash after an hour of trying to make it work.
Hi Julia, I’m really sorry this was such a frustrating experience — especially when you were making this for an event. I know how disappointing that feels.
When crepes rip, it’s usually not the recipe itself but one of a few small variables that can make a big difference. A few things that may have caused it:
- The pan may not have been fully preheated before the first crepe
- Crepes need to be fully set before flipping — if they’re moved too early, they will tear
- Pan may need more butter
I’ve made this recipe many times with consistent results, but I truly want it to work for you as well. If you have any photos or videos of the batter or cooking process, feel free to DM me on Instagram and I’d be happy to help troubleshoot with you.
Tasted like condensed milk and creme cheese. 🤷♂️
Thanks for giving the Nalysnyky a try! The filling is definitely rich and sweet—kind of like a cross between cheesecake and custard. Some folks love that creamy vibe, but I totally get that it might not be for everyone. Appreciate the feedback!
Hi there.
Thanks for sharing this recipe with us. Going to try it out. Can you tell me the brand of skillet you are using to make crepes?
Hey Olga, I can't wait for you to try these crepes! Here is the skillet I used: https://www.amazon.com/dp/B00… It's the Norpro Nonstick Breakfast/Crepe/Tortilla Pan, 9.5 Inch.
Hello, can I do more farmers cheese say 16oz and less of the cream cheese?
Hi Katie, absolutely. My mom only used farmers cheese, I ended up changing things up as I tested my preference for the recipe. You can make it to your own preference!
What if I omit the cottage cheese. I don’t have any.. if I just do cream cheese, condensed milk and heavy cream, should it still work to bake them up?
Hi Elena, yes, I have made them like that too, they come out little less "cheesy" but still great. Enjoy!
Can butter be substituted for vegetable oil? If so, how much?
Hey Talin, I have not tried this recipe with butter. If you do, please report back!
Can I put these in a blender? Will it change the consistency? Can't wait to try!
Either a blender or whisking it up by hand works. Enjoy!
These are delicious! I want to make them for a crowd and I apologize if this is a repetitive question…is it possible to make the crepes, stuff them and refrigerate until the next day? Thought it would be easier to then pour the condensed milk over them in the morning and bake- serving nice and warm. Will they be just as scrumptious?
I absolutely do this all the time for parties! Just bake them out of the fridge and they taste just as good.
Hi Pam, You can but it depends on what you stuff them with. You don't want them to be soggy the next day. For the absolute best results I really recommend eating them fresh. I hope this helps. thanks for reaching out!
This sounds so yummy!!! But I ran out of milk so I want to know if I can make the batter with evaporated milk instead of milk?
Also, I have never tried your filling option, but am going to try it today! I usually just use butter and brown sugar, among others, but the butter/brown sugar is our favorite. I’m sure your filling will be our new favorite… 🙂
Hi Jackii, I do not use it so I dont know if there will be a slight taste or texture difference. If you give it a try, I would love to know how they turned out! Thank you so much!
Love this recipe. Always a winner. Made them soo many times. Thank you for the recipe
Hi Iryna, I am so glad to hear you love this recipe! Thanks so much for the feedback, Enjoy!
Nice post
Thank you, I hope you give this recipe a try! 😉
Hello, I wanted to ask you are there some mini sweet crepes from asian cuisine with some sweet cream cheese filling or heavy cream, since I tried at one place (that is closed permanently close now) crepes like I described from japanese restaurant? If someone know please provide me with recipe.
Hi Levi, I will link my Blintzes recipe for you here. Hope this helps!
https://momsdish.com/cheese-b…
My husband was craving crepes which I make less than once a year. I used the filling recipe here and didn't have condensed milk so used flavored creamer instead. It was absolutely the best filling I have ever used and the first crepe recipe I have ever bothered to save. 🙂
Hey there! That's great to hear that you found a recipe you love! That filling sounds super delicious! Great job on the creativity!
Looks amazing! Can I use almond or coconut flour instead?
Hi Cristina- I personally haven't tried using either of those flours but another commenter did mention that they used gluten free flour instead and they turned out great. If you decide to use almond or coconut flour, please keep us posted on the results- others will find it helpful too, I'm sure!
Can I freeze them?
Hi Irina- my recommendation is to enjoy them fresh. But if you'd like to freeze them: assemble them on a baking sheet lined with parchment paper. Next, pop the sheet into the freezer uncovered. Once completely frozen, transfer to a freezer-safe bag. To defrost and reheat, place them in the refrigerator for a couple of hours and then proceed with baking per recipe.
Thank you!!!! I am living in Russia for 2 years now, but all this time I could not find the recipe for perfect blini, all of my grandma neighbours don't measure their ingredients :). But this recipe here is spot on perfect! Normally my first blin is "not good" but with your recipe, even the first one I fried was perfect. What I like about it is your recipe/batter has the correct consistency, is spreads in the skillet correctly, the edges are the correct amount of crispy, the edges lift up and flip over perfectly and the look and taste of them are also perfect. To sample the recipe, I divided it down to use 2 eggs (made a total of 6 blini) and I used sunflower oil (all that I had). Thanks again!
Lori, I'm so glad you loved the recipe thank you for taking the time to comment your feedback!
This was the recipe I was looking for! No crispy edges, very delicate texture. I do like adding a pinch of salt but other than that it’s perfect, thank you so much!
Thank you for the salt tip, Anna! I'm glad you enjoyed this crepe recipe.
I make crepes but the maxi eggs I use is only 3 and not 6 and more flour and my crepes are light and tasty as I do add some vanilla.
Thank you for your feedback, Anne!
Omg!! These are soooo goooood! I already made these like 5 times. So easy and delicious to make. I do not recommend making the batter in the blender like I did because it well make the batter very foamy and the crepes will come out to thin and crispy. Otherwise these so so perfect to please a crowd.
Thank you for your feedback, Valentina! I'm so glad you enjoyed the crepe recipe.
This sounds so much like my mom used to make when I was a kid... I’m not sure about the condensed milk but she used a cottage cheese/cinnamon mixture.. but same thing, stacked crepes, filled and rolled then into the oven.. the ends got crispy... I could eat about 20 at a sitting.
Yummy, cinnamon sounds delicious! If you try this version let me know what you think Steve, I would love to hear your feedback!
Thank you, Natalya.
Health wise condensed milk is not a good option for crepes. Otherwise the recipes are great. Thank you !
I can see how condensed milk can be not the healthiest but if you don't get carried away, the flavor is worth it.
I make French crepes and use 7/8 flour, vanilla, sugar and 2 large eggs and homo milk. 6 eggs are a lot and I still get at least 15 or more crepes.
I'm getting ready for a dinner party, can I make these ahead, refrigerate and bake 30-40 minutes before serving dessert?
Yes, you can make all the steps but only bake them right before serving. Enjoy
I made these crepes for my family today and it was a hit. I made it with gluten free flour as that is all I have in the house and it still turned out great! I used lactose free condensed milk. I was wondering if I could make it with non dairy milk? I actually use oat milk. I didn't use it this time as I wasn't sure how it would turn out.
Trena, thank you for sharing all of those tips. People often ask me about those options, they will definitely be helpful. Thank you!
These are delicious, thank you!!
Can you refrigerate leftover batter?
Hey Katie, I am so happy to hear this feedback. Yes, you can. Just whisk it right before making crepes again.
Thank you!
Do you pour the condensed milk on each separate layer or just over the top?
Hey Oksana, there is really no way to mess up here but we just drizzle the very top. Hope you love the recipe!
Hi there, these look amazing, do you think you can freeze these?
Hey Linda, yes you can freeze them. Just place plastic or wax paper between each crepe to prevent them from sticking together.
Thank you soo much for this amazing recipe. I tried different recipes and this one is THE BEST!!!! Crepes come one thin and sooo good! Kids love it! Thank you!!!
Hey Katie, this is so sweet. I am so glad you loved the crepes. Hope you get to enjoy other recipes on the blog!
Hey hey, beginner cook here just wondering if this filling would also be good if I did a caramel sauce over top instead of the dark chocolate? I just don't want the taste to not fit our be too sweet. Like some others have said I don't want to get so far then completely bomb it at the end lol. Im trying to be impressive. Im getting better but I made the mistake of trying to jump to souffle pancakes and I was NOT ready for all that crazy mess lol. Thank you for making and posting these typs of recipes. I know it takes a lot if time and work but they are such a big help to beginners and make me look just to good. 🙂
You can skip on chocolate altogether or drizzle some caramel sauce. What you can do is try caramel sauce with one crepe and see how you like it after that add it to the rest.
This is very much like nalysnyky...My Mom (and I) use sweetened sour cream in place of the condensed milk, but it might make for a nice change now and then. Lots more sugar, though. 🙂 I'll certainly save your crepe recipe!
Linda, thank you for stopping by. Yes, nalisniki are made in many different ways. 🙂 We love the flavor of condensed milk, for sure there is a ton of sugar but its a treat for us 🙂