Follow this easy guide to learn everything you need to know about feeding and maintaining your sourdough starter. Let’s dive in!
What You Will Need
Before diving in, check out these necessary tools for baking with sourdough. We made it even easier and compiled a sourdough essential tools list ready to go for your bread baking needs!
- Sourdough starter: Of course you’ll need a sourdough starter to make sourdough bread! Our favorites are active live starter or dry starter.
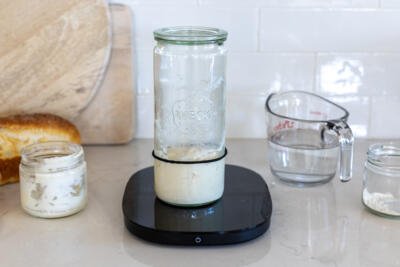
- Kitchen scale: To measure all ingredients accurately, use a good kitchen scale.
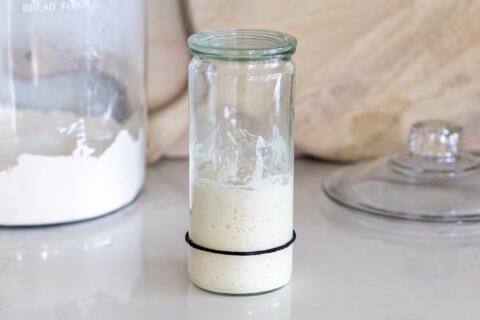
- Glass Jar: You’ll need a clear container or glass jar to keep your starter in, such as this one. Add a rubber band to your jar to help track the starters growth.
- Dough whisk: This dough whisk makes combining all the ingredients a piece of cake and it removes pesky bubbles and lumps.
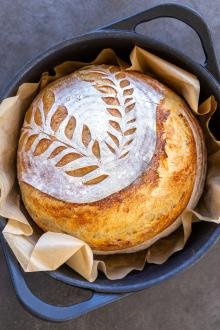
- Bread slashing tool: Make beautiful designs on your bread with this bread slashing tool.
- Proofing basket: Proof your dough in this set of two proofing baskets.
- Dutch oven: The Staub dutch oven is my go-to, but feel free to use any brand!
- Cast iron bread pan: Alternatively, make your bread in a cast iron bread and loaf pan.
Sourdough Feeding Ratios
There are a few most frequently-used feeding ratios to consider when choosing how much to feed your starter. Here’s a guide to help you choose the best ratio for your starter.
- 1:1:1: For every 1 gram of starter, feed it with 1 gram of flour and 1 gram of water. In other words, if you have 10 grams of starter, feed it with 10 grams of flour and 10 grams of water. This will produce a total of 30 grams of sourdough starter.
- 1:2:2: For every 1 gram of starter, feed it with 2 grams of flour and 2 grams of water.
- 1:3:3: For every 1 gram of starter, feed it with 3 grams of flour and 3 grams of water.
- 1:4:4: For every 1 gram of starter, feed it with 4 grams of flour and 4 grams of water.
We like to use the 1:1:1: ratio, as it is the easiest to keep track of and rises the quickest, but feel free to use the other ratios to best suit your sourdough needs! A higher ratio means a slower, longer rise that stays active longer. It also means the starter will not need to be fed as frequently.
The Sourdough Cycle
Cycle Steps
The sourdough starter will go through a “cycle” of feeding, rising, peaking, and falling. Here’s what to expect during this process.
- Feeding: The first step of the cycle is to feed the starter. Feed the starter based on your preferred feeding ratio.
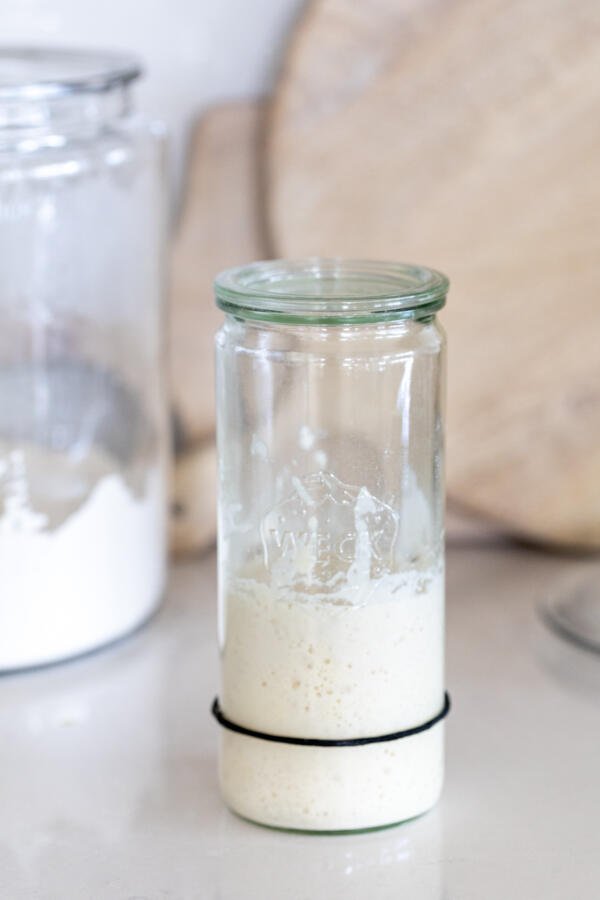
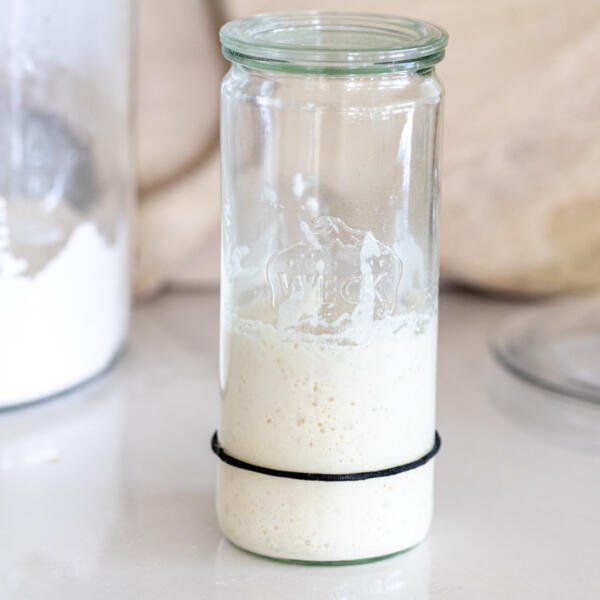
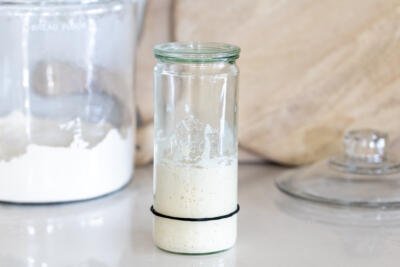
- Rising: Once the starter is fed, the growing process begins. As the starter feeds on the food, CO2 gas is created, making the dough rise in the dish/jar. Bubbles will form and the dough will form a “dome” shape on the very top. As long as the dome shape is visible, the starter is still growing.
- Peaking: The peak of the growth occurs when the dome begins to flatten. This is when the starter has run out of food to “feed” on. At this time, the dough may look “weak” like it might collapse. Many sourdough recipes use the starter at this point to make bread.
- Falling: After the peak, the starter will begin to slowly fall as the CO2 bubbles escape. Don’t worry, this is totally normal!! At this point, the starter enters the “hunger” state. It may begin to smell acidic or like acetone/paint thinner. A dark, grayish liquid called hooch may appear on the top of the starter. This liquid is a harmless sign of a hungry starter. Remove the liquid and any discolored starter underneath, then begin the feeding process again.
Feeding tip: Every sourdough baker creates their own feeding schedule. We like to feed it once every 24 hours because it’s consistent and easiest for the home baker. A consistent feeding schedule trains the starter to rise and fall predictably.
Cycle Speed
The sourdough cycle is the same for each starter, but the speed of the starter rising/falling depends on the ambient temperature, age of starter, and ratio used to feed.
- Slow cycle: A slower cycle occurs most often with a newer/weaker starter, when the temperature is colder (in the room and in colder seasons), and/or when using a high feeding ratio (such as 1:3:3). The higher the ratio, the more food the starter has to “eat through.”
- Fast cycle: A fast cycle occurs with an older, stronger starter, in warmer temperatures (especially during warm summer months), and when using a lower ratio of food to starter (such as 1:1:1).
How to Feed/Maintain Your Sourdough Starter
It only takes a few minutes to feed your sourdough starter to keep it growing! Follow these three quick steps to get it done!
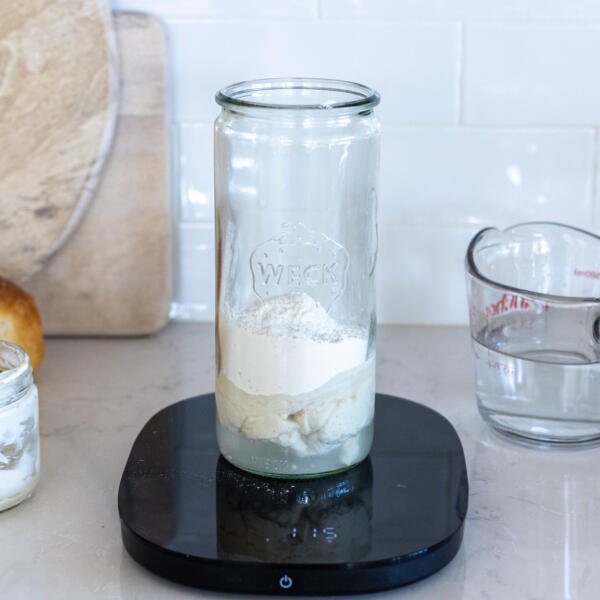
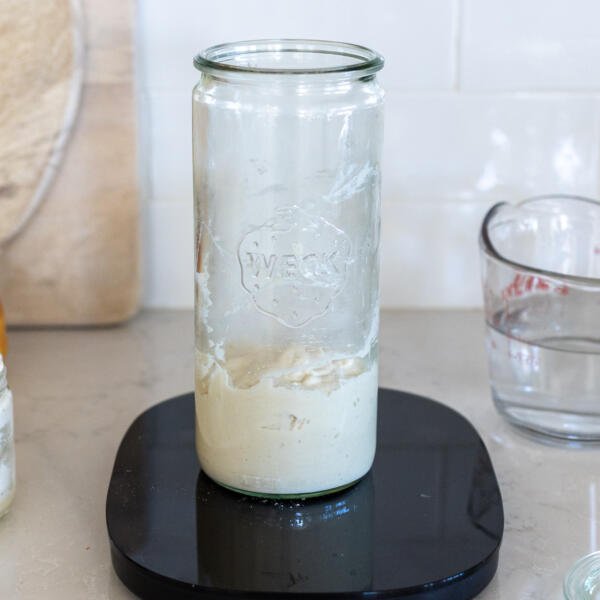
- Combine the ingredients: Place the sourdough starter in a clean glass dish, then add equal parts water and flour (by weight). Stir the mixture to combine. Add a rubber band around the jar at the height of the starter.
- Cover the dish: Cover the dish, but avoid sealing it tightly to allow the starter to breathe.
- Use the starter: When the starter expands and becomes bubbly, use it to make a delicious sourdough recipe!
Don’t forget: To bake sourdough bread, you need to feed and activate the starter. An inactive (unfed) starter will not allow the bread to rise as it should.
When to Use Starter to Make Bread Dough
The starter is ready for sourdough bread after it has been fed and is in the stages before, during, and after “peak rise”. Depending on what stage you use the starter in, the rise and flavor (such as how sour the bread is) will be affected.
- Before peak rise: Using the starter before the peak (during the rising stage) results in a mildly-flavored bread. When using a starter from this stage, the bread will leaven and rise quickly.
- At peak rise: Using a starter that has hit peak rise will result in a bread with the most rise, although it will not be as quick of a rise compared to using a “before peak rise” starter. The bread from a “peak starter” will have a more complex flavor and be sour.
- After peak rise: If using a starter that has begun to fall (it is past peak rise), the resulting bread will have the most sourness and flavor but will not rise as much.
Quick Tip: Test if a starter is ready to use by taking a scoop of it and carefully placing it in a glass of water, making sure the bubbles in the starter do not deflate. If the starter floats, it is ready.
Hot Tips
Sourdough can be tricky, but follow these tips and you won’t have any problems!
- Feed the starter with filtered water: Use only filtered water to feed the starter. Unfiltered water may have chlorine, which inhibits the starter’s strength and ability to rise and reproduce.
- Use unbleached bread flour: Our go-to sourdough flour is Bob’s Red Mill unbleached bread flour. Avoid substituting unbleached bread flour with any other types of flour, as this will affect the texture and taste of the dough.
- Loosely cover with a lid: Avoid closing the lid tightly on the container with the growing starter. The starter needs to have some airflow and room to expand as it grows.
- Measure ingredients accurately: The best way to keep accurate track of weight is with a kitchen scale. Measure the ingredients in grams to ensure uniformity.
- Avoid neglecting a new starter: The older the starter, the more resilient it is to neglect. Avoid neglecting a new starter in the beginning.
- Strengthen your starter: If your starter is growing very slowly, feed it more often — right after the “peak” in the growing cycle. Do this a few times until the starter becomes stronger.
Storing the Starter
Once you’ve fed your sourdough starter, decide how to store it based on how often you plan to use it.
- Room temperature: If you plan to use the sourdough multiple times a week, keep the starter ready to go on the kitchen counter at room temperature. Feed, maintain, and use as usual.
- Refrigerator: If you rarely use the starter (such as baking bread once a week), the best way to keep it healthy is by refrigerating. This way, you will not have to work with a large amount of discard. Feed the starter every 7-10 days to avoid neglecting it.
Feeding a Refrigerated Starter
To feed a refrigerated starter, remove the starter from the refrigerator and set it on the counter for 1-2 hours to come to room temperature.
- To maintain the starter: To maintain a healthy starter, feed the starter and allow it to begin to grow and rise for an hour or two, then refrigerate again. Avoid allowing it to reach its “peak” as it’s best to let the “uneaten food” remain in the mixture to sustain the starter in the fridge.
- To use for baking: To use the starter for baking, feed the starter as usual. Depending on the strength of your starter and how long it’s been in the refrigerator, sometimes you may need to go through the sourdough cycles 2-3 times before using. With only one feeding, the sourdough may be very sluggish to rise and may not produce the best flavor and texture.
Sourdough Discard vs Active Starter
Sourdough discard is a portion of the sourdough starter that is removed prior to feeding. It is different from the “starter” because the starter refers to the fed starter that is rising/has risen to its peak. It is important to always “discard” a portion (usually about half of the starter) before feeding the rest of the starter in order to keep the growth under control and the dough healthy.
What to Do With Sourdough Discard
Discard can be made into an active starter by placing it into a new jar and feeding with equal parts flour and water. Or, use the discard to make easy sourdough crackers, pizza crust, pancakes, or overnight bagels. For a treat everyone will love, make these brown butter sourdough chocolate chip cookies. The discard is essentially a gift that keeps on giving!
FAQ
What do I do with the starter if I want to take a month break?
If you go on vacation or just want a break from sourdough, feed it and place it in a closed jar. Place it in the refrigerator until ready to use again.
How do I “resume” a starter that has been in the fridge for over a month?
If you’ve kept your starter in the fridge for over a month and are ready to resume feeding and using the sourdough, remove it from the fridge and place it on the counter. Allow it to come to room temperature, then feed it. Do this a few times before using any discard. This will allow the starter to fully re-develop the important bacteria.
When do I feed the starter again?
The starter enters a “hungry” state after reaching its peak growth, when it begins to fall. Feed it when this happens, or feed it consistently every 24 hours or so.
Sourdough Bread Recipes
- Almost Whole Wheat Sourdough Bread– Uses bread and whole wheat flour
- Sourdough Bread – Classic sourdough bread
- Sourdough English Muffins – Perfect for breakfast sandwiches
- Sourdough Cinnamon Rolls – Sweet, gooey and soft dessert rolls
- Sourdough Biscuits – Extra flakey and tangy biscuits
- Sourdough Ciabatta – Rustic ciabatta loaves perfect for sandwiches
- High Hydration Sourdough Bread – Partially whole wheat bread with amazing flavor and crumb
- Sourdough Pizza Crust – Perfectly chewy pizza crust
Recipe
Ingredients
- 1/2 cup sourdough starter (113 grams)
- 1 cup unbleached bread flour (113 grams)
- 1/2 cup filtered water (113 grams)
Instructions
- Place starter in a clean glass dish. Add water and flour. Stir to combine together.

- Cover with a plastic wrap or a lid but don't seal tightly.
- Use it as soon as it expands and becomes bubbly.


I received a starter yesterday and feeling confused at the ratio amounts to feed it. I got a kitchen scale but unsure of a good rule of thumb to know how much to feed. I can bake as soon as it doubles in size?
Hey Anna, I use 1:1:1 ratio, so for every 1 gram of starter, feed it with 1 gram of flour and 1 gram of water. You can use the starter once it has at least doubled in size. Let me know if you have any other questions.
Can u just use wheat flour+water to start my starter?
Hi Lana, I personally prefer to use a starter - it develops a lot faster than trying to create a starter with just wheat and flour. If you do try that though, please let us know how it worked out for you!
It worked out pretty well, actually. But I did have to combine wheat flour with organic unbleached all purpose flour.
I'm happy to hear it worked out!
Can you tell me what temperature the water needs to be that you recommend to feed it? Specifically in °F? Thank you for your info!
Hi Sveta, I always use room temperature filtered water. Hope this helps.
I've been so intimidated by starters - thank you for breaking it down!
Hi Melissa, I am so glad you have found this helpful!
I have always been intimidated by sourdough - but these tips helped me to conquer sourdough! Now I love making it and having a starter going all the time.
Hi Andie, I am so happy that you have found this helpful! Thank you for sharing your feedback! Enjoy!
I've been wanting to start a sourdough starter but didn't know what all it entailed. This was super helpful!
Hi Abby, I am so glad to hear that! Thank you for sharing your feedback with me. Enjoy!