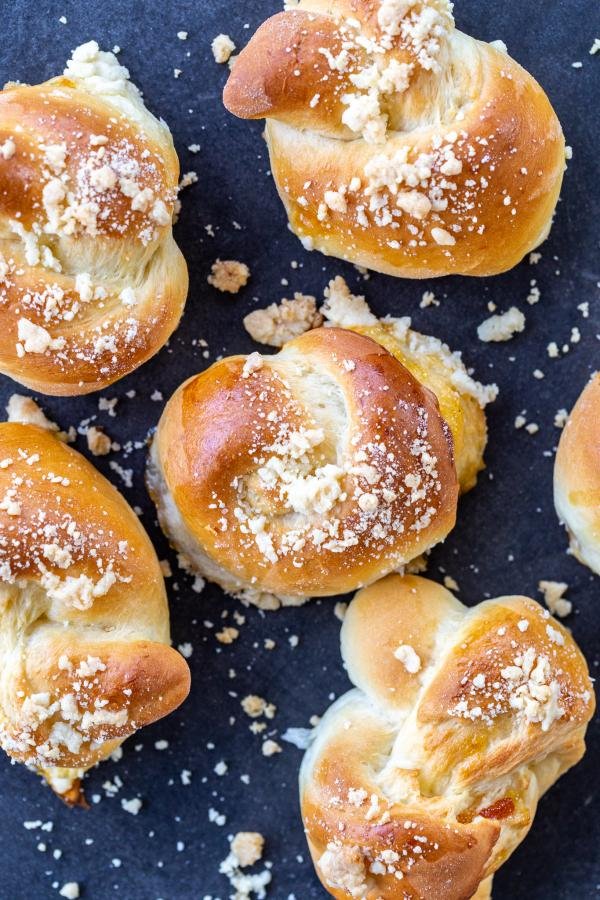
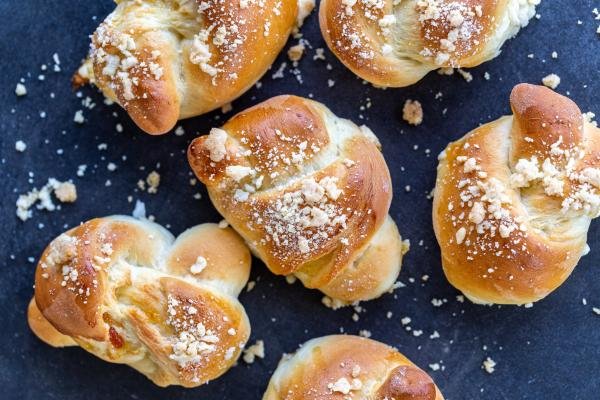
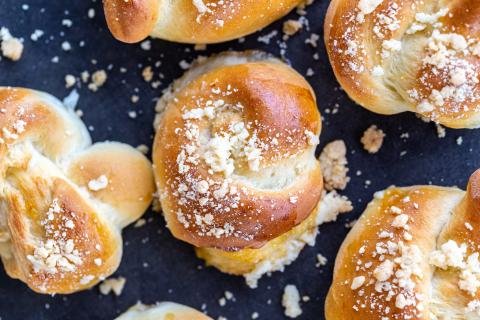
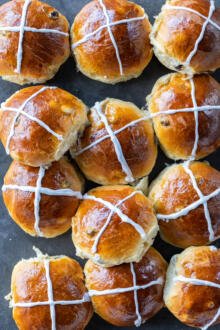
These bulochki are worthy of any bakery window. Stuffed with puckery jam and topped with graham cracker crumbs and a sweet glaze!
So many people have tried piroshki, but not as many have tapped into the wonders of bulochki. These lightly sweet buns take a bit of prep, but are totally worth it. They also fill your house with the most irresistible smell. Good luck eating just one!
What are Bulochki?
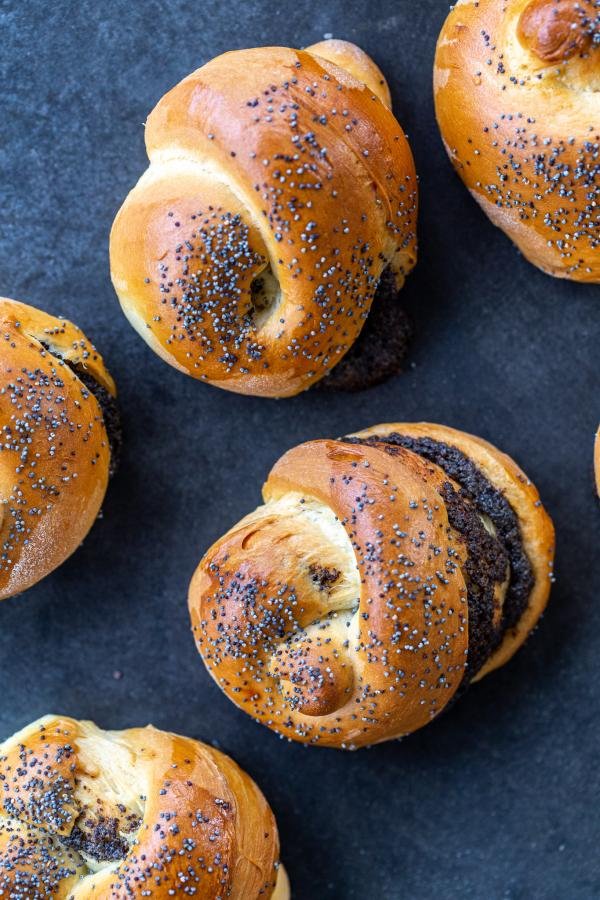
Bulochki are popular pasty buns made with a simple yeast dough. You’ll find them served in bakeries throughout Slavic countries and filled with a wide array of jams, poppy seed fillings, and even sweet farmer’s cheese. Below, find an overview of the flavor, texture, and time it takes to make our version.
- Flavor: These bulochki are the perfect combination of sweet yeast dough, tart jam, honey graham crackers, and a sweet, sugary glaze.
- Texture: The texture of the buns is light and fluffy.
- Time: From start to finish, these buns take about 3 hours to make.
How to Make Bulochki from Scratch
Making homemade bulochki is a bit time consuming, but the process is actually quite easy.
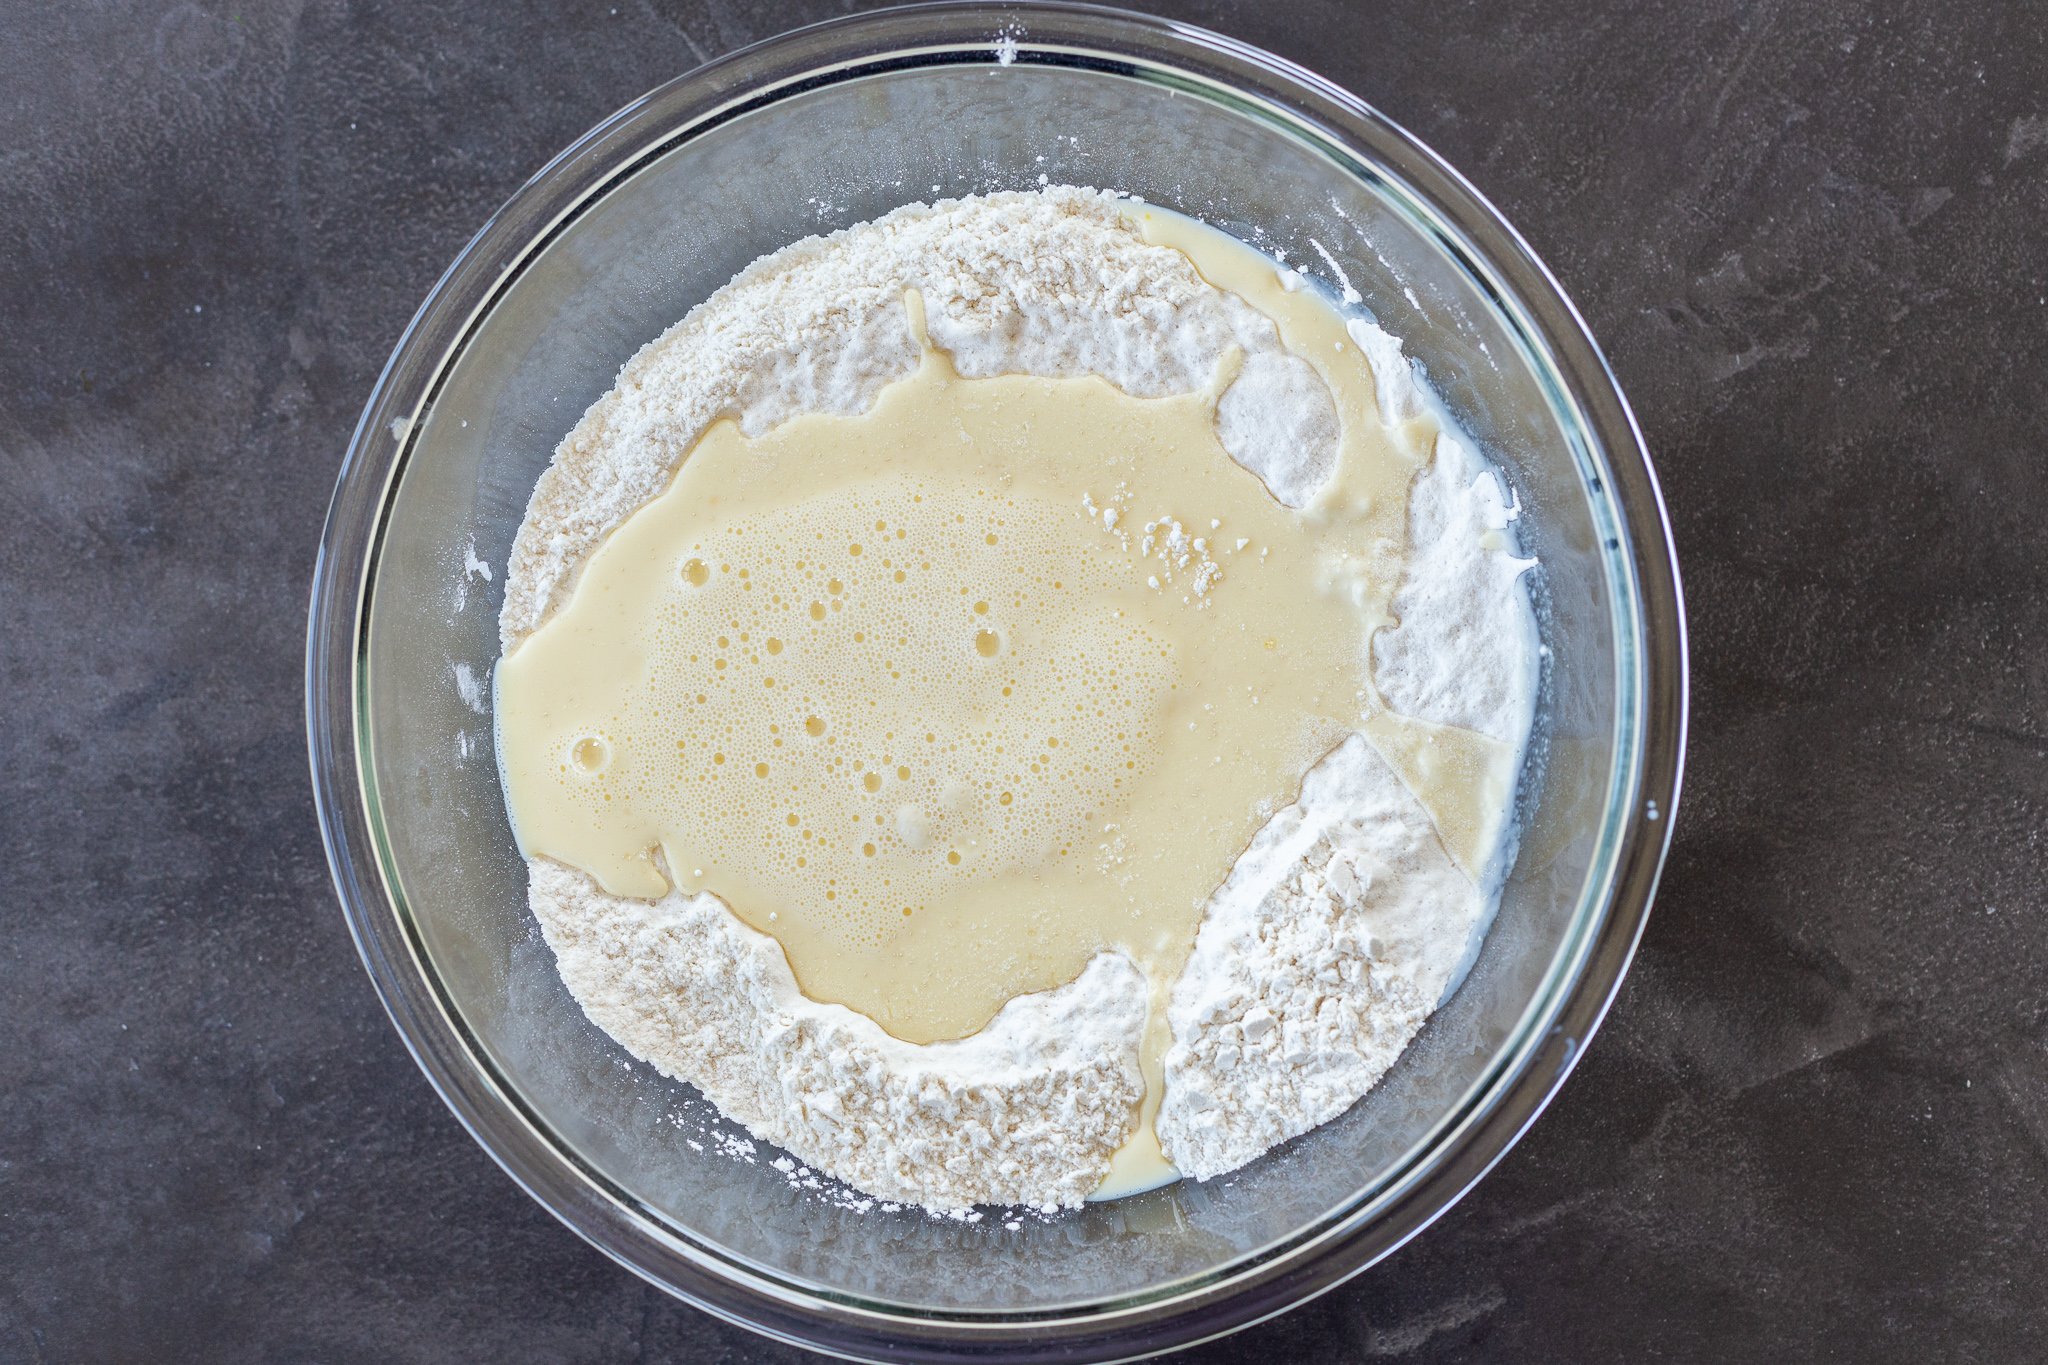
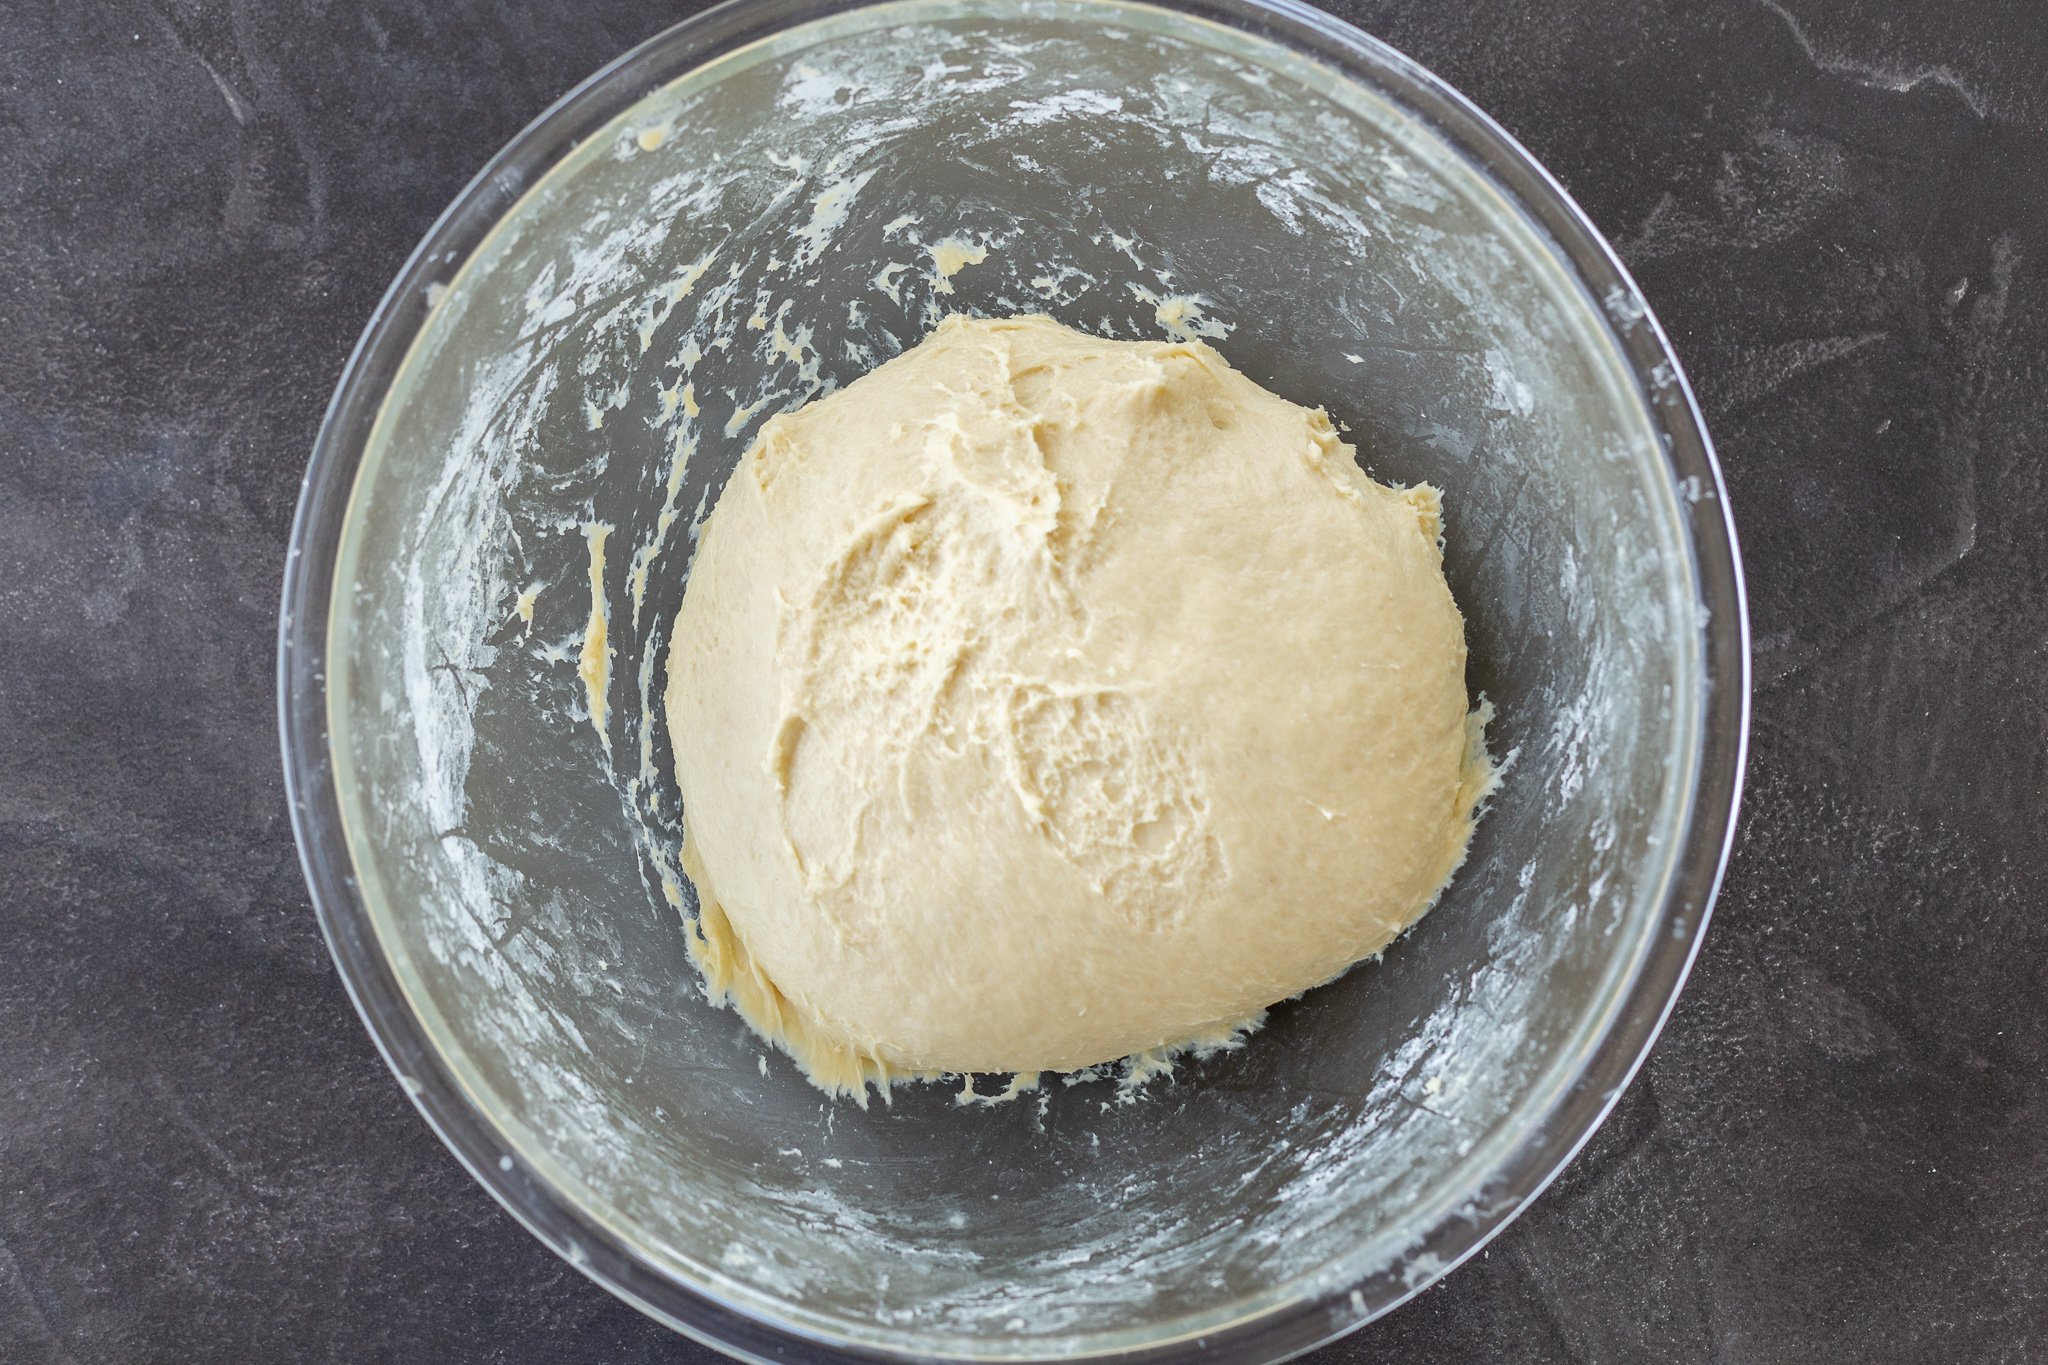
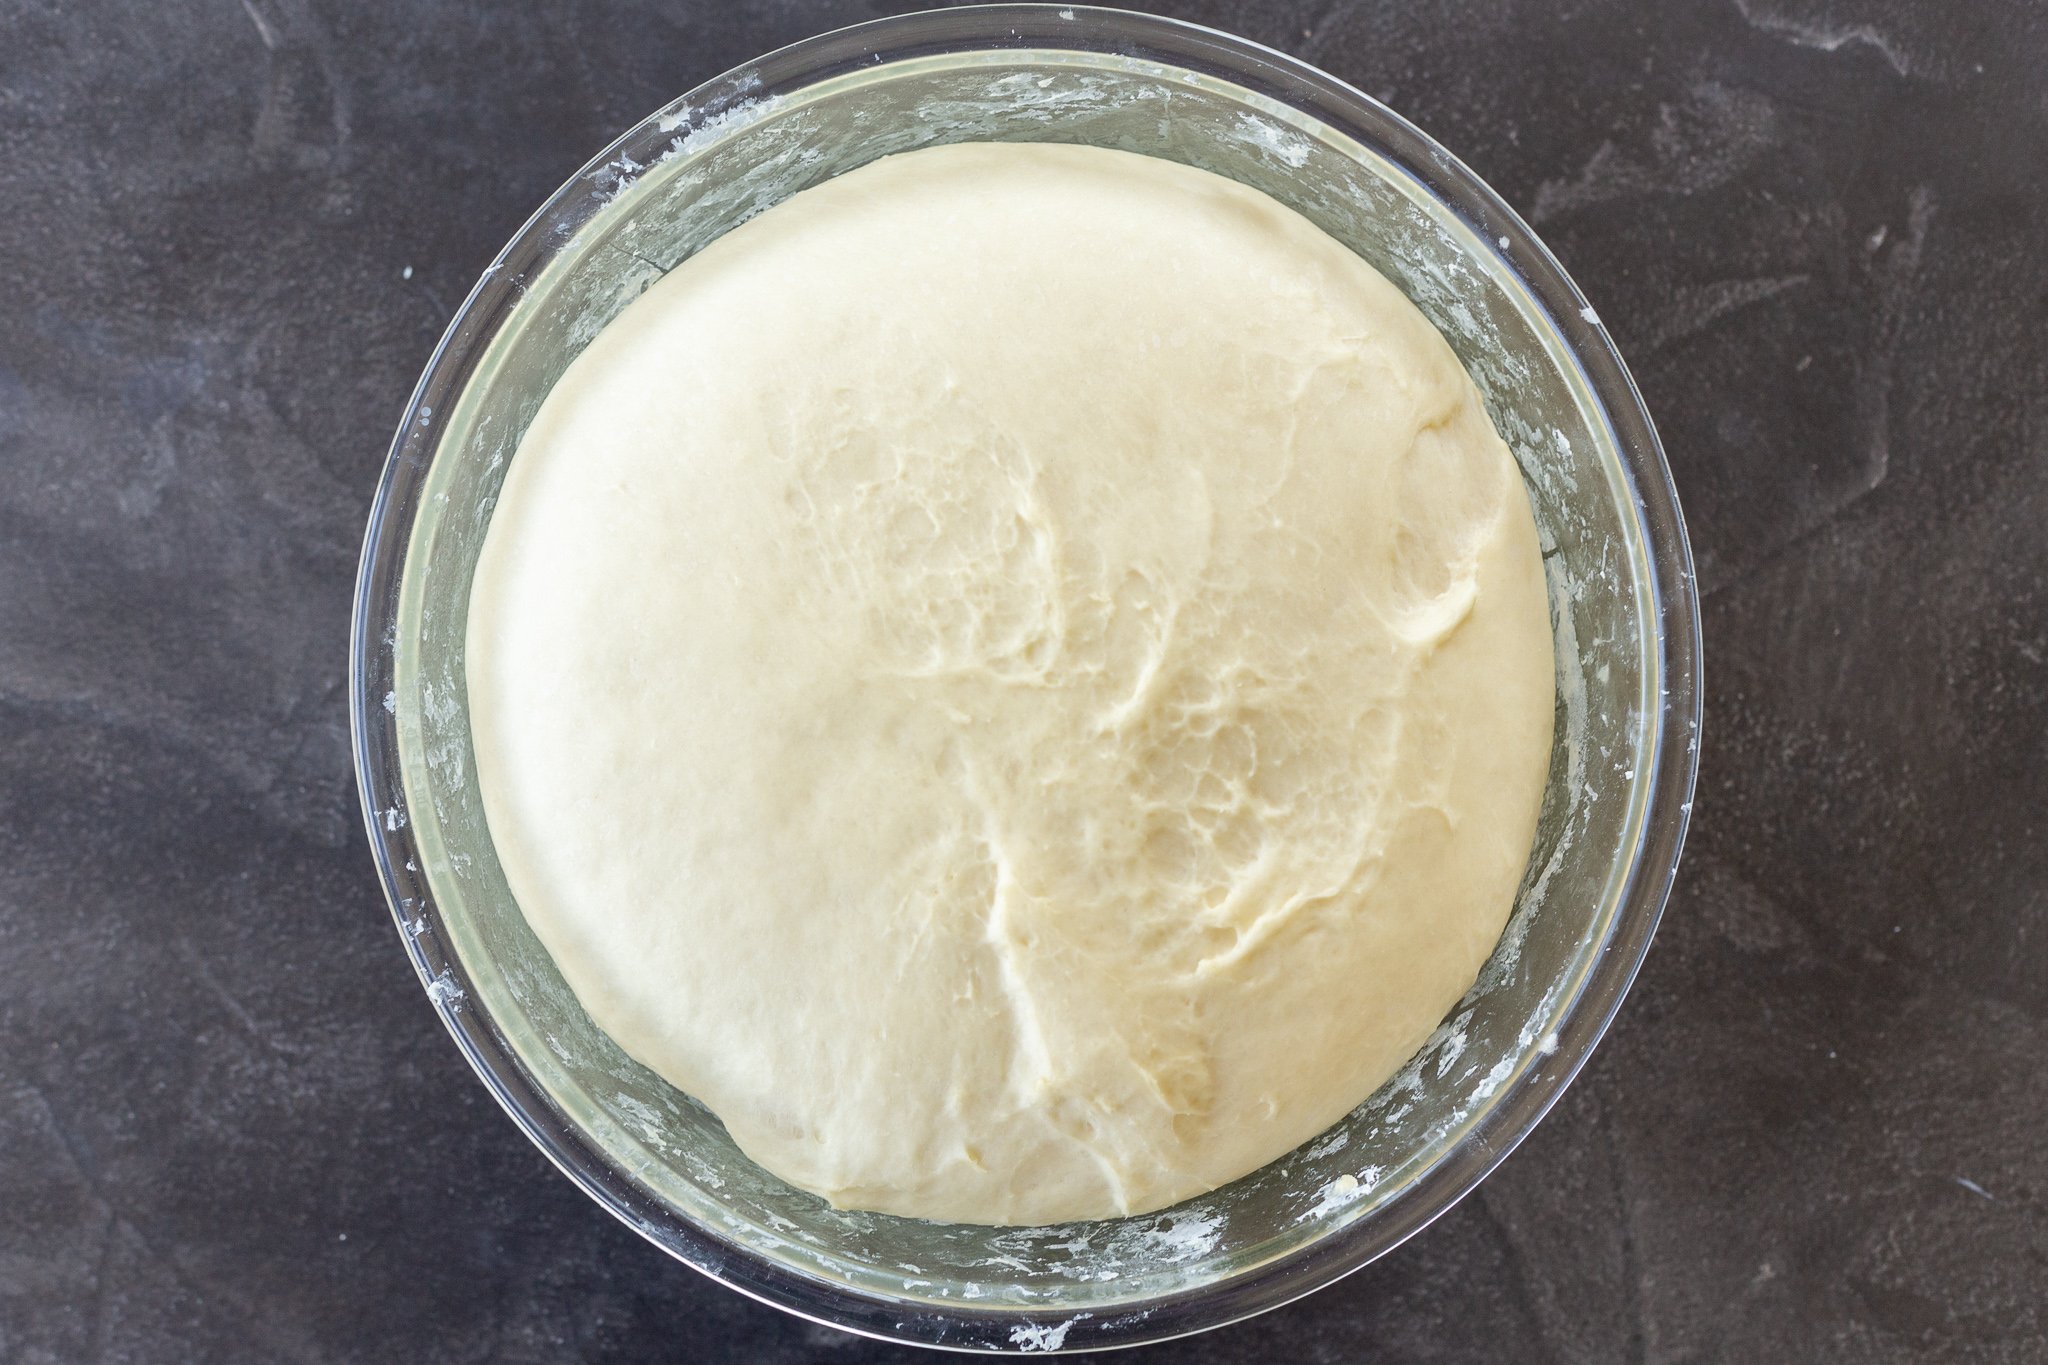
- Make the Dough: First, mix all the dry ingredients together – flour, sugar, salt, and yeast. Lay the mixture out on a flat surface and create a well in the middle to nestle in the eggs and warm milk. Using your hands, mix the ingredients together. Allow the dough to rest for 5-10 minutes. Next, using a stand mixer or your hands, mix in the butter in small amounts, kneading slowly until everything is incorporated. Knead the dough for 10 minutes, cover it with a kitchen towel, and let the dough rise for an hour.
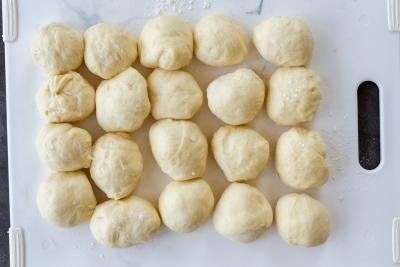
- Separate the Dough: Separate the dough into evenly-sized, round pieces and cover each small portion of dough with plastic wrap.
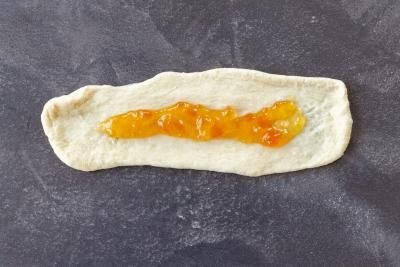
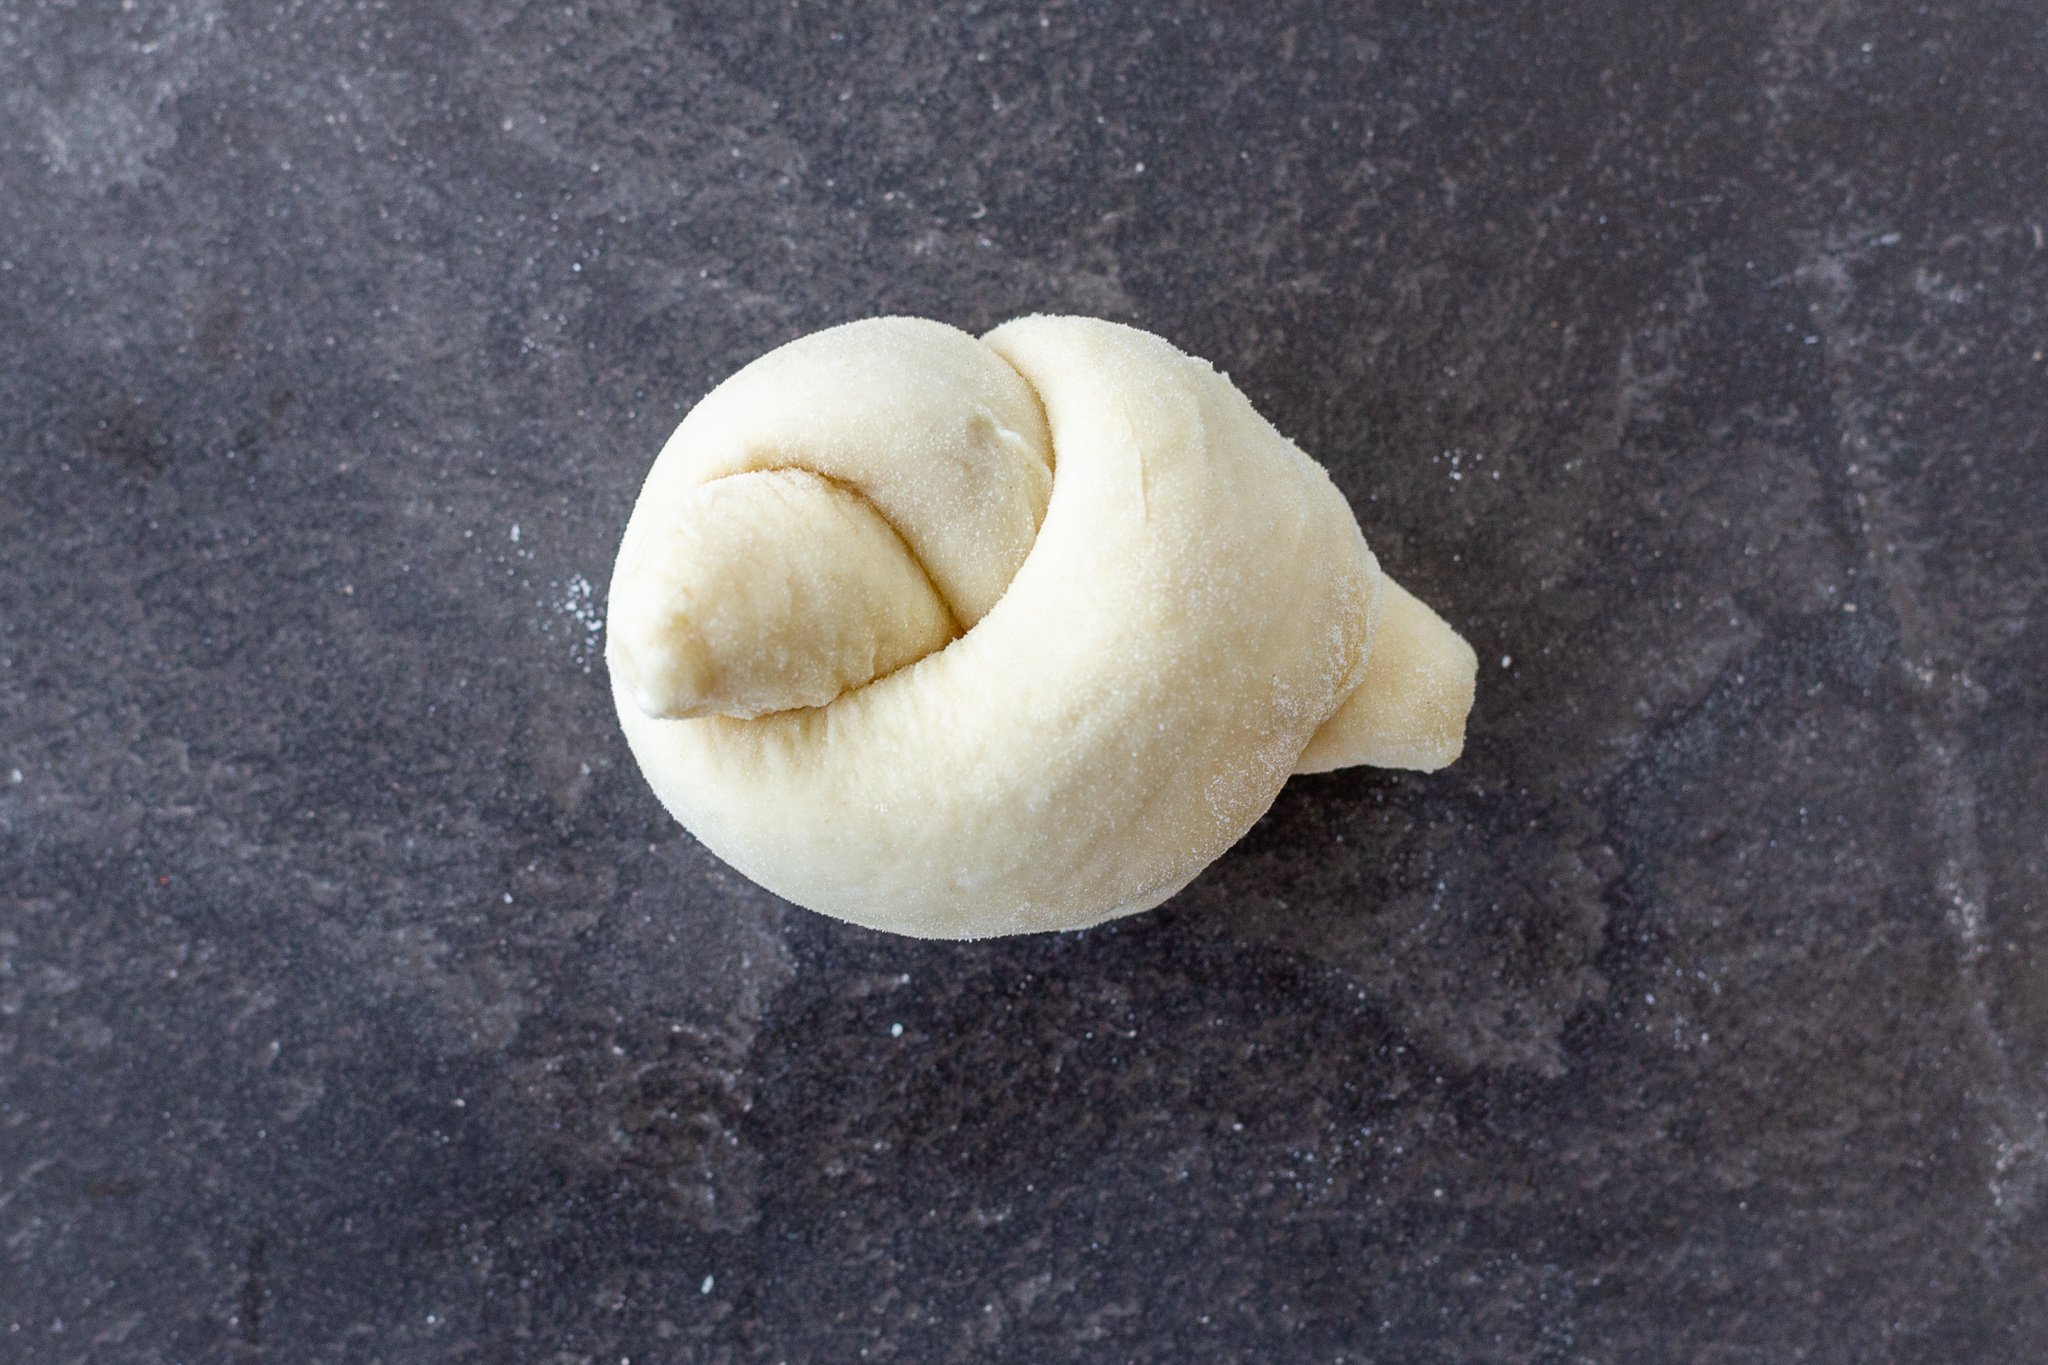
- Roll the Dough Out: White the rest of the dough balls sit covered, roll one dough piece out into an oval shape and cover one half of it with jam. Roll the dough up to secure the jam inside.
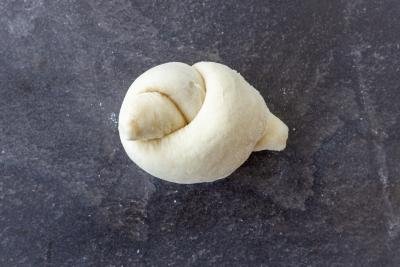
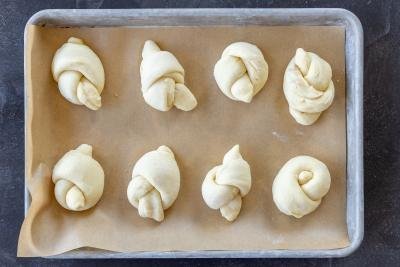
- Tie the Dough Into a Knot: Next, seal the edges and tie each roll into a knot. Repeat until all your dough balls are rolled, filled, and tied.
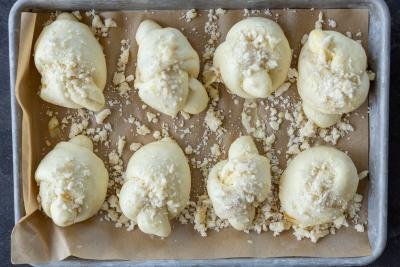
- Prepare the Baking Pan: Line the baking sheet with patchment paper. Place the knots next to each other and cover them with a towel to rise for 40 minutes.
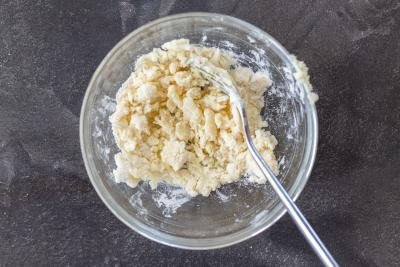
- Prepare the Glaze & Crumb Topping: Next, whisk the beaten eggs with milk, and sugar. Brush the top of each knot with the sweet egg wash. In a separate bowl, stir the flour, sugar, and butter together. Sprinkle the crumb on top of the buns.
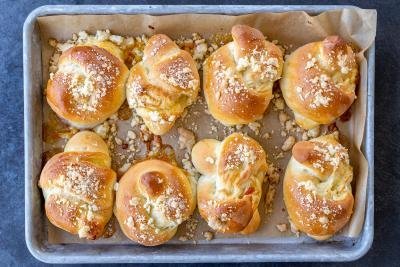
- Bake the Buns: Finally, bake the buns in the oven at 350°F for 20-30 minutes or until golden brown. Dig in and enjoy!
Bakers Tip: If you’ve tried my yeast pastry dough recipe before, know that it can be used for this recipe too!


3 Tips for the Most Authentic Bulochki
A handful of tips will help you get bakery-worthy buns.
- Use butter softened at room temperature. Pull the butter out about an hour before you plan to bake to make it super easy to incorporate in the dough and crumb topping.
- Use an electric stand mixer. Make the kneading process a no-brainer by using an electric stand mixer. If you knead it by hand it can take up to 30 minutes to get the dough to not be sticky. In a stand mixer, it takes just 10 minutes and you’ll save your forearms the stress!
- Make the buns evenly sized. To promote even baking, make sure your bulochki are similar in size.
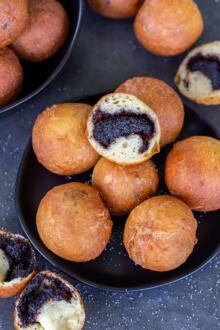
Different Filling Options for Bulochki
The beauty of bulochki is that it can be filled with so many different spreads, jams, and other goodies. Below, find a couple of ideas to inspire you.
- Poppy Seed Filling
- Farmer’s Cheese and Apricot Jam
- Nutella and Rough Chopped Walnuts
- Apple Filling & Sweetened Condensed Milk
- Canned Cherries & Farmer’s Cheese
- Vanilla custard and Berries
Storing, Freezing, & Reheating Best Practices
Below, find all the best practices for storing, freezing, and reheating your bulochki.
- Storing: To keep bulochki on hand for up to 2-3 days, store them in an airtight container on the counter. If you’d like to increase the shelf life to a week or more, store them in the fridge. Note: They will harden at bit with the cold air, but will soften upon reheating.
- Freezing: If you’d like to have bulochki on hand for up to 3 months, freeze them raw on a prepared baking sheet lined with parchment paper. Once completely frozen, transfer them to a freezer-safe bag. When you’re ready, baking them from frozen according to the recipe directions.
- Reheating: Reheat bulochki in a conventional oven or air fryer until warmed through. You can also pop them in the microwave for 30 seconds.
FAQ
If the dough still sticks to your fingers, do you need to mix for longer than 10 mins?
If the dough is elastic you don’t need to knead it much longer. Sometimes you need to simply let it rest a bit longer so it dries out a bit.
Do you only need 1 tbsp of butter for the crumb?
Yes! That might seem like a small amount, but you want just enough to create a nice crumb.
Is this the same yeast dough as your Perfect Pastry Dough?
It’s not! There’s some slight differences, but the dough is just as tasty.
How thin should you roll the dough out?
Roll the dough out as thin as you can without it looking translucent. You’ll want the dough to be thick enough to roll and tie so it doesn’t rip when you handle it.
What kind of flour do you recommend?
Canadian flour is by far the best for baking. It’s higher in protein, yielding a much fluffier and flavorful bun.
More Wonderful Recipes to Try
- Fluffy Poppy Seed Buns (Piroshki) – Sweet buns with poppy seed filling
- Starbucks Morning Buns (Copycat) – Sticky honey buns
- Quick Cottage Cheese Buns – Sweet and salty cheese buns
- Cream Cheese Vatrushka Buns – Farmer’s cheese stuffed buns
Recipe
Instructions
- Mix all dry ingredients together (flour, sugar, salt, and yeast) in the bowl of a stand mixer fitted with dough hook. Create a well in the center, and add the eggs and milk into the well.
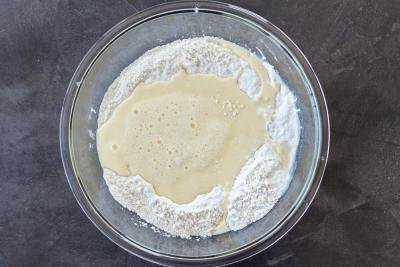
- Mix in the wet ingredients with the dry ingredients. Knead the dough for a minute or so, you may need to use a spatula to scrape down the sides of the bowl. Let the dough rest for 5-10 minutes. Then, mix in the butter in small amounts until everything is incorporated.

- Continue to knead the dough for 10 minutes, or until the dough no longer sticks to your hands. Cover the dough with a kitchen towel and let it rise for about an hour.

- Separate the dough into small, round pieces. If you're using a kitchen scale, each piece should weigh around 35 grams. Cover the dough balls with plastic wrap.
- One at a time, roll out each piece of dough into a flat, oval shape. Add a spoonful of jam to the center. Roll or fold the pastries up, being careful to lock the jam inside by pinching the edges.
- Seal the edges and tie each roll into a knot.
- Line a baking sheet with partchment paper. Place knots next to each other. Cover with a towel and let the knots proof for 40 minutes.
- Preheat the oven to 350°F. Whisk the egg, milk and sugar and brush it on top of the knots. In a separate bowl, mix the flour, sugar, and butter until it forms into crumbs, it's ok if some pieces are bigger.
- Sprinkle the knots with the flour crumbs.
- Bake the bulochki in the oven until they are golden brown, about 20-30 minutes. Enjoy!


I made it work but a little disappointed that the dough I ended up having to add at least a cup more and finished kneading by hand until it felt right. On buns with Poppy seed filling - the dough ripped during baking. On jam filled buns, the jam mostly came out on to the baking sheet. The buns taste really good and the dough is really good but definitely not pretty
Hi Jenn, I am sorry it didn't come out pretty. I use this recipe very often. I think I can help you to narrow down the issue. What brand of flour did you use? That can really make a huge difference.
Came out so good!!
So glad you loved it!
Could you do a video for this recipe?
Hi Anastasiya, I will put that on my list! Thank you for reaching out!
Woke up today craving some sweet Russian ponchiki/bulochki and had all the ingredients for these. The dough was amazing, so soft and moist! Had family over for lunch after church so these were baked in time for tea after. Let me tell you, these were a hit, they were gone in a flash! Thank you for this wonderful recipe!
Hi there! How awesome that you had all the ingredients on hand for this recipe! You know it's going to be a good day when that happens lol! I am so glad that you loved them as much as we do! Thank you for your feedback. Enjoy!
Thank you so much for sharing this amazing recipe! Will surely have this again! It's really easy to make and it tasted so delicious! Highly recommended!
Thanks for the feedback, Allyssa! Glad you enjoyed it.
I think this is one of my favorite recipes I’ve ever made! Ugh, they are SO GOOD. It’s hard to share! Can’t wait to make them again & again!
It's one of my favorites too, since I was a child. Thanks for sharing, Jennifer!
These are so fluffy and delicious. The crumb on top really seals the deal!
Hi Katie- i'm glad you enjoyed this recipe! Thanks for commenting.
if the dough still sticks to my fingers, do i mix for longer than 10 mins?
If the sough is elastic you dont need to knead it much longer. Sometimes you just need to let it rest for a few minutes and knead a little longer.
Great recipe! I used this recipe for Moscow buns, poppyseed rolls only one less egg if I need thicker dough. Thank you.
Hi! How many grams are 1 cup of flour? The recipe have 4 cups of flour. Thank you!!
Amazing these bulochki knots!
I am not sure 🙂 try to see what Google says
Hi, I want to make this recipe today but it says that for the crumbs its 1 tbsp of butter but on the pic it looks like way more than that. So I wanted to know how much butter you use for the crumbs please? And when do you actually use the 1 tbsp. Thank you!
Sorry for confusion, this recipe was doubled when I took pictures. Ingredients are correct!
Hi thanks for sharing this yummy looking recipe. Very nice of you to share. Question on the crumbs, in the picture it look way a lot than just two tablespoons of each ingredients. I want it perfect like yours. And how many breads did you ended up making?
You will end up with about 30 of them. It is two tablespoons of each ingredient. In photos it may look different because on zoom in on many of them.
Wonderful recipe , this dough is one of the best I have ever worked with! Thank you..
Hi, can you please tell me if you used only 1 tbsp of butter for the topping? On the pic it looks like there's more. Thank you, I really appreciate your feedback.
Hey, this is great to hear. I haven't made this buns in a while. I think its time. My favorite part is the crumbs on top 😉
Ohhh I'm glad I found your blog/site!!
I can already see favorites 🙂
I hope all your recipes will be perfect! Keep me updated on recipes you try, I like hearing from people. 😉
Is this the same yeast dough as your Perfect Pastry Dough?
No, this dough is a little different but it's also very good.
also how many pieces did you end up with and how thin do you roll them out?
Pretty thin but should still be easy to work with.
You say to use jam for filling but in your pictures it looks like you're using canned fruit?
Actually it's fresh peaches with sugar. But usually I use jam.
Gotcha, my dough came out very sticky even though it was in the mixer for about half hour. Are the eggs and milk supposed to be warm/room temp?
Yes, it's good when you hear milk just a little. Depending on a flour you use you may need to add just a lite more of the flour. I use Canadian flour.
which canadian flour do you use?
I used Rogers Brand but all Canadian flour is higher in protein so it would work great in this recipe.
Roll out small piece of dough into a oval shape. Cover half of it with jam and roll into long roll. Tie it into a knot.
How exactly to I roll them up? I'm a little confused:/
Roll out each piece into a flat, oval shape. Cover ½ of each piece with jam. Roll them up into a long log, leaving jam on the inside. Seal the edges and tie each roll into a knot.
wouldn't be too sticky, as long as it was kneaded enough. The only reason the wouldn't rise is due to yeast. Maybe it's outdated?
I fallowed the recipe and my dough turned out sticky and now its not rising? idk what I did wrong?
Hi, shw doesnt spicify about the yeast but you should use instant dey yeast since you don't need to proof it. 4 cups of flour is way too little for 1 1/2 cups of milk. Im doing it rigth now and only used 1 C milk and still had to add an additional C of flour but dough looks perfect. Hope this helps!
It depends on the flour brand.