A homemade baguette is a true treat! Better yet, this recipe requires only four simple ingredients and absolutely no kneading.
Baguette is perfect for every occasion. From soups to salads to hearty roast dinners, fresh baked bread is always welcome on our table.
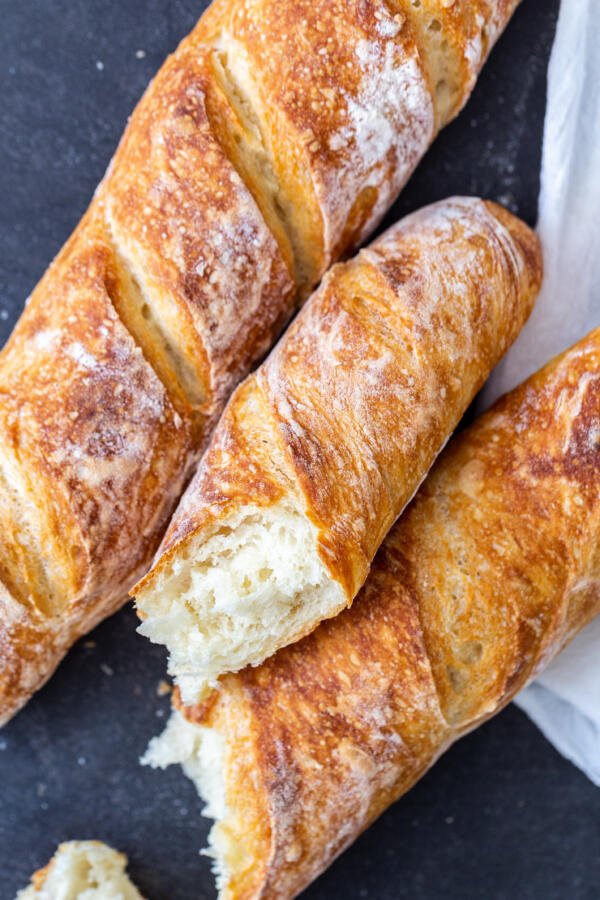
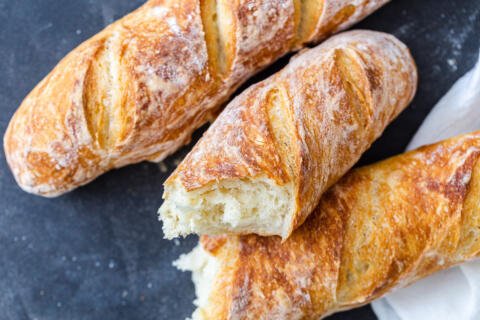
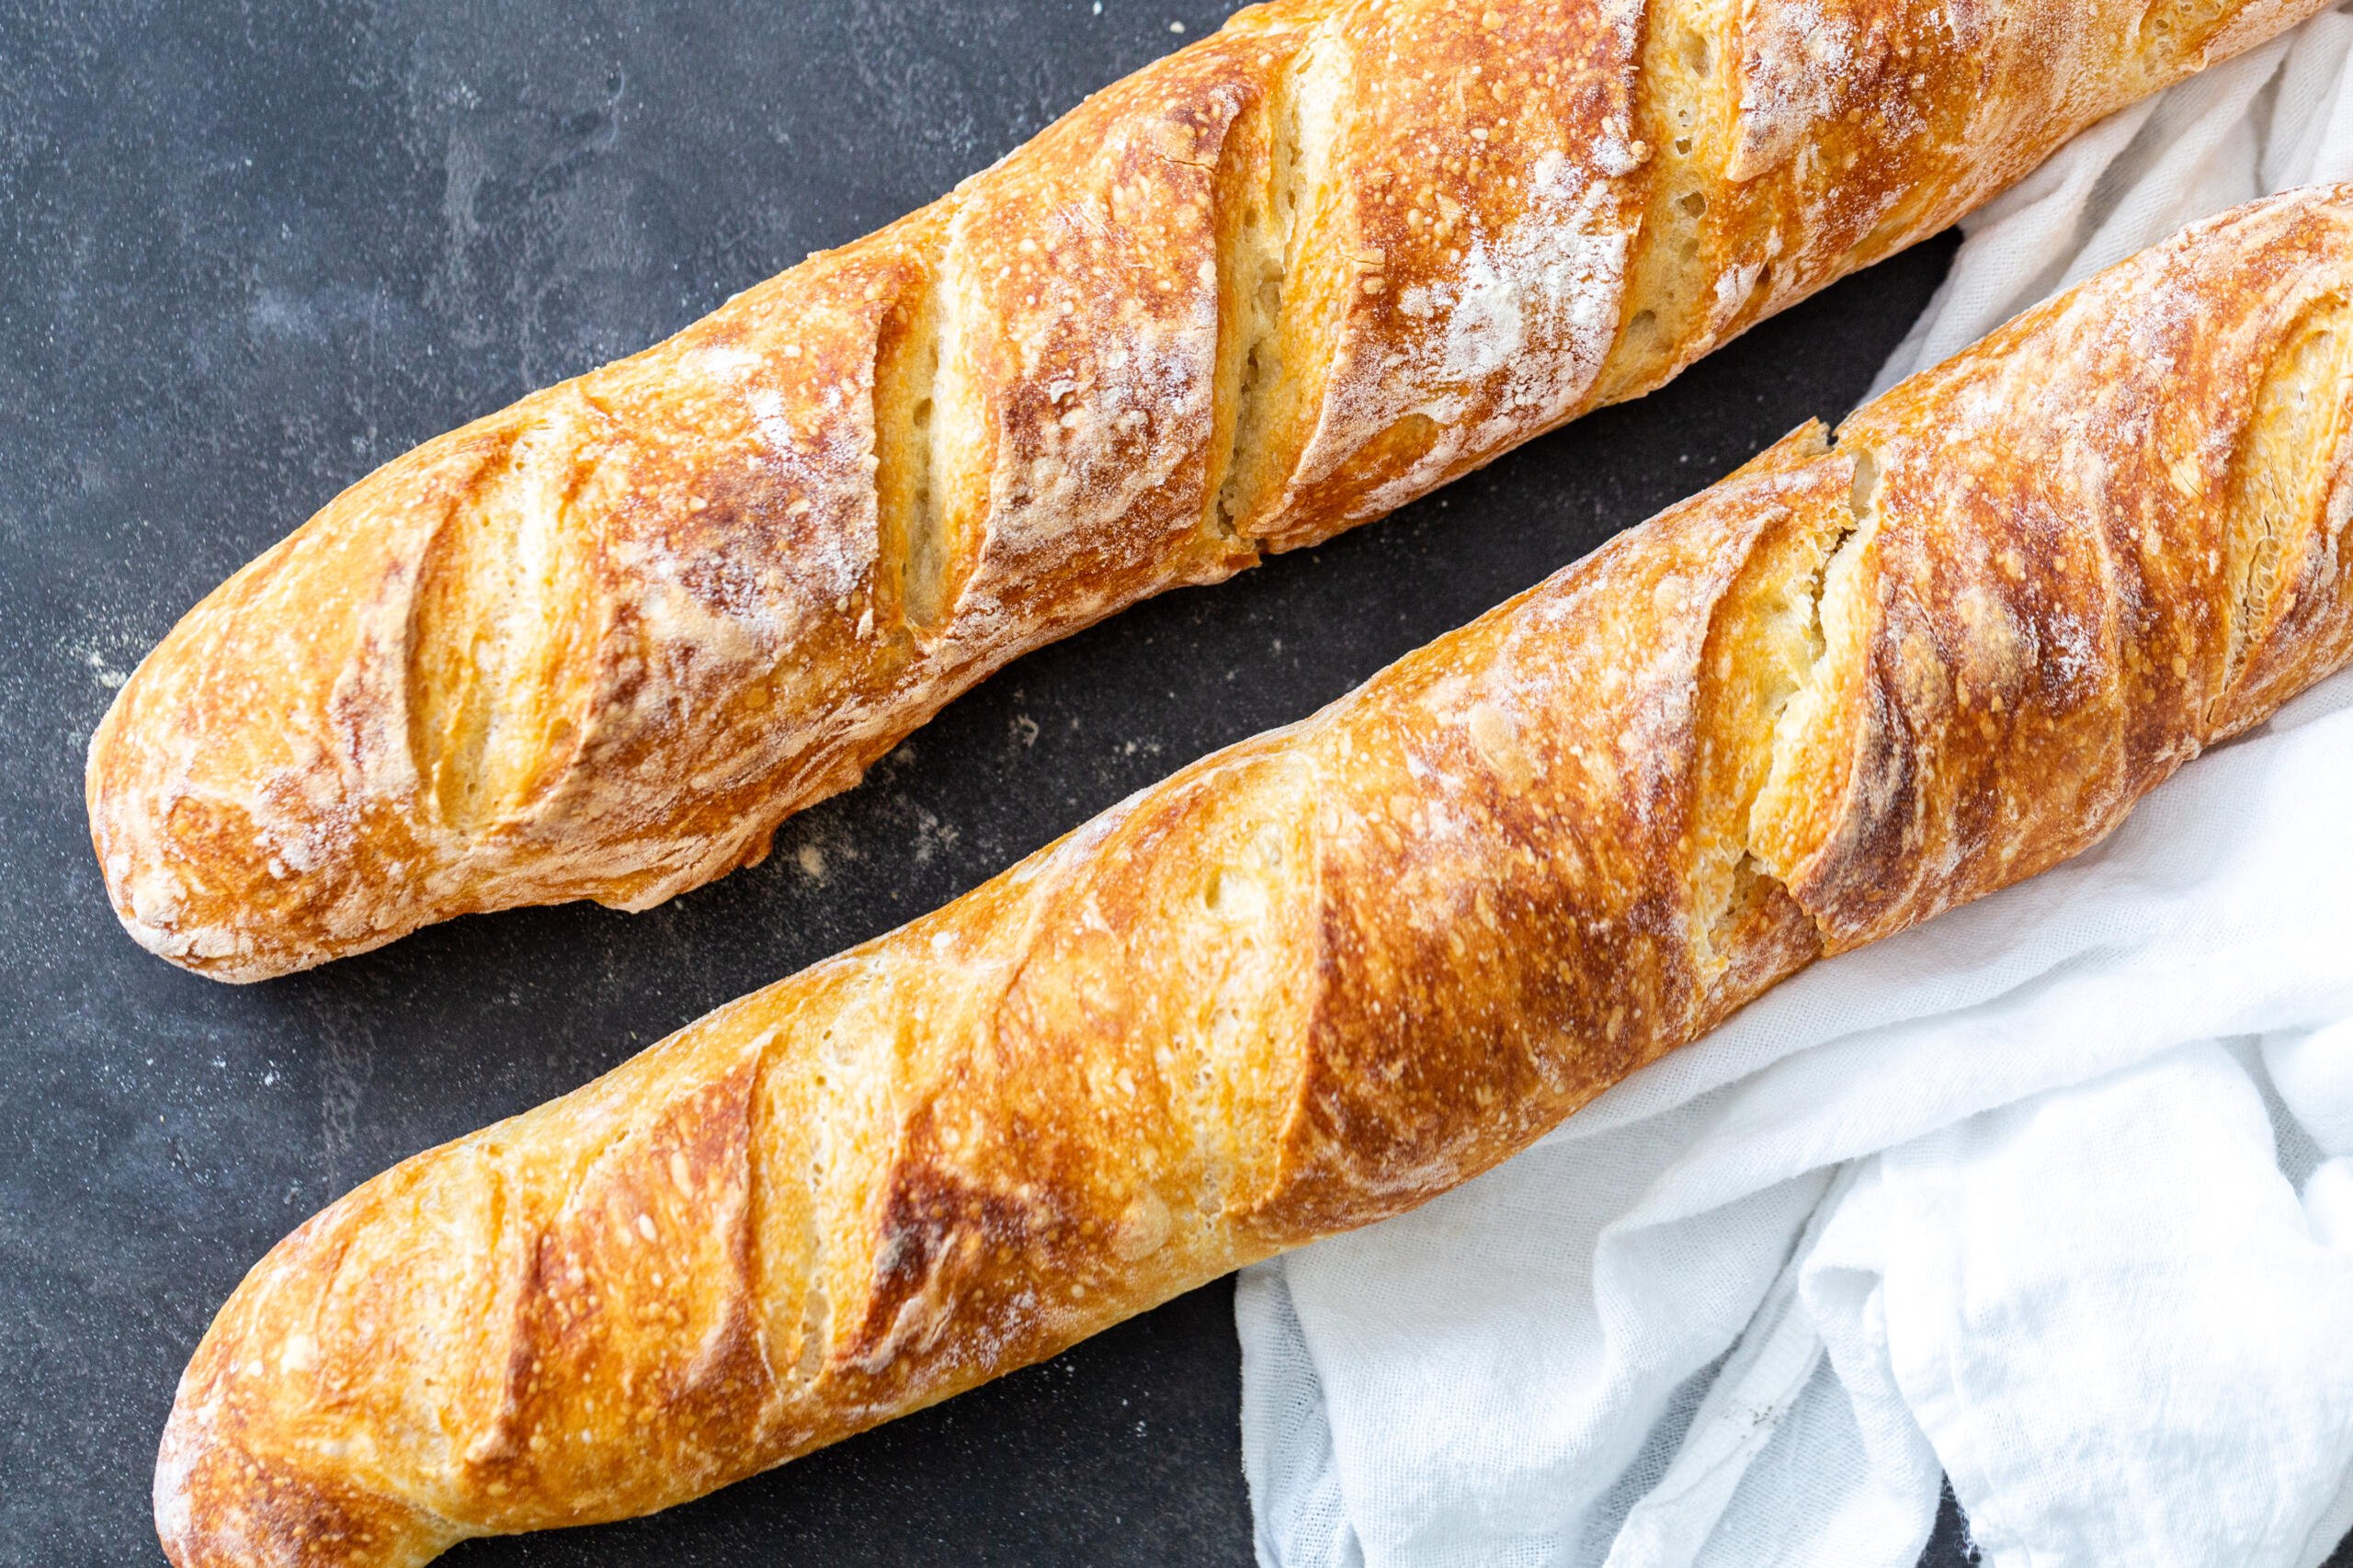
Baguette making can be an extremely time consuming process, but with this no-knead recipe you will cut corners without compromising taste. We are obsessed with the chewy inside and crispy exterior. It’s just like the baguette we had on our last family trip to Paris!
What is Baguette?
If you have eaten at a French restaurant, it’s likely you have tried this iconic bread. Simply put, a baguette is a long, thin loaf of French bread that is characterized by a crisp crust and chewy center. The ingredients are pure and simple, consisting of water, flour, salt and yeast.
How Do You Make Baguettes From Scratch?
This method is the easiest way to make baguette and happens to also be my personal favorite. Follow these simple steps to nail the loaf each time:
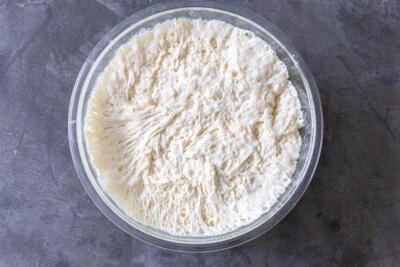
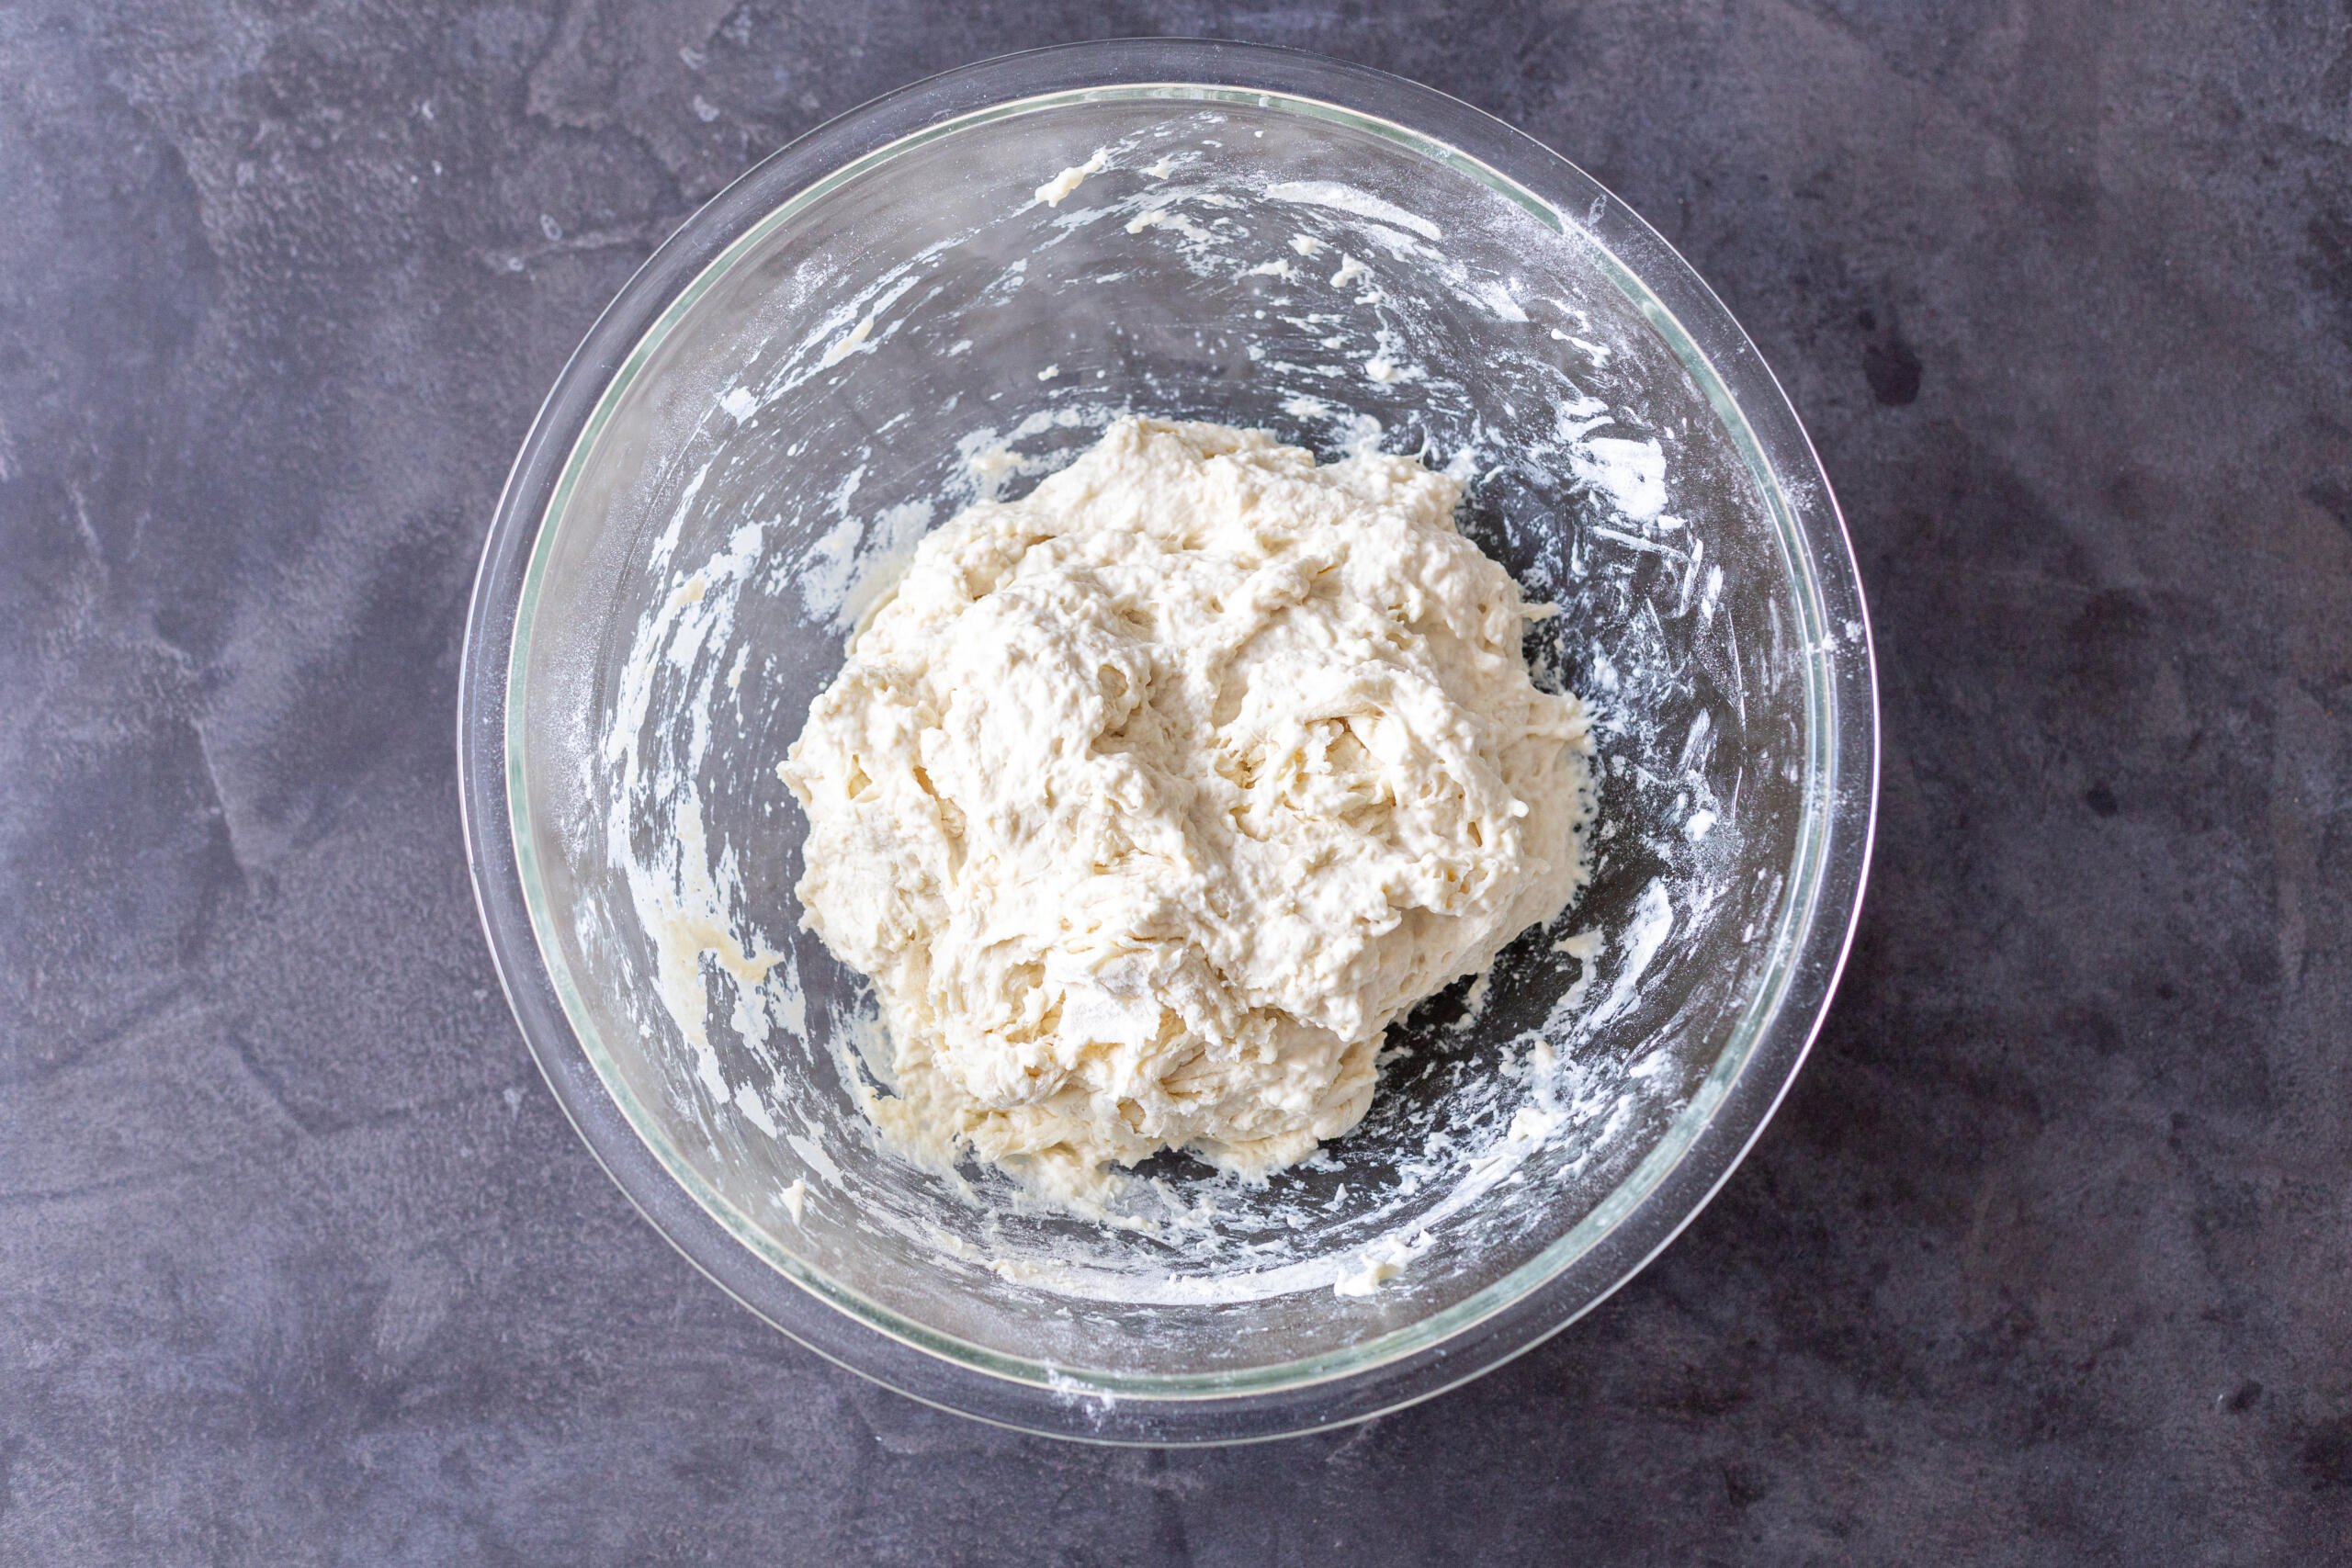
- Mix the dry ingredients together and add water. Cover with plastic wrap and let sit overnight (up to 20 hours) on the countertop in a well oiled bowl.
- Generously flour your hands and your baking sheet.
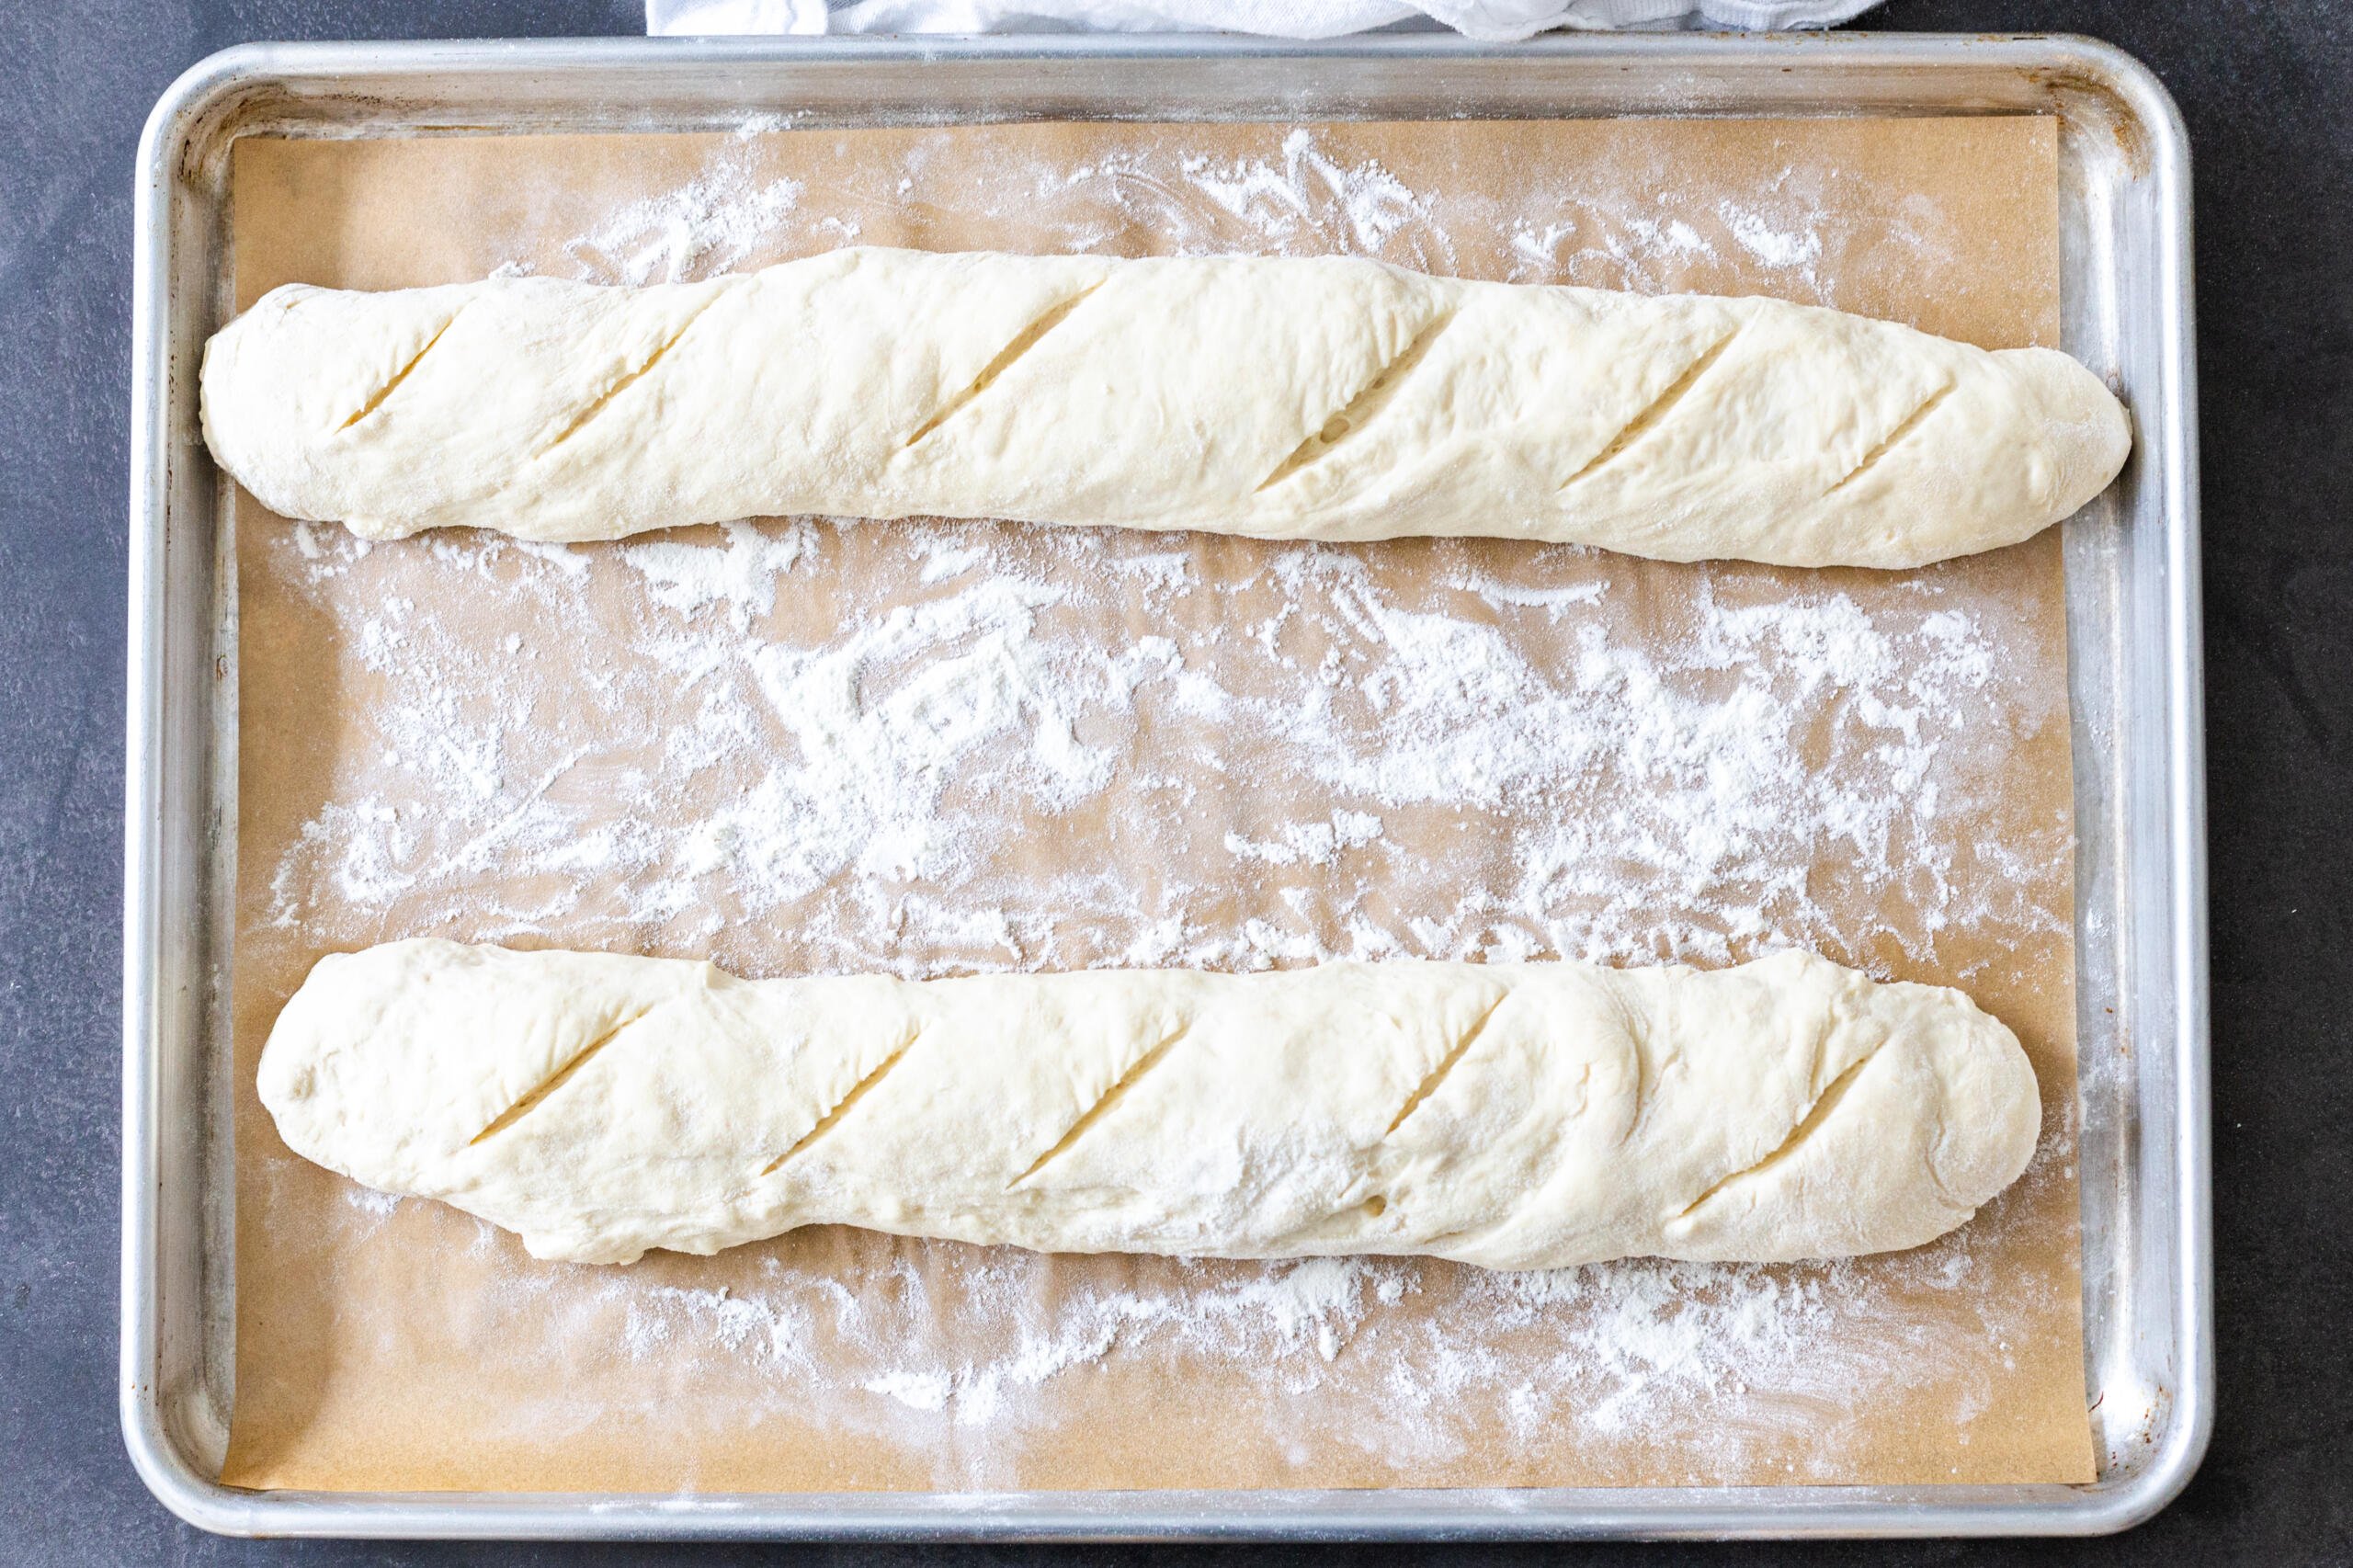
- Form dough into baguette shape (about 12 inches long) and let it rise in a warm place for 1-2 hours. Follow this video tutorial for tips on shaping the dough.
- Bake in the oven for ten minutes with a pan of boiled water resting on the bottom rack. Remove the water and bake until golden brown.


DON’T PANIC! The dough will be really sticky and that’s perfectly OK. To make handling it easier, make sure the work surface is really well-floured or wet your hands periodically throughout the shaping process. I also love using a dough scraper for easier handling.
Tips for the Best Baguette
- Use the right flour. Try using flour with higher protein content to get the best texture. A couple of my favorites include King Arthur or Bobs’ Red Mill. Any Canadian brand will typically fit the bill.
- Score the top with a very sharp knife. Scoring, or slicing, the top of your baguettes isn’t just for decoration. When you initially shape your bread, you are creating a very taut surface. When you pop your baguette into the oven without scoring the top, the heat causes a burst of gas called an “oven spring” that can rupture the top of the bread and destroy its shape.
- Freeze and reheat your baguette. I like to bake a couple loaves of bread at once and freeze a couple for later. Reheat them in the oven and they will be just as good as freshly baked bread!
- Make sure your yeast is fresh. This common mistake happens to the best of us. Over time, active yeast deactivates and loses its ability to make your bread rise and fluff. Always check the label to make sure it’s not expired!
- Don’t skip the steam bath. The steam bath is crucial to making the outside of your bread crusty. It’s well worth the extra step!
How to Shape The Baguette
Serving Baguette
I probably don’t have to tell you too much about how to enjoy baguette, but here are some of my favorite ways to serve it.
- European-style butter or high-quality olive oil. Pulgra and Kerrygold are delicious options you can find at most grocery stores.
- Smoked Salmon Dip. This 15-minute recipe is super easy and features an instructional video with yours truly and my husband, Tim! 😉
- Slathered with Raspberry Jam. Our recipe only requires 3 simple ingredients and our boys are hooked on it.
- Alongside a steaming bowl of borscht. It’s sorrel season! Pair a toasty piece of baguette with our schavel borscht.
- Make a steak sandwich. C’mon, you deserve one!
- Serve up some bruschetta. Nothing says summer quite like bruschetta made with farmer’s market tomatoes.
FAQ
Why are my baguettes flat?
When shaping the baguettes you will need to use ample flour to successfully shape the baguettes- have a well floured surface and hands, and keep folding the dough until you get a tight, skinny log/baton shape. Watch this tutorial on shaping the dough.
Why is the dough sticky or wet?
Rest assured it is normal for the dough to be very sticky and wet as this is a high hydration dough. More flour is added when shaping the dough-you will need to have well floured hands and surface when shaping the baguettes.
What if my dough is rising faster than 12-20 hours?
This dough needs ample time to rise because not a lot of yeast is called for. The longer it sits, the better the final texture and taste. You may find that the dough rises much faster if you live in a warmer, humid climate. In this case, the rising time may be closer to 12 hours- you can place the dough into the fridge for the remainder of the rising time, if desired.
Why is the crust so hard?
Baguettes are known for their crispy, golden exterior. If you’d like to soften the crust, wrap your baguettes in a clean kitchen towel after baking.
How many baguettes does this recipe make?
This recipe will easily yield 2-6 baguettes, depending on the size of baguette you prefer!
Recipe
Ingredients
- 6 cups all-purpose flour (depending on a brand, you may need to add more flour)
- 2 1/4 cups lukewarm water
- 2 tsp yeast
- 2 tsp salt
Instructions
- The night before, combine all ingredients together. First mix the dry ingredients together and then add water. Mix the ingredients until the dough comes together. Cover it with a plastic wrap and let it sit for 12-20 hours on the countertop.

- The following day, the dough should be wet, sticky and bubbly. Generously flour your hands and the baking sheet.
- Take the dough (if it sticks, apply more flour to your hands) and form a baguette shape. You will get about 4 baguettes. For tips on shaping the dough, watch this tutorial. Place it on a baking sheet and sprinkle a generous amount of flour on it. Cover with a towel. Let the dough rise in a warm place for about an hour. Score the top with a sharp knife.

- Preheat the oven to 450°F. You will need to have 2 shelves in an oven. Fill a deep baking pan with 2 cups of hot boiled water, and place it on the lower rack, inside your oven. This will make the bread crispy on the outside. Place the bread on the middle rack. Remove water from the oven after 10 minutes. Keep on baking the bread for another 20 minutes or until golden crispy brown.


In January 2026, I updated this recipe after testing several versions. The reviews were all over the place—some people had great success, while others struggled with the high-hydration dough.We landed on 75% hydration as the easiest level to control and adapt for any baker. If you choose to go with higher hydration levels, I’ll list them below. If you do test them, I’d love to hear your feedback. Here are the test I have done:
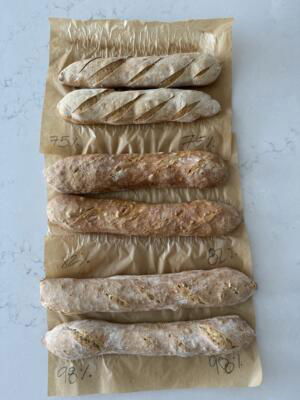 82%:720 g all-purpose flour, 590 g lukewarm water, 2 tsp yeast (about 6 g), 2 tsp salt (about 10 g) 98%: 720 g all-purpose flour, 706 g lukewarm water, 2 tsp yeast (about 6 g), 2 tsp salt (about 10 g)


Loved this recipe. It was so easy and made such a nice baguette. The crust is nice and crusty and the inside has some chew but not too much. I used the baguette pan that I bought recently and made three loaves for that pan. I will definitely be using this again.
Hi Jennifer- thank you for the feedback! A baguette pan can definitely be so useful here. 🙂
Can I use bread flour?
Hello Jaime! Yes, you can use bread flour instead of all purpose flour in this recipe. In fact, I've used both. All purpose flour tends to give you a tighter crumb, but bread flour often has a chewier texture and an open crumb. It’s up to you!
Found this totally by accident, set up last nite, just got done baking & now enjoying the best ever crunch and flavor. Great easy recipe thank you ever
Hi Cathi, you made me smile reading your comment! Thanks for coming back to share about the crunch 🙂 Glad it came out great for you!
Are the nutritional stats per recipe, loaf, or serving?
Hi Jannett- the nutrition info is per loaf!
I just started my first batch of this recipe, I’ve used many different no knead baguette recipes and I like the overnight aspect of this one. I always feel like that makes the bread richer and tastier. But based on past experience, I added 2 teaspoons of sugar to the mix. What do you think about that? also, I have baguette pans, so I usually just cut the wet dough into strips with a bench knife and dump it in. But I can see that the folding she does in the tutorial might make the bread have more air.
Hi Marion, I actually don’t add sugar to this recipe because the long overnight rise gives the yeast plenty of time to develop flavor naturally. That said, 2 teaspoons of sugar certainly won’t hurt anything—it may give the yeast a little boost and can help with browning.
As for shaping, the folding technique isn’t required, but it does help build structure and can create a lighter, airier crumb with larger holes. If you've had success transferring the dough straight into your baguette pans, keep doing what works for you! The folding step is just an extra way to encourage a bit more volume and texture.
Could you please respond with the old recipe? I think water ratio, rise time and over temp & times were different.
The old recipe worked perfectly RMT for me, while the new one was a flop :/
Hi Marina! You're right- they were slightly different. The original recipe was at 98% hydration. Here are the ingredient and amounts for that: 720 g all-purpose flour, 706 g lukewarm water, 2 tsp yeast (about 6 g), 2 tsp salt (about 10 g). I'm glad the original was your favorite (it's mine too!)
I bake for family and friends, so on behalf of all of us “thank you!” For the yum and easy recipe 🙂
You're very welcome! And thank YOU for trusting my recipes, Marina!
I used French flour and the first rise was great however no rise after that and the loaves were very flat. Very disappointing.
Same for me with normal flour after ~17 hours of rising. It rose great the first time, barely if even at all the second.
Hi Abigail! I'm going to guess that the it over proofed on the first rise and the yeast was exhausted and no longer was able to rise any more during the second rise. Next time, try to reduce your room temperature, or let it rise for a shorter period of time.
Oh no, Taryn! I'm sorry about that! I don't have much experience with French flour, but after a bit of research, I feel that the issue was in the flour. I read that French flour tends to absorb less water and ferments faster than standard flour. This may have led to your yeast doing well during the first rise but then it didn't have any energy left for the remaining rise. Basically, it may have overproofed on the first rise. I hope you can try again with a different flour!
One thing I do differently is leaving the water bowl in the oven for the full 30 minutes. I personally prefer it that way because it gives the baguettes a much crunchier exterior and that beautiful golden‑brown color I love. I’m really drawn to a deeply crunchy, artisan‑style crust. I also don’t like opening the oven midway or 10 minutes in, since it releases so much heat. That’s just my preference, though—to each their own.
I absolutely love this recipe and plan to keep using it while continuing to perfect my technique. I also accidentally let the dough proof for almost two hours this time because I forgot about it—and it turned out just fine.
Thanks for leaving a comment, Chloe! I enjoyed reading about your technique, and I'm sure a lot of readers will, too. I'm glad the baguettes still worked out even if they did accidentally proof for longer!
Can you use quick rise instant yeast.
Louise, I typically use active dry yeast, but instant yeast can work, too. Just add it directly to the flour, and it might speed things up a bit, so keep an eye on that. Good luck 🙂
Do not cook another 20 minutes after you remove the water! I was so glad I checked because after 14 minutes they were almost too done. Will only do 10 minutes with water and 10 minutes without water next time. But they were still delicious!
Hi Kelly- wow, it sounds like your baguettes baked quicker than typical! I'm glad you were keeping an eye on them. Thank you for the feedback!
Hi just wondering would leaving it overnight not overproof it? Can I proof overnight in the fridge or would it not be ready for the next day baking
Hi Ruby- leaving overnight will not overproof it; this bread needs to sit for 12-20 hours at room temp. I know it seems like a lot of time but just trust the process!
This was my first time making baguettes and I know I will be returning to this recipe! I had to improvise a bit as I started my batch at 8PM not realizing I had a meeting the next day and wouldn't be home to shape the loaves at the 20h mark, so I ended up shaping them after a 14h rise and popped the baking sheet in the fridge for 10h. I let them sit at room temp for about an hour before scoring and baking with the steam bath and they came out nicely. Thank you so much for sharing this!
Hi Mariska- I'm so glad to hear this! Thank you for sharing your feedback with us.
Do you freeze it baked or raw?
Hello Wendi! I typically freeze it after it's baked. They thaw pretty quickly afterwards 🙂
Thanks!
what are the utensils to make baguette? why are there no answers
Hi Charlotte- which utensils are you referring to? The post has the dough scraper linked, if that's what you are referring to. Happy to try to help if you provide more details!
Made a half recipe. Really came out well with a great taste and crunch on the outside.
15hr rise and it was 2 beautiful loaves
That's great to hear, Ai! Enjoy your baguettes!
Wow. What a simple recipe to follow. Turned out wonderfully and will continue to use this recipe from now on. Thank you!
Thanks, Mackey! I really appreciate you leaving a comment. Enjoy!
This is fantastic! Have made twice and no issues whatsoever. Easy and delicious (I hit with some salt prior to baking and my family loves it). Quick question- am I able to let it rise for like 30 hours? Running out of time tonight and don’t want to ruin the batch.
Hi Dee! That's so good to hear! I'm afraid it may overproof at 30 hours, unless you leave it at a much colder spot for that long time? Let me know what happens!
Hi, I accidentally left mine on the counter too long. Can it be saved?
Oh no, J! It happens, I know 🙂 Try making into focaccia bread instead. Follow this focaccia recipe , starting with step 5 since you already have your dough. I hope it works out!
Followed this recipe ,so simple to do and it made the most amazing baguettes we've ever had so will now be making these weekly, thank you 😊
Andrew- thank you for the feedback! So glad to hear ya'll love them!
Love this recipe, I make it often and my family love the bread.
I'm very glad your family loves this bread, Yasmin. It's always nice to hear families enjoying my recipes!
Loved this recipe! I followed it as written and it came out great. I did use KA bread flour which has higher protein. I did 720g (6 cup equivalent). I also threw some ice cubes on the floor of the oven when I put the baguettes in to get some more initial steam. Nice and crusty!! I plan to freeze 2 of them to use for later.
Hi Daniel! I'm very glad these baguettes turned out so well for you. Thank you for the specifics of what you did too, as that is very helpful to know. Enjoy the baguettes!
I must have printed an older version of this recipe. It called for 3 cups of water not the 2 1/4 listed in this recipe. It was so wet I couldn't shape it.
Hi Tracy! I recently updated the recipe, so that's likely where the water measurement difference occurred. I decreased the hydration from 98% to 75%, making it easier to control and adapt for any baker. If you choose to try again with the updated ratios, let me know how it goes!
Can you make a single round loaf instead of baguettes? Thanks!
Hi Barb, I haven't tested the recipe as a round loaf so I probably wouldn't recommend it. If you want a boule, I would recommend either my "dutch oven no-knead bread" or sourdough bread recipes. Hope this helps!
Worked great!! I cut the recipe in half, rose about 12 hours. I used an 80% whole wheat flour.
That's so great to hear! Thanks for leaving a comment, friend!
Thank you
You're welcome! Hope you loved it!
I’m gonna give this a try, but I was wondering after I bake the loaves can I wrap them and freeze them?
Hi Karen! It is absolutely fine to freeze the baked baguettes! 🙂
I reviewed other comments about amount of water if the dough was to dry I live in a very dry climate and did try that however the baguette were not as good I have also add just a little more salt and decreased the flour to 5 1/2 cups. This change did give me the texture I was hoping for.
Thanks for sharing , Duffy. I definitely realized how much different climates affect the whole baguette making experience. It's amazing but definitely can be a little bit frustrating! I am glad you figured it out and hope you're enjoying your bread now. 🙂
Hello! I used instant yeast. Do I still need to wait the 12-20 hours? My dough has already doubled in size
Hi Nicole! Do you live in a super warm climate? I'm surprised yours doubled so fast! How long did it take? If you feel confident that the dough is not rising any more, you can continue with the next step. Let me know what happens!
What are the original water measurements? I have used this recipe many times and it turned out perfectly. This time, the dough was dry after mixing so I added more water. This morning when I turned my dough out it wasn't as sticky as in previous times. It is rising now so we will see, but I would really like the original measurements as it was perfect for our climate. Last year at our church Valentine dinner, a woman said that the baguettes tasted and looked just like the ones she had eaten in France! Thank you.
Hi Brenda, The original recipe was at 98% hydration. I will add a note to the recipe to state that.
98%: 720 g all-purpose flour, 706 g lukewarm water, 2 tsp yeast (about 6 g), 2 tsp salt (about 10 g)
Please report back with your results!
I used the prescribed measurements and if anything, after the first step, came out on the dry side (thought about adding more water). I let it set for 21 hours then continued w the rolling, shaping, & baking. Came out good, but would have added more salt and while the outside was crispy, the inside was more dense
- not light and fluffy like I’d prefer for this type of loaf. Any suggestions on how to fix this?
Hi Cat, it could be the brand of flour. What brand did you use?
Mine never gets brown before it is done.
try malt powder
Hi Dan, it could be the oven. We lived in about 10 homes and each oven acts so different. Its a bit annoying because they show one temp but never exactly right.