This homemade kielbasa is surprisingly simple to prepare. With just a few ingredients and the help of a sausage stuffing attachment, you will have fresh kielbasa on the table in no time!
Homemade kielbasa was a tradition in my childhood home on Easter and Christmas. My father would butcher a pig and my mother would hand case the meat all day long. The process I will share with you below is much simpler, without skimping on any of the homemade flavors!
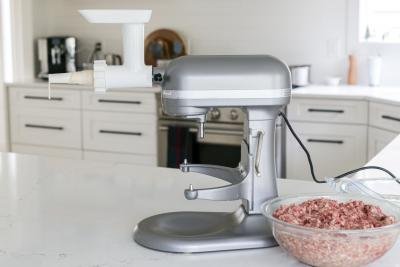
With the help of modern-day tools like a meat grinder and sausage stuffing attachment for a KitchenAid mixer, you will be able to case your own sausages in a fraction of the time. Yay future!
What is Kielbasa?
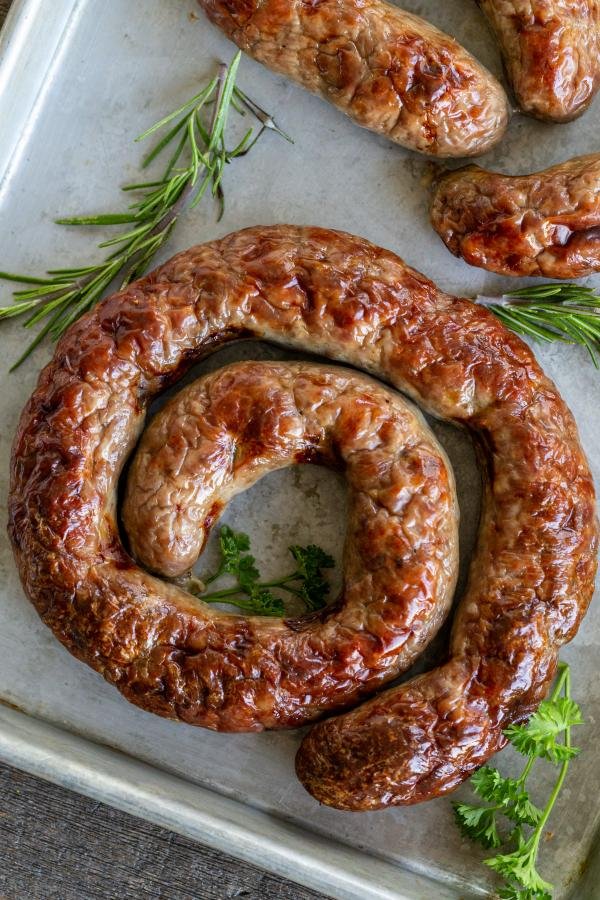
Although Kielbasa originated in Poland, it has become a very common and popular sausage across all of Europe. Kielbasa is most commonly made with ground pork, but it can also be made with any mixture of beef, turkey, veal, chicken, or lamb. It can be fresh or smoked and it is typically seasoned with onions, cloves, mustard seeds, bay leaf, salt, and pepper. You can find it in a “u-shape”, ring, or in a traditional link.
Homemade Kielbasa Video
How to Make Homemade Kielbasa
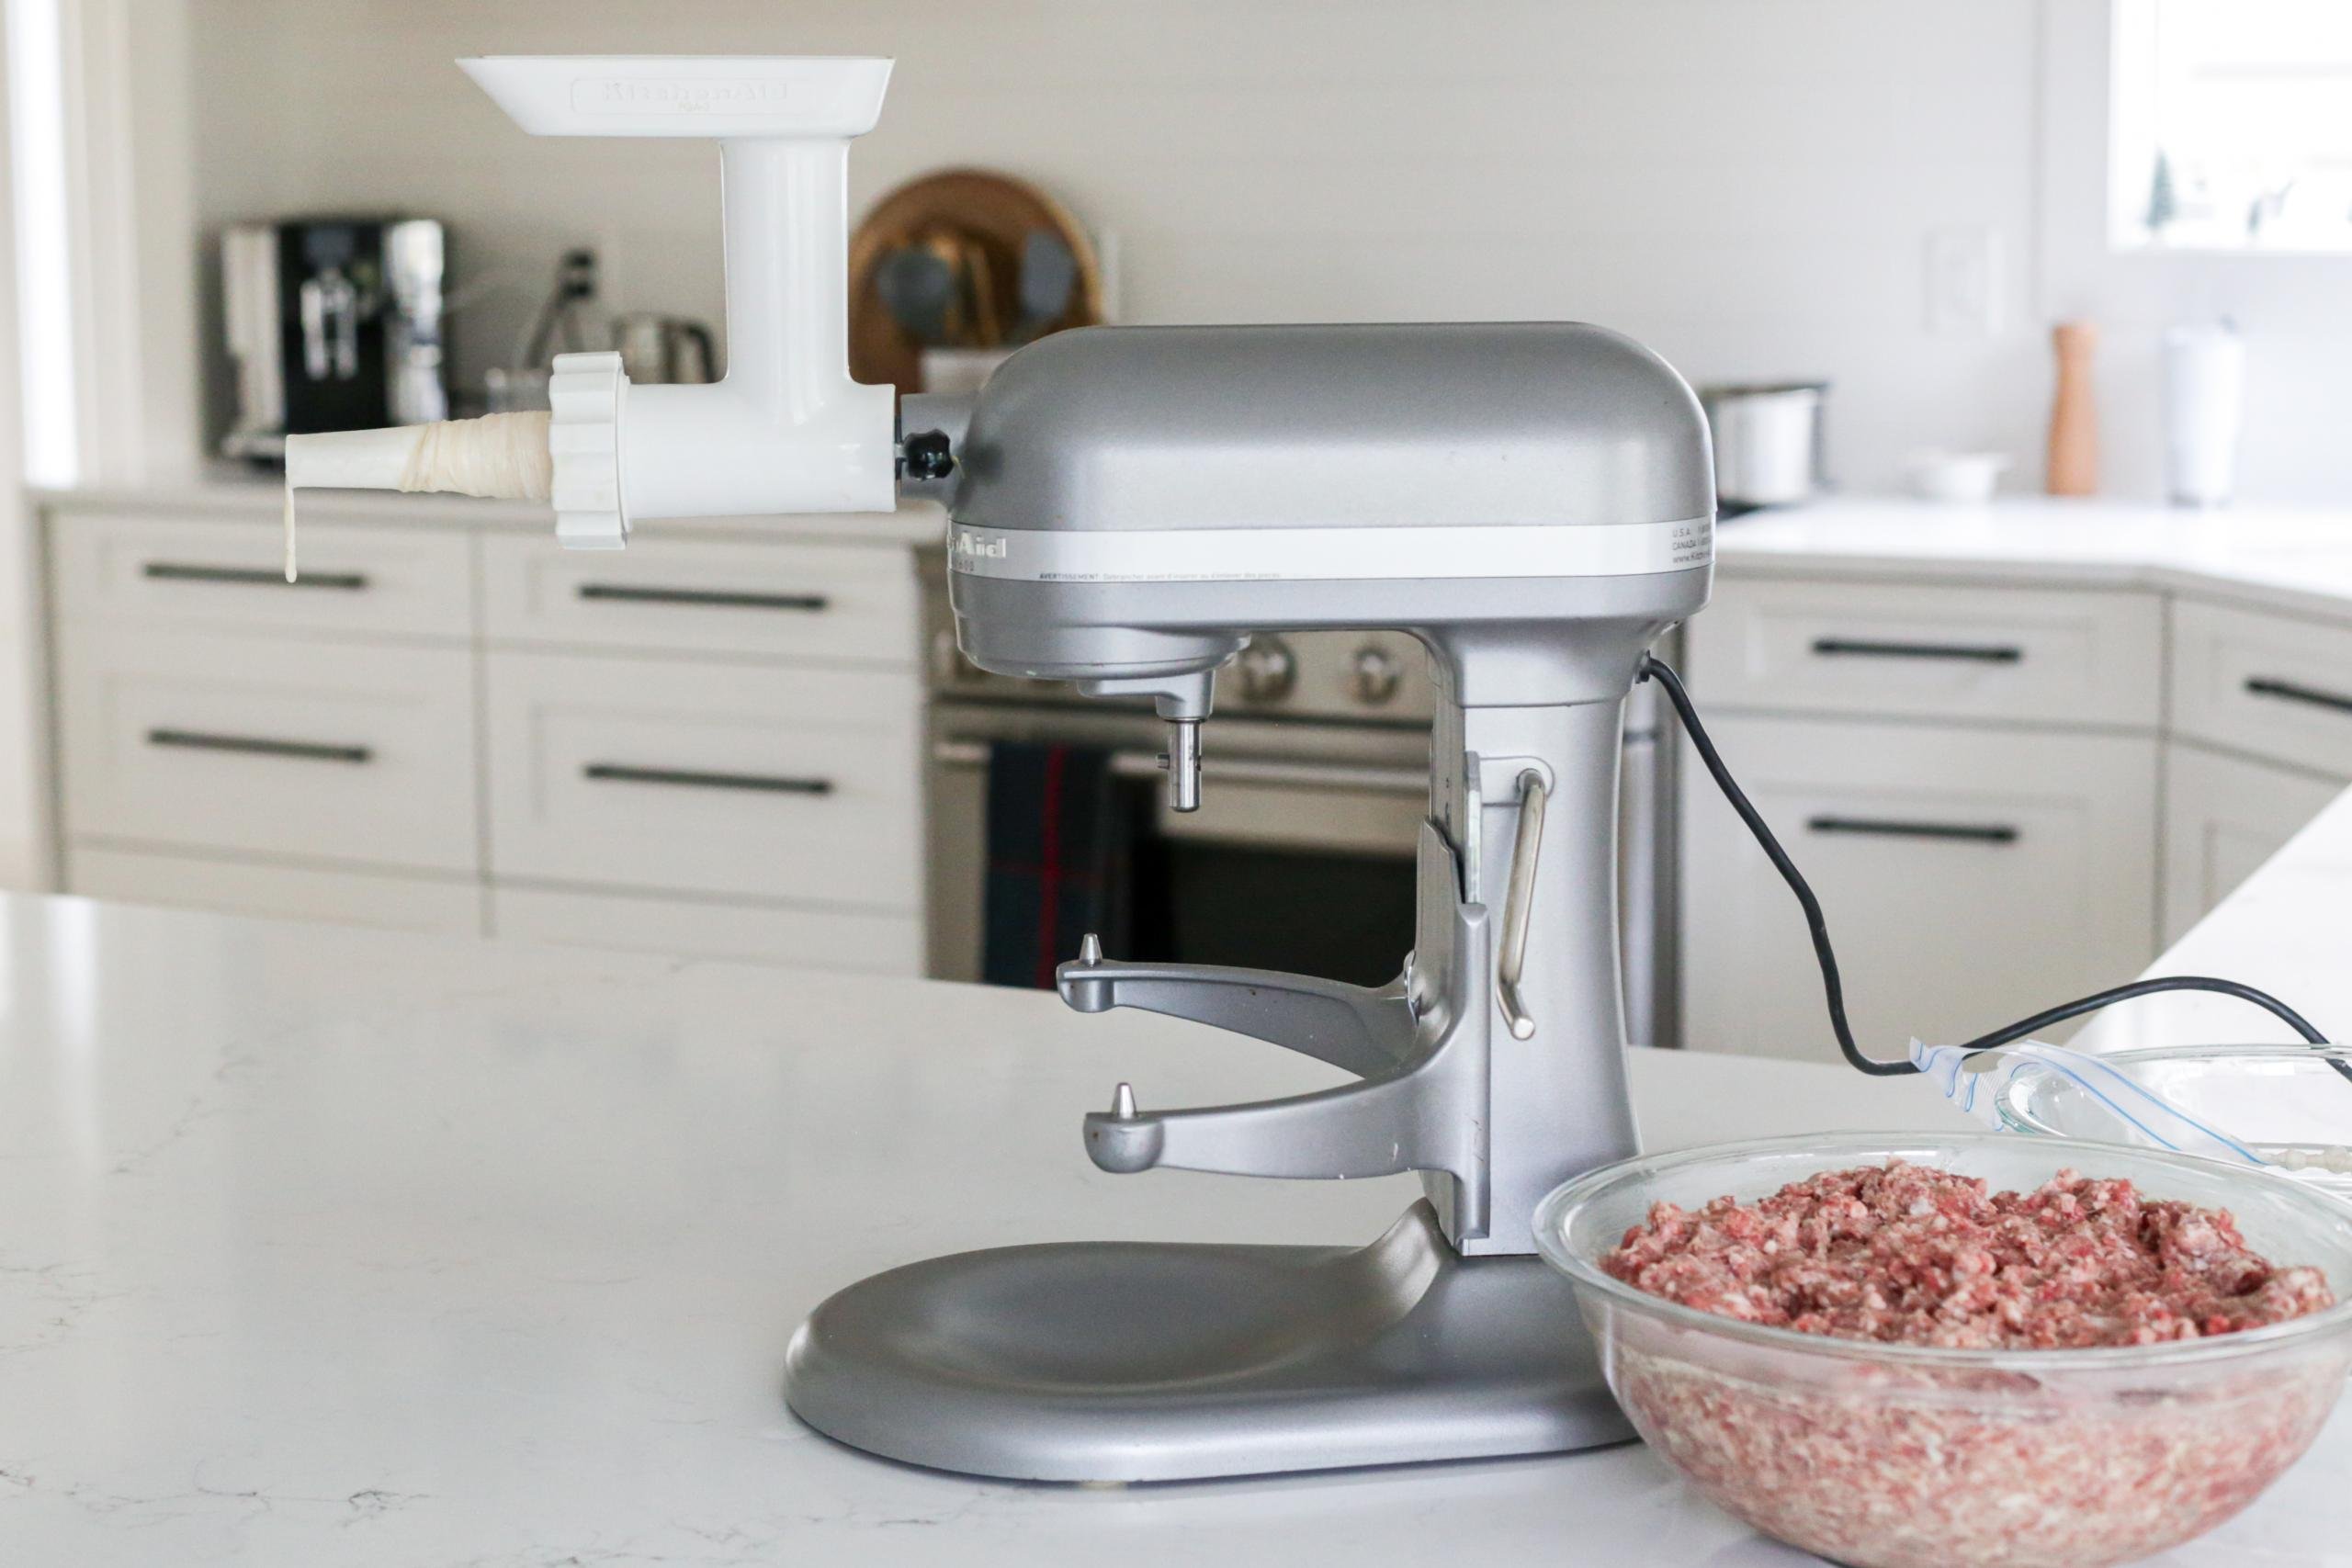
With the help of a sausage stuffing attachment on your stand mixer, making homemade kielbasa is quite simple. Below, find an overview of the process before you dive in.
- Hand Mix the Filling: Using your hands, combine the ground meat with all the seasoning.
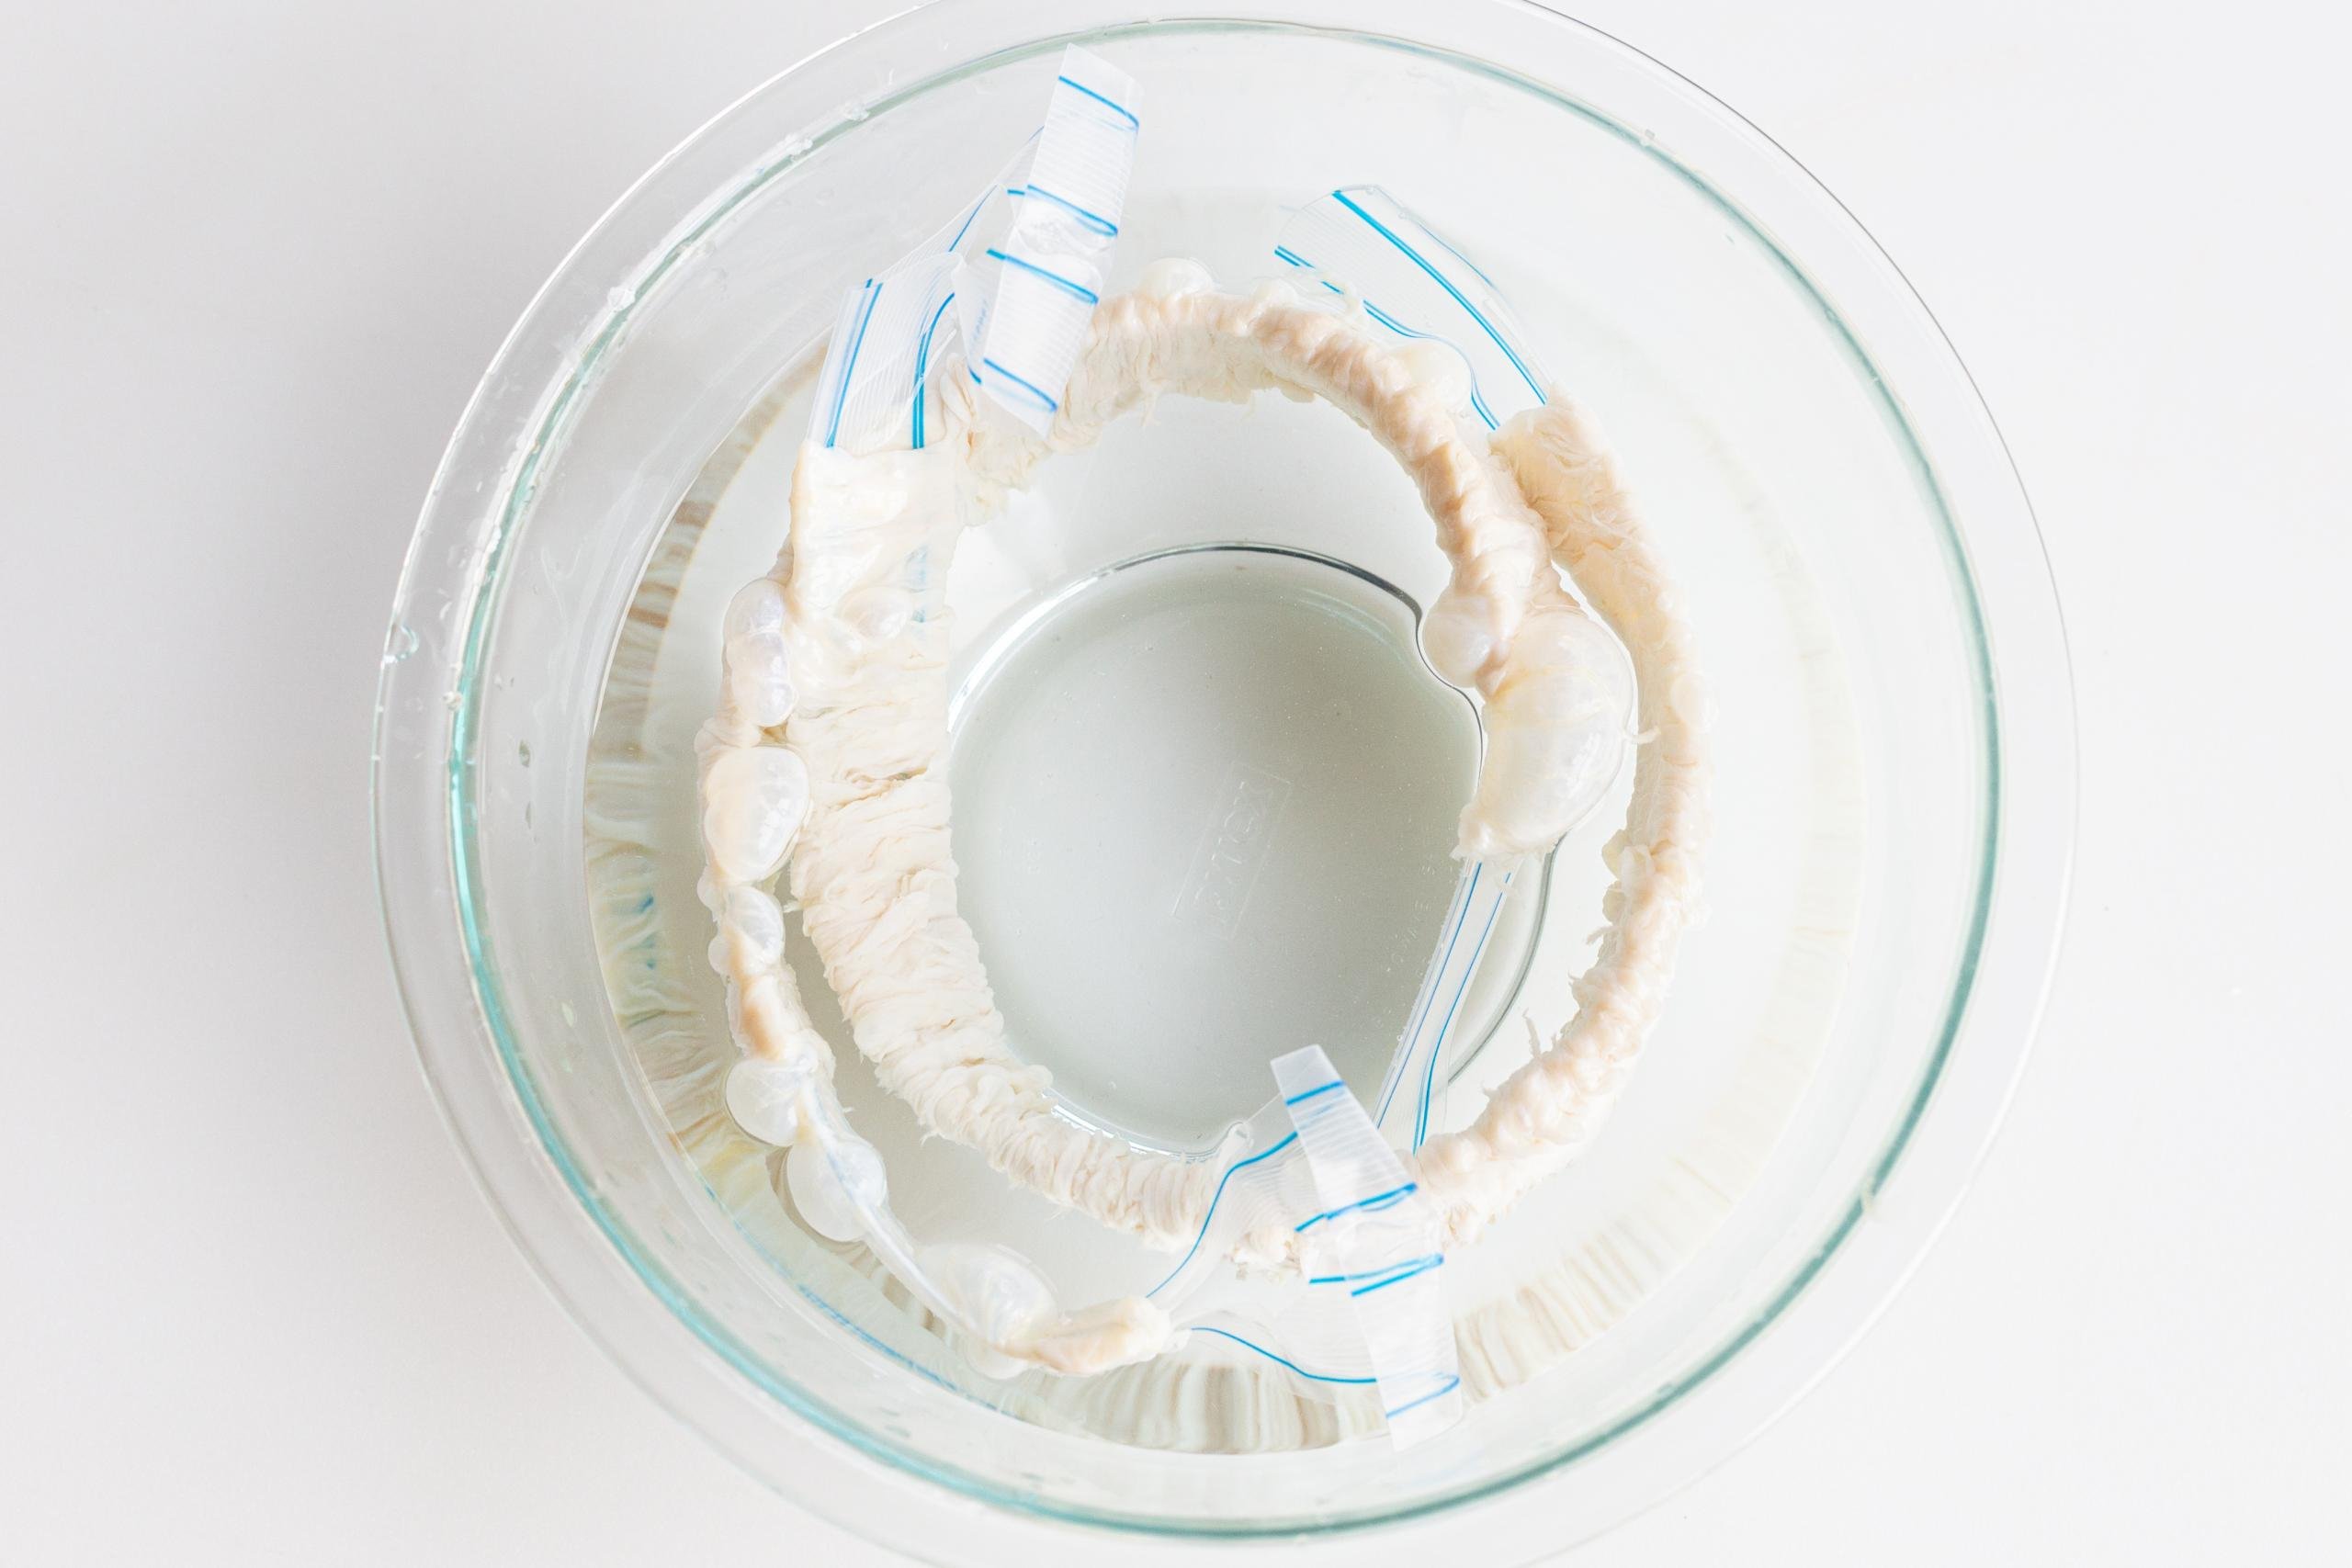
- Clean the Casings: Run cool water through the casings to rinse off excess salt and make them easier to attach to the stuffer.
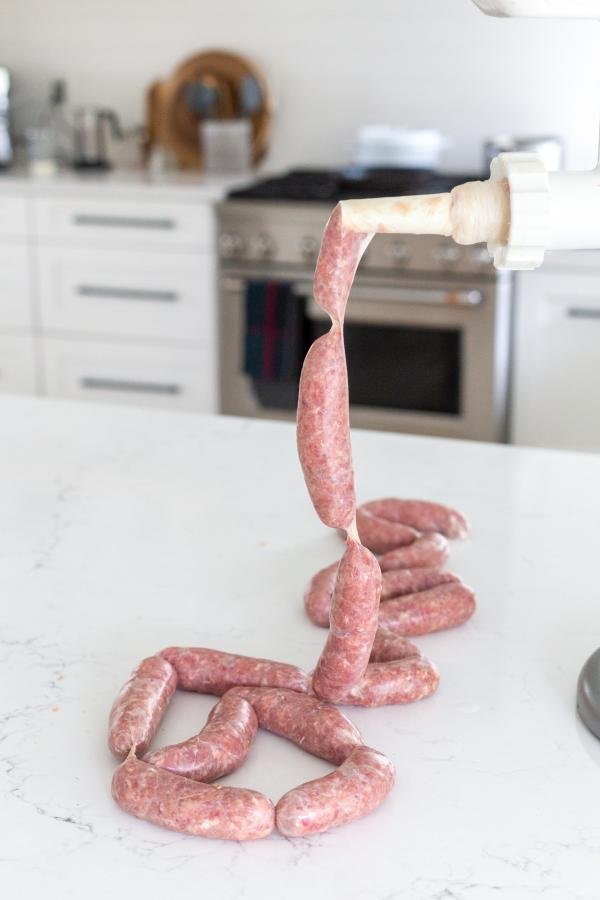
- Prepare the Stuffing Attachment: Remove the blade from the grinder and attach the stuffer. Slide the casing completely up the piping piece.
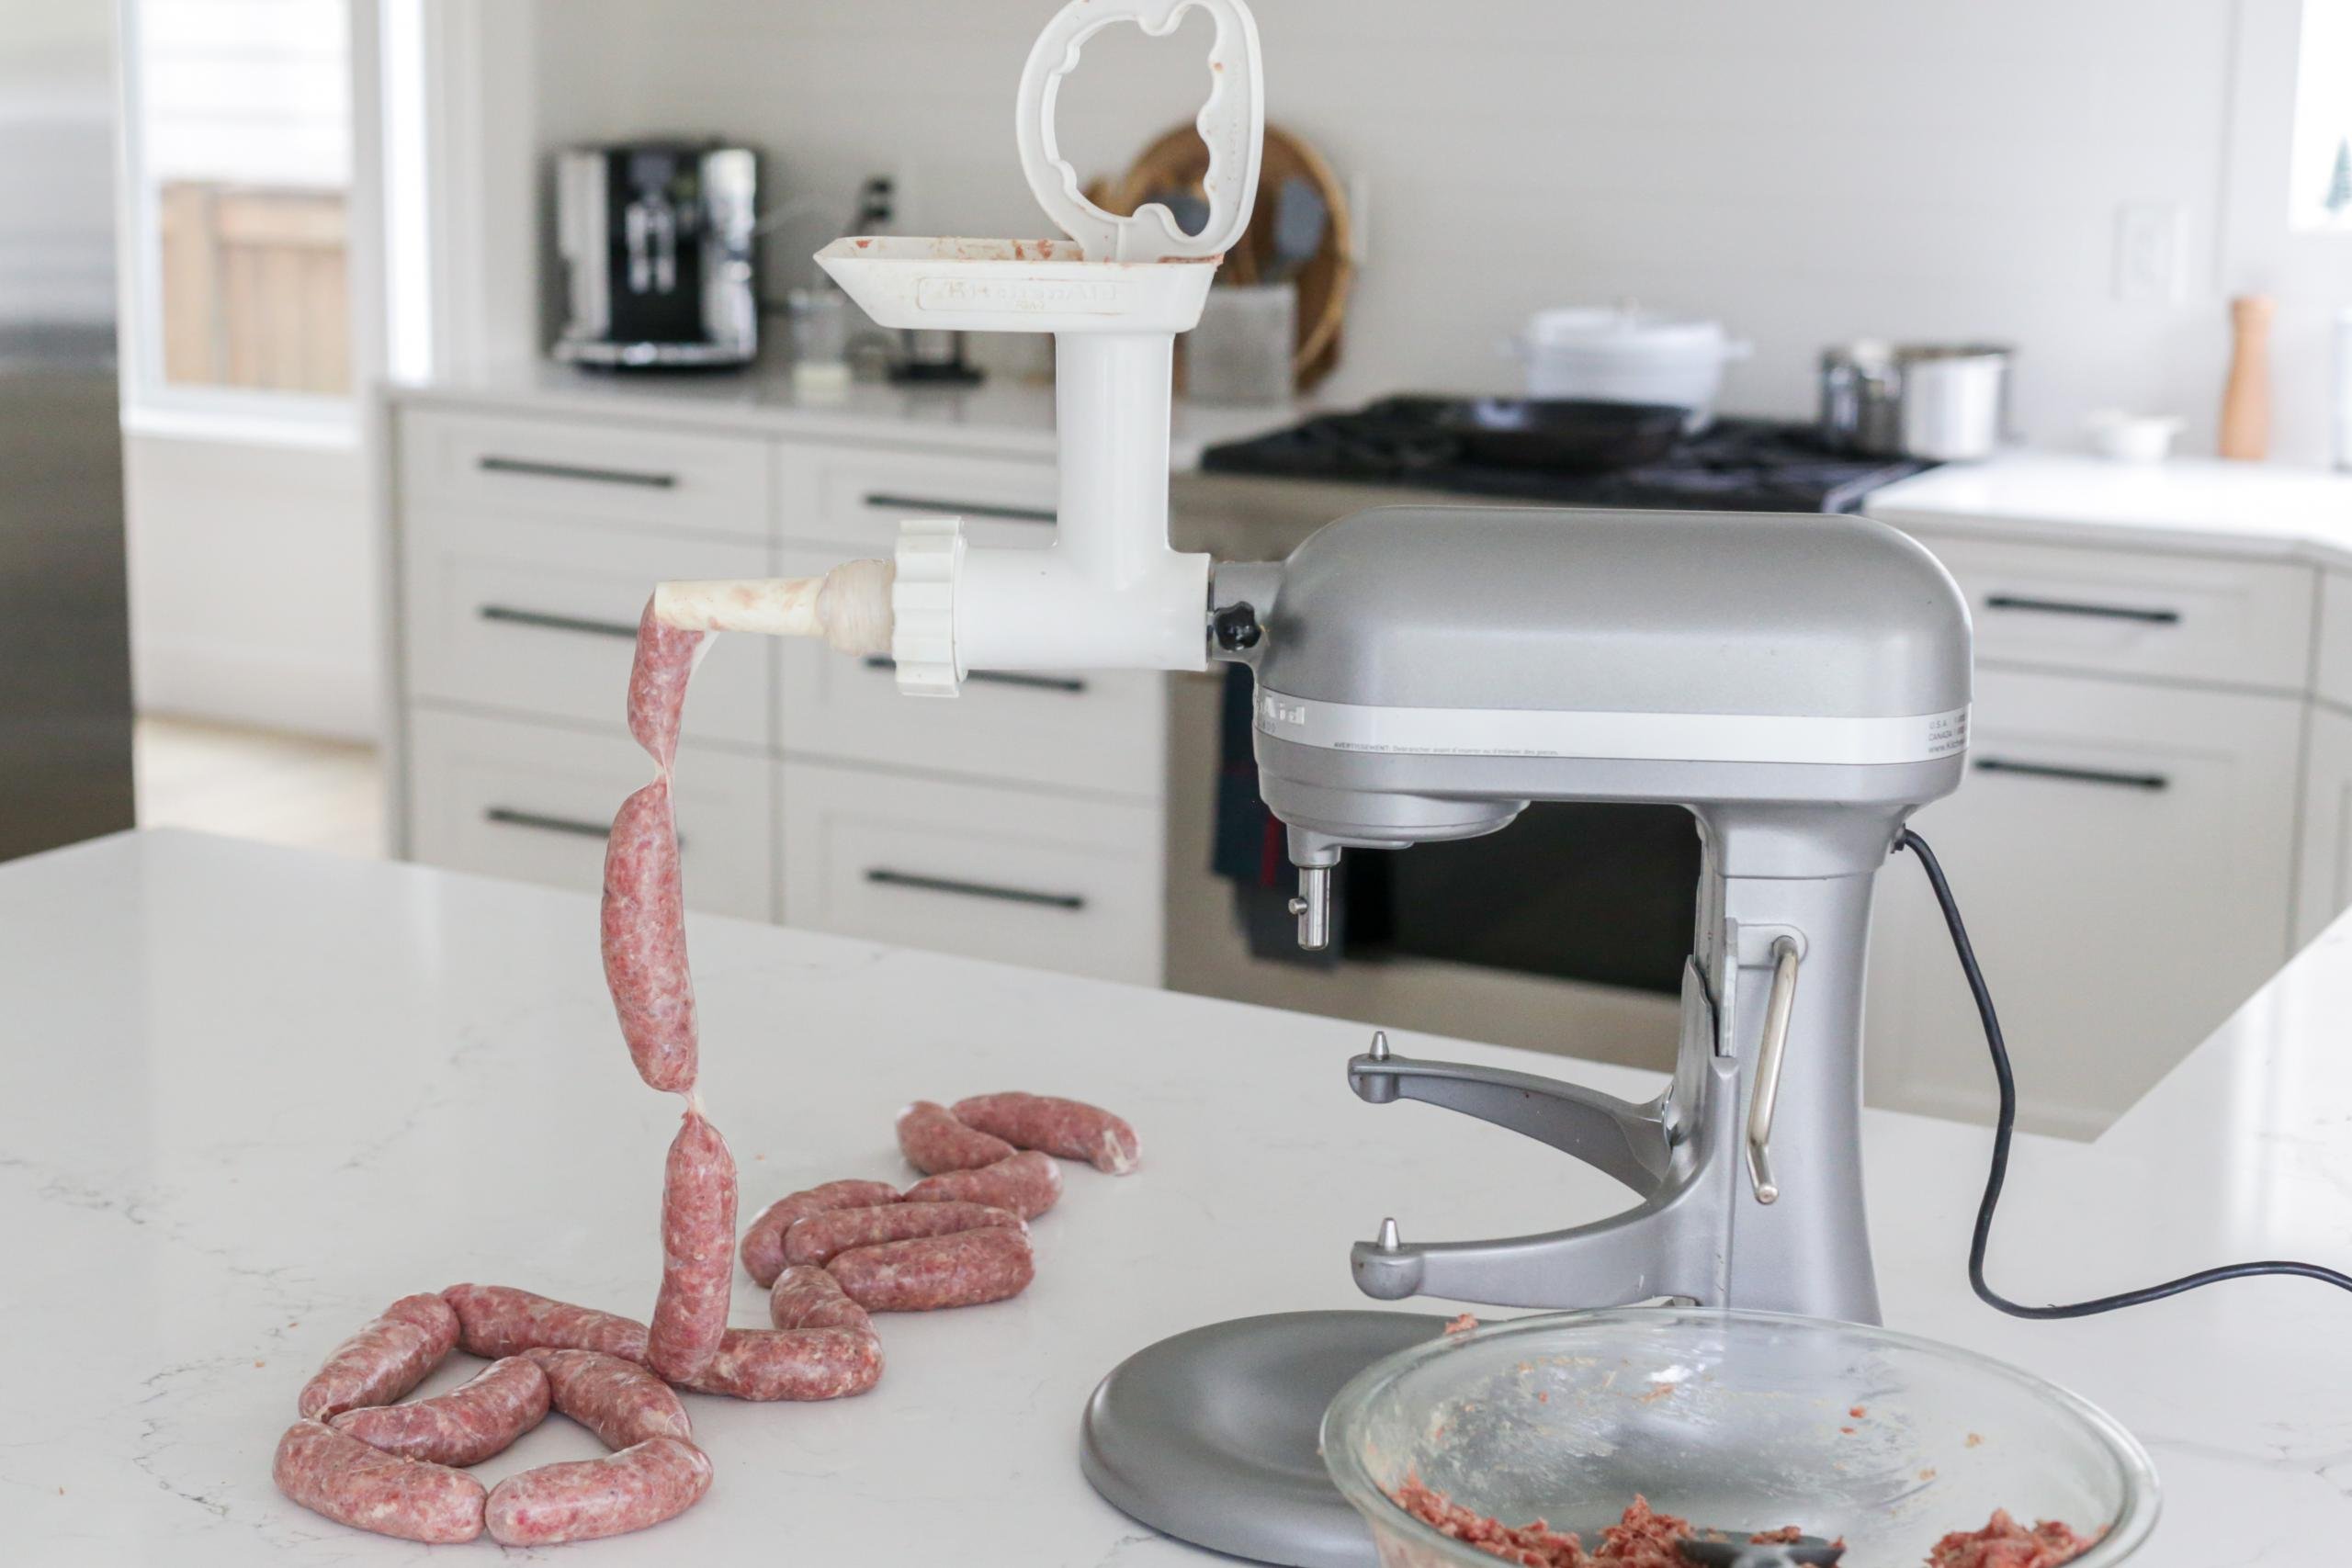
- Stuff the Casing: Place the meat mixture into the grinder. Holing the casing in one hand and the plunger in the other, slowly plunge the meat through the grinder and fill up the casing.
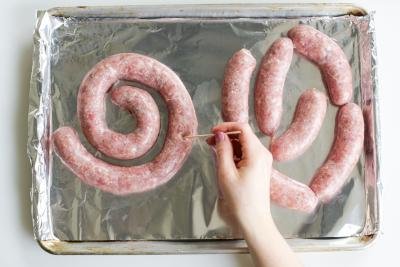
- Tie and Twist the Casing: Pull the casing off of the stuffer once it’s full. Tie one loose end with a knot. If you’re making links, twist the casing in between each link. Secure the other end of the casing with a knot. If you’re making a sausage spiral, secure both ends with a knot and twist the casing into a spiral shape.
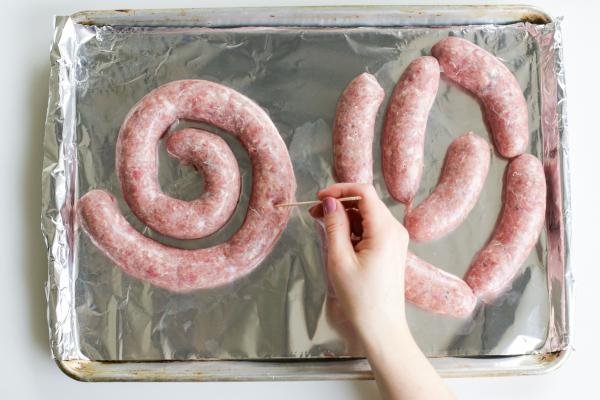
- Bake: Preheat the oven and place the sausage on a baking sheet. Poke the spiral or links with a toothpick to allow liquid to escape during the baking process and prevent ripping. Bake for 30 minutes or until golden brown.


How to Cook Kielbasa
There are two ways to cook kielbasa: baked in the oven or smoked. Both ways are awesome, it just comes to what you’re in the mood for. Baked kielbasa will have a nice, crispy casing when removed from the oven, while smoked kielbasa will have a BBQ-like flavor and a beautiful red hue.
Bake Fresh Kielbasa in the Oven
After you case your sausages, preheat your oven to 350°F. Poke tiny holes in each sausage with a toothpick. This will allow some liquid to release from the casing during baking, preventing your sausages from ripping. Bake for 30 minutes or until golden brown.
Smoke Fresh Kielbasa
Preheat your electric smoker to 130°F. Place raw kielbasa in the smoker by either laying them on the racks or hanging them on the hooks. After about 4 hours (increase the smoker temperature by 20 degrees each hour), take them out and put them in a hot water bath that has the water pre-heated to 165°F. Let them simmer in the hot water bath for 45 minutes. Then, dunk the kielbasa in an ice water bath to halt cooking. Remove them from the ice water and hang them to dry.
Tips for Making the Best Homemade Sausage
Below, find a collection of tips and tricks for making the best homemade kielbasa sausage.
- Rinse the casings before stuffing them. Sausage casings tend to come in a very salty brine. Rinse them with cold water to remove any excess salt. This also makes them easier to slide on the stuffing attachment.
- Make sure to generously salt the meat mixture. Since you won’t be able to taste-test the raw meat mixture, make sure to add a generous amount of salt to it before stuffing. Once the meat mixture is in the casing, there is no taking it out!
- Make sure to poke holes in the sausage before baking. When the sausage bakes, liquid and pressure build-up within the casing. To make sure your casing doesn’t break, poke holes in the sausage to create tiny pressure vents.
Serving Homemade Kielbasa
Serve kielbasa with a side of roasted potatoes, mashed potatoes, or braised cabbage for a hearty meal. For an amazing one-pan meal, this classic kielbasa and sauerkraut entree will not disappoint. If you’re looking for a lighter meal, marinated mushrooms, tomatoes or peppers are a great choice. Their vinegary flavor is the perfect complement to the savoriness of the sausage. You can also go classic and sandwich a BBQ kielbasa between a hot dog bun. Just don’t forget the mustard, relish, and onions…
Storing Homemade Kielbasa
- Refrigerator: Raw kielbasa can be refrigerated in an airtight container for 2-3 days. Cooked kielbasa will stay fresh for up to a week.
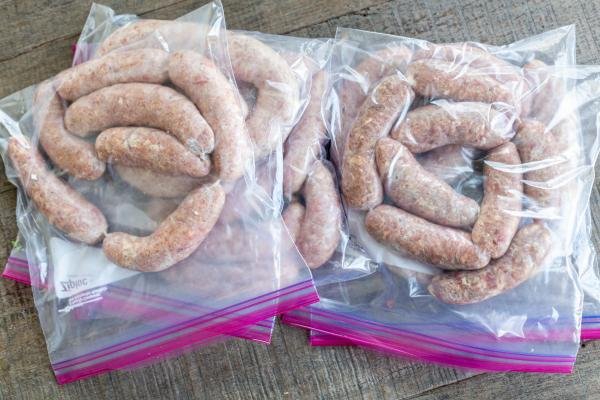
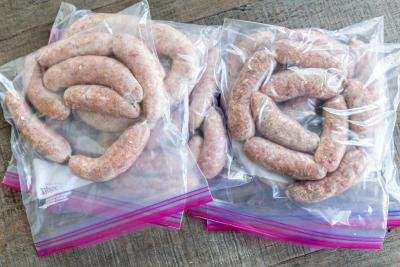
- Freezer: Place raw kielbasa in a freezer-safe plastic bag. Remove any excess air and store it in the freezer for up to three months.
FAQ
Can I boil kielbasa?
Yes, you can boil raw kielbasa. Fill a large pot with cold water. Place the kielbasa in the water. Bring to a boil and cook for 10 minutes. Allow the kielbasa to rest in the hot water for five additional minutes.
Do I need to clean the casings before stuffing?
Yes, you need to clean the casings before stuffing them. Casings tend to come very salty. Running cold water through them will rid them of excess salt and make them easier to slide onto the stuffing attachment.
What kind of casings should I buy?
Natural pork casings work best. Whole Foods has a great option at their butcher department.
Can I substitute powdered onion and garlic for fresh?
You can use 1/2 tbsp of garlic powder and 1 tbsp of onion powder as a substitute. However, nothing beats fresh garlic and onions in terms of flavor. The raw onion also adds nice juiciness to the sausage.
Other Yummy Sausage Recipes
- One-Pan Sausage and Vegetable Bake – Hearty one-pan dinner
- Johnsonville Beer Bratwurst – Brats grilled and then baked atop caramelized onions
- Sausage Kale Soup – Sausage, bean, and kale soup
- Buckwheat Meat Patties – Buckwheat and ground meat sausage patties
Recipe

Ingredients
- 5 lbs ground meat (beef, chicken, pork or turkey)
- 1 large onion grated
- 5 garlic cloves grated
- 1 tbsp chopped bay leaves
- 2 tbsp yellow mustard seeds
- 1 tbsp salt adjust to taste
- 1 tbsp ground pepper adjust to taste
- 2 long sausage casings
Instructions
- Using your hands, combine the ground meat, onion, garlic, bay leaves, mustard seeds, salt, and pepper.

- Run water through the sausage casings to rid them of excess salt. Note: Wet casings will also be easier to attach to the stuffer.

- Remove the cutting knife from the grinder and attach the stuffer. Secure the casing onto the stuffer by sliding it completely over the piping piece. Note: You can trim the casing for smaller sausage spirals or links.
- Fill up the grinder with the meat mixture. Holding the sausage casing taut with one hand and slowly pushing down the meat mixture with the plunger in the other, fill up the casing with meat. Make sure it's not too thick or it will rip.
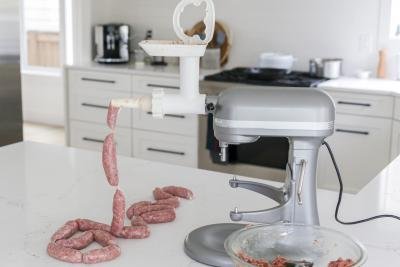
- Once the casing is full, pull it off the stuffer. Tie the loose end in a knot. If making links, twist the casing in between each link tightly, moving down the casing until you reach the end. Leave enough casing at the end to tie a knot to secure the filling inside. If you're making a spiral, simply secure both ends of the casing with a knot and twist the casing into a spiral shape.

- Preheat the oven to 350°F. Place sausage on a baking tray. Poke it with a toothpick, creating small holes to allow liquid to escape and prevent the sausage from ripping.
- Bake sausage for 30 minutes, or until golden brown.


Freezing Homemade Sausage
- Place raw sausage in a freezer-safe bag, remove all the excess air before sealing. Frozen sausage will stay fresh for up to three months in the freezer.


Can these be made with ready ground meat from the store?
Yes, you can use store-bought ground meat to make homemade kielbasa. It's better to grind the meat yourself for better control over the texture and fat content, but quality pre-ground meat works well too.
I bake fresh polish sausage in ginger ale. Pour the ginger ale in the roasted pan , until it comes 1/2 way up the side of the sausage. Bake at 325’, turning until brown overall. When finished, I pour the juices into prepared fried sauerkraut, and serve.
HAPPY COOKING…!!
Hi Philip, Thanks so much for your recipe! That sounds absolutely delicious!
Has anyone made these without the chopped bay leaves? Many websites advise against eating them because they don't really soften when cooked and could be a hazard.
Hey Stacey, you can definitely skip out on them. When we eat Kielbasa, we just remove them as we go. Enjoy
There are different sized in casings what size to you use.
Using natural pork casings.
Hey Debbie, I used natural pork casings from wholefoods. They look pretty similar in size every time we get them. Hope this helps
Can you substitute onion and garlic powders for the fresh onion and garlic, and if so, how much would you need?
Hey Sandy, you can use 1/2 tbsp of garlic powder and 1 tbsp of onion powder. But nothing beats fresh, fresh onions also add juice to the sausage.
Hello again ,,,,,,just browsing my 100s of recipes for something ??? and. here I am going to make your recipe fresh kielbasa stores do not have it and so easy. your recipe seems to not have fat proportion. seems to me it would not be wonderful without FAT now pork butt. yes and I can see the fat in your photos ,, I don't have casings so I will wrap in twisted Saran Wrap. sausage shaped simmer till almost done and remove wrap. and fry or roast with potato wedges. den serve with Kapusta. YUMMMMMy and as my old long past associate. James Beard would say " Good Eating "
Hey, it really depends on your preference for the meats. We make a turkey version during Thnkgiinvg and it's so good. My mom makes it with pork and lots of fat, it was a treat growing up. Glad you found this recipe. Enjoy
Could this be baked in a loaf pan?
Hey Liza, yes you definitely can.
My mom always made fresh Kielbasa our side she called Kapusta. sour kraut shredded cabbage onion and garlic. we used canned kraut ,many years ago drained and if to salty rinsed equal parts cabbage yellow onion sliced two maybe three cloves garlic sauce onions first with cabbage when tender add chopped garlic fresh pepper and kraut yummy boiled red potato horseradish fresh ground den kruschucki for desert dey look like bows wit powder sugar. not sure how to spell it.
Joseph, that sounds delicious! Now I will be craving this! 🙂
Hi Chef !! thank you for your reply ,,Mom also made a potato stuffed sausage ???? not sure if Polish or Lithuanian do you have a recipe for that ??
Joseph, I am actually Ukrainian and we also made potato stuffed sausage but I dont have a recipe for them. I need to ask my mom.
did you check with Mom for potato sausage recipe ????
I know she mentioned that you need special casings for it, not the skinny type. And it is just seasoned grated potatoes.
seasoned usually means salt n Perrier. what herbs ??
She usually used salt and pepper. Sometimes fresh dill.
About 5 years ago I tried making my own sausage, but I found that my sausages either ripped when I tried to skillet fry them or the casing would just be loose around the stuffing that shrinks inside. Do you have any idea why both of those would happen?
It's because the liquids evaporate, try poking it with a toothpick so it lets some of the juices out. But I wouldn't recommend using a skillet. My favorite way is on the grill or baking it. It's actually what's for dinner tonight 🙂
you can use a skillet ,,,But first add a little oil enough to coat the pan med heat add sausage then add enough water as to barely but not cover them place a lid but off center to allow some steam to escape ,,cook till sausage is done like poached ,remove lid and raise heat a bit water will boil off and sausage will brown in remaining oil ,,,can't give times and temp I just know in mt head like Ive been cooking for 70 years Natalya maybe you can give better directions !!
That is an amazing tip,thank you for sharing it!
I usually buy the sausage casings in Price Chopper. Also they can be find in Asian Stores.
g, removin
g, removin
g, removin
g, removin
sausage casings.
sausage casings.
sausage casings.
Thanks for the helpful tip. I am sure others can find it useful too.
You can buy casings at CABELLAS.
Do you use kitchen twine or do you just tie the ends of the casings?
Ok thank you, my husband has been asking for these for years, finally I got the casings and the attachment to kitchen aid to make these, thank you! 🙂
I usually just twist the ends, don't stuff casings too tight to the ends.
Tell me how it goes for you, I love reading feedback form readers 🙂
You can also twist the casings after small part of the stuffing. It would create small sausages. (I hope you understand what I mean) lol
Thank you for posting this recipe!
No problem 🙂