Cutting up a whole chicken is not as daunting as it sounds. With the right tools and a simple approach, it takes less than five minutes!
Why Choose a Whole Chicken?
It often seems easier to buy individual chicken cuts instead of tackling a whole chicken. But — let’s look at how the perks of buying a whole chicken easily outweigh the benefits of individual cuts.
- A whole chicken is cheaper than individual pieces. Often times, buying the whole chicken is almost half the price than buying all the cuts separately, because all parts of the chicken can be used for a meal. Plus — you aren’t paying for someone to cut the chicken for you!
- The bones make for an uber flavorful broth. The backbone and the wing tips of the chicken make the best tasting broth that can’t be bought.
- Each cut can be used in a variety of dishes. With a whole chicken, you get chicken breast, chicken thigh, wings, drumsticks, and more! This means a plethora of flavors and dishes to be enjoyed!
How To Cut up a Chicken
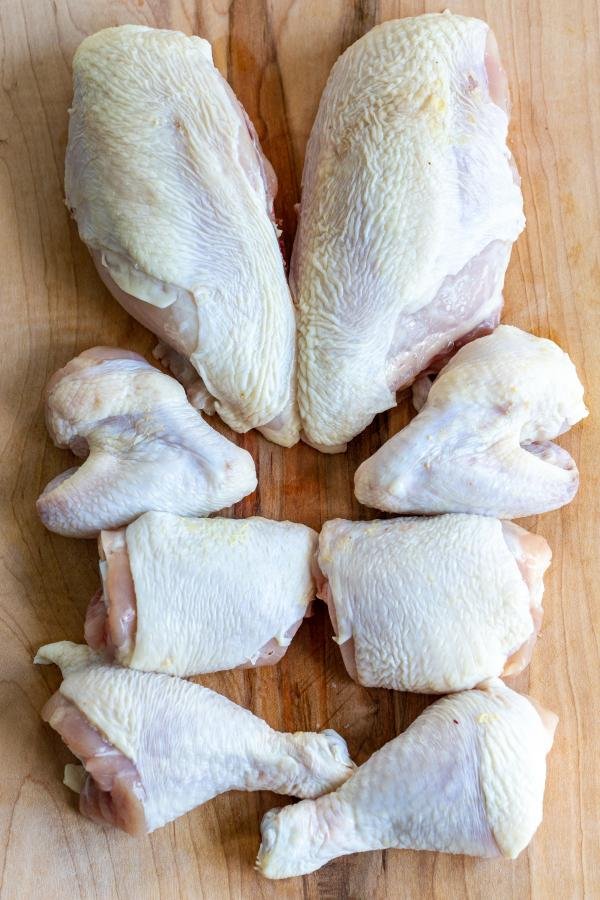
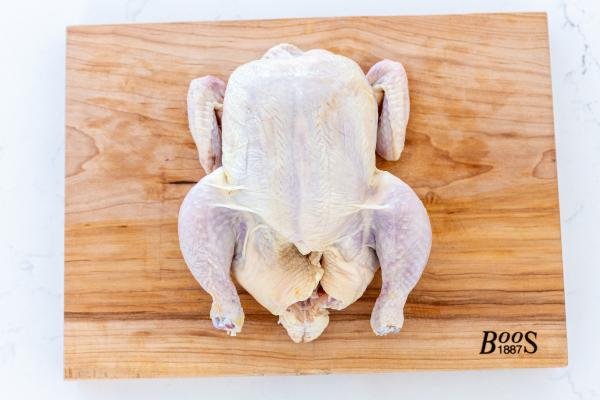
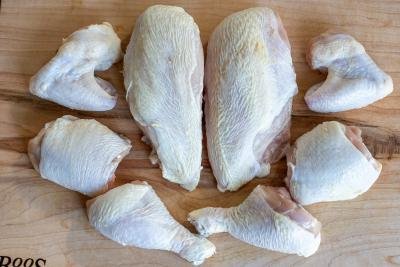
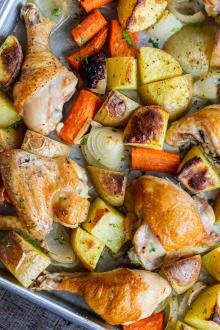
Before getting started, suit yourself up for battle! Ensure you have a SHARP kitchen knife — a boning knife or chef’s knife work best. Also, grab a pair of kitchen shears. To get your work station ready, set the bird on top of a sturdy, large wooden cutting board. Your end result will be eight separate pieces: two wings, thighs, breasts, drumsticks, and the coveted backbone.
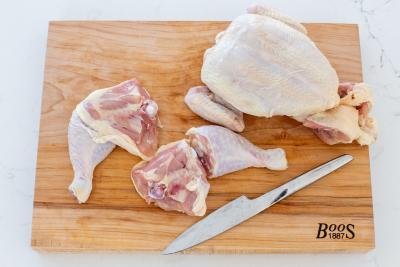
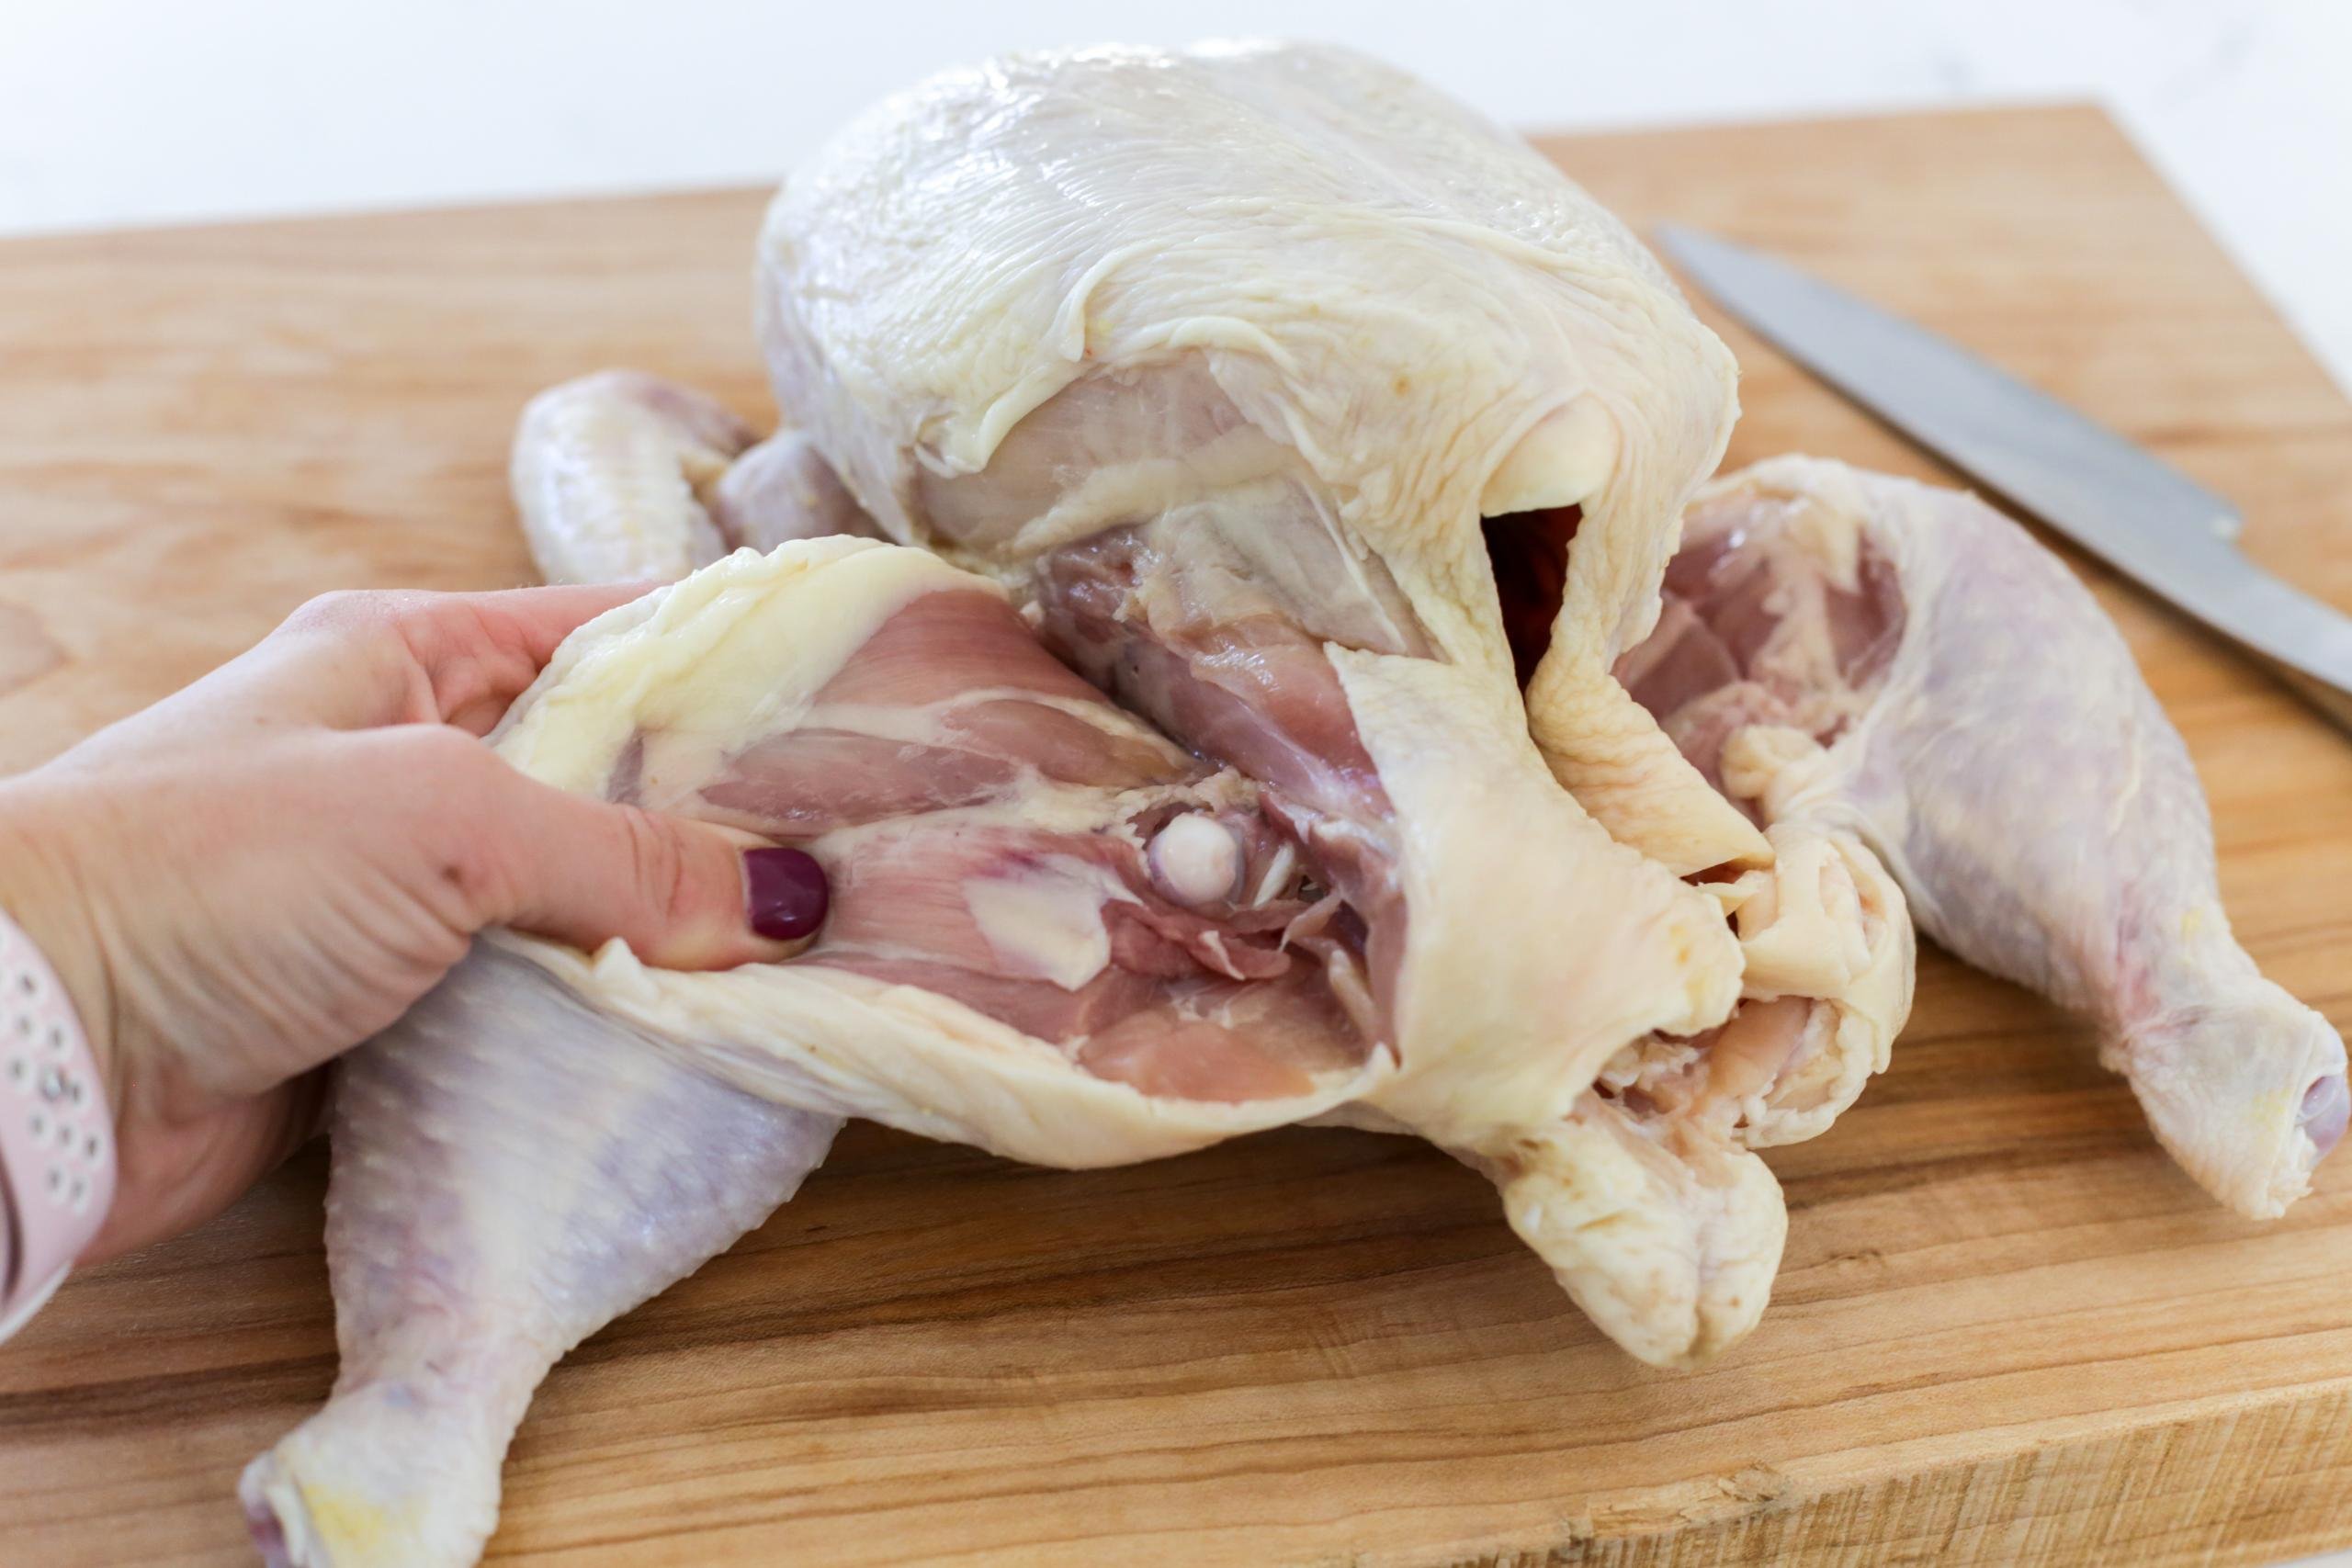
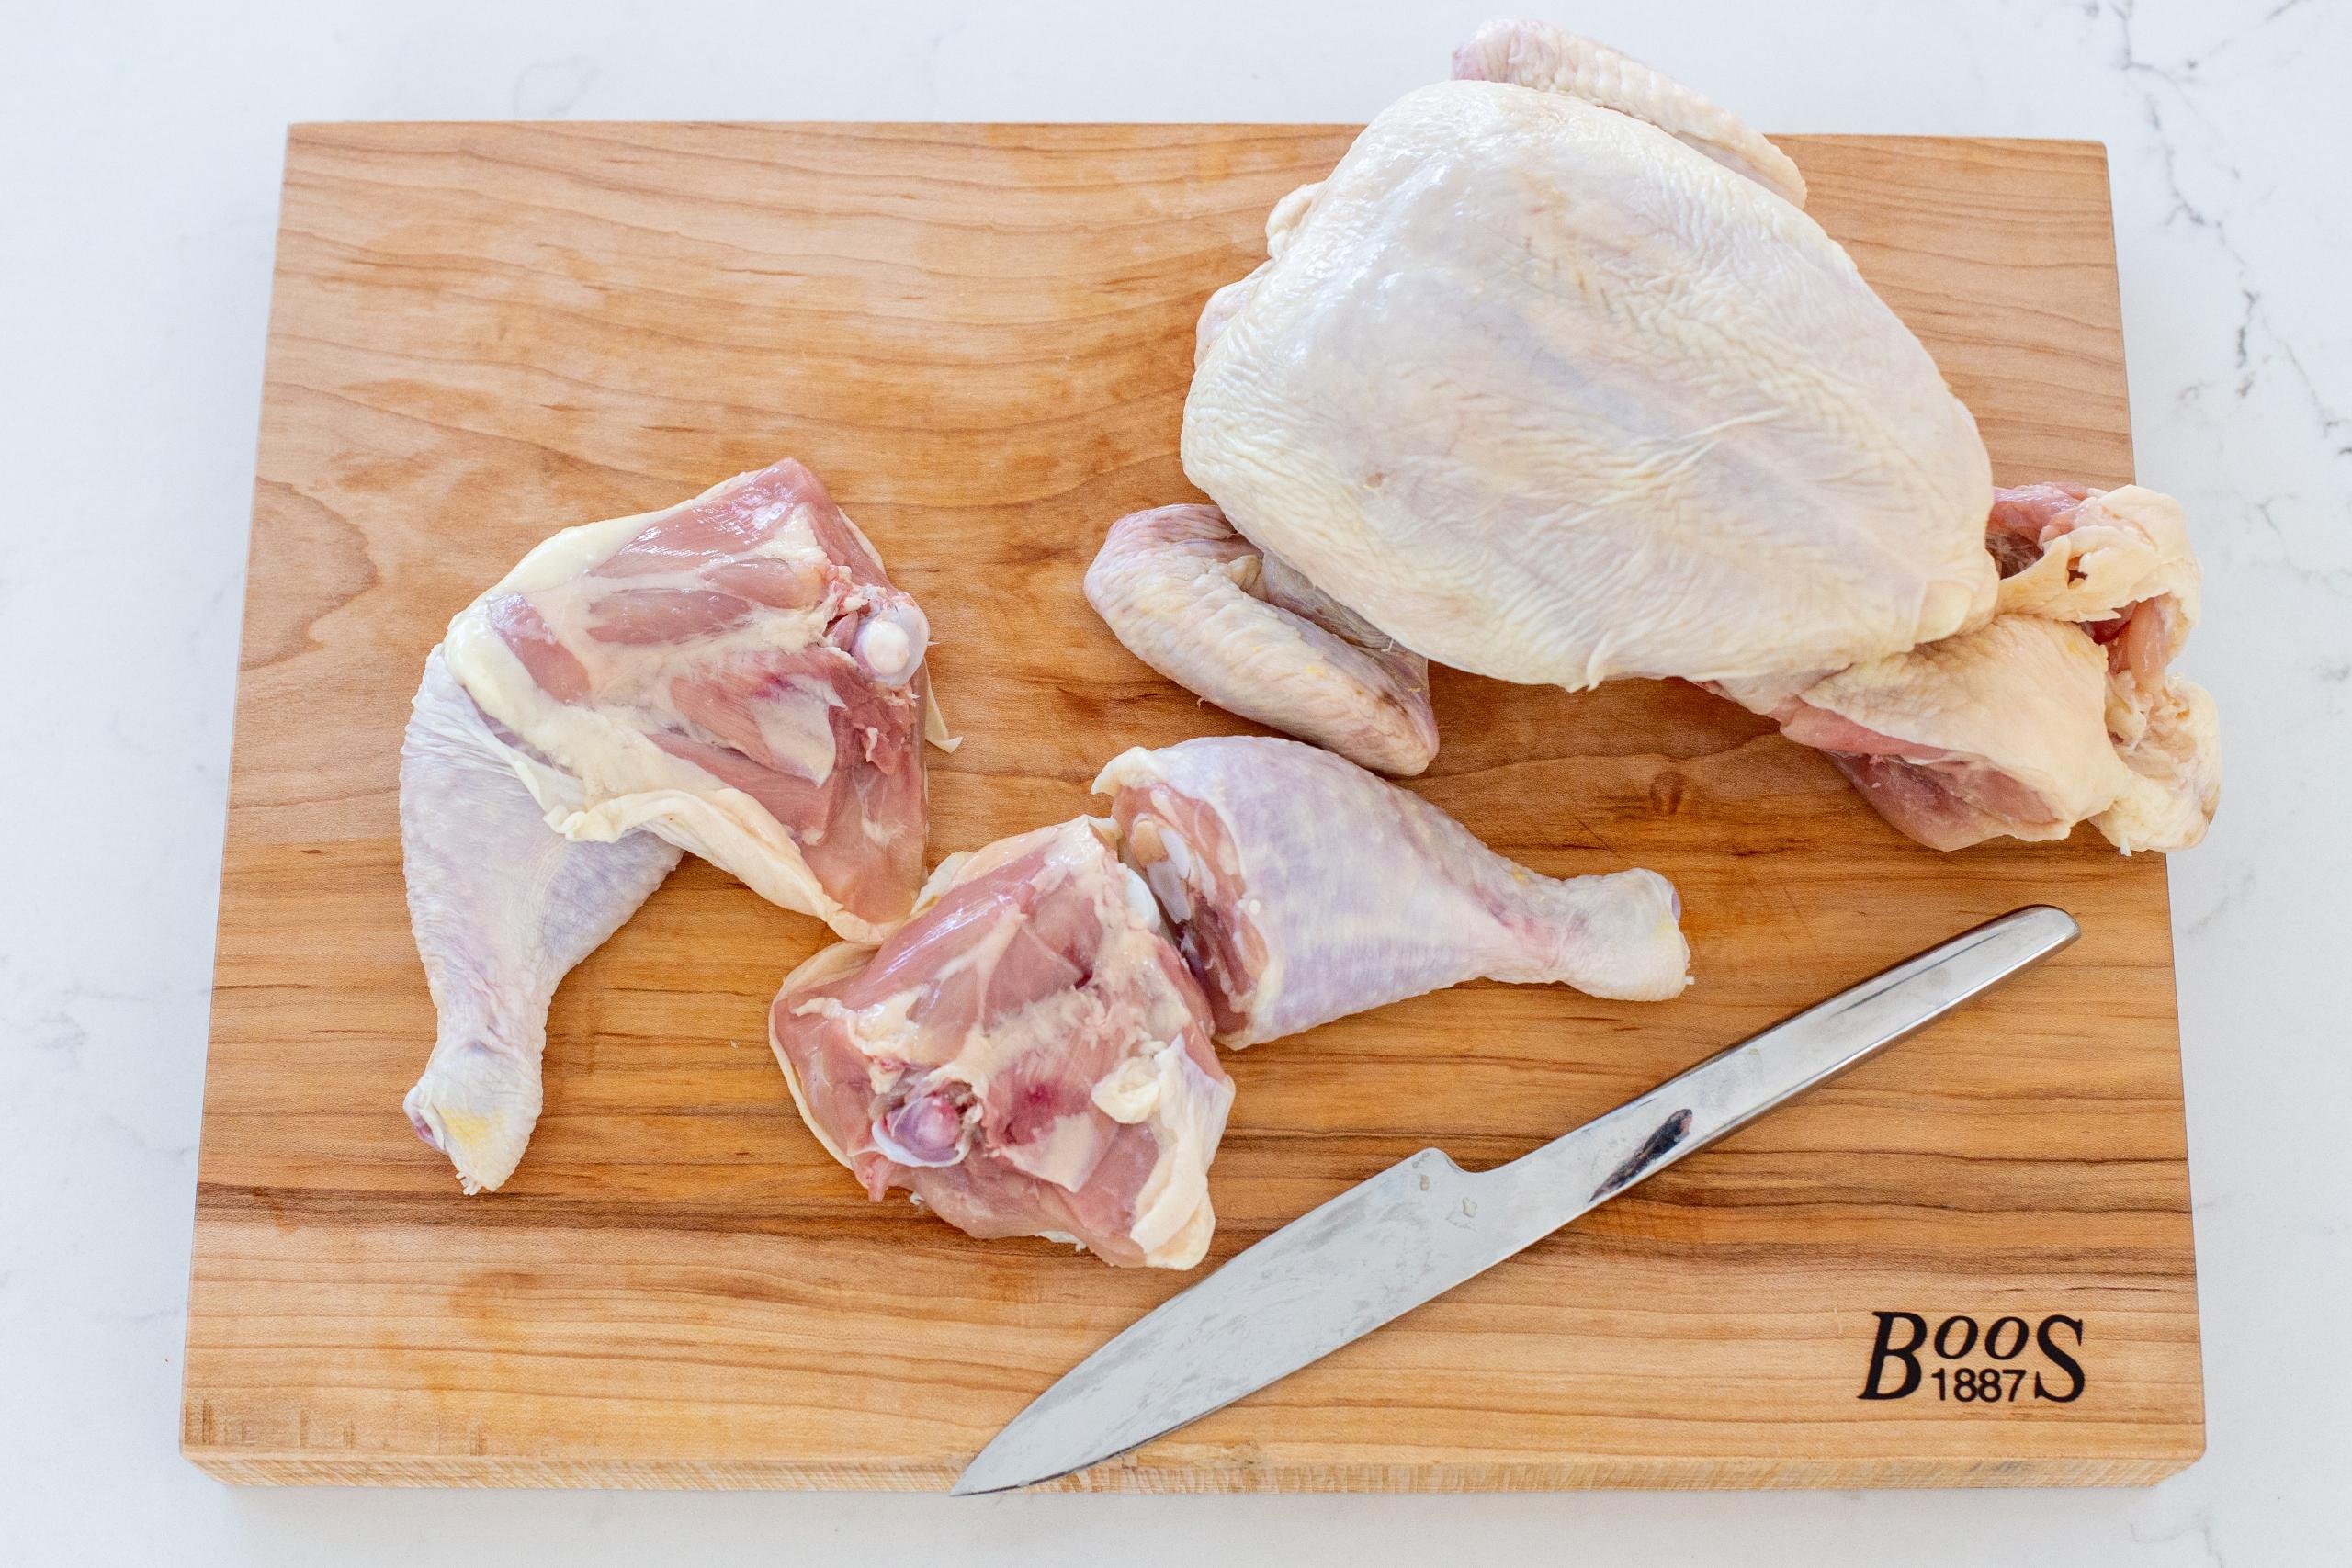
- Remove the legs: Find the space where the thigh connects with the breast and cut through the skin and flesh until you see the bone. Bend the thigh until it pops out of its socket. Look for the fat line (it will mark where the joint is) and cut through it with the sharp knife.
- Separate the drumstick: Separate the drumstick from the thigh by cutting along the fat line that joins them.
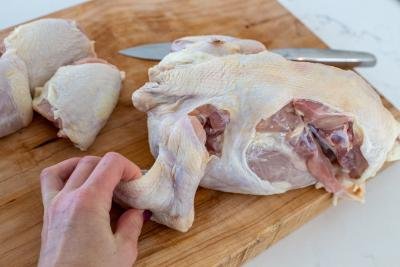
- Remove the wings: To remove the wings, use your finger to get a feeling of where the joint is. Slice through it with your knife.
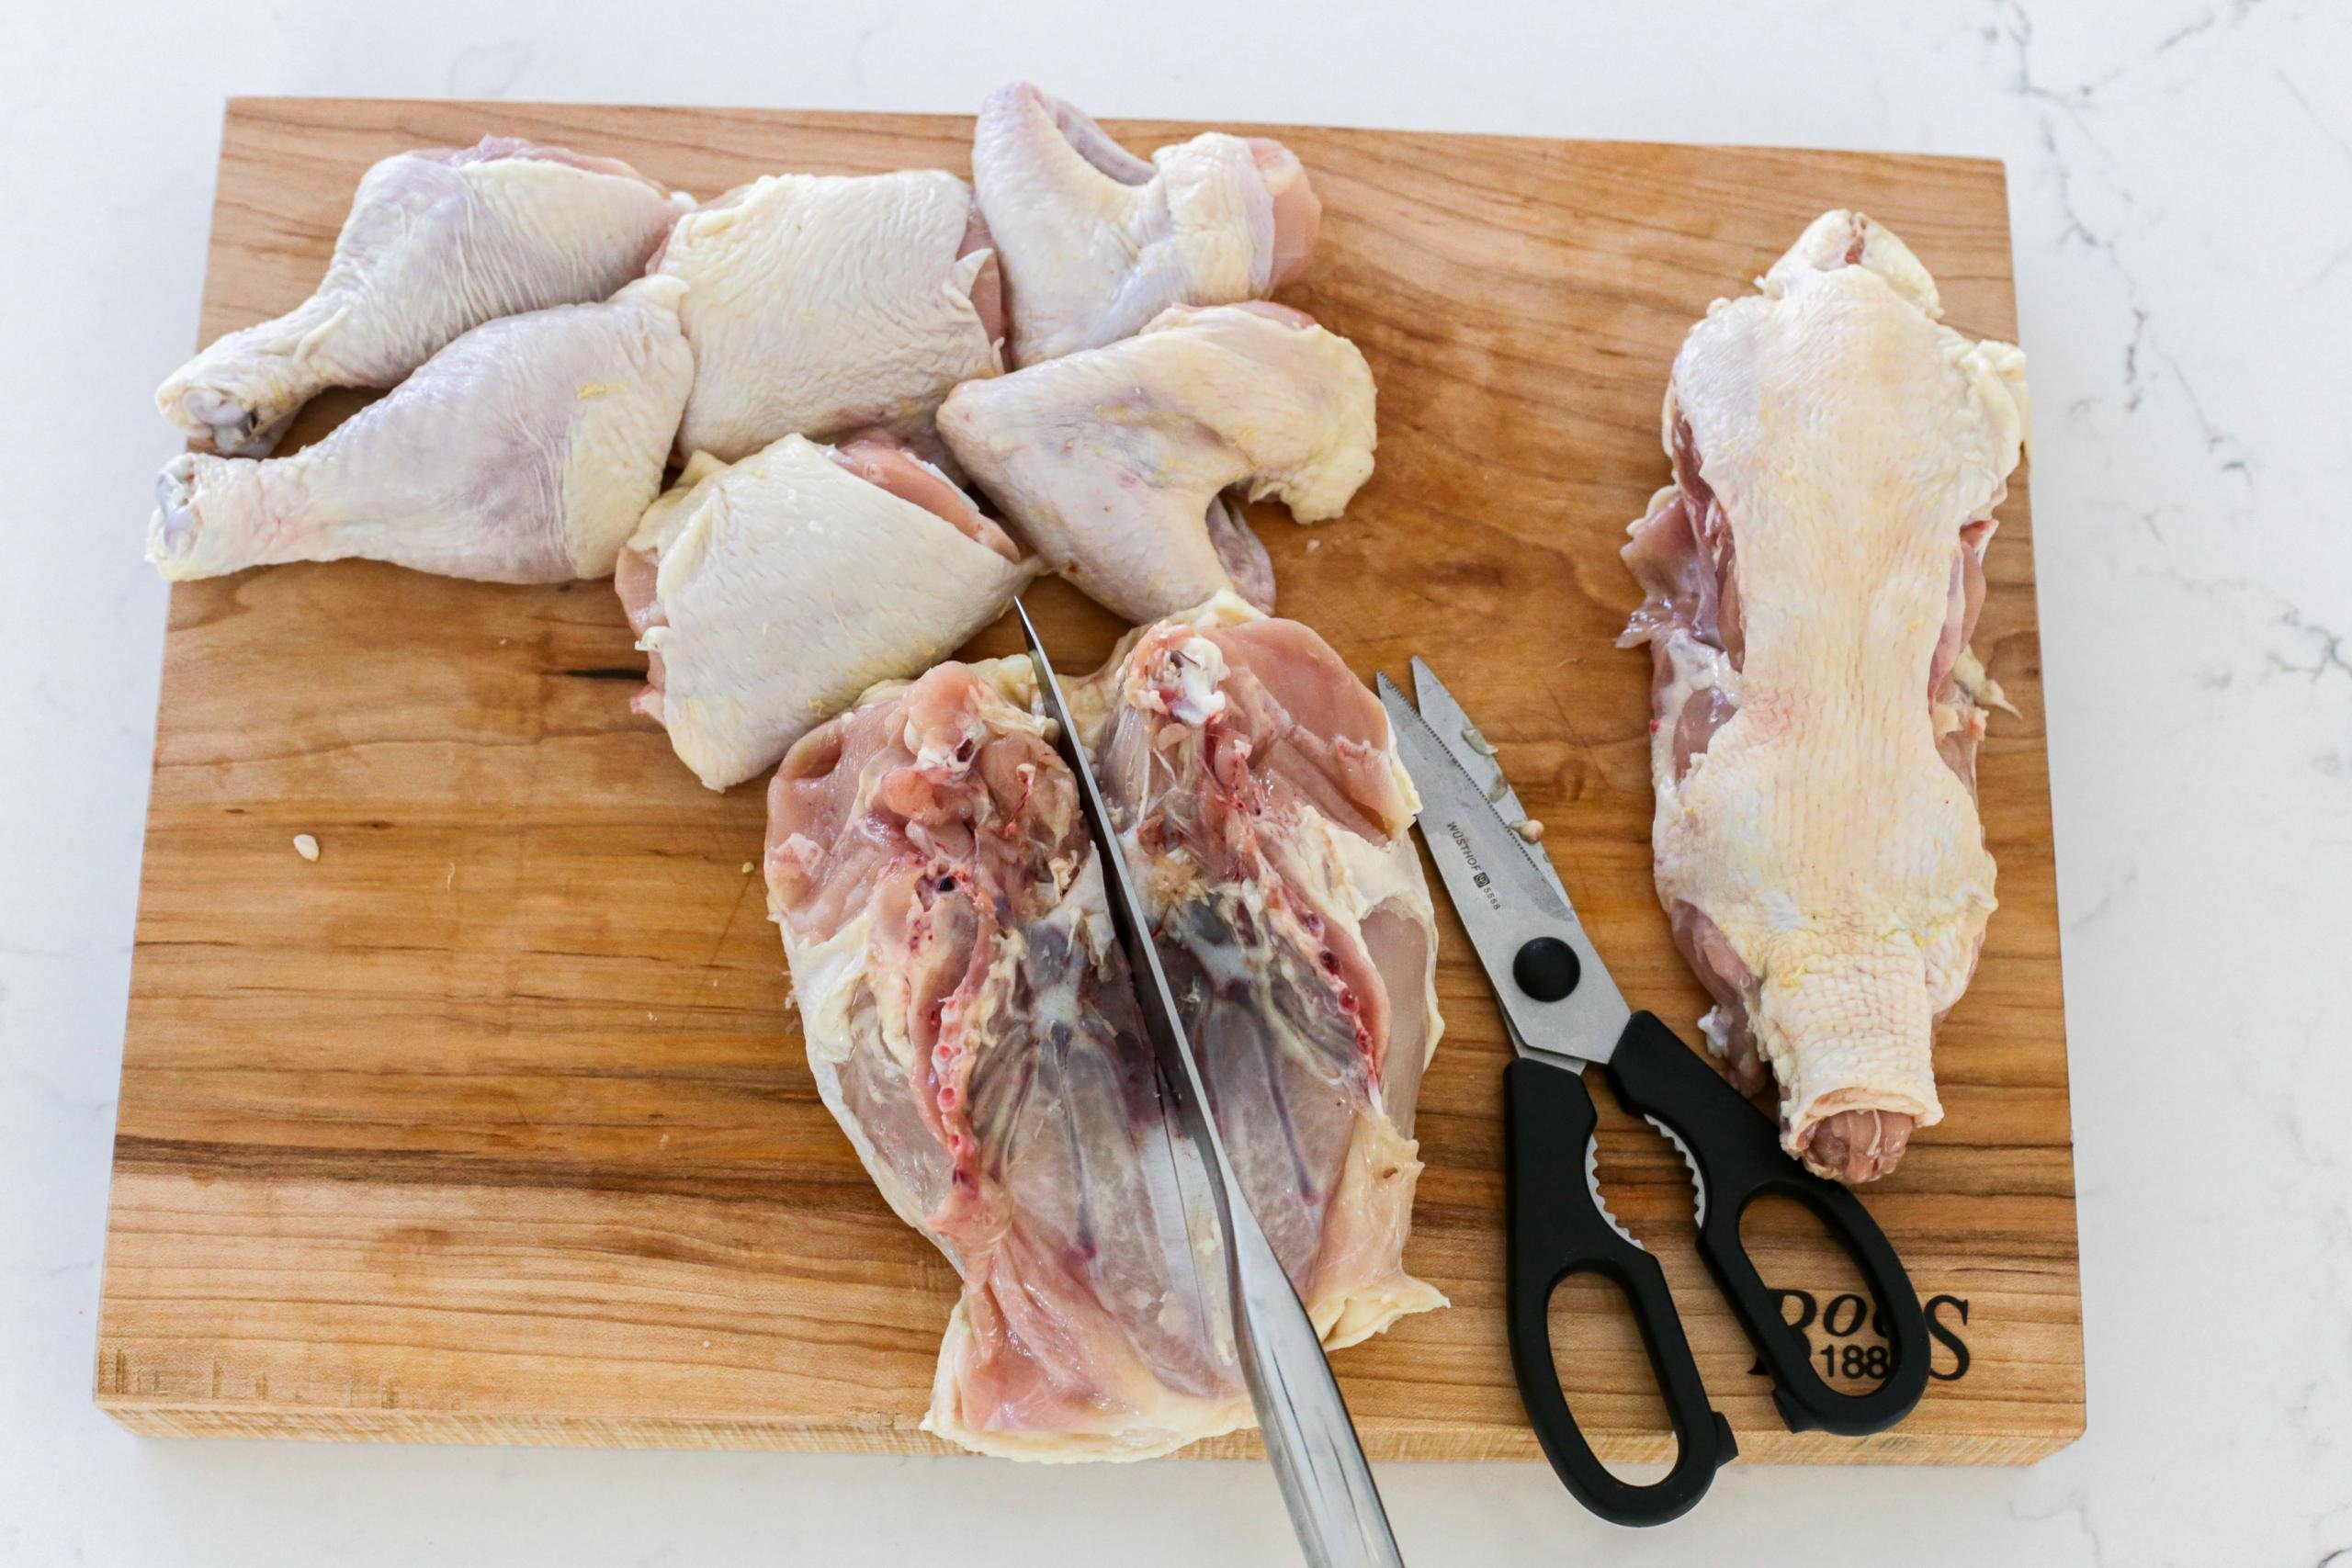
- Cut the backbone: To separate the backbone/spine from the breast, turn the chicken on its side and look for a thick white fat line. Cut through it with kitchen scissors.
- Separate the breasts: When removing the chicken breasts, make a small cut in between them. Turn the breast over (the breast should be facing up) , and applying pressure with your hands, break the bone. At this point, it should be easy to cut the breast halves apart.
Hot tip: Pat the chicken dry with a paper towel before cutting in. A dry chicken is so much easier to handle than a wet, slimy one!
Chicken Recipes by Cut
Now that you have the chicken pieces, here are a couple great recipes to use for each of those cuts of meat.
- Chicken breast: Use the chicken breasts to make spinach stuffed chicken breast for a protein and veggie combination or honey chicken skewers for a quick, 30 minute grilled treat!
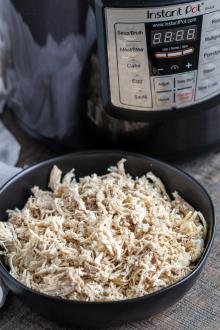
- Chicken thighs: Make these instant pot chicken thighs for a juicy, yet crispy bite. Or, opt for these grilled chicken thighs for ranch flavored grilled chicken. Last but not least, these Greek lemon chicken thighs are divine!
- Chicken wings: For a healthier “fried” version, make these air fryer chicken wings. Or, if you prefer to use the oven, check out these baked chicken wings.
- Drumsticks: We love these baked chicken legs for an easy dinner. Or, use them to make a delicious pot of fresh garden soup.
- Backbone: Don’t ever throw out this delicious part of your chicken! Instead, use it to make a mouthwatering homemade chicken broth!
- Giblets: Depending on the chicken you buy, the cavity may be stuffed with extra pieces inside. These are the giblets (heart, liver, gizzard, and neck), which can also be made into tasty dishes!
Hot tip: If you want to use up all (or most) of your chicken pieces in one recipe, try roasting them in this one-pan chicken and potatoes recipe. It’s a quick and no-fuss meal!
Storing Raw Chicken
You most likely will find yourself with more chicken than you immediately need — which is a huge plus! Store any extra pieces in the fridge or freezer.
- Refrigerator: Store raw chicken (either whole or cut into pieces) for up to two days in the fridge. Keep the chicken in an airtight container!
- Freezer: To freeze for up to nine months, separate the cuts into separate airtight containers or freezer-safe ziploc bags. Label the bags with the type of chicken cut to make it easier to distinguish later on. Thaw in the refrigerator overnight.
Hot tip: We love using this vacuum sealing machine along with these vacuum bags to seal raw meat for long term storage.
Recipe

Instructions
- Start by removing the legs by finding the space that connects the thigh with the breast. Cut the skin to see the bone on the inside. Bend the thigh to pop the bone until you see the joint, then proceed to cut the joint with a knife.

- To separate the drumsticks from the thighs, find the fat line and cut along it using a sharp knife.
- To separate the wings, use your finger to get a feeling where the joint is and cut through to separate it.
- Separate the back bone from breast by turning the chicken to its side to find a fat line and cutting through it with scissors.

- To separate the breast, make a small cut in between the breast, turn the breast over and applying hand pressure, break the bone. Now, it should be easy to cut the breast into two pieces.

- Your end result should yield two each of wings, thighs, breasts, drumsticks, and the backbone. Use in your favorite chicken recipes!


Hi WE always cut down each side of back bone to use that wonderful part with wing tips and neck for a stock just freeze parts for that time when you have enough also save bones after dinner cut leg bones ih half or smash with a mallet ,yes wrap in plastic wrap first den freeze along wit other bones and back ,,great for bone broth too
Joseph, those are really great tips. Thank you for sharing them.