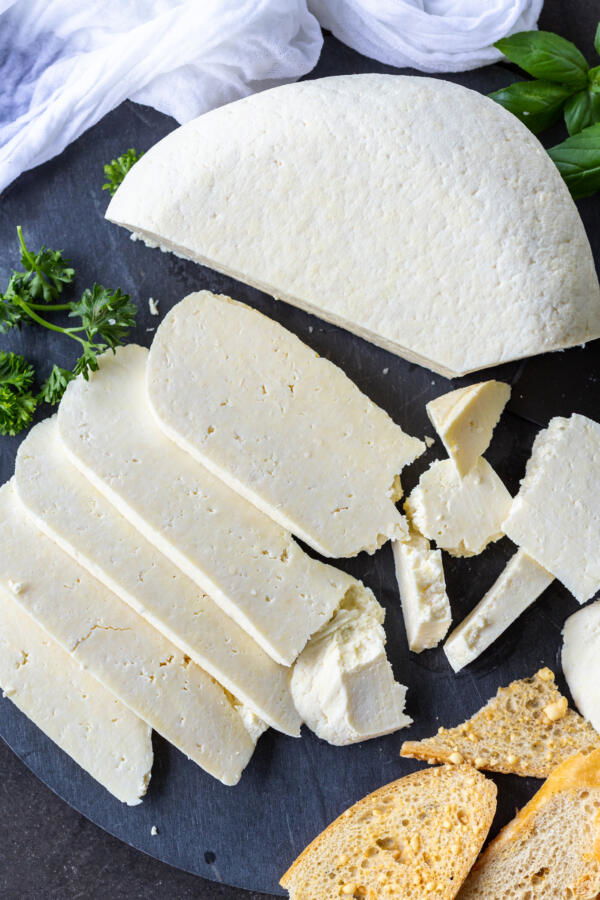
Homemade cheese couldn’t be any easier to whip up in your kitchen. You’ll need only four simple ingredients to make an irresistibly tasty wheel of fresh cheese!
I never thought I’d be the kind of person making cheese at home, but here we are. This old-world homemade cheese recipe is shockingly easy (even for the busy mom!). Once I tried it myself, I was hooked. The best part is knowing exactly what’s in it. No preservatives, no fillers, just real ingredients made right at home. I never knew cheesemaking could be so easy and rewarding.
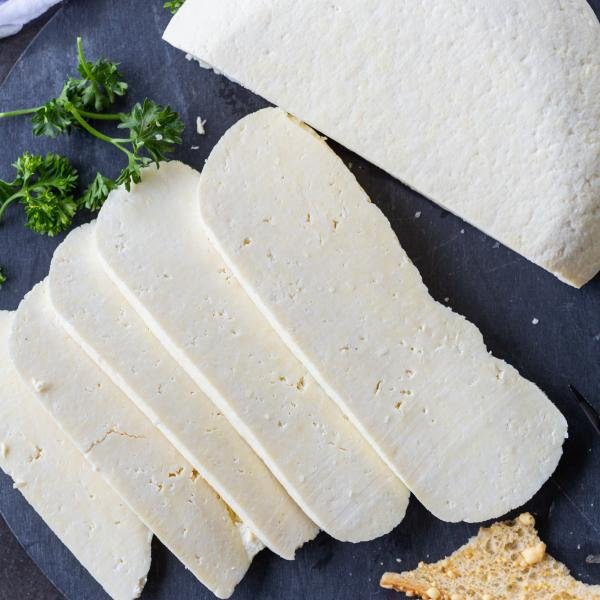
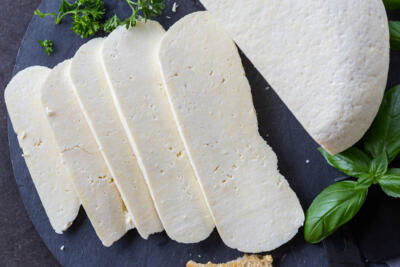
This homemade cheese has a similar taste to paneer cheese from India. Overall, it has a simple flavor, with a creamy, yet slightly firm texture. Taste and see how good this homemade cheese is for yourself!
Love making your own cheese at home? Try your hand at making my easy farmer’s cheese recipe while you’re at it.
How to Make Homemade Cheese from Scratch
How can you make cheese? Great question! Follow this crazy easy simple recipe, then you’ll have a block of cheese in no time at all. No need for any special enzymes, starter cultures, rennet, or any cheese making kits!
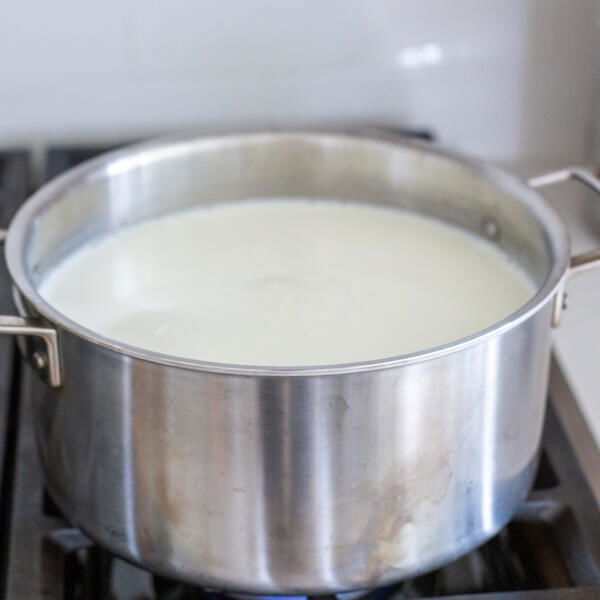
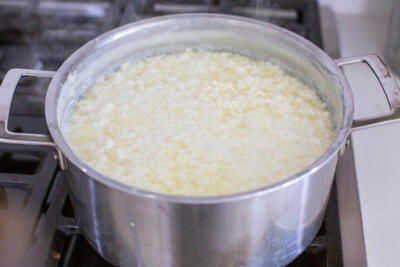
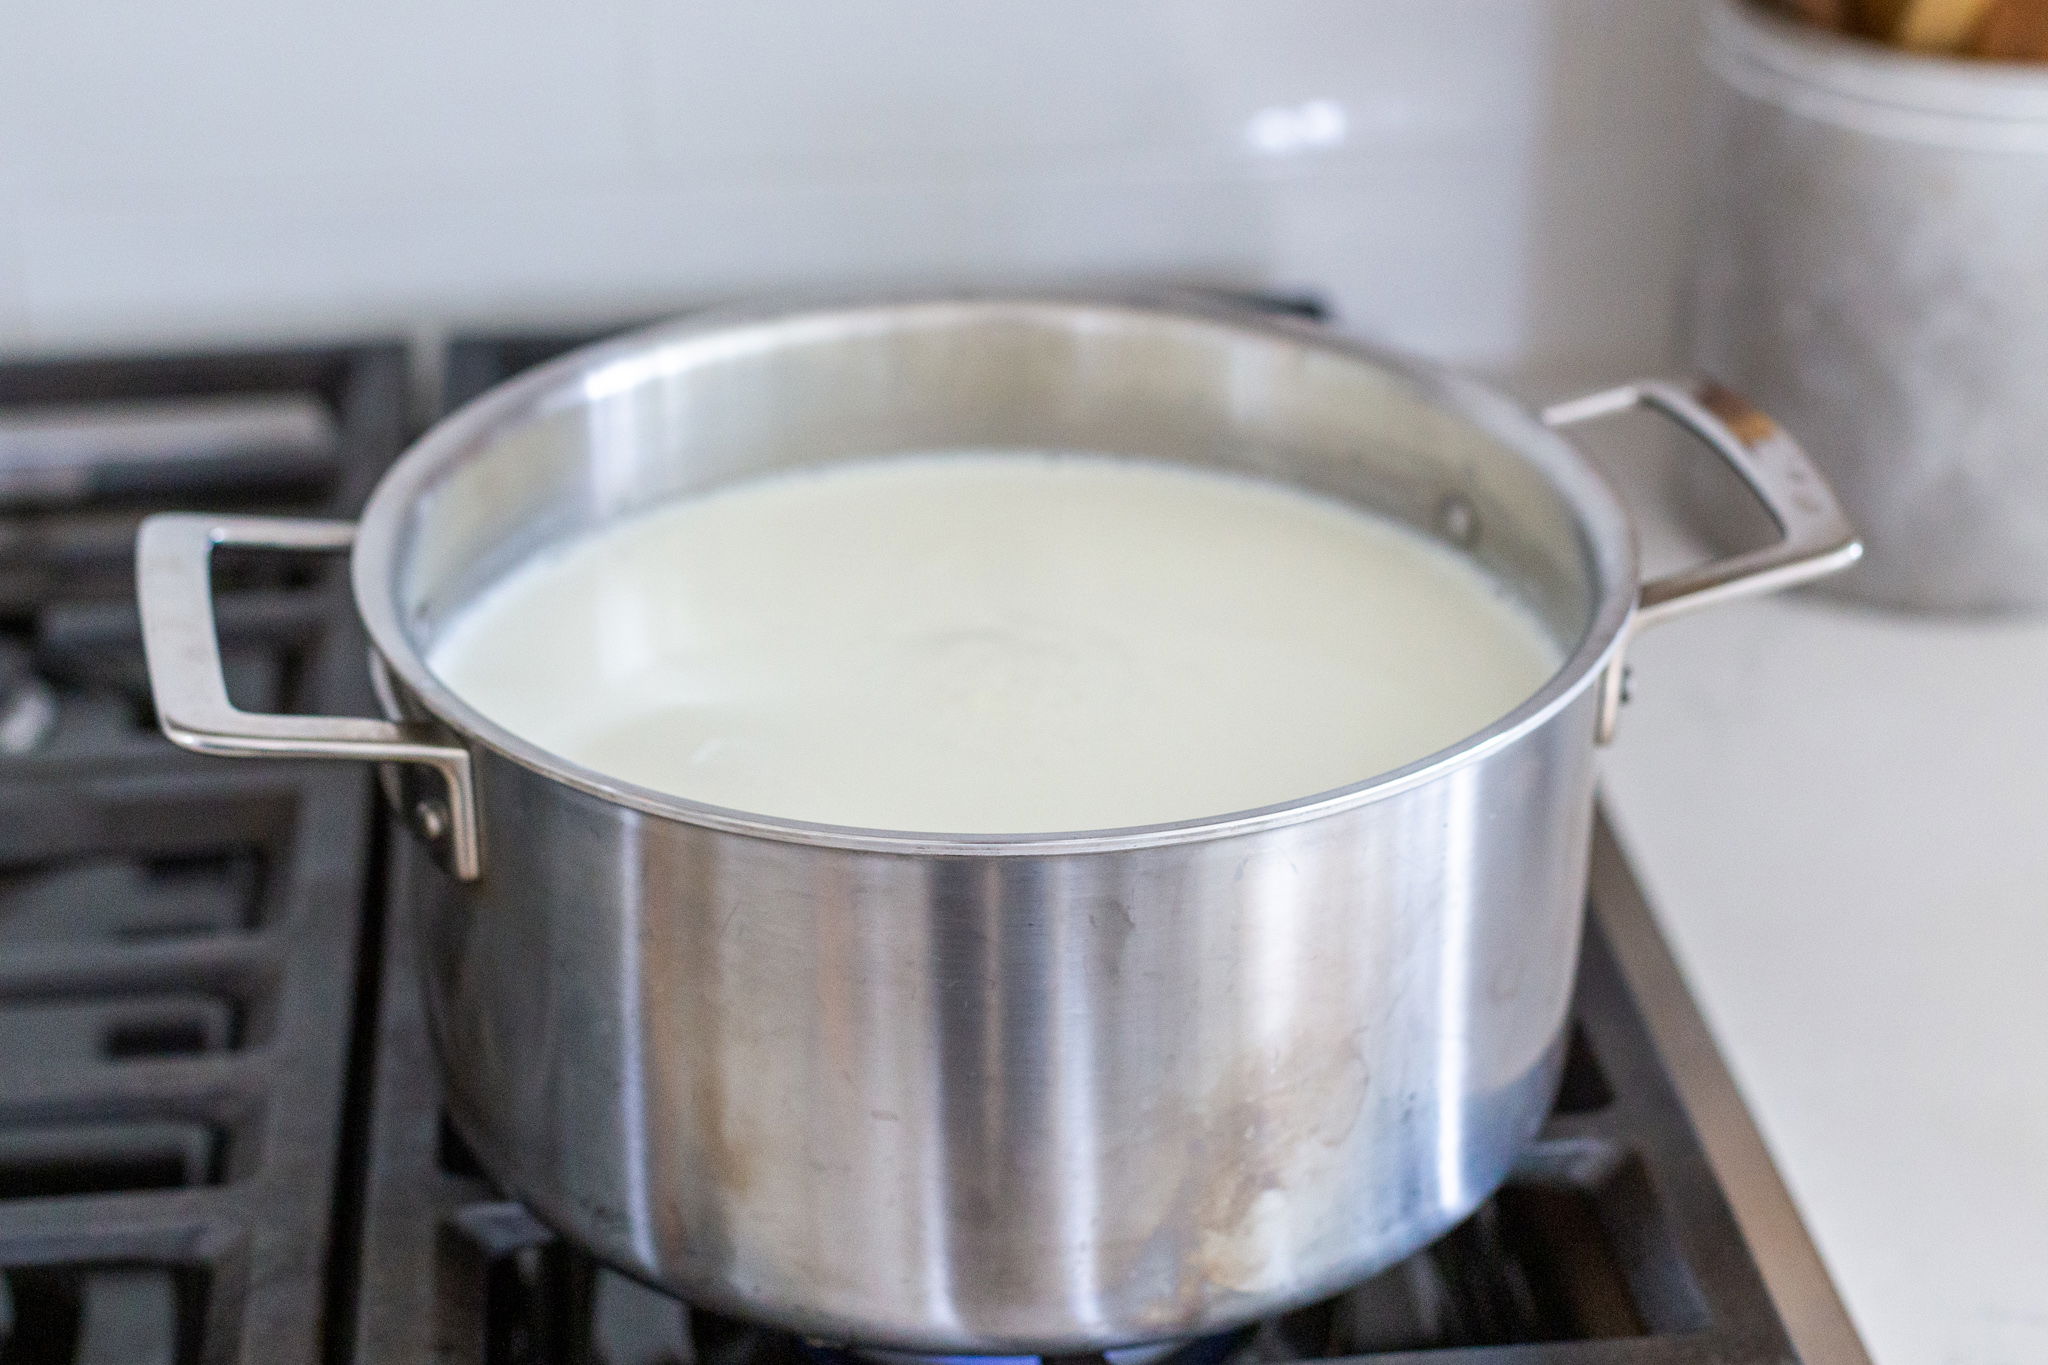
- Bring the milk to a boil: First, bring the milk to a slow boil in a large pot over medium heat. Stir it frequently with a spatula or wooden spoon to prevent sticking.
- Prepare the coagulant: Next, whisk the eggs with the salt in a large bowl, followed by the sour cream.
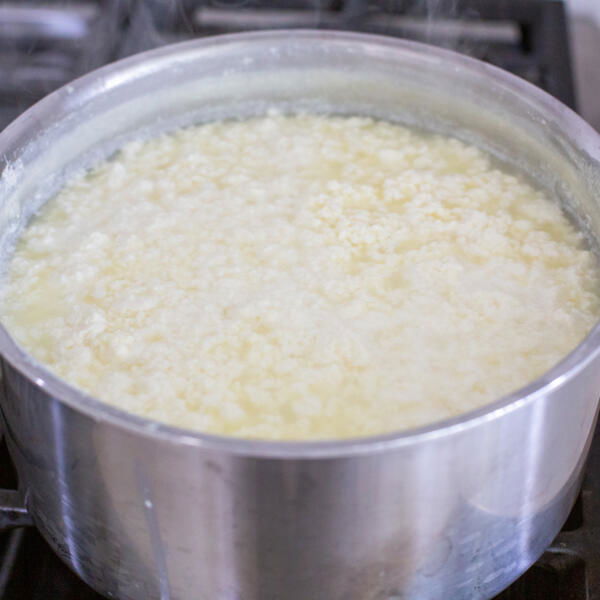
- Coagulate the milk: Slowly pour the egg mixture into the boiling milk. Let the mixture cook for seven minutes, stirring it often as the curdling takes place.
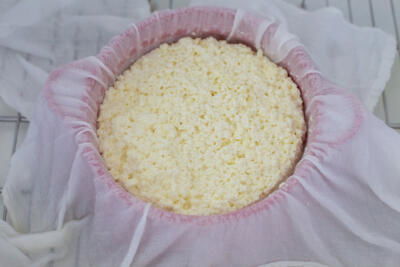
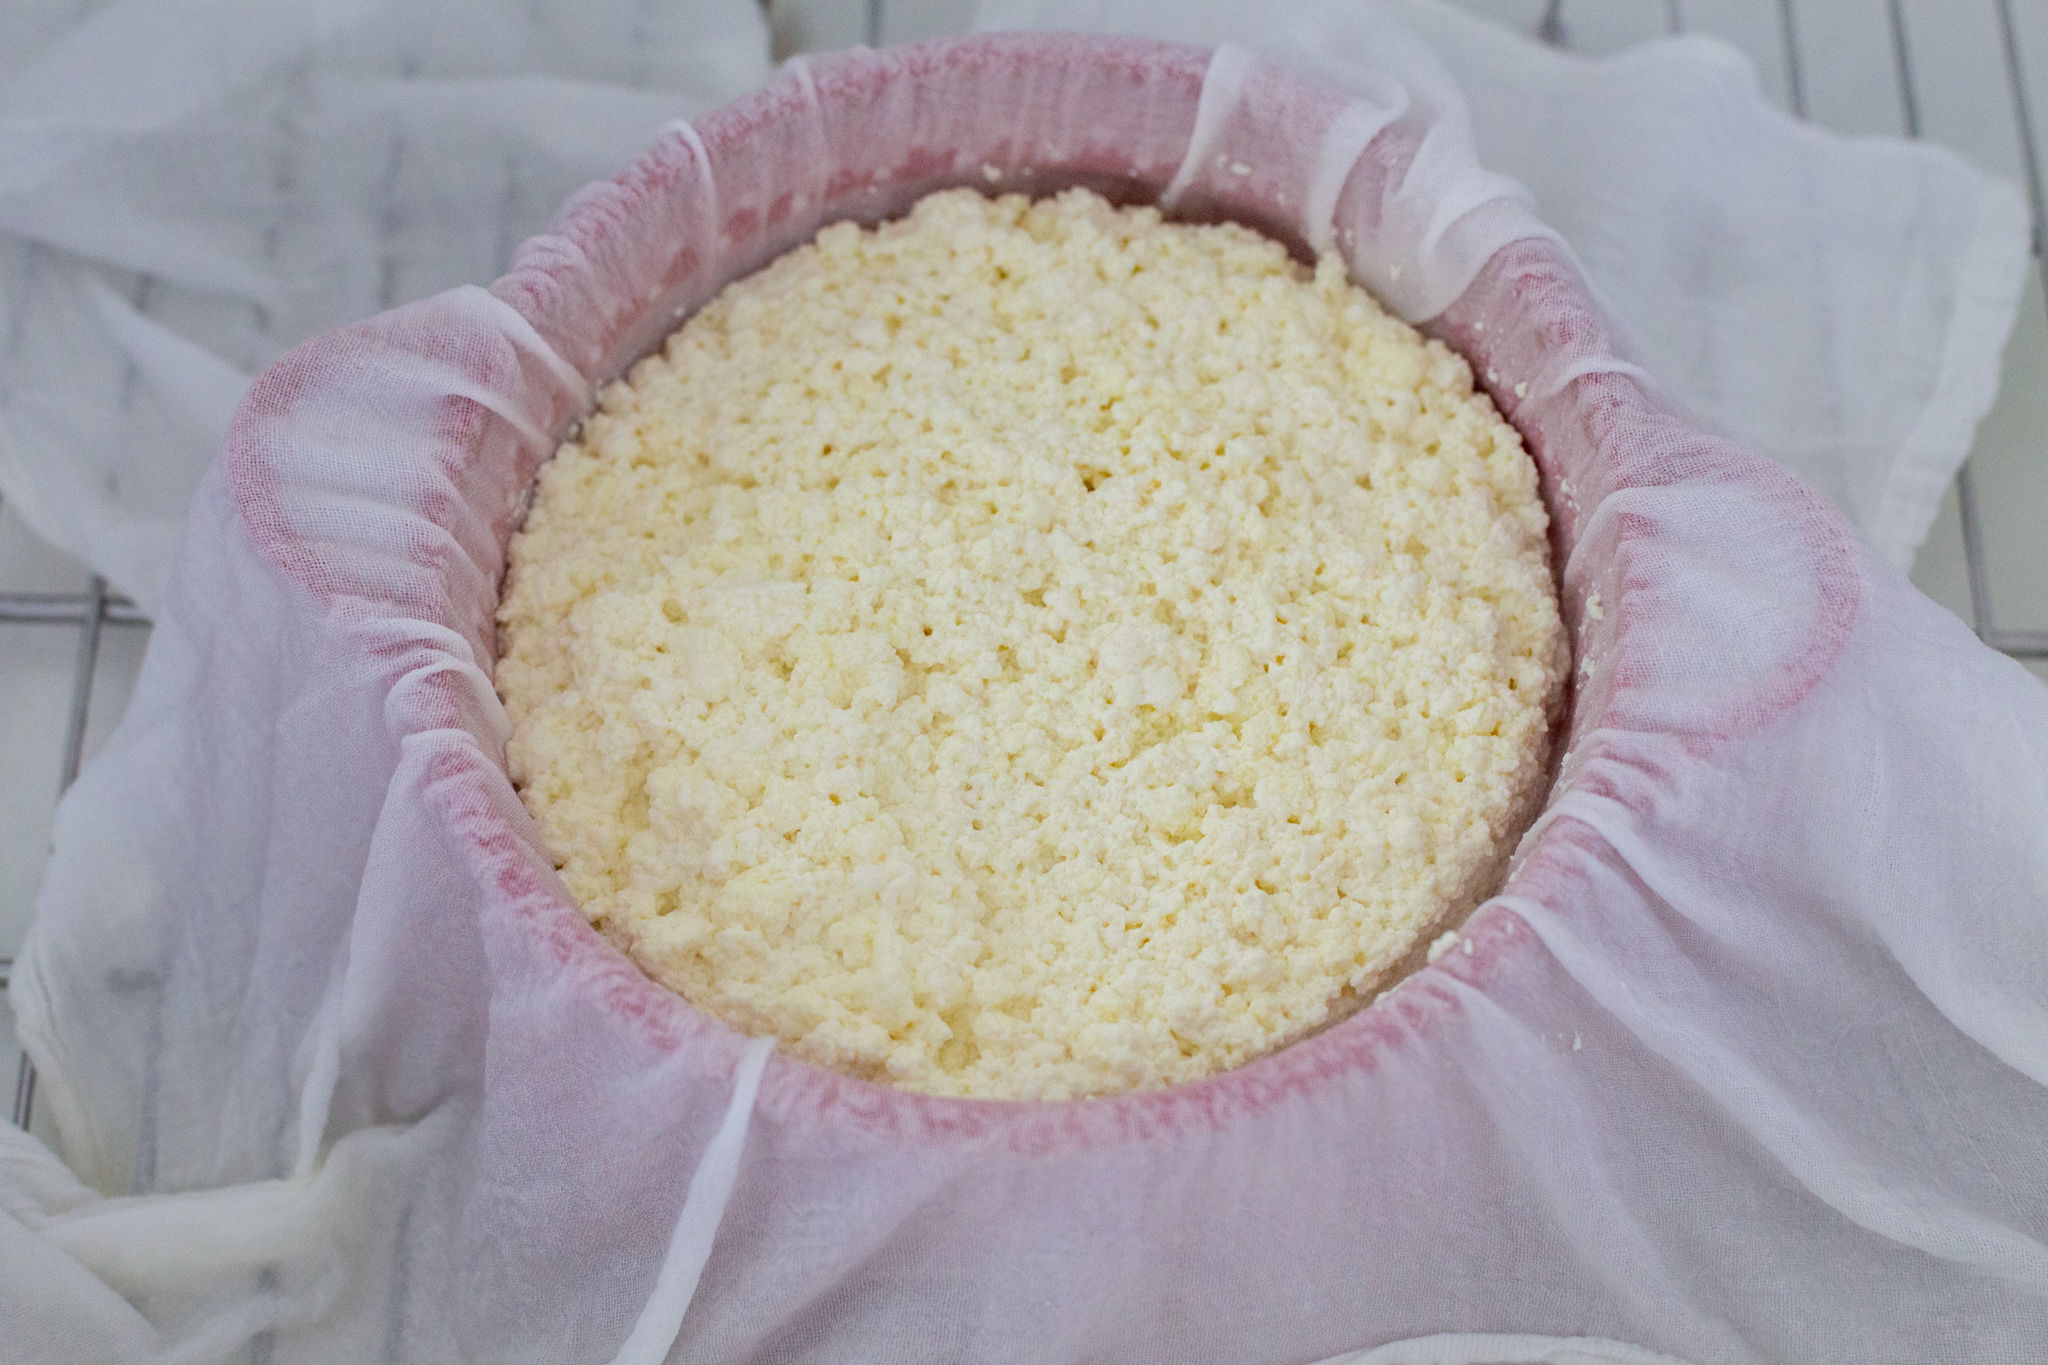
- Strain the cheese: Next, line a colander with a cheesecloth. Pour the mixture through and strain out the liquid.
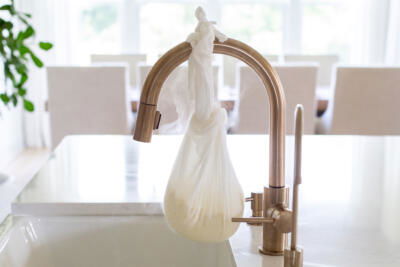
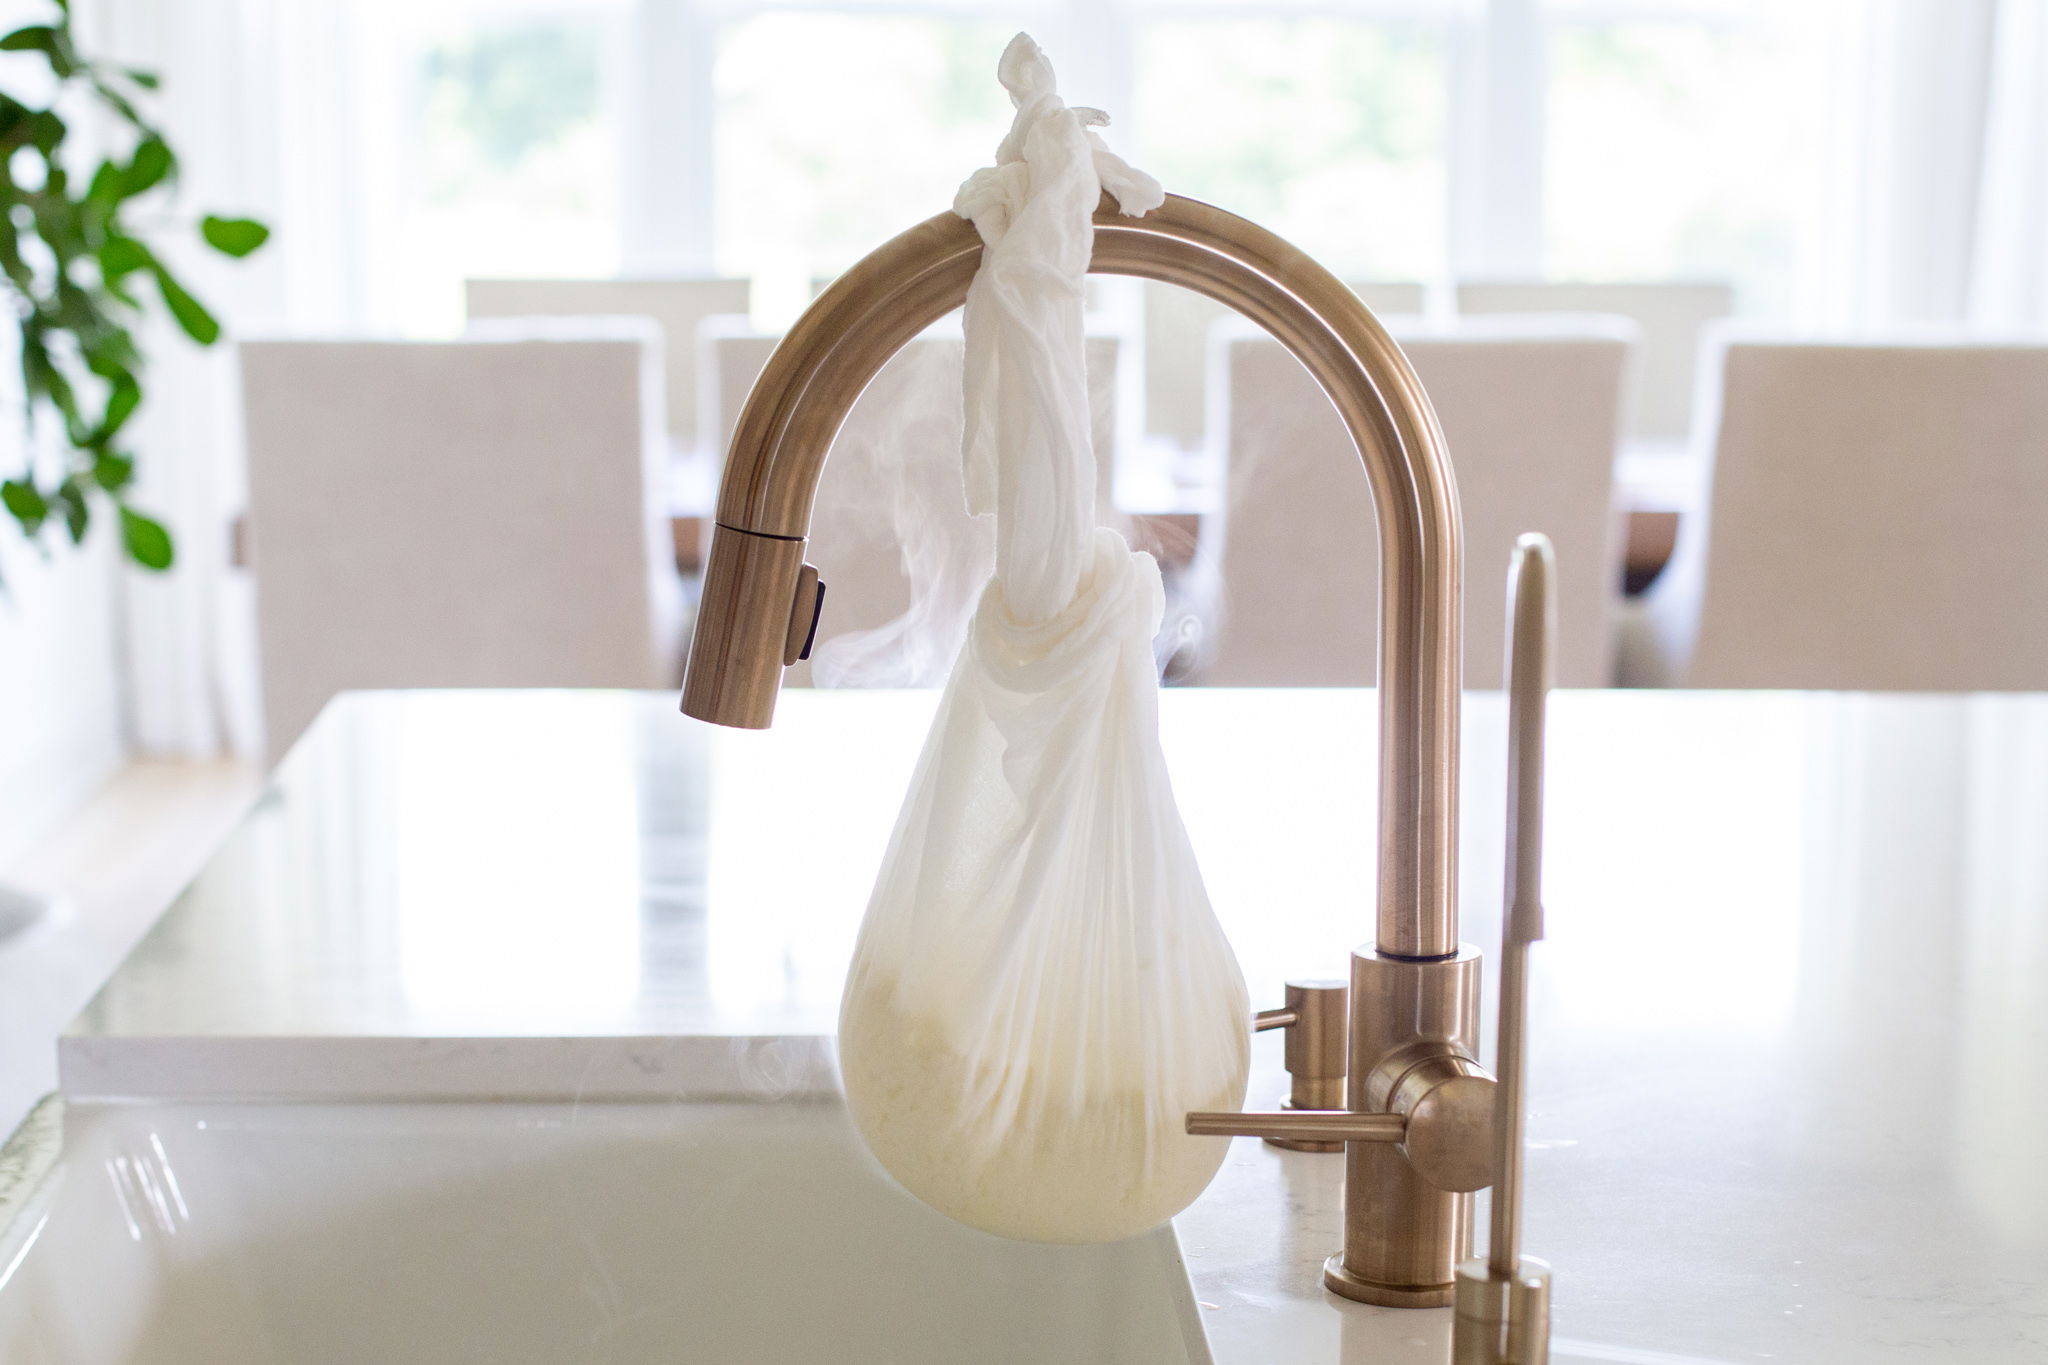
- Squeeze the whey out: Gather the cheesecloth around the cheese and wring out the whey.
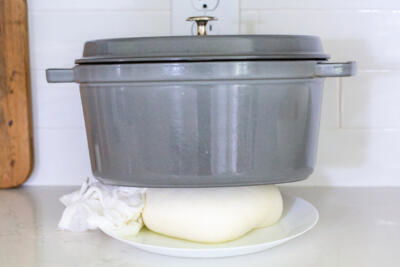
- Press the cheese: Place the cheesecloth-wrapped cheese on a plate and weigh it down with something heavy. Let it rest at room temperature for several hours.
- Refrigerate the cheese: Refrigerate the cheese until you’re ready to use it. Enjoy!
Did you know? Rennet is the term for the enzymes that help curdle milk and make cheese. Instead of rennet, many people use lemon juice, white vinegar, and, in this case, sour cream.


Helpful Tips When Making Cheese
I never thought I’d be one to make cheese, but these tips have definitely made the process and the result so much better.
- Opt for whole milk: Pasteurized whole milk is the best when making homemade cheese. It makes for the most creamy cheese, while also containing the least amount of harmful bacteria. Using non-fat milk creates a cheese that’s nowhere near as creamy and large as when using whole milk.
- Drain out as much of the whey as possible: To get the best possible texture, strain out as much of the whey/liquid from the cheese curds as possible. Wring the cheese cloth several times with all your might! Use that “mom” strength!
- Press the cheese for at least five hours: For the firmest wheel of cheese, press the curds for at least five hours with something heavy. I love using a heavy Dutch oven, and if you know me – I’ve got tons of them!
- Add more flavor: Add more flavor with fresh ground black pepper, red pepper flakes, or herbs (chives, dill, or basil). Put them into the cheese curds before you press out the liquid.

Serving Homemade Cheese
Just like regular cheese, there are a million and one different ways to use homemade cheese. Don’t let the fact that it’s homemade deter you from any of these!
- Sandwich: Whip up an air fryer grilled cheese or garlic bread sandwich with thick slices of homemade cheese.
- Salad: Dice up the cheese into small cubes and toss it into your favorite salad. You can also swap it in for the mozzarella cheese in an arugula caprese salad or Italian pasta salad.
- Charcuterie Board: Serve the cheese with homemade apricot jam, sourdough crackers, cured meat, marinated mushrooms, and other goodies on a snacking board.
- Pizza: Swap the homemade cheese in instead of shredded cheese on a perfect pepperoni pizza or a margherita flatbread pizza.
Storing & Freezing Homemade Cheese
If you have some leftover cheese to stow away or you’d like to freeze an entire wheel for later, here’s my experience on how to do it.
- Refrigerator: To keep the cheese on hand for up to a week, store it in an airtight container in the refrigerator lest the cheese dries out.
- Freezer: To freeze the cheese, wrap it in plastic wrap and pop it into a plastic storage bag. Pop it in the freezer for up to two months. Then, to thaw, place it in the fridge overnight.
More Fun Homemade Recipes
- Homemade Kielbasa Sausage Recipe – Hand-cased sausage
- Sourdough Bread – Delicious with butter and homemade cheese
- How to Make Homemade Pasta – Simple, fresh pasta noodles
- Homemade Gnocchi Recipe – Italian potato dumplings
Recipe

Instructions
- In a large pot, bring the milk to a boil over medium-heat. Stir the milk occasionally so it doesn't stick to the bottom.

- In a large bowl, whisk the eggs with the salt. Whisk in the sour cream until the mixture is smooth and even.

- As you continuously stir, pour the egg mixture into the boiling milk. Let the mixture cook for 7 minutes, stirring it every so often to prevent sticking. Cook until it curdles. Allow it to cool to room temperature.
- Line a colander with a cheesecloth and pour the mixture through.
- Gather the cloth around the cheese and squeeze out as much of the milk as possible.
- Place the cheesecloth-wrapped cheese on a plate and place something heavy on top to weigh it down. Allow it to sit for at least 5 hours.
- Refrigerate the cheese until you're ready to use it. Enjoy!


I like the texture but it’s pretty blend to my taste even with that amount of salt as per recipe. Any other recommendations what else can be added to boost the flavor?
Hello- it is a more mild flavor. You can add more flavor by adding fresh ground black pepper, red pepper flakes, or herbs (chives, dill, or basil). Put them into the cheese curds before you press out the liquid. Hope this helps!
Would raw milk work?
Hi Tatyana! I haven't tried it myself, but I know my mom and grandma used raw milk all the time in Ukraine. Good luck!
Hi I really like a smelly saltiest cheese like cheddar or linberger any idea on what I could use to give the same feeling?
Hey Andie, For different flavor profiles and types of cheese, you'll need to experiment with recipes specifically designed to achieve those tastes. Strong, salty cheeses like cheddar or Limburger each have unique characteristics that come from specific aging processes, cultures, and ingredients. Trying out different recipes will help you find the flavor that best suits your preference. Enjoy your cheese-making journey!
Is it essentially brinza (брынза) cheese as it called in Russia. It looks like it is.
I'm sure they share some similarities! Have you made Brinza?
Thank you so much for sharing! It's delicious. So happy I can make cheese now 🙂
Hi Rachel, I'm happy to hear this! Enjoy all the cheese making!!
Is there anyway to make this recipe dairy free
Hi David, I have never made dairy-free cheese so I am not sure if this recipe would work with a dairy-free milk. If you try - let us know how it works out.
I would love to try making this cheese. Is it really just one quart of milk? Your pot seems like the size of a Dutch oven and it's filled almost to the top.
Hey Ana, Yes, the recipe uses one quart of milk. It's a much smaller pot than it appears. 🙂
Can I use yogurt instead of sour cream
Hi Rose, I have not tried but I think Greek yogurt should work. Enjoy it, nothing like homemade cheese. 🙂
Very nice recipe chef 👍👌👏. Thank you for your effort 🌹🌞😎.
Hi Jasson, thank you so much for sharing your feedback with me. Enjoy!
Can I use 18% cream instead of whole milk?
Hi Monty- since this recipe only uses a few ingredients, I wouldn't recommend subbing the whole milk. I'm not sure how the higher fat cream would affect the texture or end result of the cheese. I hope you are still able to give the recipe a try with whole milk!
It sounds delish. I used to make cheese uses rennent and cultures. But this sounds so much easier.
Hi Carol, Oh yeah, You definitely went all out making cheese! That is really impressive! I hope you enjoy making this recipe.
I can't believe how easy it is to make cheese!! I want to put this on everything!! SO creamy & delicious!
Hi Kristyn, Thanks so much for your feedback! Enjoy!
I never thought that I would be able to make my own cheese, so thank you so much for sharing this recipe!
Hi Jess! Its actually very simple! You're very welcome!
I had no clue how easy this was to make, thank you! So yummy too.
Hi Diane! Thanks for trying our recipe! Enjoy
Is there a name for this cheese
Hi Don- I don't have a name for it, it's just a soft cheese!
Do you really mean boil? As in a roiling boil?
Hi there - A light boil will do the trick. Milk burns easily, so a rolling boil is not necessary. Hope this helps!
What do the eggs do?
There is an egg protein that allows for growth of bacteria necessary for slow aging. Most aged cheese like grana padano and parmesano reggiano have eggs in it. The age process takes from 12 to 24 months. Imitation of these cheeses don't have eggs and fake bacteria is added to produce a hard cheese very fast.
Hey dear, I am not 100% sure, this is just the recipe our family used. Sorry, I don't have the best answer. 🙂
they act as a tthickening agent
Honestly one of the best fresh cheeses I've ever made. Though it odd with the eggs but it works great! Pinned to my favouites. I'm wonder would this work fine toasted in a sandwich press? I'm going to try it tonight anyhow. All on it's own it's wonderful 🙂 Thanks.
Hey Sue, I do think it should work great but not 100% sure. Enjoy
Hey and thanks for this wonderful post! Could the leftover milk be used for anything or is it just better to pour out...?
The whey can be used as a base in bread recipes, instead of water. personally I just get rid of it because I dont like the flavor it adds.
Is this farmers cheese?
No, this is regular cheese that you can enjoy with some tea or a sandwich.
Does the milk mixture have to cool before you pour it into the cheese cloth or no?
As long as you don't burn your self, you can pour the mixture right away. It is best to put it in a cheese cloth while it's still warm.
you doing this on low ?when i have to remove from heat?
It cooks on a medium heat the whole time. Ass soon as you add sour cream mixture cook for about 7 minutes (step 3). Hope this helps 🙂
how much % does the milk contain?
I used whole milk, I believe it's 4%
Hi for how long you have to stir ? milk should be warm then pour egg mixture?
Stir as you pour egg mixture. Yes, milk should be warm.
Any idea on the caloric content?
I can't tell you exact because I never looked into it. But if you were to add sour-cream, egg and milk calories that's what it would be. It's definitely less than most store bough cheese and no preservatives.
Is this cheese called brindza? In Russian
No, this cheese texture is a little different. Closer towards "plavleniy" cheese.
Why at least 5 hours? Does it taste better when left pressed for a longer time?
At least 5 hours to create firm cheese and get rid of whey. I don't think it would be any different if you keep it pressed for a longer time.
can this be made with 2 per cent milk?
Yes, I have tried 2% milk, but the results are better with whole milk.
Do you need to temper the egg mixture first?
You don't need to temper the eggs, you just need to stir the milk while pouring.
do you have to chill this when it sets?
Not necessary but refrigerate after all whey is pressed out.
Thank you!