This classic chicken Kiev or chicken Kyiv is a scrumptious combination of chicken breast with an herb butter interior and browned breadcrumb exterior. It is simultaneously crispy and juicy in every bite!
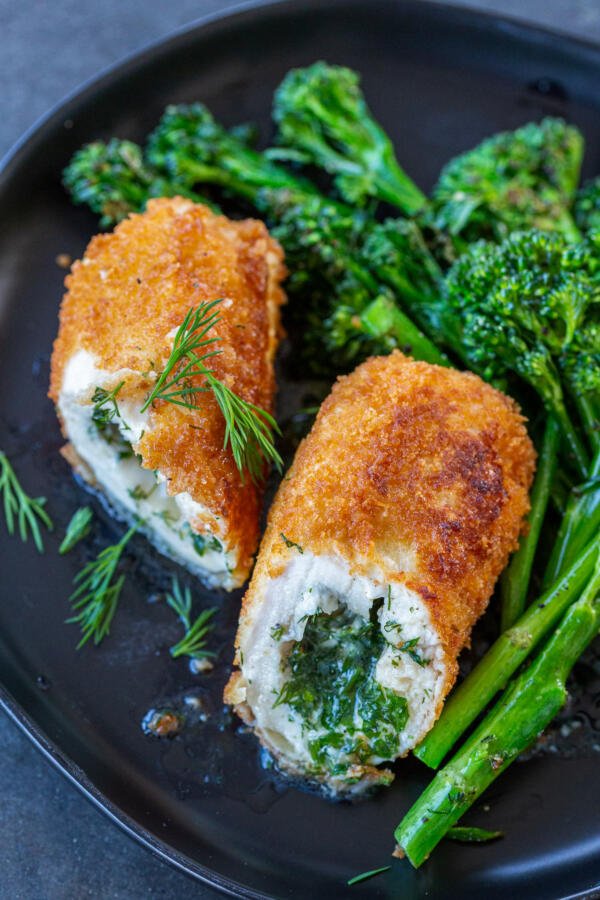
You will love this dish for its full flavor, packed with seasoned tender chicken breasts and a buttery interior. The crispy texture from the fried panko breadcrumb coating gives a crunch that makes you come back for more. This dish is sure to be a crowd pleaser – both for taste and its good looks!
What Is Chicken Kiev?
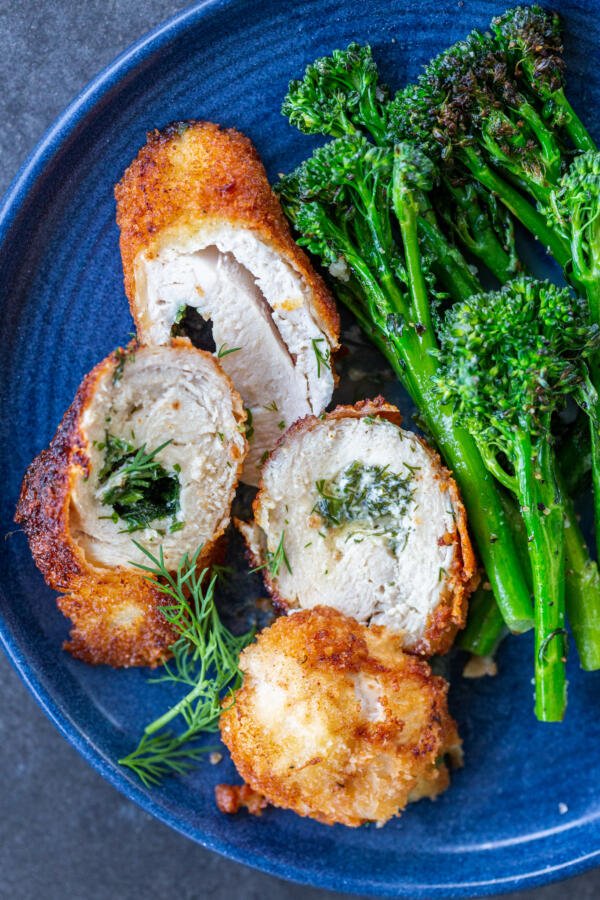
Classic chicken Kiev (or chicken Kyiv) is made with seasoned chicken breast wrapped around a juicy compound butter center. The chicken breast is coated and rolled in a bread crumb crust and fried (or sometimes baked) to crunchy perfection.
The exact origin of chicken Kiev is hard to pinpoint (much like plombir ice cream), but most sources agree on its Eastern European, primarily Ukrainian and Russian, roots. Today, it is a common dish in Eastern Europe as well as all over the world.
Why is it called “Kiev”? Based on oral tradition from today’s city of Kyiv, Ukraine, the name is attributed to a signature restaurant dish. The signature dish was served in a popular luxury hotel in Kyiv in the beginning of the 20th century until later destroyed by the Nazi German invasion.
Looking for more Ukrainian dishes? Try these classic cabbage rolls, savory potato pieorogi, or our hearty braised potatoes.
How To Make Classic Chicken Kiev
The best way to guarantee a smooth cooking experience is to first review the steps in their entirety. Here’s the general process of making this wonderful meat dish.
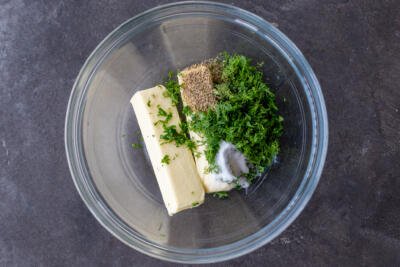
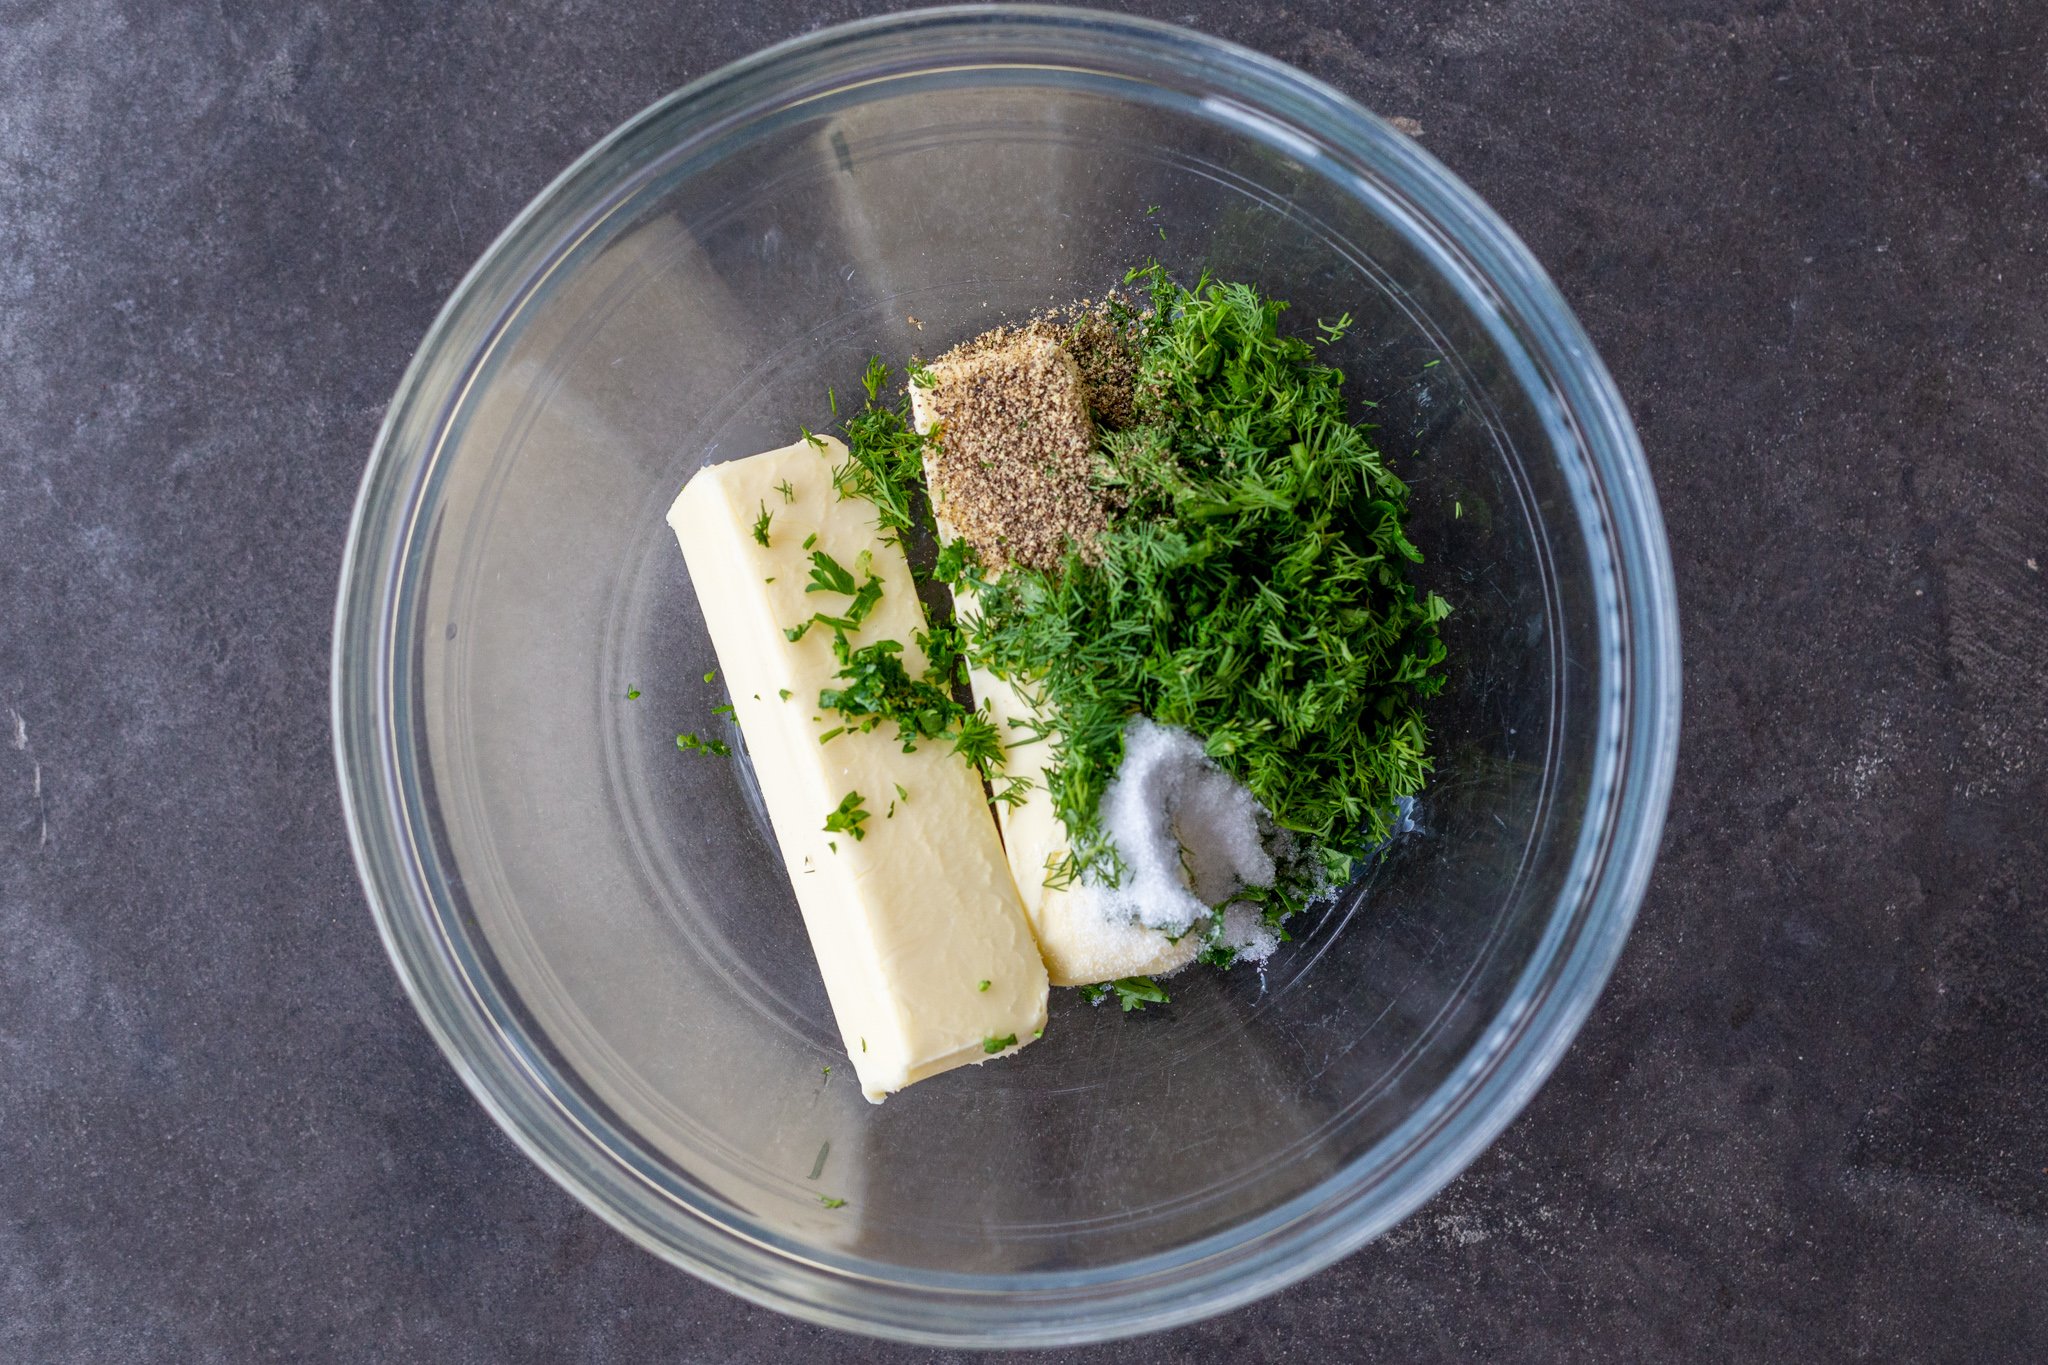
- Freeze the herb butter: In a bowl, combine butter, fresh herbs, and seasonings. Place mixture into a piece of plastic wrap and roll into a one inch thick log. Fully freeze.


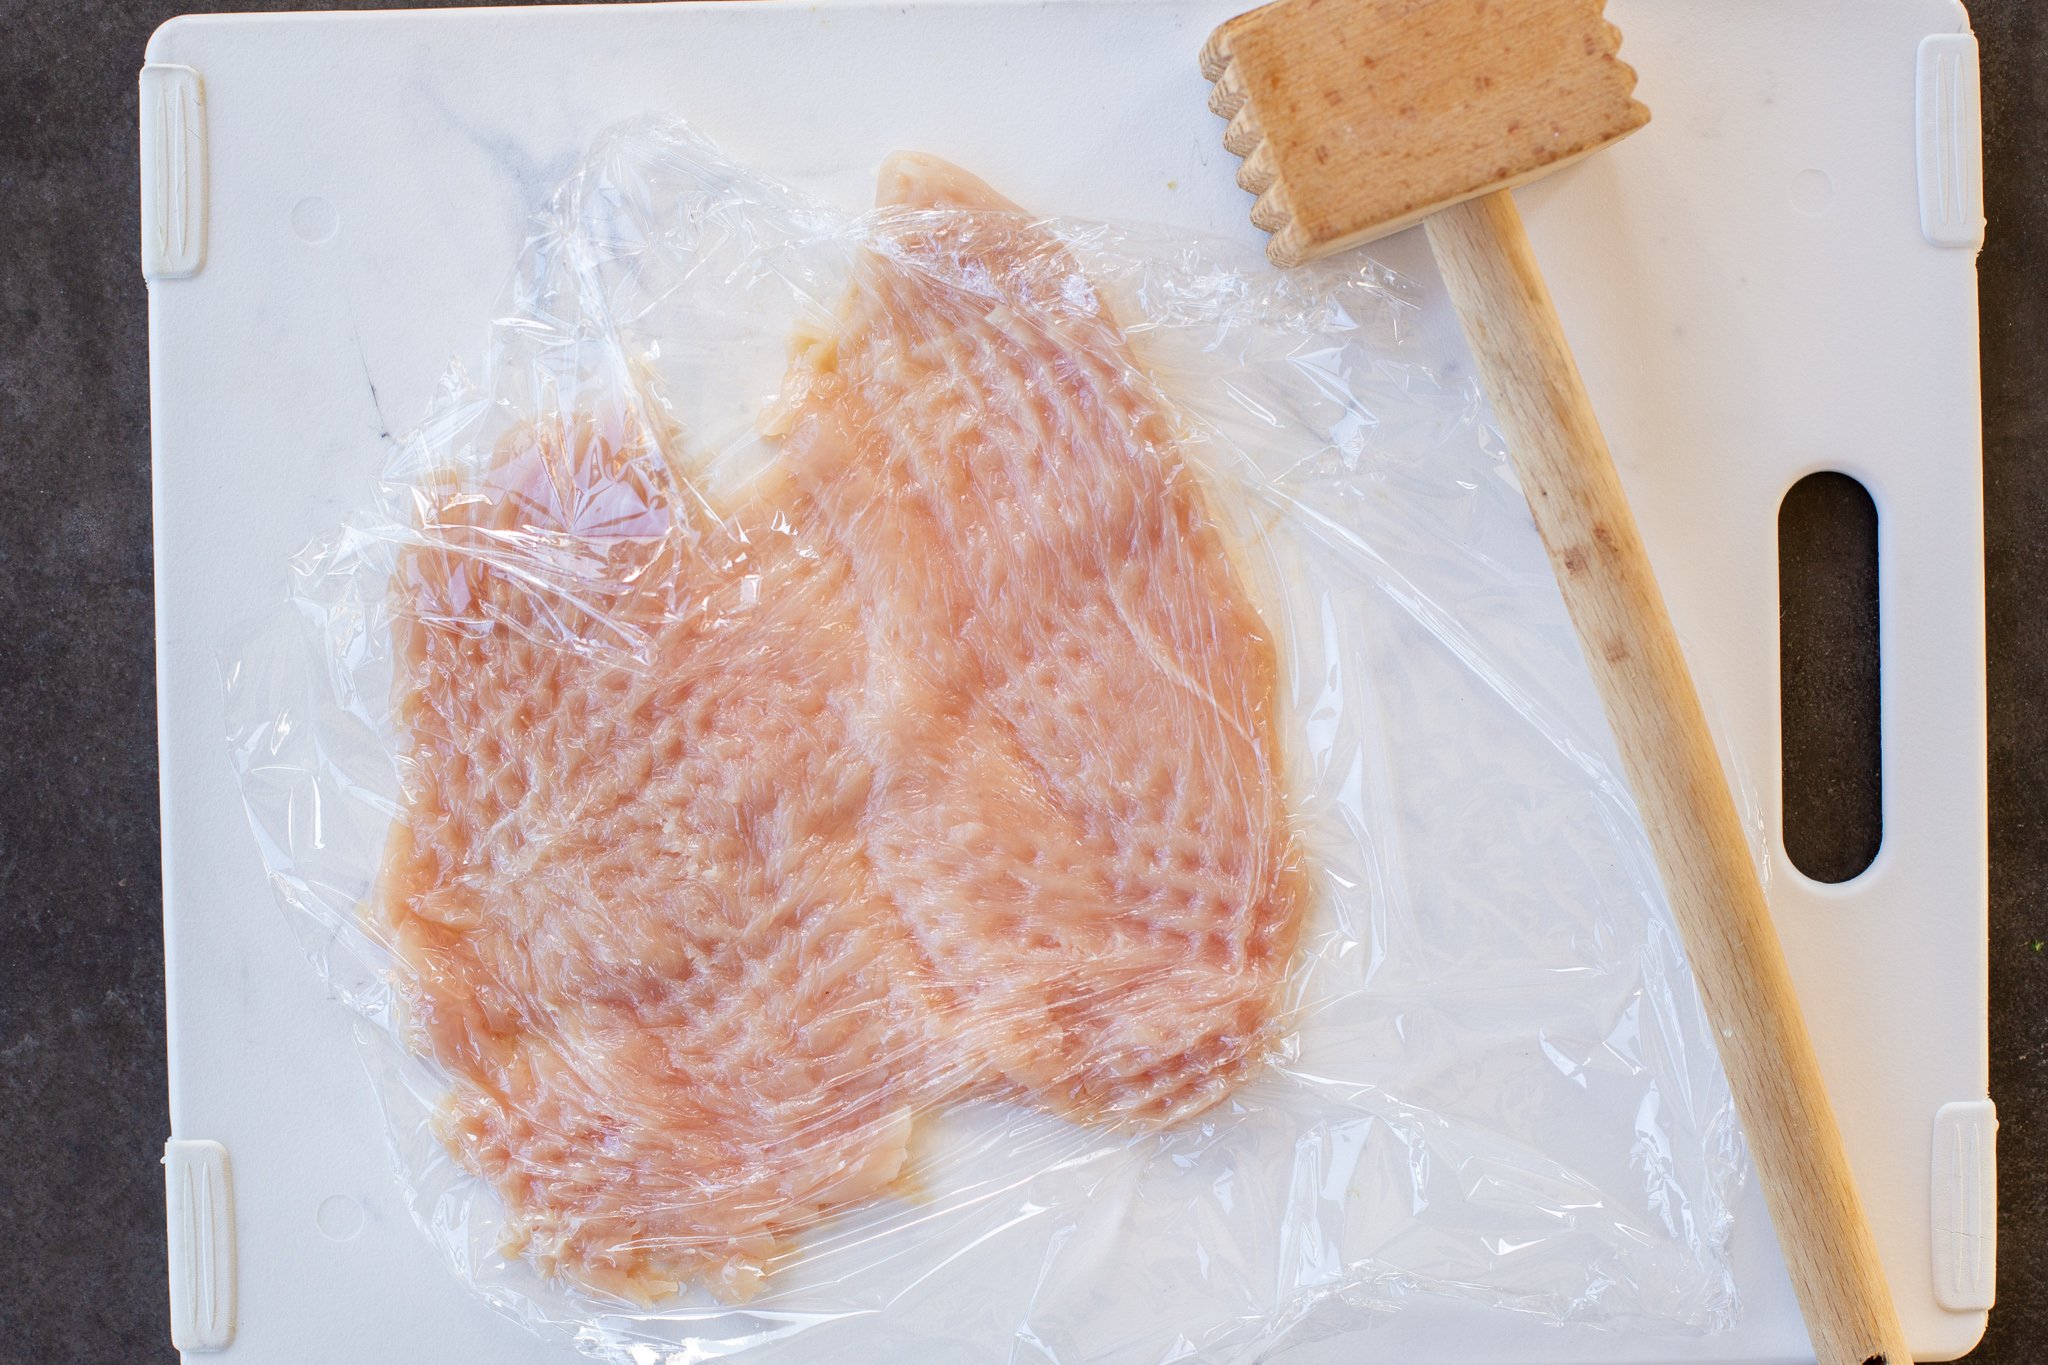
- Cut chicken: Cut chicken breasts into about six even-sized cutlets. Tenderize.
- Wrap chicken around herb butter log: Cut butter into six pieces and wrap chicken around each piece of butter. Wrap in plastic wrap and partially freeze.


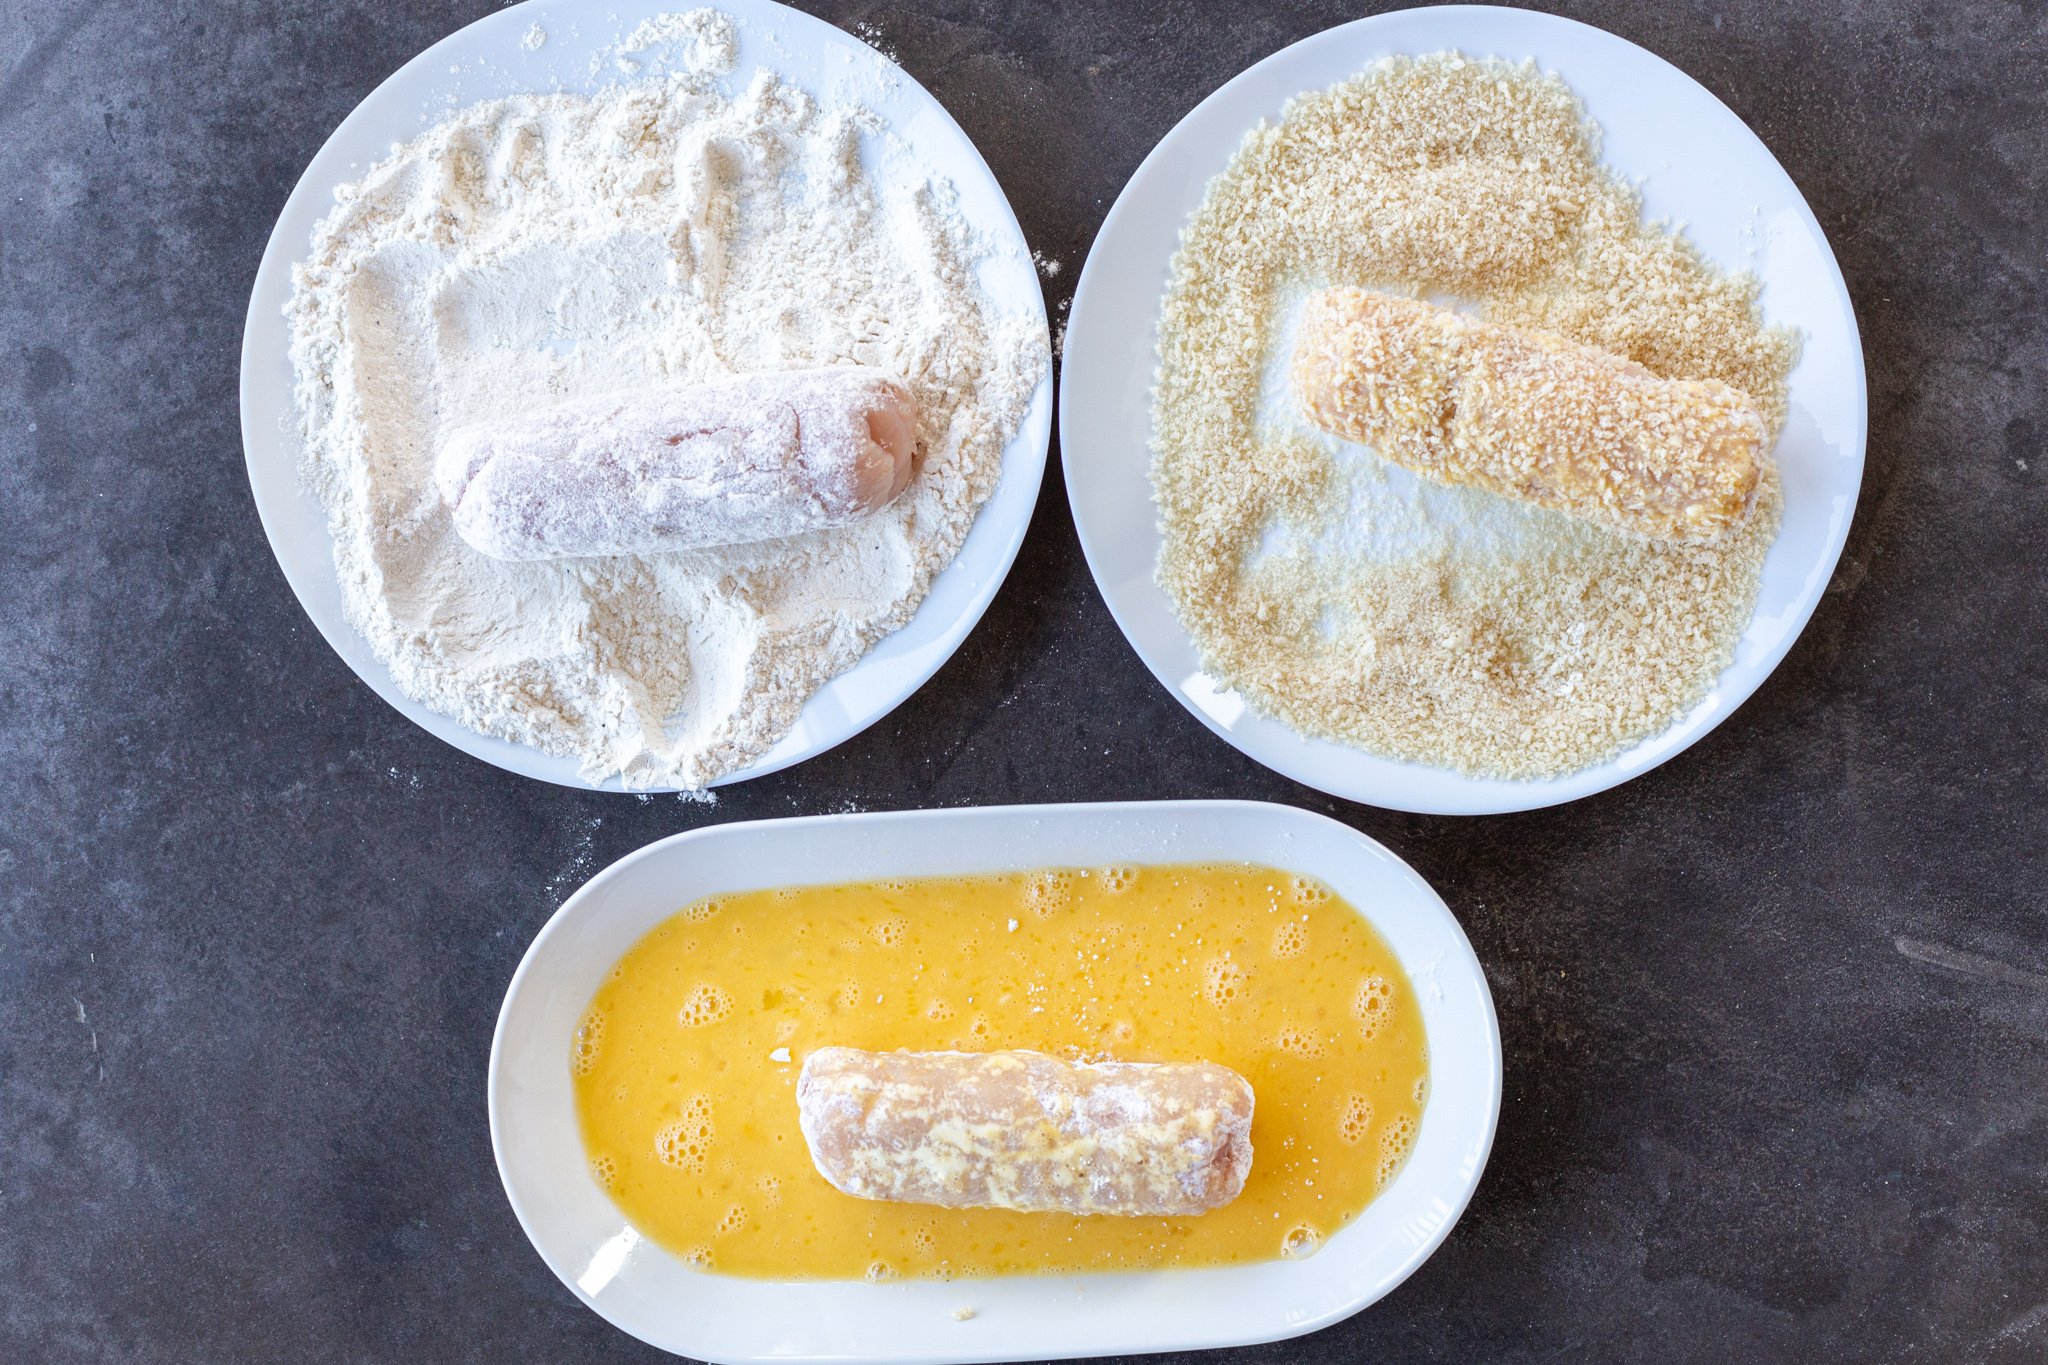
- Prepare chicken coating: Combine flour, salt, pepper in one bowl. Whisk eggs in a separate bowl.
- Coat chicken: Dip chicken into flour mixture. Then dredge in the egg mixture, followed by Panko breadcrumbs.
- Fry chicken: Fry chicken on all sides until golden brown and serve.


Hot Tip: To make sure your butter doesn’t leak out when frying, avoid skipping out on partially freezing the chicken. Also, double coat the chicken in the flour and egg mixture to help seal the butter in. Coat with breadcrumbs just before frying.
How To Cut Chicken for Chicken Kiev
There are a few different methods often used to cut chicken for chicken Kiev, but our preferred method is butterflying it. This cut helps to easily wrap the chicken around the compound butter inside and ensures the chicken cooks evenly and thoroughly.
- Place the chicken breast on a cutting board.
- Butterfly the chicken by cutting it horizontally without slicing all the way through, and then spread it open like a book.
- Tenderize the chicken to the same thickness.
Prep Tip: The best way to tenderize and flatten meat is with a meat mallet. If you don’t have a mallet on hand, try a rolling pin or the back of a skillet. Wrap the meat in plastic wrap or wax paper, and pound until all the pieces are even in thickness.
Tips and Tricks for Classic Chicken Kiev
For an unbeatable classic chicken Kiev, follow these simple tips.
- Use appropriate oil: For frying the chicken, olive, avocado, or vegetable oil will work the best.
- Freeze the butter log: As the chicken and frozen butter log cook, the butter slowly melts into the chicken. This creates the most perfect, juicy center.
- Add additional herbs: To boost the flavor, add fresh thyme, rosemary, parsley, chives, or garlic to the butter before freezing.
- Use unsalted butter: To prevent an overly salty dish, use unsalted butter. It’s easier to salt at the end to taste instead of dealing with over-salted chicken.
- Tenderize evenly: For best flavor and to successfully wrap the chicken around the butter, butterfly and tenderize each piece of chicken to the same thickness. This will help each piece cook evenly.
- Finish off with lemon juice: Squeeze a few drops of fresh lemon juice on top of the cooked chicken to brighten up all the flavors.
Ingredient Substitutions in Chicken Kiev
The great thing about Chicken Kiev is that the ingredients are most likely already in your fridge or pantry. However, in case something is missing, here are some substitution ideas.
- Chicken thighs: Instead of chicken breast, use chicken thighs. Boneless skinless chicken thighs tend to be more juicy and have more fat than chicken breast. If using thighs, still pound the thighs so they are the same in thickness.
- Dried herbs: Fresh herbs will make for the most flavorful butter, but you can substitute with a smaller quantity of dried herbs.
- Corn flakes: Panko breadcrumbs are the best option for coating chicken Kiev. However, many cooks use corn flake crumbs as a substitute for panko breadcrumbs. The taste and flavor may be slightly different, but is acceptable in a pinch.
Alternative Cooking Methods for Chicken Kiev
Chicken Kiev is customarily made by frying on the stovetop; however, it is easily made in the air fryer or oven with a few modifications.
- Air fryer: Air frying is often considered a “healthier” alternative to pan-frying. To air fry chicken Kiev, follow stove-top instructions as written. Instead of placing chicken in a pan, place chicken in the air fryer. Spray the chicken thoroughly with olive oil. Air fry at 350°F for about 20 min, turning every six minutes or so. Cook until chicken reaches 165°F.
- Oven: Baking chicken Kiev in the oven is easy and tasty; however, the breadcrumb exterior may not become as crispy compared to frying methods. To bake chicken Kiev, follow stove-top instructions as written. Instead of placing chicken in a pan, place chicken in an oven-safe dish. Lightly spray the breadcrumb coating with olive oil to add crispiness. Bake chicken in the center of the oven at 400°F for approximately 35 minutes or until the chicken reaches 165°F.
Best Dishes to Serve with Chicken Kiev
Chicken Kiev is a savory meat dish that pairs well with any starch, vegetable, and salad. Our favorite starch pairing are Creamy Mashed Potatoes, Basmati Rice, or Homemade Pasta. For a perfect salad pairing, try our Purple Cabbage Salad, Quinoa, Kale, and Avocado Salad, or another Slavic classic: Olivier Potato Salad. Or, if you simply want vegetables, try some easy roasted broccolini like we did above. Air Fryer Asparagus, Broccoli, or Brussel Sprouts are all solid options as well. You won’t go wrong with either of these sides!
Making Chicken Kiev In Advance
To make chicken Kiev in advance, follow instructions as written up to the frying step. Instead, freeze raw coated chicken on a baking sheet. Once frozen, transfer to a ziplock bag. Thaw fully in the refrigerator before cooking. Avoid freezing after fully cooking the chicken Kiev. Doing so can change the taste and texture of the dish.
How to Store Chicken Kiev
Chicken Kiev will have the best flavor and texture when freshly cooked. However, if you do have some extra chicken Kiev on hand, here are some ways you can store the dish for later.
- Refrigerator: To keep the leftover chicken fresh for up to four days, store it in a refrigerator, in an airtight container. Keep in mind that the crispy breading does become less crispy the longer it is kept in the fridge.
- Freezer: Avoid freezing cooked chicken Kiev as this can greatly affect the flavor and texture. Instead, freeze the raw coated chicken on a baking sheet. Once frozen, transfer to a ziplock bag. Thaw fully in the refrigerator before cooking.
Best Ways to Reheat Chicken Kiev
Let’s be honest – chicken doesn’t necessarily like to be reheated. It tends to result in a slightly drier variant, compared to the freshly cooked option. However, if you do have some pre-cooked chicken stowed away in your fridge, we have a few methods to help you reheat it in the best possible way.
- Air-fryer: To reheat the chicken in an air fryer, place it into the air fryer basket. Spray olive oil to help re-crisp the exterior, and fry for 8-10 minutes or until chicken is 165°F. Air-frying will re-produce the crispiest exterior.
- Stovetop: To reheat on the stovetop, heat a tablespoon of oil in a skillet over medium heat. Place chicken into a pan and reheat, flipping halfway to heat evenly.
- Oven: To reheat in the oven, place chicken Kiev in a baking dish in the oven at 350°F until internal temperature reaches 165°F.
- Microwave: Reheat chicken Kiev in a microwave in a covered container for maximum distribution of heat. However, keep in mind that while this method is easy, it’s likely to produce the driest results.
FAQ
What is the difference between chicken Kiev and chicken cordon bleu?
The difference between chicken Kiev and chicken cordon bleu lies on the inside. On the outside, both dishes consist of pounded chicken breast coated in breadcrumbs. However, chicken Kiev is stuffed with a compound butter mixture, whereas chicken cordon blue is stuffed with sliced ham and cheese.
How do I know when chicken Kiev is cooked through?
Chicken Kiev is fully cooked when the internal temperature reaches 165°F and the exterior is golden-brown.
What is compound butter?
Compound butter is softened, unsalted butter that is creamed together with a mixture of herbs, spices, and a variety of other ingredients. The ingredients can be either savory or sweet, depending on the recipe. In classic chicken Kiev, the compound butter is a mixture of unsalted butter, fresh parsley, fresh dill, salt, and ground pepper.
Other Chicken Recipes to Try
- Parmesan Crusted Chicken – Tender chicken breaded in nutty parmesan and breadcrumbs
- Greek Lemon Chicken – Chicken thighs made with a delicious herby, lemony marinade!
- Marry Me Chicken – Tuscan-inspired chicken with cherry tomatoes, sundried tomatoes and a creamy parmesan sauce
- 5 Ingredient Chicken Cutlets – Versatile crispy chicken great for sandwiches, pasta, or salad
- 30 Minute Honey Chicken Skewers – Juicy chicken with the easiest marinade, ready in 30 minutes
- Air Fryer Chicken Parmesan – Chicken with breadcrumb exterior, topped with marinara and cheese
- Low Carb Chicken – Seasoned chicken breast in a creamy cheese sauce
Recipe

Ingredients
Herb Butter
- 1 cup unsalted butter softened
- 1/4 cup fresh parsley chopped
- 1/4 cup fresh dill chopped
- 1 tbsp salt
- 1/2 tbsp ground black pepper
Chicken Seasoning
- 2 lbs chicken breast skinless & boneless
- 1 cup all purpose flour
- 1 tbsp salt
- 1 tsp ground black pepper
- 3 eggs
- 2 cups panko crumbs
- oil for frying
Instructions
- In a medium size bowl, combine butter, parsley, dill, salt and pepper. Place the butter into a plastic wrap, roll it into a one inch thick log. Let the butter fully freeze.
- Butterfly and then tenderize each chicken breast. You should have around 6 or so.

- Cut butter log into 6 equal pieces. Place a piece of butter into each chicken piece and wrap it tightly. Wrap chicken with a plastic wrap and let it freeze partially.

- In a shallow dish, combine flour with salt and pepper. In a separate bowl, whisk eggs.

- Preheat a pan with oil. While oil is preheating, coat chicken by dipping it into flour, followed by the egg mixture and then fully coating it with the panko crumbs.

- Fry chicken on all sides for about 6-10 minutes or until the temperature reaches 165F and chicken is golden brown. Serve right away!


Do you deep fry the chicken, or in about 1/2 inch of oil?
I shallow fry the chicken in about 1/2 inch of oil, ensuring a crispy golden crust while keeping the inside juicy and tender. Enjoy!
Thanks.
This looks fabulous! But I don't have these fresh herbs on hand right now. Do you think that using dried herbs would still be okay?
For this recipe I think fresh herbs are best. However, in a pinch, dried herbs work too. Let me know how it turns out!
Hi Natalya,have you ever used aready-made garlic butter or herb butter when you do Kyiv Chicken?
I am worry that doing so might make the aroma too strong.
Thank for your advices.
I've never tried using ready-made garlic butter or herb butter for Kyiv Chicken! The flavors might be stronger than homemade butter because pre-made versions may have more concentrated seasoning. If you're worried about the aroma being too strong, you could try mixing the ready-made butter with unsalted butter to mellow it out. Let me know if you give it a try—I'd love to hear how it turns out!
The panko crumbs made it nice and crunchy, and we loved the dill flavor!
Hi Kara, I love the crunch as well! Thank you for taking the time to leave feedback! Enjoy!
We absolutely loved this dish!! It tasted incredible and my family is already asking to have it again!
Hi Olivia, I am so thrilled to hear that! Thank you for your feedback. Enjoy!